
Yes, you can make a plastic bag holder without sewing! It’s a very easy and fun craft. A no-sew plastic bag holder is a simple way to keep those useful plastic bags tidy. It helps clear up space and makes it easy to grab a bag when you need one. This guide shows you how to make a holder using different things you might already have.
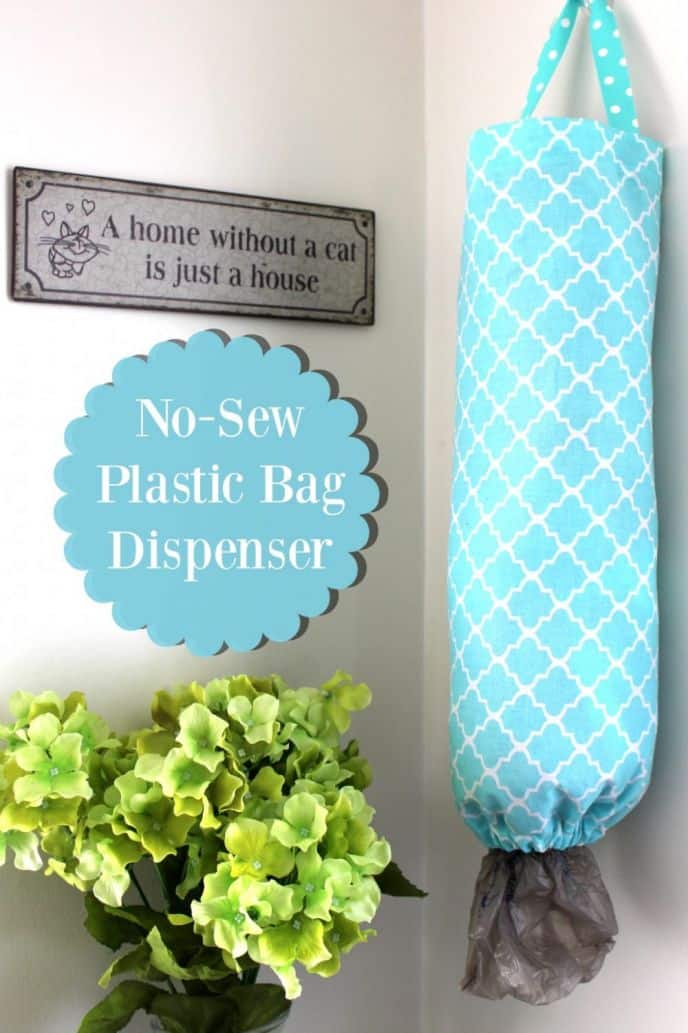
Image Source: scrappygeek.com
Getting Your Space Ready
Before you start, clear a space. Make sure you have room to work. Cover your table if you are using glue or paint. This keeps your work area clean. Making a no sew plastic bag holder is a great way to use things again. It turns old stuff into something new and helpful.
Why Make One Yourself?
Making your own bag holder is a good idea for many reasons.
* It’s cheap: You use things you already own. No need to buy new stuff.
* It’s easy: Most ways don’t need special skills. Kids can help too.
* It helps the Earth: You repurpose plastic bag storage. This means less waste. You give old items a new life.
* It clears clutter: Plastic bags can pile up. A holder keeps them neat.
* You make it your way: You pick the colors and style.
This guide will show you how to make a DIY bag dispenser no sew. You will see it is simpler than you think.
What Things Can You Use?
You can make a bag holder from many things. You probably have some of these at home.
* Old fabric (like t-shirts, towels, pillowcases)
* Plastic bottles
* Cardboard boxes or tubes
* Felt scraps
* Old non-woven shopping bags
Let’s look at how to use some of these things. This will help you make a homemade grocery bag organizer that fits your home.
Method 1: Fabric Fun (No Needle Needed!)
This is a popular way to make a fabric bag holder no sewing. You use fabric, but you don’t stitch it. You can use glue or special fabric tape.
Choosing Your Fabric
Pick fabric that is not too thin. A thick t-shirt, a towel, or even an old pair of pants can work. The size depends on how many bags you want to store. A piece about 18 to 24 inches wide and 24 to 30 inches long is a good start.
Things You Need for Fabric Method
- Fabric piece (size as above)
- Fabric scissors
- Fabric glue or strong craft glue (make sure it works on fabric)
- Something round (like a plate or bowl)
- Pen or marker
- Safety pin or a stick (for turning)
- Ribbon or string (to hang it)
Putting the Fabric One Together
This is an easy plastic bag holder craft. Just follow these steps.
Step 1: Cut the Fabric Right
Lay your fabric flat. Use your round object (like a plate edge) to draw a curve on the bottom corners. Cut these curves off. This makes the bottom look nice.
Step 2: Make the Top Fold
Fold down the top edge of the fabric by about 1 inch. Put glue along the edge of the fabric under the fold. Press it down. This makes a clean edge. This is where you will put the ribbon to hang it.
Step 3: Make the Bottom Fold
Fold up the bottom edge (the curved part) by about 1 inch. Put glue along the edge under the fold. Press it down. This finishes the bottom opening.
Step 4: Fold It Over
Now, fold the fabric in half lengthwise. The wrong side of the fabric should be facing out. Line up the long edges.
Step 5: Glue the Long Side
Put a line of glue along one of the long open edges. Press the two sides together firmly. Make sure the glue holds well. You are making a tube shape now. Let the glue dry completely. This might take a few hours. Check the glue bottle for how long.
Step 6: Turn It Right Side Out
Once the glue is dry, the fabric is still inside out. Push one end through the tube. Use a safety pin attached to one corner or a long stick to help push the fabric through until it is right side out. This is like turning a sock.
Step 7: Add the Ribbon
Now you have a fabric tube with openings at both ends. The top opening has the fold you made first. Get your ribbon or string. Use the safety pin to pull the ribbon through the top fold. You made a channel when you glued the fold down. The ribbon will come out the other side. Tie the two ends of the ribbon together to make a loop. This is how you will hang your holder.
Step 8: Use It!
Your fabric holder is ready! Stuff plastic bags into the top opening (the one with the ribbon). Pull them out one by one from the bottom opening. You just made a simple no sew plastic bag holder! This is a great storage for plastic bags without sewing.
Tips for Fabric Method
- Use fabric glue for the best hold. It stays soft after drying.
- Press the glued seams with your fingers or a book while they dry.
- If your fabric is thin, you can use two layers. Glue them together first before starting the steps.
Method 2: Plastic Bottle Power
You can upcycle bag dispenser style using a big plastic bottle. This is a very quick and easy way.
Choosing Your Bottle
You need a large plastic bottle. A 2-liter soda bottle works well. Make sure it is clean and dry inside. Take off the label.
Things You Need for Bottle Method
- Large plastic bottle (2-liter or similar size)
- Sharp craft knife or strong scissors
- Tape (duct tape, packing tape, or decorative tape)
- Paint or markers (optional, for decorating)
- Ribbon, string, or command strips (to hang it)
Putting the Bottle One Together
This is a super simple plastic bottle bag holder DIY. Be careful when cutting the bottle. Ask an adult for help if you are young.
Step 1: Cut the Bottle Ends
Cut off the top part of the bottle, just where it starts to curve inwards towards the neck. Cut off the bottom part too, about 1-2 inches up from the very bottom. You will be left with the middle, straight section of the bottle, open at both ends.
Step 2: Make the Edges Safe
The cut edges of the plastic can be sharp. Cover them with tape. Fold the tape over the edge. Duct tape works well and is strong. You can also use colorful tape to make it look nice.
Step 3: Decorate It (Optional)
Now you have a plastic tube. You can leave it plain or decorate it. Use paint made for plastic, or use permanent markers. You can stick stickers on it too. Let any paint dry fully.
Step 4: Add a Way to Hang It
There are a few ways to hang this bottle holder.
* Tape a loop: Tape a strong ribbon or string loop to the top of the bottle tube. Use strong tape.
* Punch holes: You can carefully punch or drill two small holes near the top edge. Thread ribbon or string through the holes and tie a loop.
* Command Strips: Stick one or two command strips to the back of the bottle. This lets you stick it to a wall or cabinet. Make sure the surface is clean first.
Step 5: Fill and Use
Stuff your plastic bags into the top opening of the bottle tube. Pull them out from the bottom opening. This simple easy plastic bag holder craft is ready to use! It is a very basic storage for plastic bags without sewing.
Tips for Bottle Method
- Use a sharp tool for cutting, but be very careful. Cut slowly.
- Covering the edges with tape is important to prevent cuts.
- Make sure the paint you use works on plastic.
Method 3: Cardboard Box Creation
You can also use a cardboard box or tube to make a cardboard bag organizer no sew. This is another easy way to repurpose plastic bag storage.
Choosing Your Cardboard
A tall, narrow box works best. A box that cereal or crackers came in could work. Or, a cardboard tube from wrapping paper or paper towels (you might need a few of these taped together for length). Make sure it is clean and dry.
Things You Need for Cardboard Method
- Cardboard box (tall and thin) or tube
- Scissors or craft knife
- Tape (packing tape, clear tape)
- Decorative paper, paint, or fabric scraps (to cover the box)
- Glue (if using paper or fabric)
- Hole punch
- Ribbon or string (to hang it)
Putting the Cardboard One Together
This method lets you decorate a lot!
Step 1: Prepare the Box/Tube
If using a box, cut off the top flaps. If using a tube, make sure it is the length you want (maybe 12-18 inches). If using multiple tubes, tape them end to end.
Step 2: Make the Openings
For a box, the top is already open. For the bottom, you need an opening to pull bags out. You can leave the bottom flaps closed and just cut a hand-sized hole in the middle of the bottom. Or, you can cut the bottom flaps off and leave it fully open. For a tube, both ends are open.
Step 3: Cover and Decorate
This is where you make it look nice.
* Paint: Paint the outside of the box or tube. Use acrylic paint. Let it dry.
* Paper: Wrap the box or tube with colorful paper, wrapping paper, or newspaper. Glue it on smoothly.
* Fabric: Glue fabric scraps onto the box.
Cover the whole outside so the cardboard doesn of show. This makes it look better and protects the cardboard a bit.
Step 4: Make Hanging Holes
Near the top of the box or tube, use a hole punch to make two holes. Make them on opposite sides.
Step 5: Add the Ribbon
Thread ribbon or string through the holes you just punched. Tie the ends together to make a loop. This is how you will hang your holder. If you used a tube, you can also tape a loop onto the back instead of punching holes.
Step 6: Fill and Use
Stuff your plastic bags into the top opening. Pull them out from the bottom opening or hole. You made a useful homemade grocery bag organizer from cardboard! This is another easy DIY bag dispenser no sew.
Tips for Cardboard Method
- Make sure the cardboard is sturdy.
- Covering the cardboard makes it last longer and look nicer.
- Let all glue or paint dry completely before hanging and using it.
Method 4: Using Felt or Non-Woven Bags
Felt or old reusable shopping bags (the ones made of a fabric-like material) are great because they don’t fray when you cut them. This makes a fabric bag holder no sewing even easier.
Choosing Your Material
Get some felt pieces or an old reusable shopping bag that is not woven fabric (many are polypropylene). A piece about 18×24 inches is good.
Things You Need for Felt/Bag Method
- Felt or non-woven bag material
- Scissors
- Strong glue (craft glue or fabric glue)
- Ribbon or string (to hang it)
- Pen or marker
- Something round (optional, for curves)
Putting the Felt/Bag One Together
This is very similar to the first fabric method, but simpler because the edges don’t need folding under.
Step 1: Cut Your Piece
Cut a rectangle from your felt or bag material. Size it like the fabric method (18-24 inches wide, 24-30 inches long). You can round the bottom corners if you like using a plate as a guide.
Step 2: Fold and Glue Top
Fold down the top edge by about 1 inch. Put a line of glue under the fold. Press it down. This makes a channel for the ribbon.
Step 3: Fold and Glue Bottom
Fold up the bottom edge by about 1 inch. Put a line of glue under the fold. Press it down. This finishes the bottom opening.
Step 4: Fold in Half
Fold the material in half lengthwise. The side you want showing should be on the inside for now.
Step 5: Glue the Side Seam
Put a line of glue along one of the long open edges. Press the two sides together firmly. You are making a tube. Let the glue dry well.
Step 6: Turn It
Once the glue is dry, turn the tube right side out.
Step 7: Add the Ribbon
Thread ribbon or string through the channel you made at the top. Use a safety pin to help push it through. Tie the ends together to make a hanging loop.
Step 8: Use It!
Fill with bags from the top. Pull bags from the bottom. You made an upcycle bag dispenser from simple materials! This is a truly no sew plastic bag holder.
Tips for Felt/Bag Method
- Felt edges don’t need hemming or folding, but folding for the ribbon channel and bottom opening makes it look nicer.
- Non-woven bag material is often quite strong.
- Make sure your glue works on the material you choose.
Making It Look Special (Still No-Sew!)
You can make your bag holder look unique without sewing.
* Stickers: Use fun stickers or vinyl decals.
* Paint or Markers: Draw designs, shapes, or words on fabric, plastic, or cardboard.
* Glue on things: Stick on buttons, beads, yarn pieces, or pompoms with strong glue.
* Tape: Use colorful washi tape or duct tape to add patterns or cover edges.
* Fabric paint: Draw with special fabric paint.
Get creative! This helps you make your homemade grocery bag organizer just the way you like it.
Where To Put Your Holder
Think about where you use plastic bags most.
* Kitchen: Near the trash can, under the sink door, or on the side of a cabinet.
* Garage: Near a door, or where you store cleaning supplies.
* Laundry Room: Good for keeping bags for wet clothes or trash.
Hang it from a hook, a nail, or use strong sticky hooks (like Command Hooks) if you don’t want holes in the wall. A storage for plastic bags without sewing is easy to hang in many spots.
Tips for Using Your Holder
- Stuff them in well: Push the bags down into the holder so you can fit more.
- Pull from the bottom: Most holders work best when you pull one bag out from the bottom opening. The next bag should pop down and be ready.
- Don’t overfill: If you stuff too many bags, it might be hard to get them out.
- Roll big bags: Large store bags can be rolled up a bit before putting them in so they fit better.
These tips help your DIY bag dispenser no sew work smoothly.
Comparing the Different Ways
Here is a simple look at the no-sew methods we talked about.
| Feature | Fabric (Glued) | Plastic Bottle | Cardboard Box/Tube | Felt/Non-Woven Bag |
|---|---|---|---|---|
| Materials Used | Old fabric, glue | Plastic bottle, tape | Cardboard, glue/tape | Felt/old bag, glue |
| Easiest? | Simple steps | Very quick & easy | Easy to decorate | Very simple edges |
| Needs Cutting? | Yes | Yes (be careful!) | Yes | Yes |
| Needs Glue? | Yes | No (uses tape) | Yes (for covering) | Yes |
| Looks Nice? | Depends on fabric | Can decorate outside | Easy to decorate | Can decorate |
| How Strong? | Depends on fabric | Quite strong plastic | Can get wet/bent | Depends on material |
| Best For | Using old clothes | Quick upcycle | Easy decoration | Simple, no fray edges |
All of these methods make a good homemade grocery bag organizer. Pick the one that uses materials you have and seems most fun to make.
Helper Words for Readability
To make this easy to read, we use simple words. Like “get” instead of “obtain.” And “use” instead of “utilize.” Short sentences help too. This makes sure everyone can follow the steps for making their no sew plastic bag holder. Making things should be fun, not hard to read about!
Why This Helps Our World
Making a upcycle bag dispenser from old items is kind to the Earth.
* Less goes to trash: You keep things out of landfills.
* You use less new stuff: Making new things uses energy and materials. Using old things saves these.
* It makes you think about waste: You see how you can reuse things.
Every little bit helps. Making an easy plastic bag holder craft is a small step that makes a difference. You are taking something that might be thrown away and making it useful again. This is smart repurpose plastic bag storage.
More Ideas
- Different Sizes: Make small holders for small bags or big ones for many bags. Just change the size of your material piece or bottle/box.
- Multiple Holders: Make a few! Keep one in the kitchen, one in the garage, one in the car.
- Gift Idea: These make nice, simple gifts for friends or family. Everyone needs storage for plastic bags without sewing!
Making your own bag holder is a satisfying project. It is quick, useful, and helps the environment. Whether you use fabric, plastic, or cardboard, you will have a great DIY bag dispenser no sew in no time.
Often Asked Questions (FAQ)
Q: Can I wash a no-sew fabric bag holder?
A: It might be tricky. The glue might not hold up well in a washing machine. If it gets dirty, you might need to spot clean it carefully with a damp cloth. If you used fabric glue, check the glue bottle to see if it says it can be washed.
Q: How many bags can a holder hold?
A: This depends on the size of your holder and how you stuff the bags. A standard holder (like one made from a 2-liter bottle or a fabric piece around 25 inches long) can often hold 20-40 standard grocery bags.
Q: Will the bags rip when pulled from the bottom?
A: Usually, no. As long as the bottom opening is big enough for a bag to pass through easily, they should come out one at a time without ripping. Don’t make the bottom hole too small.
Q: Can kids make these?
A: Yes! Many of these methods, especially the cardboard or fabric ones with adult help for cutting and gluing, are great for kids. The plastic bottle method needs careful adult help for cutting. Decorating is perfect for kids.
Q: What kind of glue is best for the fabric method?
A: Fabric glue is usually best because it stays flexible after it dries. Strong craft glue that works on fabric can also work. Make sure it is a strong-holding glue.
Q: My cardboard holder seems weak. How can I make it stronger?
A: Use thicker cardboard. You can also cover it with a layer of strong paper or thin cardboard pieces glued on. Using strong tape like duct tape on the seams can also help make a cardboard bag organizer no sew last longer.
Q: Can I use newspaper or magazines to cover the cardboard?
A: Yes, you can. Gluing newspaper or magazine pages onto the cardboard box or tube can make it look interesting. Use a clear glue or Mod Podge for this. This is a fun way to decorate your upcycle bag dispenser.