
Image Source: i.ytimg.com
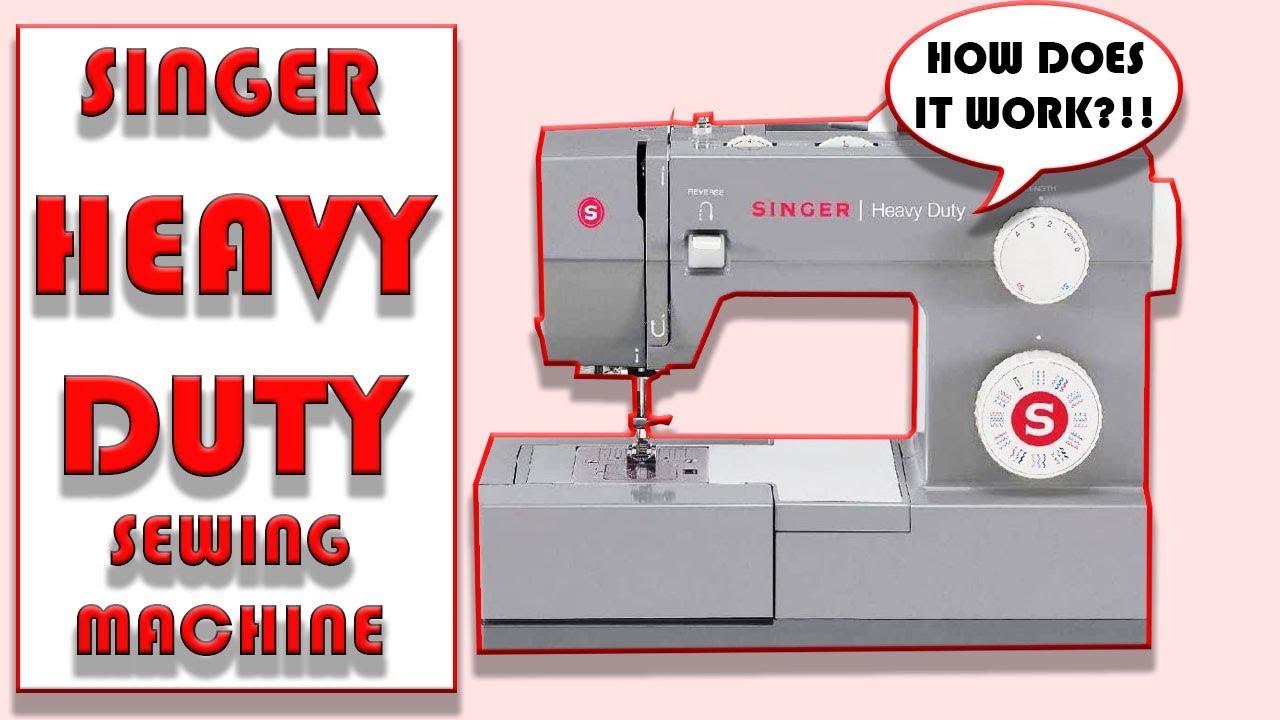
Beginner Guide: How To Use Singer Heavy Duty Sewing Machine
Welcome to your new Singer Heavy Duty sewing machine! These machines are strong and fast. They can sew many types of fabric. This guide helps you start using yours today. We will go step by step. Soon, you will sew like a pro!
Setting Up Your Machine: Singer Heavy Duty Setup
Getting your Singer Heavy Duty ready is simple. Take it out of the box carefully. Place it on a steady table. Make sure you have room to work.
Here is what you need to do first:
- Find a good spot. It needs to be flat and strong.
- Open the box. Take out the machine and all its parts.
- Look for the foot pedal and the power cord.
- Plug the power cord into the machine. The spot is usually on the side or back.
- Plug the other end of the power cord into the wall outlet.
- Plug the foot pedal cord into the machine. It goes into a different spot near the power cord plug.
Now your machine has power. Do not turn it on yet. We need to get it ready first.
Getting to Know Your Machine’s Parts
Your Singer Heavy Duty has many parts. Each part does a job. Knowing the names helps you follow steps.
Here are some key parts you will see:
- Power Switch: Turns the machine on and off.
- Speed Control (on some models): Lets you sew faster or slower.
- Handwheel: The big round wheel on the right side. You turn this by hand to move the needle up or down slowly. Always turn it towards you.
- Stitch Selector Dial: Lets you pick the stitch pattern.
- Stitch Length Dial: Controls how long your stitches are.
- Stitch Width Dial: Controls how wide zig-zag or other stitches are.
- Tension Dial: Controls how tight the upper thread is. This is key for good stitches.
- Thread Guides: Paths the upper thread follows from the spool to the needle.
- Needle: Pushes the thread through the fabric.
- Presser Foot: Holds the fabric down while you sew.
- Presser Foot Lever: Lifts and lowers the presser foot. It is usually behind the needle area.
- Feed Dogs: Small teeth under the presser foot. They move the fabric forward.
- Bobbin Winder Spindle: Holds the bobbin when you wind thread onto it.
- Bobbin Compartment: Holds the bobbin under the needle plate.
- Needle Plate: The metal plate under the needle. It has a hole for the needle and lines to guide your fabric.
Spend a little time looking at these parts. Touch them. See how they move. This helps you feel more comfortable with your machine.
Powering On and Checking Basics
Your machine is set up. Now you can turn it on.
- Flip the power switch. Lights should come on.
- Step on the foot pedal gently. The machine should start sewing. It might make some noise. This is normal.
- Take your foot off the pedal. The machine stops.
Do not have fabric under the presser foot yet. Just test the motor and light.
Preparing the Lower Thread: Singer Heavy Duty Bobbin Winding
Before you can sew, you need thread on a bobbin. This is the lower thread. Your machine uses a specific type of bobbin. Check your manual to be sure.
Let’s wind a bobbin:
- Put a spool of thread on the spool pin. This is usually on top of the machine.
- Find the bobbin winder tension disc. The thread needs to go around this. It helps wind the bobbin smoothly.
- Take an empty bobbin. Find the small hole on the edge of the bobbin.
- Push the end of your thread through this small hole from the inside of the bobbin. Pull a few inches through.
- Put the bobbin onto the bobbin winder spindle. Push it down firmly. The end of the thread should stick up.
- Push the bobbin winder spindle to the right. This makes the machine stop sewing. It is now ready to wind the bobbin.
- Hold the thread end sticking out of the bobbin. Keep it tight for a few turns.
- Step on the foot pedal. The bobbin will spin fast. It will fill with thread.
- Let go of the thread end after the bobbin has a few layers of thread. The thread stays on its own now.
- Watch the bobbin fill. Do not overfill it. Stop when it looks full but not packed tight.
- Take your foot off the pedal.
- Push the bobbin winder spindle back to the left. This makes the machine ready to sew again.
- Cut the thread. Use the small thread cutter often found near the bobbin winder.
Your bobbin is now full and ready.
Placing the Bobbin into the Machine
The bobbin goes into the bobbin compartment. The Singer Heavy Duty models usually have a drop-in bobbin system. This is easy to use.
Here is how to put the bobbin in:
- Make sure the needle is all the way up. Turn the handwheel towards you if needed.
- Open the bobbin cover plate. It is usually a clear plastic cover right in front of the needle plate.
- Take your wound bobbin.
- Look at how the thread comes off the bobbin. It needs to spin the right way. For drop-in bobbins, the thread usually comes off counter-clockwise (it looks like the letter ‘P’). Check your manual or the diagram on the machine itself.
- Drop the bobbin into the bobbin case.
- Pull the thread tail into the bobbin case slot. Follow the path shown by arrows or lines on the machine. There might be one or two slots.
- Pull the thread gently. The bobbin should spin a little. The thread should slide into the tension spring in the bobbin case.
- Leave a thread tail about 4-6 inches long resting on the needle plate.
- Close the bobbin cover plate.
The lower thread is ready.
Threading the Upper Thread: Singer Heavy Duty Threading
Now you need to thread the top part of the machine. This takes the thread from the spool down to the needle. Follow the numbers or arrows on your machine.
This is the path for Singer Heavy Duty threading:
- Place your spool of thread on the spool pin.
- Put the thread under the thread guide near the spool pin.
- Bring the thread down through the first thread guide clip.
- Bring the thread down into the main threading channel. This is often a groove or slot on the front of the machine.
- Follow the channel down. You will go around a turn.
- Bring the thread back up the channel.
- At the top, you will find the take-up lever. This lever moves up and down as you sew. The thread MUST go through the hole in the take-up lever. Turn the handwheel towards you until the take-up lever is at its highest point. Loop the thread from right to left through the hole.
- Bring the thread back down the threading channel.
- Pass the thread through the thread guide clip just above the needle.
- Pass the thread through any other guides, like the one on the needle bar.
- Now, thread the needle. The needle has a flat side on the back. The thread goes from the front to the back of the needle. Some machines have a needle threader helper. If yours does, use it! If not, hold the thread end carefully and push it through the needle eye.
- Pull the thread tail through the needle eye about 6-8 inches.
- Pass the thread tail under the presser foot and pull it towards the back of the machine.
Your upper thread is now ready.
Bringing Up the Bobbin Thread
You have the bobbin in and the top thread through the needle. Now you need to bring the bobbin thread up so you have both threads ready to sew.
- Hold the end of the upper thread gently with your left hand.
- Turn the handwheel towards you one full turn. The needle will go down and come back up.
- As the needle comes up, it will catch the bobbin thread. You will see a loop of the bobbin thread come up through the small hole in the needle plate.
- Stop turning the handwheel when the needle is at its highest point.
- Use tweezers or your finger to pull the loop of bobbin thread up.
- Pull the upper thread tail you are holding. This will bring the end of the bobbin thread up through the needle plate hole.
- You now have both the upper thread and the bobbin thread tails.
- Pull both thread tails together and slide them under the presser foot towards the back of the machine.
Both threads are now ready to start sewing.
Setting Up for Your Project: Singer Heavy Duty Presser Feet
The presser foot holds your fabric down. Different presser feet do different jobs. Your machine came with several presser feet.
The most common foot is the All-Purpose Foot or Zig-Zag Foot. This is good for most basic sewing.
Other feet you might have:
- Zipper Foot: Helps you sew close to zippers.
- Buttonhole Foot: Helps make buttonholes automatically (on some models).
- Button Sewing Foot: Helps sew buttons onto fabric.
- Hemming Foot: Folds the fabric edge for a neat hem.
Knowing about Singer Heavy Duty presser feet helps you pick the right one.
To change the presser foot:
- Make sure the needle is up.
- Lift the presser foot lever to raise the foot.
- Find the red or black button on the back of the presser foot holder (the part the foot snaps onto). Push this button. The presser foot will drop off.
- Take the new presser foot. Line up the bar on the new foot with the space under the presser foot holder.
- Lower the presser foot lever slowly. The holder will snap onto the bar of the new foot. You might hear a click.
- The foot should now be attached firmly.
Always change presser feet when the machine is off or unplugged for safety, especially when you are new to it.
Choosing Your Stitch: Singer Heavy Duty Stitch Settings
Your Singer Heavy Duty machine can make many different stitches. You choose the stitch using the Stitch Selector Dial. This dial shows pictures of the stitches.
- Turn the dial to the picture of the stitch you want. The most common is the Straight Stitch.
- The dial often has numbers or letters. These match the pictures.
Once you pick a stitch, you might need to set the stitch length and width.
- Stitch Length Dial: This controls how long each stitch is.
- Lower numbers (like 1 or 2) mean shorter stitches. These are strong and good for starting and ending seams (backstitching).
- Higher numbers (like 3 or 4) mean longer stitches. These are good for normal seams and gathering fabric.
- Set to ‘0’ or a special mark for making buttonholes (check your manual).
- Stitch Width Dial: This controls how wide stitches like zig-zag are.
- ‘0’ means a straight stitch (width is zero).
- Higher numbers mean a wider zig-zag or decorative stitch.
- The maximum width is often 5mm or 6mm on these machines.
For basic sewing (straight stitch), set the stitch selector to the straight stitch picture. Set the stitch length to about 2.5 to 3. Set the stitch width to 0.
Playing with Singer Heavy Duty stitch settings on scrap fabric is a good idea. See what different settings do.
Fine-Tuning for Perfect Stitches: Singer Heavy Duty Tension Adjustment
Getting the stitch tension right is important. Tension is how tight the threads are. If the tension is wrong, your stitches will look bad. They might be too loose or too tight.
Look at your stitches on a piece of scrap fabric. Use two different color threads, one for the top and one for the bobbin.
- Perfect Tension: The top thread and bobbin thread meet exactly in the middle of the fabric layers. From the top, you only see the top thread. From the bottom, you only see the bobbin thread.
- Top Thread Too Loose: You will see loops of the top thread on the bottom of the fabric.
- Top Thread Too Tight: You will see loops of the bobbin thread on the top of the fabric.
- Bobbin Thread Too Loose: You will see loops of the bobbin thread on the top of the fabric. (Looks the same as top thread too tight, but you fix it differently).
- Bobbin Thread Too Tight: You will see loops of the top thread on the bottom of the fabric. (Looks the same as top thread too loose, but you fix it differently).
Most tension problems are fixed by adjusting the Tension Dial for the upper thread. This is the dial with numbers on the front of the machine.
- The dial usually has numbers from 0 to 9.
- A setting of 4 or 5 is often a good place to start for basic sewing.
- If the top thread is too loose (loops on bottom), turn the tension dial to a higher number. This makes the top thread tighter.
- If the top thread is too tight (loops on top), turn the tension dial to a lower number. This makes the top thread looser.
Rarely, the bobbin tension needs adjusting. This is harder and usually done on the bobbin case itself. For beginners, focus on the upper tension dial first. Most problems are solved there. If you still have problems, check that the machine is threaded correctly first! Incorrect threading is the most common reason for bad tension.
Always test on a scrap piece of the same fabric you will use for your project. Different fabrics need slightly different tension settings. Singer Heavy Duty tension adjustment is key for nice-looking stitches.
Starting to Sew: Singer Heavy Duty Basic Sewing
You are ready to sew! Let’s do some Singer Heavy Duty basic sewing.
- Make sure the machine is threaded correctly (top and bobbin).
- Put the correct presser foot on (usually the all-purpose foot).
- Set the stitch selector to straight stitch.
- Set the stitch length (about 2.5-3).
- Set the stitch width to 0.
- Check the tension dial (start at 4 or 5).
- Lift the presser foot lever.
- Place your fabric under the presser foot. The edge of the fabric should line up with a guide line on the needle plate.
- Lower the presser foot lever. The foot holds the fabric down.
- Hold the thread tails gently to the back.
- Step on the foot pedal gently. The machine will start sewing.
- Guide the fabric gently with your hands. Do not push or pull hard. The machine’s feed dogs move the fabric. Your hands just steer.
- Sew to the end of your seam.
- To secure the seam, sew a few stitches backward at the start and end. Most machines have a reverse lever or button. Hold it down to sew backward.
- When you finish, stop sewing. Make sure the needle is up.
- Lift the presser foot lever.
- Pull the fabric away from the machine towards the back.
- Cut the threads using the cutter on the side of the machine or with scissors.
Practice on scraps! Sew straight lines. Sew curves. This helps you get a feel for guiding the fabric. Singer Heavy Duty 4423 tutorial videos online can show you these steps too. They often show a specific project.
Sewing Different Fabrics
Your Heavy Duty machine can sew many fabrics.
- Light fabrics (like cotton lawn or silk): Use a smaller needle (size 9 or 11). Use fine thread. You might need slightly lower tension.
- Medium fabrics (like quilting cotton or linen): Use a medium needle (size 12 or 14). Use standard thread. Tension around 4-5 is usually good.
- Heavy fabrics (like denim, canvas, multiple layers): Use a larger needle (size 16 or 18). Use strong thread. Increase stitch length (maybe 3.5 or 4). You might need slightly higher tension.
Always change your needle when sewing different fabrics. A sharp needle is key!
Keeping Your Machine Running Smoothly: Singer Heavy Duty Cleaning
Dust and lint build up inside your machine. This can cause problems. Regular cleaning keeps your machine working well. This is important for Singer Heavy Duty cleaning.
What you need:
- Small brush (comes with the machine).
- Small screwdriver (comes with the machine).
- Soft cloth.
How to clean:
- UNPLUG THE MACHINE before cleaning. This is very important!
- Remove the needle and the presser foot.
- Remove the needle plate. Use the screwdriver to unscrew it. Keep the screws safe!
- Open the bobbin area. Take out the bobbin case (if it has one) or just the bobbin (if it’s drop-in).
- Use the brush to clean out the lint and dust from the bobbin area. Clean around the feed dogs. Clean the area under the needle plate. Be gentle.
- If you can, remove the bobbin case holder (check your manual). Clean gently under there.
- Put everything back together. Put the bobbin case back, then the needle plate (screw it back on), then the presser foot.
- Wipe down the outside of the machine with a soft cloth.
Check your manual for oiling spots. Your machine might need a drop of sewing machine oil sometimes. Do not use any other oil.
Clean your machine often, especially after sewing fluffy fabrics. This helps prevent many problems.
Solving Common Problems: Singer Heavy Duty Troubleshooting
Sometimes things go wrong. Do not worry! Many problems are easy to fix. Here is some Singer Heavy Duty troubleshooting help.
Problem 1: Machine will not sew, or thread breaks often.
- Check Threading: Is the top thread threaded exactly right? Did you miss a guide? Is the thread in the take-up lever? This is the most common cause.
- Check Bobbin: Is the bobbin put in correctly? Is the bobbin thread caught? Is the bobbin empty?
- Check Needle: Is the needle in correctly? Is it pushed all the way up? Is the flat side facing the back? Is the needle bent or dull? Change the needle!
- Check Presser Foot: Is the presser foot down? The machine will not sew with the foot up.
- Check Tension: Is the tension dial set correctly for your thread and fabric?
- Clean: Is there a lot of lint in the bobbin area? Clean it out.
Problem 2: Stitches are loops on top or bottom.
- This is a tension problem.
- Loops on the bottom: Top thread is too loose. Increase the upper tension dial number. Or the top thread is not in the tension discs correctly. Re-thread the machine carefully.
- Loops on the top: Top thread is too tight. Decrease the upper tension dial number. Or the bobbin is not in the bobbin case correctly, or the bobbin thread is not in its tension spring. Re-seat the bobbin.
Problem 3: Machine makes bad noises or jams.
- STOP SEWING IMMEDIATELY.
- Check for Thread Jams: Is there a big knot of thread under the fabric or needle plate? Carefully cut the threads and pull the fabric out. Remove the needle plate and clean out the jam.
- Check Bobbin Area: Is the bobbin area jammed with thread? Clean it.
- Check Needle: Is the needle hitting the presser foot or needle plate? Re-insert or change the needle.
Problem 4: Fabric is not moving.
- Is the presser foot down?
- Are the feed dogs up? There might be a lever to lower the feed dogs for free-motion sewing. Make sure it is in the ‘up’ position.
- Is the stitch length set to 0? Increase the stitch length.
Most problems can be fixed by re-threading, changing the needle, or cleaning. If a problem continues, look in your machine’s manual or search for your specific model online (like Singer Heavy Duty 4423 troubleshooting).
Going Further: Basic Sewing Projects and Ideas
Now that you know the basics, what can you make? Your Singer Heavy Duty is great for many projects.
- Simple Tote Bag: Sew two rectangles of fabric together. Add straps. This is a great way to practice straight lines and seams.
- Pillow Covers: Sew two squares or rectangles together. Add a zipper or envelope closure. Practice different stitch types.
- Simple Skirt or Pants: Follow a simple pattern. Practice curved seams and hemming.
- Repairing Clothes: Sew up ripped seams, patch holes, hem pants. The Heavy Duty machine is perfect for thicker fabrics like jeans.
Remember to always use the right needle and thread for your fabric! Start with easy projects and build your skills. Looking for a Singer Heavy Duty 4423 tutorial online can give you project ideas. Many tutorials are made just for beginners.
A Note on Safety
Sewing machines are safe when used correctly.
- Keep your fingers away from the needle when sewing.
- Unplug the machine when changing the needle, presser foot, or cleaning.
- Do not sew over pins. Remove pins before they reach the needle.
- Keep the workspace tidy. Do not let cords trip you.
- If the machine makes a bad noise or stops, stop sewing right away.
Use common sense and follow the steps in your manual.
FAQ: Common Questions About Singer Heavy Duty Machines
Q: Can I sew thick fabric like denim or leather on my Singer Heavy Duty?
A: Yes! This is what Singer Heavy Duty machines are made for. Use the correct large needle (like a size 16 or 18 for denim, or a leather needle for leather) and strong thread. Go slowly over thick seams.
Q: Why does my thread keep breaking?
A: The most common reasons are incorrect threading, a bent or dull needle, using the wrong size needle for the fabric, or the upper tension is too tight. Re-thread, change the needle, and check your tension setting.
Q: My bobbin thread is making loops on top of the fabric. How do I fix this?
A: This usually means the top thread is too tight or, more likely, the bobbin thread is not seated correctly in the bobbin case tension. Make sure the bobbin is put in the right way and the thread is pulled through the bobbin case tension spring correctly.
Q: How often should I clean my machine?
A: Clean the bobbin area after every few projects or after sewing fabrics that create a lot of lint. Give it a more thorough cleaning and oiling (if your manual recommends it) every few months, depending on how often you use it.
Q: What stitch should I use for sewing seams?
A: A straight stitch is used for most seams. Use a stitch length of about 2.5 to 3 for standard seams. Sew a few stitches backward at the start and end to lock the seam.
Q: My machine is skipping stitches. What is wrong?
A: Skipped stitches are almost always caused by a bent, dull, or incorrectly inserted needle. Change to a new, correct needle for your fabric. Make sure the needle is pushed all the way up into the needle clamp and the flat side is facing the back.
Wrapping Up
You have learned the key steps to use your Singer Heavy Duty machine. You know how to set it up, thread it, wind the bobbin, change the feet, pick stitches, fix tension, and start sewing. You also know how to clean it and fix common issues.
These machines are built to last and handle tough jobs. Practice these steps. Try sewing different things. Your skills will grow quickly. Enjoy making wonderful things with your powerful sewing machine!