
Image Source: www.blossomheartquilts.com
For Beginners: How To Quilt A Quilt On A Sewing Machine
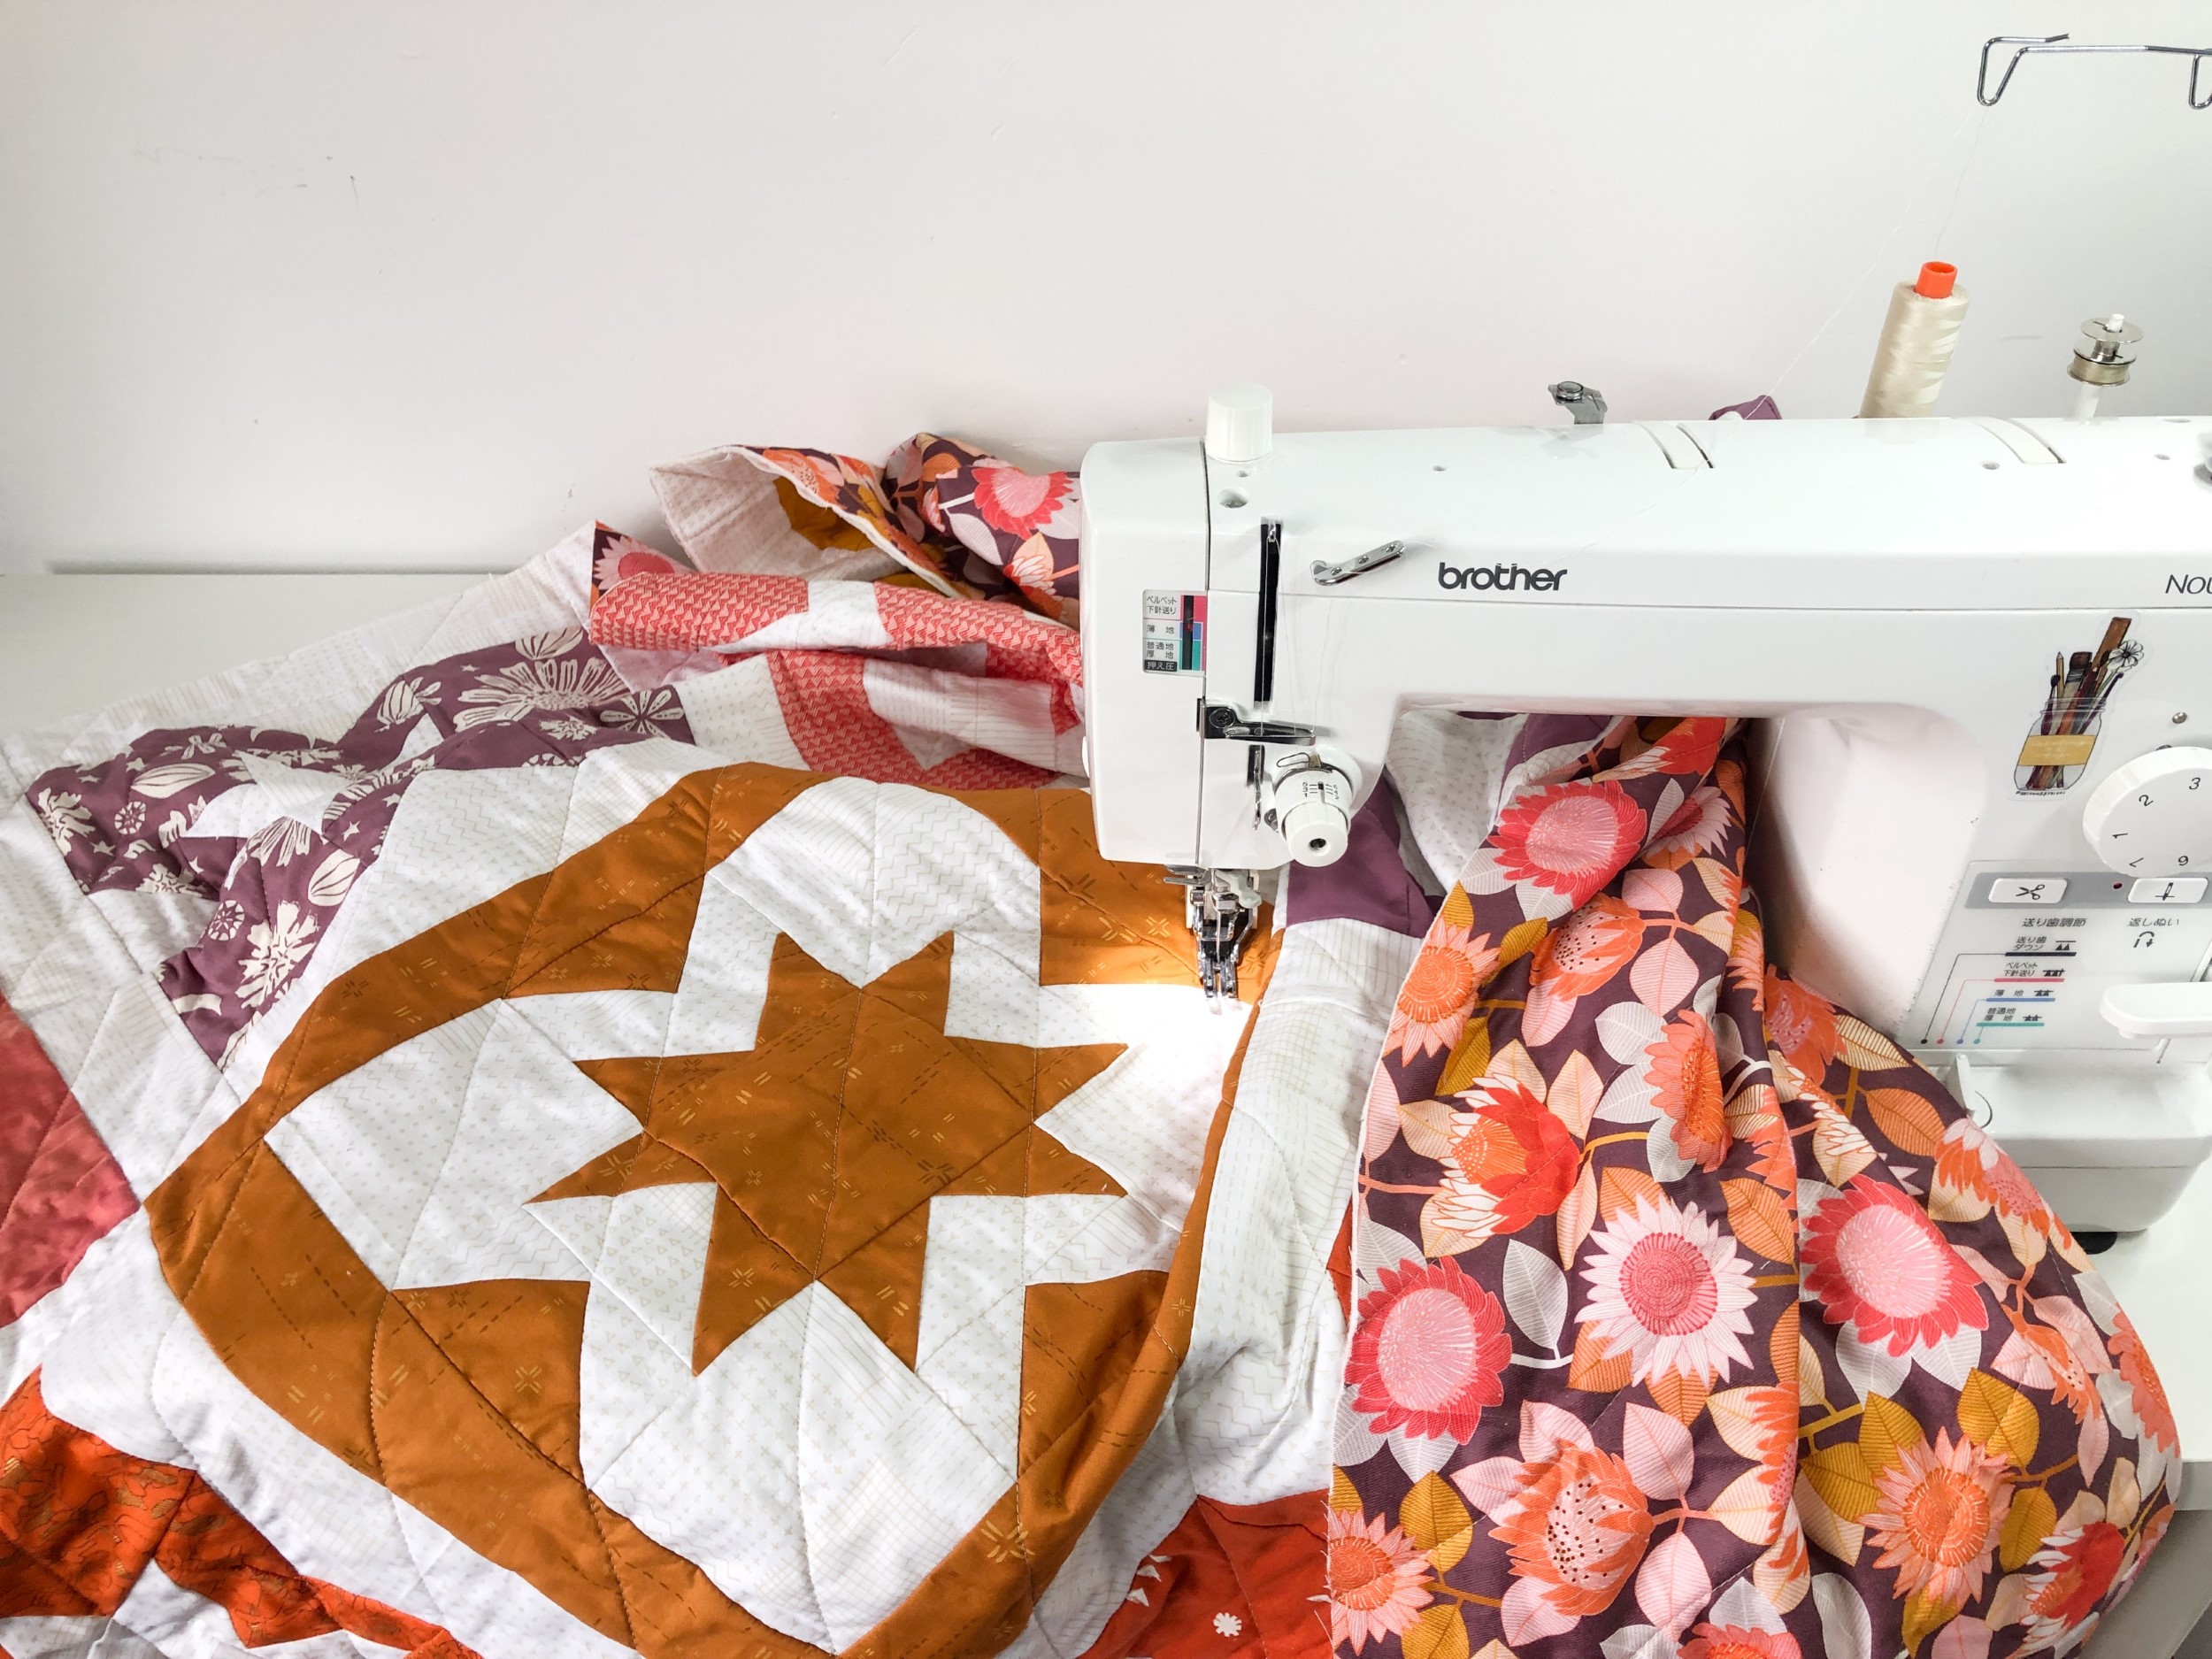
So, you want to know how to quilt a quilt on a sewing machine? Great! Yes, you absolutely can quilt a quilt on a regular sewing machine, even if you are just starting out. It takes some practice, but many quilters make beautiful finished quilts this way. This guide will walk you through the basic steps, tools, and techniques needed to add those lovely stitches that hold your quilt together and make it look finished.
Gathering Your Sewing Friends
Before you start stitching, you need the right tools. Think of these as your helpers.
Your Sewing Machine Pal
You don’t need a fancy machine. A home sewing machine that works well is just fine. Make sure it can do a straight stitch. It helps if your machine has some space to the right of the needle to fit your quilt.
The Right Needle
Use a sharp needle. A size 80/12 or 90/14 needle works well for quilting. Change your needle often. A fresh needle makes stitching easier and cleaner.
Selecting the Best Thread
Using the best thread for machine quilting is important. You want thread that is strong but not too thick. Cotton thread is a popular choice. Look for good quality thread that does not break easily. Polyester thread also works well and is strong. Choose a color that matches your fabric or a neutral color like white, cream, or gray. You can also pick a contrasting color to make your stitches stand out.
Picking the Perfect Batting
Quilting batting types come in many choices. Batting is the fluffy layer in the middle of your quilt. It gives the quilt warmth and puffiness.
* Cotton Batting: This is a common choice. It is soft and breathable. It gives a classic look to quilts. You often need to quilt closer together with cotton.
* Polyester Batting: This is light and warm. It holds its shape well. It’s good for beginners as you don’t need to quilt as closely.
* Wool Batting: This is very warm and light. It drapes nicely. It costs more than cotton or poly.
* Blend Batting (like 80% Cotton / 20% Poly): This mixes the good things about cotton and poly. It’s popular and easy to work with.
* Bamboo Batting: This is soft and drapes very well. It is eco-friendly.
Think about how you want your finished quilt to feel and look when choosing batting.
Quilting Feet for Sewing Machines
Your machine needs the right foot to help you quilt. Two main feet are used:
- Walking Foot: This foot helps feed all three layers of the quilt through the machine evenly. It has “feed dogs” on top that work with the machine’s feed dogs below. This stops the fabric layers from shifting and puckering. Using a walking foot for quilting is great for straight lines or gently curving lines.
- Free Motion Foot (or Darning Foot): This foot is used when you want to move the quilt in any direction. It hovers over the fabric. You drop the machine’s feed dogs when using this foot. This lets you move the quilt freely to draw designs with your stitches.
Make sure you have or can get one of these feet for your machine.
Other Helpful Items
- Safety Pins or Basting Spray: These hold your quilt layers together before stitching.
- Quilting Gloves: These help you grip the quilt and move it under the needle.
- Fabric Scissors: For cutting thread tails.
- Marking Tool: To draw quilting lines (use one that disappears).
- Large Table: To support the weight of your quilt as you stitch.
Getting Your Quilt Ready
Before you can stitch, you need to prepare your quilt layers. This is called making the quilt sandwich.
Making the Layers Smooth
Press your quilt top and your backing fabric. Get out any wrinkles. This makes layering easier and smoother.
Layering a Quilt for Quilting
This is an important step. You need to put your three layers together neatly. This is often done on a large flat surface like a table or a clean floor.
- Backing Layer: Lay your backing fabric face down. Make sure it is smooth and flat. You can tape the edges to the table to keep it from moving. Your backing should be about 4 inches wider and longer than your quilt top. This gives you room to work.
- Batting Layer: Put your batting on top of the backing fabric. Center it. Smooth it out with your hands. Make sure there are no wrinkles or bumps. The batting should be a little bigger than your quilt top, too.
- Quilt Top Layer: Lay your finished quilt top face up on top of the batting. Center it carefully. Smooth it out starting from the middle and working your way to the edges. Check that all three layers are flat and smooth.
Now you have your quilt sandwich!
Holding the Layers Together (Basting)
You must hold these three layers together so they don’t move while you quilt. This is called basting.
- Pin Basting: Use special curved safety pins. Start in the middle and place pins every 3-4 inches across the whole quilt. Make sure to pin through all three layers.
- Spray Basting: Use a temporary fabric adhesive spray. Follow the product directions. Spray lightly on the batting, then add the layers. Smooth carefully. This is fast but can be messy.
- Thread Basting: Use a large needle and thick thread. Make long, loose stitches across the quilt. This takes time but uses no pins or spray.
Choose the method you like best. The goal is to keep the layers from shifting at all while you quilt.
Setting Up Your Machine Right
Correct machine settings make a big difference in how your quilting looks and feels.
Choosing the Needle
Put your new sharp needle in. Make sure it is put in the right way for your machine.
Threading Your Machine
Thread your machine with the thread you chose. Make sure the thread goes through all the right guides. Thread both the top and the bobbin. Use the same thread in the bobbin as on top, or a similar type.
Checking Thread Tension
Thread tension is how tight the stitches are. If the tension is not right, your stitches won’t look good. The top thread might loop on the back, or the bobbin thread might loop on the top. Test on a scrap of your quilt sandwich. Stitch some lines. Look at the stitches on the top and back. They should look the same. Adjust your tension dial until the stitches look balanced.
Setting Stitch Length
If you are using a walking foot (for straight lines), set your stitch length. A length of 2.5 to 3.0 mm is a good start. You can make it a bit longer if you like the look.
Managing the Feed Dogs
Feed dogs are the little teeth under the needle plate. They move the fabric along as you stitch.
- For Walking Foot: Keep the feed dogs UP. The walking foot needs the feed dogs to work with it.
- For Free Motion: Put the feed dogs DOWN. Your machine might have a switch or you might need a special plate. When the feed dogs are down, you control how the fabric moves.
Attaching the Right Foot
Put the walking foot on your machine if you are doing straight lines. Use the free motion foot (or darning foot) if you want to draw designs by moving the quilt freely. Make sure the foot is attached correctly.
Picking Your Quilting Design
How you stitch across your quilt is called the quilting design. It adds texture and style. For beginners, simple designs are best.
Straight-Line Quilting (Using a Walking Foot)
This is a great way to start. It uses the walking foot to make straight lines. Using a walking foot for quilting helps keep your lines even and your layers smooth. Walking foot quilting techniques are easy to learn.
- Stitch in the Ditch Method: This is a popular technique. You stitch right next to the seams that join your fabric pieces. This makes the stitching almost disappear. It holds the layers together well. It makes the pieced blocks stand out. To do this, guide your walking foot along the ditch (the low spot next to a seam). Go slowly.
- Parallel Lines: You can stitch straight lines across the quilt. These lines can be spaced 1 inch apart, 2 inches apart, or any distance you like. You can stitch them side to side, top to bottom, or on a diagonal. Mark lines with a ruler and a disappearing pen, or use the edge of your walking foot or a guide bar if your foot has one. Stitch the first line. Then use the edge of your foot as a guide for the next line.
- Grids: Stitch lines going one way, then turn the quilt and stitch lines crossing the first ones. This makes squares or diamonds.
Free Motion Quilting
This method lets you stitch any design you can draw. It feels like drawing with your machine! This is where the feed dogs are down and you use a free motion foot. You move the quilt to create the design. Starting with a simple free motion quilting tutorial can help.
- Meandering: This is a common first free motion design. It looks like loops or wiggly lines that fill an area without crossing over too much. Practice this on scrap fabric first! Keep the quilt moving smoothly. Try to make the loops about the same size. Keep your stitch length even by moving the quilt at a steady speed while the machine stitches.
- Loops: Simple loops that connect. Like writing in cursive but with loops.
- Stars or Hearts: You can try stitching simple shapes inside blocks.
Free motion takes practice. Don’t worry if your stitches are not perfect loops at first. Just keep the quilt moving.
Starting to Stitch
Okay, your machine is set up, your quilt is layered and basted, and you picked a design. Time to stitch!
Where to Start
Often, it’s good to start quilting in the middle of the quilt. This helps push the extra fabric and fullness towards the edges. If you are doing straight lines, you might start with a central line and work your way out. If doing free motion, start in the middle area and fill it in.
Beginning and Ending Stitches
You need to secure your stitches so they don’t come undone.
- Backstitching: Stitch a few stitches forward, then a few stitches back over them, then forward again. Do this at the start and end of your stitching lines. This is easy with a walking foot.
- Locking Stitches / Burying Threads: For a neater look, especially with free motion, you can take a few tiny stitches in place to lock the thread. Then, leave a long thread tail (about 4 inches). When you are done quilting, use a needle to pull the thread tail to the back of the quilt and bury it inside the batting layer. This hides the knots.
Moving the Quilt
Quilts can be heavy! You need to support the weight of the quilt as it moves under the needle. Use a large table to the left and in front of your machine. Let the quilt rest on the table. Do not pull or push the quilt through the machine. Guide it gently. Let the machine feed the fabric if using a walking foot. Control the movement yourself if doing free motion.
Take Breaks
Quilting can be tiring. Your neck, shoulders, and back might get sore. Stand up, stretch, and walk around often. This helps you stay focused and makes quilting more enjoyable.
Looking at Quilting Stitches on a Machine
Most machine quilting uses a simple straight stitch. The look comes from the length of the stitch and the design you make with it.
- Straight Stitch: This is the most common stitch. You can make it short or long.
- Decorative Stitches: Some machines have built-in decorative stitches like hearts, leaves, or waves. You can use these for quilting, but be careful. They can be tricky with multiple layers. Often, a simple straight stitch looks best for holding the layers together.
The “quilting stitches on a machine” really refers to the path your needle takes (straight lines, curves, loops) rather than a special stitch type itself.
Finishing Your Quilt
Once all your quilting stitches are done, your quilt is almost finished!
Trimming the Edges
Trim away the extra batting and backing fabric. Use a ruler and a rotary cutter to make the edges straight. Cut about 1/4 inch away from the quilt top edge.
Adding the Binding
The binding is the fabric strip that goes around the edge of the quilt. It covers the raw edges. This is the last step to finish your quilt. There are many ways to attach binding, by machine or by hand.
Helpful Advice for Machine Quilting for Beginners
- Practice on Small Pieces: Don’t start on your most loved quilt top! Make some quilt sandwiches with scrap fabric. Practice straight lines and free motion designs. Stitching small things helps you get the feel of it.
- Start Simple: Choose easy designs first. Straight lines or a simple all-over free motion pattern like meandering are great for beginners.
- Done is Better Than Perfect: Your first machine quilting won’t be perfect. That’s okay! The stitches hold the quilt together. Don’t stress over small mistakes. They add character.
- Watch Videos: Look for videos online that show walking foot quilting techniques or a free motion quilting tutorial. Watching someone do it can help a lot.
- Get Comfortable: Set up your sewing area so you can sit comfortably. Make sure you have good light.
- Manage the Weight: Use tables or chairs to support the quilt. Heavy quilts are hard to push through the machine.
- Clean Your Machine: Lint builds up quickly when quilting. Clean your machine often, especially around the bobbin area.
Frequently Asked Questions
Q: Can I quilt a large quilt on a small machine?
A: Yes, you can. It is harder because you have to fit more fabric through the machine’s throat space. Roll or fold the parts of the quilt that are not under the needle. Use clips to keep the rolled parts tidy. Support the weight on tables. It takes patience but is possible.
Q: How do I know what stitch length to use?
A: For walking foot straight lines, 2.5mm to 3.0mm is a good starting point. For free motion quilting, you don’t set the length. The stitch length is controlled by how fast you move the fabric compared to how fast the needle goes up and down. Practice to find a speed that makes stitches that look good to you (not too long, not too short).
Q: My stitches are uneven. Why?
A: This is very common, especially with free motion quilting. For straight lines, check your tension and make sure your walking foot is on correctly. For free motion, uneven stitches happen when you move the fabric too fast or too slow compared to the needle speed. Practice helps you find a steady rhythm.
Q: Do I have to use a special thread?
A: No, you don’t have to, but using good quality thread meant for quilting or sewing helps. Avoid cheap thread that breaks or creates a lot of lint. Cotton or polyester threads are good choices. Using the best thread for machine quilting makes the process smoother.
Q: How much batting do I need?
A: You need a piece of batting that is 3 to 4 inches larger on all sides than your quilt top. This extra size gives you room to work and trim later. When looking at quilting batting types, check the package for shrinkage if you plan to wash it a lot.
Wrapping It Up
Quilting a quilt on your sewing machine is a rewarding step. It takes your quilt top from a collection of pieces to a finished, cozy blanket. Start simple, take your time, and don’t be afraid to practice. Every stitch you make teaches you something new. With patience and your trusty sewing machine, you will be adding beautiful quilting to your projects in no time. Happy stitching!