
Image Source: i.ytimg.com
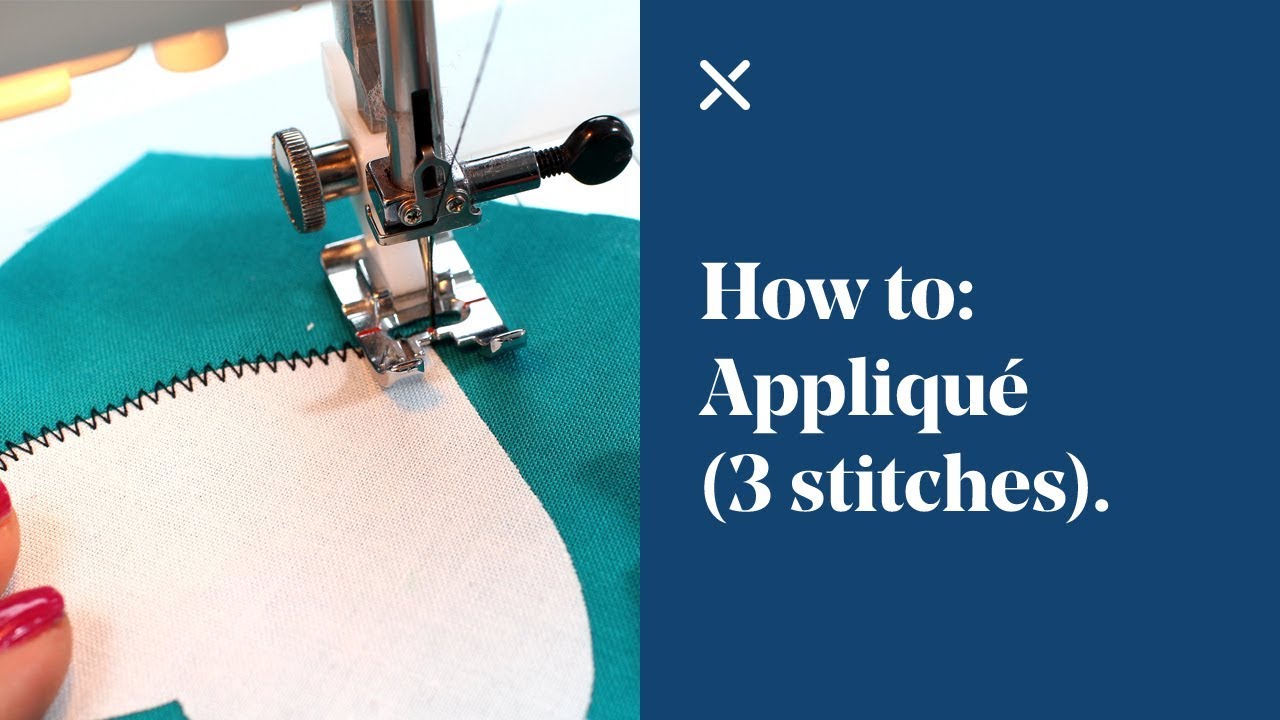
Beginner’s Guide: How To Applique By Sewing Machine Skillfully
Have you seen beautiful fabrics layered on top of each other to make pictures or patterns? That’s applique! Many people ask, “What is applique?” It’s a fun way to decorate fabric by stitching smaller pieces onto a larger background piece. “Can anyone do it?” Yes, absolutely! Using a sewing machine makes it fast and easy to get neat results. This guide will show you how to machine applique fabric like a pro, even if you’re just starting out.
Learning About Applique
Applique is an old craft. People used it for clothes, blankets, and flags. It’s like drawing with fabric! You cut out shapes and sew them onto another piece of fabric.
Using a sewing machine for applique has big pluses:
- It saves time compared to hand sewing.
- Your stitches are strong and even.
- You can use different stitch types for cool looks.
It’s a skill that lets you make amazing things. You can decorate quilts, clothes, bags, and wall hangings.
Why Pick Your Sewing Machine for Applique?
Your sewing machine is a great tool for applique. It gives you speed and control. It also offers many stitch choices. Hand sewing applique is nice, but it takes a long time. A machine lets you finish projects faster. It also makes stitches that are super tough. This is great for things you will wash a lot.
Think of your machine as your helper. It does the hard stitching work for you. You just need to guide the fabric.
Getting Ready for Machine Applique
Starting right helps a lot. Gather everything you need first. This makes the process smooth and fun.
Needed Supplies
Here’s a list of things to get ready:
- Fabrics: Your background fabric and the smaller pieces for your design.
- Thread: Choose colors that match or stand out, based on your plan.
- Needles: Get the right needle size for your fabric. A sharp needle works well.
- Scissors: Small, sharp scissors for cutting shapes are key.
- Iron and Ironing Board: You’ll use these often!
- Pencil or Fabric Marker: For tracing shapes.
- Paper: To draw or print your designs.
- Pins: To hold things in place if you don’t use fusible web.
Using Fusible Web for Applique
This is a game changer for machine applique! Fusible web for applique is a thin sheet. It has glue on both sides. You iron it onto your fabric shapes. Then you cut out the shapes. Peel off the backing paper, place the shape on your background fabric, and iron it down.
Why use it?
* It holds your shapes in place without pins.
* It stops the edges from fraying before you sew.
* It makes cutting small, tricky shapes easier.
Think of it as a temporary, iron-on glue. It makes stitching much neater because the fabric doesn’t move.
Grasping Stabilizer’s Role
Stabilizer for machine applique is super important. It’s a material you put under your background fabric. It gives the fabric body. This stops it from puckering or getting wavy when you stitch dense stitches like satin stitch.
Types of stabilizer:
* Tear-away: You tear it away easily after sewing. Good for woven fabrics.
* Cut-away: You cut it away. Good for stretchy fabrics or dense stitches.
* Wash-away: It disappears when you wash your project. Great when you don’t want any stabilizer left.
Choosing the right stabilizer stops your project from looking crinkled. It makes your stitches look much better.
Picking Your Fabric
Almost any fabric works for applique. Cotton is easy for beginners. Try to use fabrics that are similar in weight. If you put a heavy fabric shape on a light fabric background, it might pull or pucker. Pre-wash your fabrics to avoid shrinking later.
Making Your Design Ready
First, draw your design on paper. Or print a shape you like. Make sure it’s the right size. If you use fusible web, you’ll trace the reversed image onto the paper side of the fusible web. If your shape is the same forwards and backward (like a circle), you don’t need to reverse it. If it’s not (like a letter ‘J’), you must reverse it.
Setting Up Your Sewing Machine
Your machine needs a few tweaks to be ready for applique.
Machine Basics
Make sure your machine is clean. Put in a fresh needle. Get a needle type that works well for the fabric layers. A sharp or microtex needle often works great for fine detail.
The Applique Foot for Sewing Machine
Many people find an applique foot for sewing machine helpful. It’s often a clear plastic foot with a groove on the bottom. This groove lets the bulk of the stitches pass under the foot easily. The clear plastic lets you see where you are stitching. This helps you stay right on the edge of your applique shape. You don’t need a special foot, but it can make things easier.
Thread Choices
Use good quality thread. Polyester or rayon threads are strong and have a nice sheen. They work well for satin stitch. Cotton thread is fine too. Match the thread weight to your needle and fabric. You might want thread the same color as your applique shape, or a color that pops! Using a matching thread in the bobbin is usually best.
Setting the Tension
Getting your tension right is super important. You want your stitches to look the same on the top and the bottom. No loops on either side. Do a test run on scrap fabric first. Check both sides. Adjust the tension dial if needed until the stitches look perfect. Too-tight tension can cause puckering.
Ways to Do Machine Applique
There are a few common ways to attach your fabric shapes with the machine.
Fusible Web Method Steps
This is very popular for beginners.
1. Trace: Get your design. Trace the reversed shape onto the paper side of your fusible web. Leave space between shapes.
2. Iron Web to Applique Fabric: Cut a rough square around your traced shape on the fusible web. Place the glue side of the web onto the wrong side of your applique fabric piece. Iron it according to the fusible web instructions (usually medium heat, no steam).
3. Cut Out Shape: Let it cool. Cut out the shape exactly on the traced line.
4. Peel: Peel off the paper backing. Your shape now has glue on the back.
5. Place and Iron: Place the shape glue-side down onto your background fabric. Iron it down firmly to stick it.
6. Add Stabilizer: Place stabilizer under the background fabric, right where your applique is.
7. Stitch: Now you can sew around the edge of your shape using your chosen stitch (like satin or zigzag).
Raw Edge Applique Sewing
Raw edge applique sewing is simpler. You don’t turn under the edges of your fabric shape. You just cut out the shape and place it on the background fabric. Then you stitch around the edge.
Why use raw edge?
* It’s fast!
* It gives a more casual, slightly frayed look over time.
* It’s great for projects where a little fraying is okay (like quilts that will be washed).
You can use a straight stitch, a zigzag, or other stitches for raw edge applique. You don’t usually need fusible web for this, though you can use a temporary spray glue or pins to hold the shape. You still need stabilizer to stop the background from puckering.
Other Methods
- Turned Edge Applique: This is more like hand applique but done by machine. You turn the raw edge of the applique shape under before stitching. This gives a very clean look. It can be trickier by machine.
- Free Motion Applique Sewing: This is more advanced. You drop the feed dogs on your machine. You move the fabric freely with your hands while stitching. This lets you outline shapes or even “draw” with thread around the applique. Free motion applique sewing is great for a sketched look.
Deciphering Machine Applique Stitches
Your machine has many stitches you can use for applique. Each gives a different look.
Satin Stitch Applique
Satin stitch applique is very popular. It’s a wide, close-together zigzag stitch. It makes a thick line of thread that covers the raw edge completely. This gives a smooth, finished look.
How to set it up:
* Set your machine to a zigzag stitch.
* Set the stitch width. This is how wide the stitch is. Choose a width wide enough to cover the raw edge of your applique shape (maybe 2.5mm to 4mm).
* Set the stitch length. This is how close the stitches are together. For a satin stitch, you want them very close. This makes the stitches pack together into a solid line. A setting of 0.5mm or less is typical. Adjust it until there are no gaps.
When sewing satin stitch, make sure the needle swings just over the edge of the applique shape on one side and into the background fabric on the other. Use stabilizer! Satin stitch uses a lot of thread and can cause puckering.
Zigzag Stitch Machine Applique
The standard zigzag stitch machine applique is similar to satin stitch but the stitches are further apart. This uses less thread and is faster. It still covers the raw edge but you can see the individual stitches.
How to set it up:
* Set your machine to a zigzag stitch.
* Set the stitch width (maybe 2mm to 3mm).
* Set the stitch length. Make it longer than satin stitch (maybe 1mm to 2mm). Play with settings on scrap fabric to see what you like.
This is a good choice for a slightly less dense border. It works well for shapes that aren’t too complex.
Buttonhole Stitch Applique
The buttonhole stitch applique looks like a series of little L-shapes. It’s often used for buttonholes, but it’s also lovely for applique. The straight part of the stitch goes right on the edge of the applique, and the little bar tacks go out into the background fabric.
How to set it up:
* Find the buttonhole or blanket stitch on your machine.
* Adjust the stitch width and length. The width controls how far the “bar” goes out. The length controls how far apart the stitches are.
This stitch gives a handmade, craftsy look. It’s great for folk art or country-style projects. It does not cover the raw edge as completely as satin stitch, but it holds the edge down nicely.
Other Stitches
Many machines have decorative stitches. Some of these can be used for applique edges too. Try them out on scraps! A simple straight stitch or a narrow zig-zag is perfect for raw edge applique sewing.
| Stitch Type | Appearance | Recommended Settings (Start Point) | Best Use Case | Readability |
|---|---|---|---|---|
| Satin Stitch | Thick, solid line of thread | Width: 2.5-4mm, Length: 0.5mm or less | Covering raw edges fully, smooth finish, detailed | High |
| Zigzag Stitch | Visible individual stitches, covers edge | Width: 2-3mm, Length: 1-2mm | Faster than satin, slightly less dense edge | Medium |
| Buttonhole (Blanket) | Series of ‘L’ shapes along the edge | Width: 2-3mm, Length: 2-4mm | Crafty look, holds edge, not fully covering | Medium |
| Straight Stitch | Simple line of stitches | Length: 2mm | Raw edge applique, minimalist look | High |
| Free Motion (Zigzag) | Custom shapes, variable width/density | Drop Feed Dogs, Zigzag (adjust width) | Outlining shapes freely, sketched look | Low |
Note: “Readability” here means how easy it is for the stitch to hide edge flaws, not text readability.
The Sewing Process (Putting it All Together)
You’ve prepped your shape, put it in place, and added stabilizer. Now it’s time to sew!
Placing the Applique Piece
If you used fusible web, your piece is stuck down. If not, use pins or a temporary fabric glue stick to hold it exactly where you want it. Make sure the stabilizer is smooth under the fabric.
Starting and Stopping Stitches
When you start stitching around a shape, it’s good to begin on a straight edge if possible. Start with a few securing stitches. Some machines have a knot function. Or you can sew a few tiny stitches in place. Then start moving slowly around the edge.
When you get back to where you started, sew a few stitches over your beginning stitches. Secure the end stitches like you did at the start.
Turning Corners and Curves
This is where you need to slow down.
- For sharp corners: Stitch almost to the corner. Leave the needle down in the fabric on the outer side of the shape (the side away from the corner point). Lift the presser foot. Turn the fabric slightly. Lower the foot. Stitch a few more stitches towards the corner. Repeat until you can turn the fabric fully to sew down the next side. With satin stitch, you’ll make several small turns right at the corner point.
- For curves: Sew slowly. Gently guide the fabric with your hands. Turn the fabric just a tiny bit with each stitch or every few stitches. You are making small, tiny adjustments to follow the curve smoothly. The slower you go, the better you can control the fabric.
Securing Your Stitches
Always secure your start and end points. This stops your stitches from unraveling. Sewing over the first few stitches works well. Some machines can tie a tiny knot. Trim your threads close to the fabric when done.
Machine Applique Tips and Tricks
Want to make your machine applique look even better? Here are some machine applique tips and tricks:
- Practice on Scraps: Always test your stitches and tension on scrap fabric before sewing on your project. Use the same number of fabric layers and stabilizer.
- Go Slow: Speed is the enemy of neat applique, especially on curves and corners.
- Pivot Often: Use the needle down feature on your machine. It lets you lift the foot and turn the fabric without losing your place.
- Trim Threads as You Go: It’s easier to snip threads right after sewing a section than dealing with a tangled mess at the end.
- Use the Right Needle: A sharp needle makes clean holes, which is key for nice stitches.
- Match Bobbin Thread: Use the same color thread in your bobbin as on top, especially if you’re using dense stitches like satin stitch. If your tension is slightly off, the matching bobbin thread will be less noticeable.
- Consider Your Project’s Use: Will it be washed often? Use a strong stabilizer and dense stitches to protect the edges.
- Layering Appliques: If you are layering shapes, stitch the bottom layers first. Then place and stitch the top layers.
- Small Pieces: Use fusible web for small, fiddly pieces. It makes them stable and easy to cut and place.
- Pressing: Press your work gently from the back after applying fusible web. Press again after stitching if needed, but be careful not to distort dense stitches.
- Needle Position: With many feet and stitches, you can adjust where the needle goes. For edge stitching, placing the needle so it just catches the edge of the applique is key. The edge of the foot can be your guide.
Common Problems and How to Fix Them
Even experienced sewers run into issues. Here’s how to handle some common machine applique problems:
- Puckering: The background fabric looks wavy or gathered.
- Fix: You probably need stabilizer! Use a heavier stabilizer or multiple layers. Also, check your tension – too tight tension pulls the fabric. Slow down when sewing, especially on curves.
- Thread Breaks: The thread keeps snapping.
- Fix: Your needle might be old, bent, or the wrong type/size. Change the needle. Check your thread quality. Make sure the machine is threaded correctly. Your tension might be too high.
- Uneven Stitches: Some stitches are long, some are short, or the width changes.
- Fix: You might be moving the fabric too fast or not at a steady speed. Slow down and guide the fabric smoothly. Check that your stitch length and width settings haven’t changed. Make sure the presser foot is down firmly.
- Skipped Stitches: Your machine misses stitches, leaving gaps.
- Fix: This is often a needle issue. Replace the needle; make sure it’s inserted correctly. Check that you are using the right type of needle for the fabric (e.g., a sharp needle for woven fabrics).
Practice Makes Perfect
Learning how to machine applique fabric takes practice. Don’t expect your first attempt to be perfect. Start with simple shapes like circles and squares. As you get more comfortable, move to more complex shapes and try different stitches.
Make small practice pieces. Try stitching the same shape with satin stitch, then zigzag, then buttonhole stitch. See which look you like best. Practice turning corners and curves slowly on scrap fabric before working on your main project. The more you practice, the better you’ll get at guiding the fabric and choosing the right settings.
Conclusion
You now have the basic steps to start your journey with machine applique. We covered getting ready with materials like fusible web for applique and stabilizer for machine applique. We talked about setting up your machine and using an applique foot for sewing machine. You learned about different stitches like satin stitch applique, zigzag stitch machine applique, and buttonhole stitch applique, plus the easy raw edge applique sewing and exciting free motion applique sewing.
With these machine applique tips and tricks, you’re ready to start creating beautiful fabric art. Pick a simple design, gather your supplies, and take it slow. Applique by sewing machine is a rewarding skill that opens up a world of design possibilities. Happy stitching!
Frequently Asked Questions (FAQ)
Q1: Is machine applique hard for a beginner?
Not at all! With a good guide, the right tools like fusible web, and a little practice, beginners can get great results. Start with simple shapes and build your skills.
Q2: Do I always need to use stabilizer?
For most machine applique, especially with dense stitches like satin stitch, stabilizer is highly recommended. It prevents the fabric from puckering. For very light stitches on stable fabric, you might skip it, but it’s often better to use it just in case.
Q3: Can I wash items with machine applique?
Yes! Machine applique, especially when done with stabilizer and dense stitches like satin stitch, is very durable. Wash your item according to the care instructions for the fabrics used. Using cut-away stabilizer is best for items that will be washed a lot, as it provides lasting support.
Q4: What is the difference between satin stitch and zigzag stitch for applique?
Satin stitch is a very dense zigzag stitch. The stitches are packed closely together. This creates a solid band of thread that fully covers the raw edge. A standard zigzag stitch has more space between the stitches, so you can see the individual stitches, and it uses less thread. Both secure the edge, but satin stitch gives a more finished look.
Q5: How do I choose the right fusible web?
There are different types of fusible web based on weight and how permanent they are. A lightweight, paper-backed web is usually good for general applique on cotton fabrics. Always check the product instructions for how to apply it and if it’s washable.
Q6: Do I need a special machine for machine applique?
No, most modern sewing machines with zigzag stitches can do applique. Having adjustable stitch width and length is helpful. An applique foot is nice but not strictly necessary. You can start with your basic machine and add tools later.