
How can you show off your beautiful embroidery hoops? You can easily display embroidery hoops in many simple and stylish ways, turning your finished projects into lovely decor for your home.
Embroidery hoops are not just tools for making pretty pictures with thread. They are also great frames. You can hang them on walls, make fun groups, or place them on shelves. This lets you share your artwork and add a personal touch to any room. Let’s look at some simple ideas for displaying finished embroidery projects.
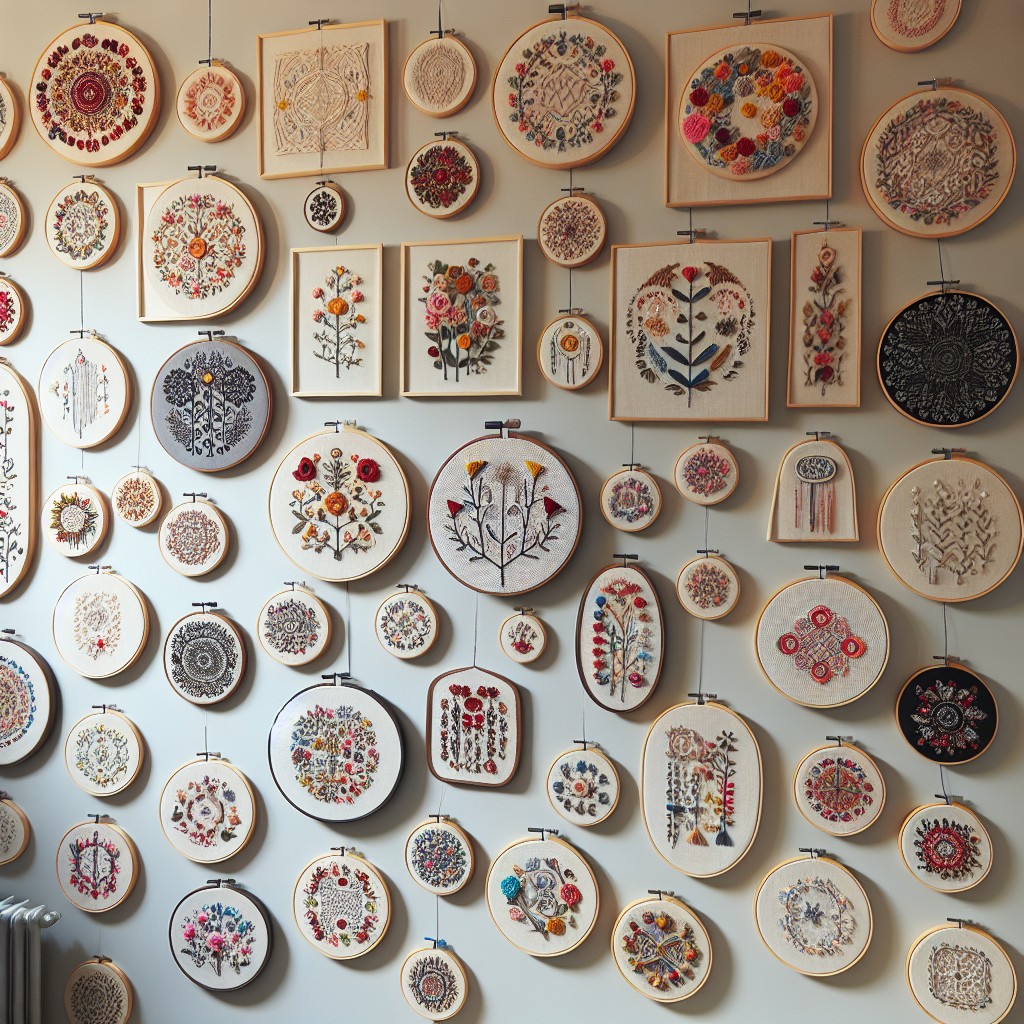
Image Source: edinyarnfest.com
Hanging Embroidery Hoops On Walls
Putting your hoop art on a wall is a popular choice. It is simple and makes your work easy to see. There are many ways to hang them.
Simple Ways to Hang One Hoop
Showing off just one special piece is easy.
* Use the hoop screw: Most hoops have a metal screw at the top. You can use this to hang it directly.
* Put a small nail or hook in the wall.
* Hang the metal screw part of the hoop onto the nail or hook.
* Make sure the screw is tight so the fabric stays put.
* Add a ribbon or string: This adds a nice touch and makes hanging easier.
* Cut a piece of pretty ribbon or strong string.
* Tie it in a loop around the metal screw at the top of the hoop.
* Hang the ribbon loop on a nail or hook.
* You can make the ribbon loop long or short. A longer ribbon makes the hoop hang lower. This looks nice if you have tall walls.
* Use sticky hooks: If you don’t want holes in your walls, sticky hooks are great.
* Choose a hook strong enough for your hoop’s weight.
* Clean the spot on the wall where you want to hang it. Let it dry.
* Peel the back off the sticky hook.
* Press the hook firmly onto the wall for the time the package says.
* Hang the hoop’s metal screw or a ribbon from the hook.
* These are good for lighter hoops or rental homes.
Showing one hoop is a simple way to make a small space special. It lets the artwork be the star.
Hanging Multiple Hoops: Making a Gallery
Creating a group of hoops is a wonderful way to make a bigger statement. This is where you can really get creative with embroidery hoop wall art ideas.
* Mix sizes: Use hoops of different sizes – big, medium, and small. This makes the display more interesting.
* Use different colors: You can use hoops with different wood stains or even painted hoops.
* Plan your layout: Before putting holes in the wall, lay your hoops on the floor. Move them around until you like the look.
* Try putting the largest hoop in the middle.
* Put smaller hoops around it.
* You can make a straight line, a curve, or a random cluster.
* Think about theme: Group hoops that have a similar theme, color scheme, or style. This makes the collection look planned and pretty.
* Use paper templates: If you are worried about getting the layout right on the wall, trace your hoops onto paper. Cut out the paper circles. Tape the paper circles onto the wall where you want the hoops to go. Step back and look. Move the paper circles until the layout is perfect. Then, put nails or hooks through the paper where the hanging part of the hoop will be. Remove the paper and hang your hoops.
Here are some ideas for arranging multiple hoops:
* A straight line: Hang hoops in a row, either level or going up stairs.
* A grid: Hang hoops in neat rows and columns. This looks very clean and modern.
* A cluster: Group hoops closely together in an organic shape. This looks more relaxed and artistic.
* Along a shelf: Hang some hoops above a shelf and place others on the shelf with a stand.
* Around a mirror or picture: Arrange hoops to frame another item on the wall.
Making a gallery wall with hoops is a great way to fill a space. It shows off many pieces at once. It is one of the best wall display ideas for hoop art.
Displaying Finished Embroidery Projects Without Hanging
You don’t always have to hang your hoops. There are other lovely ways to display them.
Using an Embroidery Hoop Stand
An embroidery hoop stand is a simple way to show your hoop art on a flat surface.
* What is a stand? It is usually a small piece of wood or metal. It has a slot or pegs to hold the hoop up.
* Where to use a stand:
* On a bookshelf.
* On a desk or table.
* On a mantelpiece above a fireplace.
* On a dresser in a bedroom.
* Benefits of using a stand:
* No need for nails or sticky hooks.
* Easy to move the display around.
* Lets you show hoops on surfaces, not just walls.
* Adds height and interest to displays on flat areas.
* Types of stands:
* Easel-style stands: These look like small easels. They hold the hoop at a slight angle. They are often made of wood or metal.
* Slotted stands: These are blocks with a thin cut in them. The bottom edge of the hoop sits in the cut.
* Peg stands: These have small pegs that hold the hoop edge.
* Choosing a stand: Pick a stand that fits the size of your hoop. Make sure it is sturdy enough so the hoop does not fall over. A stand can be a simple wood block or a fancy metal easel. Match the stand style to your room decor.
An embroidery hoop stand is a perfect solution for displaying finished embroidery projects when wall space is limited or you prefer a different look. It is a flexible way to use embroidery hoop decor around your home.
Leaning Hoops on Surfaces
This is the easiest way to display a hoop without hanging.
* How to do it: Just lean your hoop against something.
* Where to lean them:
* Against books on a shelf.
* Against the wall on a mantelpiece.
* On a cabinet or sideboard.
* Adding stability: For larger hoops, you might need something behind them to keep them from slipping. A small hidden bookend or prop works well.
* Combining with other items: Lean hoops behind small plants, candles, or other decorative items. This creates a layered look.
Leaning hoops is relaxed and casual. It’s great for adding a quick touch of embroidery to a space.
Framing Embroidery Hoops
While the hoop itself is a frame, you can add another layer of framing. Framing embroidery hoops gives a more formal look.
* Why frame?
* To give the piece a finished, polished look.
* To protect the embroidery from dust and damage.
* To match the art style with traditional picture frames.
* How to frame:
* Mount the finished embroidery piece onto a piece of acid-free board.
* You can leave the hoop on or take it off. If you leave it on, the frame will go around the hoop. If you take it off, you will only frame the fabric art itself.
* Choose a frame that fits the size of your mounted artwork.
* You might want to use a mat board around the embroidery inside the frame. A mat is a thick paper border. It gives space around the art and looks professional.
* Take the mounted embroidery to a frame shop, or buy a ready-made frame and do it yourself.
* Considerations:
* Framing with the hoop still on can be tricky because hoops are thick. Custom framing might be needed.
* Framing just the fabric requires carefully finishing the back of the embroidery so it lies flat.
* Choose frame colors and styles that go well with the embroidery and your room.
Framing embroidery hoops changes the feel of the artwork. It takes it from a craft item to a framed picture.
Getting Your Hoop Ready For Display
Before you display your hoop, you need to finish the back neatly. This makes it look professional and keeps the fabric tight.
* Trim the extra fabric: After your embroidery is done and in the hoop, you will have extra fabric hanging out the back. Trim this fabric so it is about 1 inch (2.5 cm) longer than the hoop edge all around.
* Gather or glue the fabric:
* Gathering: Use a strong thread to sew large stitches around the trimmed edge of the fabric. Pull the thread tight to gather the fabric towards the center of the hoop back. Tie the thread off. This pulls the extra fabric out of the way.
* Gluing: Use a strong fabric glue or hot glue. Put glue around the inside edge of the back of the hoop. Carefully press the trimmed fabric edge onto the glue. Work slowly around the hoop.
* Cover the back (optional but nice): You can cover the gathered or glued fabric back with a circle of felt or cardstock.
* Cut a circle of felt or cardstock slightly smaller than the hoop.
* Glue this circle over the gathered or glued fabric on the back of the hoop.
* This gives a clean look and protects the stitches.
* Clean the front: Make sure the front of your embroidery is clean. You can gently dust it or use a lint roller. If you washed the fabric before putting it in the hoop, make sure it is dry.
Finishing the back makes your embroidery ready to be seen from all sides if it is not against a wall. It is a key step for displaying finished embroidery projects well.
Creative Ways To Display Embroidery
Think beyond the basic wall hangings or stands. There are many creative ways to display embroidery hoops.
Mixing Hoops with Other Art
Combine your hoop art with other pictures, prints, or objects on a wall or shelf.
* Gallery wall with variety: Add hoops to a gallery wall that already has framed pictures, mirrors, or wall sculptures. This makes the wall more interesting.
* On a shelf: Place hoops on a shelf next to books, plants, or small statues. Lean them or use stands.
* Creating layers: Hang a hoop in front of a larger framed picture. This adds depth to the display.
Using Hoops in Different Rooms
Don’t limit hoop art to just living rooms.
* Kitchen: Hang small hoops with food-related designs or simple patterns.
* Bedroom: Display relaxing or personal pieces near your bed or dresser.
* Kids’ Room: Show off fun, colorful hoops with animals or characters.
* Entryway: Greet guests with a welcoming piece near the front door.
* Bathroom: Use designs suitable for a humid environment (perhaps not delicate silk threads), or place away from direct steam.
Using Hoops in Unexpected Places
- Door knobs: Hang a small hoop with a ribbon from a door knob.
- Cabinet pulls: For very mini hoops, you can tie them onto cabinet pulls.
- On a Christmas tree: Turn small hoops into ornaments.
- As part of a wreath: Attach hoops to a fabric or greenery wreath base.
- From the ceiling: Hang multiple hoops at different heights using clear thread or string. This makes a modern, airy display.
These ideas show how versatile embroidery hoop decor can be. They let you add handmade touches all over your home.
Mini Embroidery Hoop Display Ideas
Mini hoops are tiny and adorable. They need special ways to display them.
* What are mini hoops? They are very small hoops, often only 1, 2, or 3 inches wide.
* Displaying mini hoops:
* Group them: Mini hoops look best when grouped together. A single mini hoop might get lost on a large wall.
* On a small stand: Use very tiny easel stands on a desk or shelf.
* Hung with string/ribbon: Use fine string or thin ribbon to hang them. They are very light.
* On a cork board: Pin them onto a cork board or inspiration board.
* As magnets: Glue a strong magnet to the back of a mini hoop. Put them on your fridge or a magnetic board.
* On a plant: Hang a mini hoop from a branch of a larger houseplant.
* As jewelry: Some mini hoops are made to be worn as pendants or brooches.
* In a shadow box: Place a collection of mini hoops inside a shadow box frame. This protects them and keeps them together.
* Mini hoop wall art ideas: Create a grid or a tight cluster of many mini hoops on a small wall space. Use a level to get them straight for a grid, or just eye it for a casual cluster.
Mini embroidery hoop display opens up even more creative options. They are perfect for small, detailed designs and can fit in tiny spaces.
Choosing The Right Spot For Your Hoop Art
Where you place your embroidery matters.
* Light: Keep embroidery out of direct sunlight. Sun can fade the thread colors over time. Find a spot that gets good light but not harsh sun all day.
* Humidity: Avoid very damp places like right next to a shower. High humidity can affect the fabric and thread.
* Traffic: Don’t put fragile pieces where they might get bumped often.
* Wall type: Consider if you can put nails in the wall or if you need sticky hooks.
* Background color: Think about the wall color behind your hoop. Will the colors of your embroidery stand out or blend in too much? A busy pattern on the wall might clash with a detailed embroidery piece. A plain wall often works best.
Choosing the right spot helps your embroidery look its best and last longer. It’s part of making good embroidery hoop decor.
Making Your Embroidery Hoops Match Your Decor
You can make your hoops fit the style of your room.
* Match colors: Use thread colors that are already in your room’s color scheme.
* Paint the hoop: The wood hoop can be painted. Paint it to match your wall, trim, or accent colors. Use chalk paint for a rustic look, or a glossy paint for modern style.
* Wrap the hoop: Wrap the hoop in fabric, ribbon, or yarn. This adds texture and color.
* Add extra bits: Glue small items onto the hoop, like beads, buttons, or faux flowers. Do this carefully so it doesn’t take away from the embroidery itself.
* Choose the right finish: A plain wood hoop fits many styles. A dark stained hoop looks more traditional. A painted or wrapped hoop can be modern, country, or fun, depending on the finish.
Making your embroidery hoop decor match your room helps everything look pulled together and stylish.
Materials for Hanging and Display
Here’s a quick look at things you might need:
| Item | Use | Best For | Notes |
|---|---|---|---|
| Nails | Hanging hoops directly or with ribbon | Walls where holes are okay | Simple, strong for most hoops |
| Picture Hooks | More secure hanging, holds more weight | Walls where holes are okay | Distribute weight better than a nail |
| Sticky Hooks | Hanging hoops without making holes | Smooth surfaces like paint | Good for rentals or temporary displays |
| Ribbon/String | Adding a decorative hanging loop | Any hanging method | Choose material that fits the hoop size |
| Embroidery Stand | Displaying on flat surfaces | Shelves, tables, desks | Different styles available |
| Command Strips | Hanging flat items or lightweight hoops | Walls where holes aren’t allowed | Follow package directions carefully |
| Small Screws | For heavier hoops or more secure hang | Walls where screws are okay | Requires a screwdriver or drill |
Using the right materials makes hanging embroidery hoops on wall or placing them on stands easier and safer.
Thinking About The Back of The Hoop
We talked about finishing the back. Here’s why it matters for display.
* If hanging on a wall: The back is mostly hidden, but a neat back still looks better if someone sees it up close.
* If using a stand or leaning: The back might be partly visible. A clean, finished back makes the piece look more complete and professional.
* If hanging from the ceiling: The back will be fully visible. Finishing the back neatly and covering it with felt or fabric is important here.
Taking time to finish the back properly is part of making your embroidery hoop decor look its best, no matter how you display it.
Creative Ways to Display Embroidery Examples
Let’s imagine some real-life examples of creative ways to display embroidery.
* A reading nook: A comfy chair with a small side table. On the wall above, a cluster of three hoops with designs of open books, teacups, and simple flowers. On the side table, a single hoop on a small easel stand leaning against a stack of books.
* A child’s room: A large wall space above a bed. A mix of different-sized hoops arranged like a playful cloud or constellation. Designs could be animals, stars, moons, and letters. Some hoops could have painted wood, others left natural.
* A kitchen wall: A narrow space next to a window. A vertical line of small hoops with simple fruit or herb designs. Hung with colorful twine loops for a rustic kitchen look.
* An office desk: A mini hoop used as a paperweight. A small hoop on an easel stand with an inspiring quote design. A few mini hoops with magnets on a metal filing cabinet.
* A long hallway: A series of hoops arranged along one side. They could tell a story, show different seasons, or just feature patterns in coordinating colors. Spaced evenly for a formal look, or unevenly for a more casual feel.
These examples show how embroidery hoop wall art ideas and other display methods can be used to add charm and personality to different spaces. Displaying finished embroidery projects is really about making your art part of your home’s story.
Displaying Hoops for Special Occasions
Embroidery hoops are not just for everyday decor. You can use them for parties or holidays.
* Seasonal decor: Make embroidery hoops with holiday themes (Christmas, Halloween, Easter) or seasonal designs (leaves for autumn, flowers for spring). Swap them out with the seasons.
* Party decorations: Hang hoops as part of the decorations for birthdays, baby showers, or other events. Designs can match the party theme.
* Wedding decor: Use hoops with wedding dates, initials, or designs as part of the decorations. They can later become keepsakes.
* Gift tags: Attach tiny embroidered hoops to gifts instead of plain tags. The hoop itself is a small extra gift.
Using embroidery hoops for special times adds a unique, handmade touch to your celebrations.
Caring for Your Displayed Embroidery
Once your embroidery is displayed, you want to keep it looking nice.
* Dusting: Gently dust the surface of the embroidery and the hoop with a soft brush or a clean, dry cloth. You can also use a lint roller very lightly.
* Avoiding moisture: As mentioned, keep away from high humidity. If displaying in a place that might get damp, make sure the fabric is very dry when you put it up and check on it sometimes.
* Checking the hoop: Make sure the hoop screw stays tight. If it loosens, the fabric might sag. Gently tighten the screw if needed.
* Keeping colors bright: Continue to keep the piece out of direct sunlight to prevent fading.
Simple care helps your beautiful embroidery hoop decor stay lovely for a long time.
Arranging Multiple Hoops: More Ideas
Going back to arranging multiple hoops, let’s think more about patterns and spacing.
* Symmetry: Arrange hoops in a balanced way. For example, a large hoop in the center with two smaller hoops on each side, like wings.
* Asymmetry: Arrange hoops in a way that is not perfectly balanced, but still feels right. This can be more dynamic and modern.
* Flow: Think about how your eye will move across the display. Arrange hoops to guide the eye in a line, curve, or circle.
* Density: Decide if you want hoops packed closely together or spaced far apart. Close packing creates a strong visual block. Spacing them out feels lighter and can make each piece stand out more.
* Using negative space: The wall space around and between the hoops is important. This empty space, called negative space, is part of the design. Don’t be afraid to leave empty areas.
* Adding other items: Mix in small mirrors, empty frames, or decorative letters among the hoops when you are arranging multiple hoops.
Planning the arrangement helps create impactful embroidery hoop wall art ideas. It turns a collection of hoops into a cohesive piece of decor.
Framing Embroidery Hoops: Step-by-Step (Simplified)
If you decide to frame your hoop art (without the hoop), here is a simple idea.
1. Finish your embroidery project.
2. Wash and iron the fabric if needed. This removes hoop marks and dirt.
3. Cut a piece of acid-free mat board or thick cardboard a bit larger than your embroidery design.
4. Center your embroidery on the board.
5. Use double-sided tape or fabric glue spray on the back of the embroidery to stick it to the board. Only put glue where it won’t show through the fabric.
6. Trim the excess fabric from the back.
7. Place the mounted embroidery into a picture frame. You might need a custom mat if your design is an unusual size.
8. Close the back of the frame.
This is one way of framing embroidery hoops to look like traditional framed art.
Getting Creative with Hanging
Let’s look at more creative ways to hang hoops.
* Using branches: Find a nice piece of driftwood or a sturdy branch. Attach hoops to hang from the branch using strings or ribbons. Hang the branch on the wall. This makes a rustic, natural display.
* On a grid panel: Use a metal grid panel often used for photos or notes. Attach hoops to the grid using clips, wire, or ties. This is a flexible wall display ideas for hoop art that lets you easily change pieces.
* From a curtain rod: Use rings with clips to hang hoops from a small curtain rod mounted on the wall.
* Using embroidery floss: Instead of ribbon, use thick embroidery floss or yarn in a matching color to hang the hoop. Braid the floss for extra strength and texture.
These methods for hanging embroidery hoops on wall add extra personality to the display itself.
Final Thoughts on Embroidery Hoop Decor
Displaying your finished embroidery projects is the exciting last step. It’s where your hours of work get to be seen and enjoyed. Whether you choose simple hanging, a stand, a creative grouping, or formal framing embroidery hoops, the goal is to show off your beautiful stitchery.
Think about the size of your space, the style of your room, and the look of your embroidery. Use these ideas to find the perfect simple and stylish ways how to display embroidery hoop creations and make your home more personal and inspiring. Embroidery hoop decor is a wonderful way to add handmade art to your life.
Frequently Asked Questions (FAQ)
Q: How do I get the fabric tight in the hoop for display?
A: When you put the fabric in the hoop, loosen the screw first. Place the inner hoop under the fabric, then press the outer hoop down over it. Make sure the fabric is flat and centered. Tighten the screw bit by bit, pulling the fabric gently from the edges as you tighten. Turn the hoop and pull the fabric all around until it is smooth and tight like a drum. Tighten the screw fully.
Q: Can I display embroidery outside?
A: It’s generally not recommended. Sun, rain, wind, and bugs can damage the fabric and threads quickly. If you want to display something outdoors, use materials meant for outside or place the embroidery in a very protected area like a covered porch, and bring it inside during bad weather.
Q: How do I clean embroidery displayed on the wall?
A: For light dust, use a soft brush (like a clean makeup brush) or a lint roller rolled lightly over the surface. If it needs more cleaning, you might have to take it out of the hoop and wash it very gently by hand. Make sure the threads are colorfast before washing.
Q: My hoop is old or looks bad. Can I still use it for display?
A: Yes! You can make old hoops look new. Sand down rough wood. Paint the hoop or wrap it in fabric or ribbon. This is a great way to use up old supplies and make the hoop itself part of the embroidery hoop decor.
Q: Should I iron my embroidery before displaying it?
A: Yes, ironing can help remove creases from the fabric and hoop marks. Place the embroidery face-down on a soft towel and iron the back. Use a pressing cloth if needed. Be careful not to flatten raised stitches too much.
Q: What’s the best way to hang many different sized hoops?
A: Lay them out on the floor first to plan. Mix sizes and shapes. Start with a central hoop or a line and add others around it. Use paper templates taped to the wall to mark nail spots before you start drilling or hammering. This is key for successful wall display ideas for hoop art with multiple pieces.