
Quilt tying is a simple way to hold your quilt layers together. Can you use embroidery floss for quilting? Yes, embroidery floss is a popular choice for tying quilts. It is strong and comes in many colors. Tying is an easy hand tying method for quilts. It makes little knots or ties all over the quilt top. This holds the quilt top, the batting (the warm middle layer), and the backing fabric as one piece. This tied quilt technique is quicker than machine or hand quilting stitches that cover the whole surface. It gives the quilt a bumpy, cozy feel. This article gives you a quilt tying tutorial. It shows you how to use embroidery floss to tie your quilt step by step.
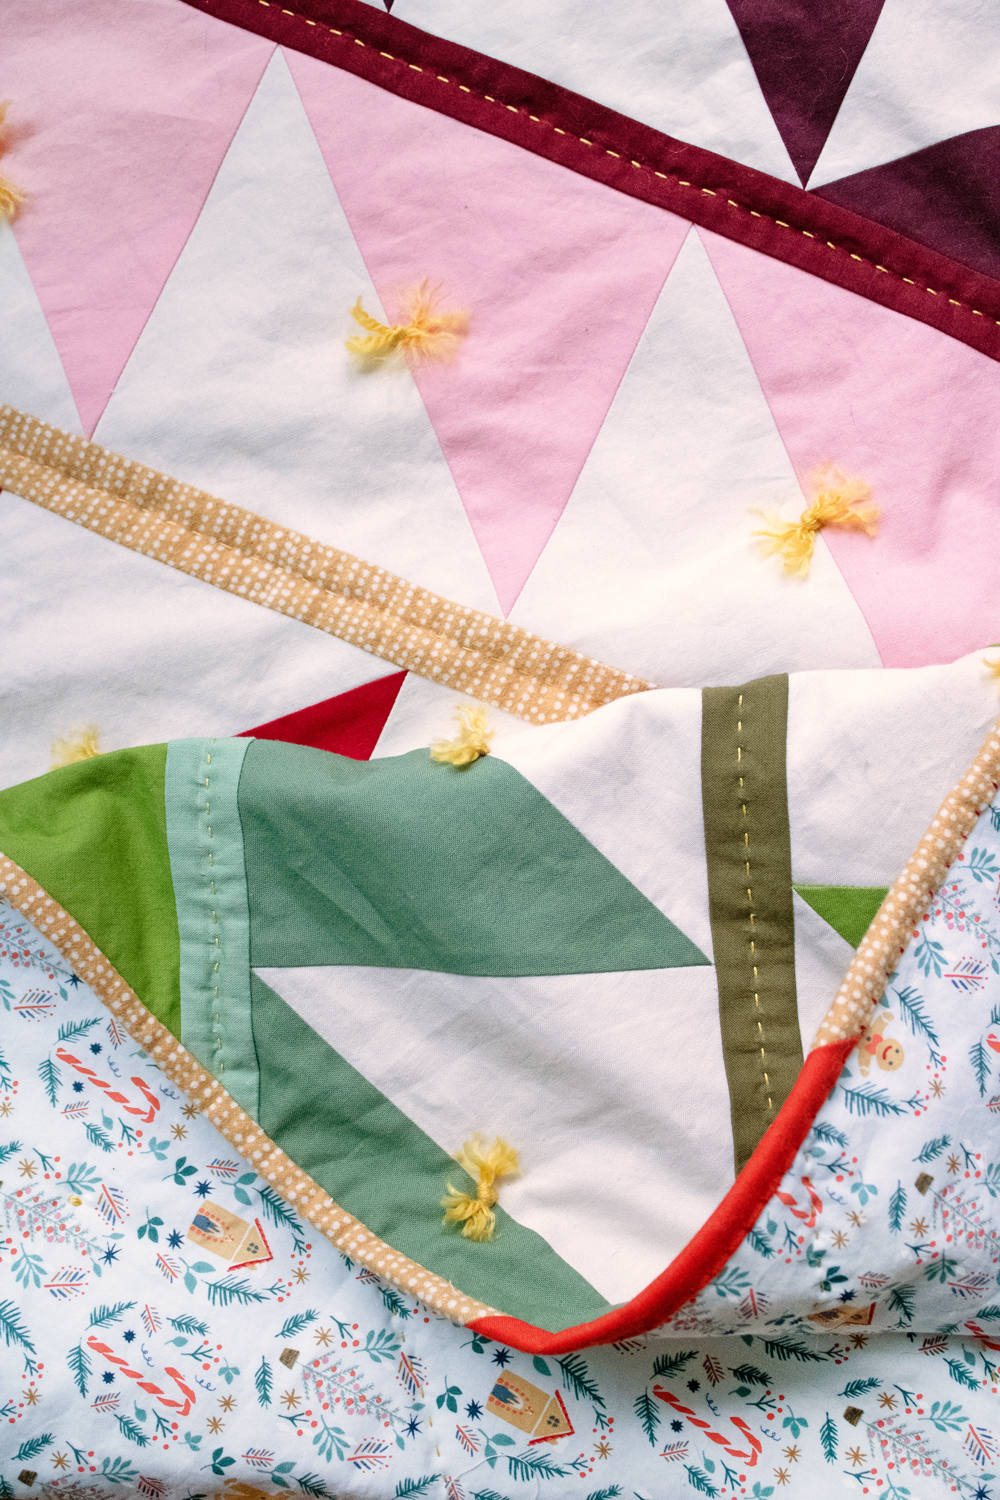
Image Source: suzyquilts.com
Why Tie a Quilt?
Making a quilt needs three layers. There is the pretty top, the batting in the middle, and the backing fabric. These layers must stay together. If they do not, the batting can get lumpy or move around when you wash the quilt. Securing quilt layers is very important.
Quilters use different ways to do this. One way is quilting. This is sewing lines of stitches all over the quilt. Another way is tying. Tying uses knots instead of long lines of stitches.
Tying is faster than quilting. It is a good choice for big quilts. It is also good for quilts with thick batting. Tying works well with thick batting because you do not need to sew through it all the time. Tying adds a different look and feel. It makes small tufts or bumps where each tie is.
Picking Your String: Embroidery Floss
You can use different things to tie a quilt. Thick thread, yarn, or embroidery floss work well. Embroidery floss is a great choice. Why?
- It is strong: Embroidery floss is made of many small threads twisted together. This makes it strong. It can hold the quilt layers tightly.
- It has colors: Embroidery floss comes in almost every color you can think of. You can pick a color that matches your quilt. You can pick a color that stands out.
- It is easy to use: It is easy to thread onto a needle. It knots well.
Using embroidery floss for quilting is a simple and good way to tie your quilt.
Getting Your Tools Ready
Before you start tying, get everything you need. Having your tools ready makes the job easier. You will need:
- Your quilt sandwich (the top, batting, and backing basted together).
- Embroidery floss (pick your color!).
- Sharp scissors.
- A special needle for tying quilts. These needles are long and strong. They have a big eye to hold the floss. A curved needle can also be helpful sometimes.
- Safety pins or basting spray (you should have used these already to hold layers).
- A ruler or a marker that you can wash off (for spacing quilt ties).
Make sure you have enough floss. It is better to have too much than not enough. One skein of floss goes a long way, but for a large quilt, you might need several.
Readying the Quilt Layers
Your quilt must be ready before you tie it. This means the three layers are smooth and held together. This is called a quilt sandwich.
- Lay out the backing: Put the backing fabric on a big, flat surface. Make sure it is smooth. No wrinkles. You might tape the edges down.
- Add the batting: Put the batting on top of the backing. Make it smooth. The batting should be a little bigger than the quilt top.
- Add the top: Put the quilt top on top of the batting. Center it. Smooth out any wrinkles.
Now, you must hold these layers together. This is called basting. Basting stops the layers from moving while you tie. You can baste with safety pins. Put pins all over the quilt. Put a pin about every 4 to 6 inches. Or you can use basting spray. This is a sticky spray that holds the layers lightly. Follow the spray can’s directions. Make sure the layers are smooth before you baste. Securing quilt layers well now makes tying easier.
Knowing Where to Tie: Tie Spacing
You need to decide where to put your ties. This is called spacing quilt ties. Where you place ties is up to you. It depends on how your quilt looks and the kind of batting you used.
- Batting instructions: Look at the package your batting came in. It will tell you how far apart the stitches or ties can be. This is important. If ties are too far apart, the batting can shift. Common distances for ties are 4 to 6 inches apart. Some battings need ties every 2 inches. Always check your batting.
- Quilt design: You can place ties in a pattern. You can put one tie in the middle of each block. Or put ties where seams meet. You can make a grid pattern. Measure and mark your spots.
- Marking spots: You can use a ruler and a fabric marker to put small dots where each tie will go. Make sure the marker washes out. You can also use masking tape to make a grid. Or just eye it, but measuring helps make it look even.
Deciding on spacing quilt ties and marking them helps make your tied quilt look nice and even.
Let’s Tie! The Knotting Steps
Now you are ready for the quilt tying tutorial. This is the fun part!
Cutting and Prepping Your Floss
Embroidery floss comes in six strands twisted together. For tying a quilt, you usually do not need all six strands. Using fewer strands makes smaller, neater knots. Using more strands makes bigger, bumpier knots. You can use 2, 3, or 4 strands. Let’s say you choose 3 strands.
- Pull a length of floss from the skein. About 18 to 24 inches is a good length to work with. Too long gets tangled.
- Cut the length.
- Gently pull the desired number of strands away from the rest. They separate easily if you go slow.
- Keep the other strands for later.
- Thread the 3 strands through the eye of your needle. You do not need to knot the end of the floss yet.
Getting the Needle Through
This step is about getting the floss through all three layers of your quilt.
- Find a spot where you want to place a tie. You might have a mark there.
- Push the needle for tying quilts straight down through all the layers. Go through the top, the batting, and the backing.
- Push the needle back up through the layers. Bring it up very close to where you went down. Try to make the distance between where you went down and where you came up very small, like 1/8 inch or less. This tiny stitch on the back will be hidden by the knot.
- Pull the needle and floss through until you have a tail of floss on the front of the quilt. Leave a tail about 3 to 4 inches long. Do not pull the floss all the way through!
Quilt Knotting Instructions: Making the Knot
This is the key part of the hand tying method for quilts. You will make a simple, strong knot. The goal is making secure knots on a quilt that will not come undone.
- You have the floss pulled through with a tail on the front and the rest of the floss connected to your needle.
- Take the long part of the floss (still on the needle) and the tail part. Hold them both up.
- Tie a simple knot. Like tying the first step of your shoelaces. Cross one piece over the other and loop it through. Pull it snug, but not too tight. You do not want to pull the fabric and make it pucker. Just snug enough to bring the layers together.
- Now, tie a second knot right on top of the first one. This makes a square knot or a double knot. Cross the pieces the other way this time for a true square knot, or just tie it the same way again for a double knot. Both are secure.
- Pull the second knot snug. Make sure the knot sits right on the surface of the quilt, close to where the floss came out of the fabric.
This completes one tie. You have a small stitch going down and up through the quilt layers and a knot on the front.
Repeating the Process
You need to do this for every marked spot on your quilt.
- Move to the next marked spot.
- Thread the needle down and up through the layers, very close together.
- Pull the floss through, leaving a tail on the front.
- Tie the double knot on the front, close to the fabric.
- Repeat, repeat, repeat.
Keep working across the quilt. Some people work in rows. Some people start in the middle and work outwards. Find a system that works for you. Using a needle for tying quilts makes it easier to push through all the layers.
Tips for a Nice Tied Quilt
Here are some ideas to help you tie your quilt well:
- Watch the tension: Do not pull your knots too tight. This can make the fabric pucker. The quilt top will look bumpy in a bad way, not a cozy way. Pull just enough to make the knot snug against the fabric.
- Keep spacing even: Try to keep the distance between your ties the same. This makes the finished quilt look neat. Use your ruler or marks. Consistent spacing quilt ties is key for a good look.
- Check your knots: As you go, give each knot a gentle tug. Make sure it feels secure. Making secure knots on a quilt means they will last through washing and use.
- Color choice matters: Think about your floss color. Do you want it to blend in? Choose a color close to the fabric color. Do you want it to stand out? Use a bright or dark color that pops. You can even use different colors in different areas of the quilt.
- Work Smart: Some people like to thread the needle through several tie spots before cutting the floss or tying knots. For example, go down and up at spot A, then carry the floss under the quilt top (but on top of the batting) to spot B, go down and up, carry to spot C, etc. Then go back and tie all the knots and cut the tails. This can be faster. Just make sure the floss carried under the top doesn’t show through light fabrics.
Following these tips helps with the hand tying method for quilts and makes your project look better.
Finishing the Tied Quilt
Once all your ties are made, your quilt is almost done! The main part of securing quilt layers with ties is finished.
Trimming the Tails
You will have a bunch of little floss tails sticking up all over the quilt. You need to trim these.
- Use sharp scissors.
- Carefully cut the two tails of floss close to the knot. Leave about 1/2 inch or 1/4 inch of tail.
- Do not cut too close! You do not want to cut the knot itself or the fabric.
- Trim all the tails on the quilt.
Leaving a little bit of tail makes a soft tuft. If you want the ties to be less visible, you can cut the tails shorter, even right against the knot. But leaving a little bit is part of the look of a tied quilt technique.
Add the Binding
After trimming tails, the next step is usually adding the binding. The binding is the fabric strip sewn around the edge of the quilt. It covers the raw edges of the quilt layers. Tying does not change how you add binding. Add your binding the way you normally would. This completes the finishing a tied quilt process.
What’s Good About Tying?
The tied quilt technique is simple and useful.
- It is quick: Tying is much faster than quilting a whole quilt by hand or machine. You can finish a quilt in a weekend instead of weeks or months.
- It is simple: The steps are easy to learn. It does not need special skills like free-motion quilting. It is a great way for beginners to finish a quilt.
- It works for thick batting: If you use fluffy batting, tying is perfect. It is hard to sew through very thick batting. Tying is easy.
- It adds texture: The little knots add a nice bumpy texture to the quilt. It feels cozy.
Using embroidery floss for quilting ties gives you these benefits with the added bonus of color choices. This quilt tying tutorial shows just how simple it is.
Caring for Your Tied Quilt
A tied quilt can be washed just like other quilts. The knots made using the quilt knotting instructions should be secure.
- Wash on a gentle cycle.
- Use cool or warm water.
- You can dry it in a dryer on a low heat setting. Check it often. Or lay it flat to dry.
- The knots might puff up a little after washing. This is normal and adds to the look.
- Over time, a knot might come loose. This does not hurt the quilt. You can just re-tie it.
The knots you made using the hand tying method for quilts are quite strong for normal use and washing.
More Details on Tying
Let’s look at some things a bit closer to make sure you are making secure knots on a quilt and doing it well.
Choosing Your Needle
The best needle for tying quilts is usually called a “quilting needle” or “quilting bee needle.” They are long, maybe 3 to 4 inches. They are strong so they don’t bend easily when pushing through layers. They have a large eye because embroidery floss is thicker than sewing thread. A curved needle (like a doll-making needle) can also be useful. You can use it to go down and come right back up in one smooth motion without needing to push the needle all the way through to the back. Try different needles to see what feels best for you.
Threading the Needle Simply
Sometimes threading embroidery floss can be tricky because it frays.
1. Cut the end of the floss clean with sharp scissors.
2. Wet the very tip of the floss slightly. This helps it stay together.
3. Pinch the end flat between your fingers.
4. Push the pinched end through the needle eye. A needle threader tool can also help a lot, especially with a large eye needle.
Quilt Knotting Instructions: A Secure Knot
The double knot is usually enough for making secure knots on a quilt. You tied the first knot. Then you tied a second knot right on top.
- Make sure the first knot is pulled snug, but not tight.
- Make sure the second knot is right on top of the first.
- Pull the second knot snug too.
- Give a final gentle pull on both tails at once to seat the knot well.
- Practice tying a few knots on some scrap fabric layers first. This helps you get the feel for the right tension.
Checking Your Work
After you finish a section or the whole quilt, look closely at your knots.
* Are they all tied? Did you miss any spots?
* Are the knots sitting nicely on the surface?
* Are they all about the same size (depending on how many strands you used)?
* Are the tails trimmed evenly?
This check is part of finishing a tied quilt well.
Thinking About Density
How many ties should you put? The batting package gives the minimum. But you can add more ties if you want. More ties make the quilt feel denser and hold the batting even tighter. They also add more texture. Putting ties closer together might be needed if you use a very airy batting or plan to wash the quilt very often. The look of the tied quilt technique changes with the density of the ties. Closer ties give a more overall bumpy feel. Wider spacing quilt ties makes the individual tufts stand out more.
Tying vs. Quilting Stitches
It is helpful to know how tying is different from traditional quilting stitches.
| Feature | Tied Quilt Technique | Quilting Stitches (Hand or Machine) |
|---|---|---|
| Method | Knots tied on the surface | Lines of stitches sewn through layers |
| Speed | Faster | Slower (especially by hand) |
| Look/Feel | Bumpy, tufted texture | Flatter, defined stitch patterns |
| Batting | Good for thick batting | Can be harder with very thick batting |
| Skill Needed | Simple knot tying | Requires learning stitching skills |
| Layer Security | Holds layers at points where knots are | Holds layers along continuous lines |
| Materials | Embroidery floss, yarn, thick thread | Sewing thread, quilting thread |
Both methods are good ways of securing quilt layers. Tying is just a different path to a finished quilt. It is a great option for many projects. This quilt tying tutorial focuses on tying with embroidery floss because it’s easy and effective.
Why This Simple Method Works
The beauty of the hand tying method for quilts is its simplicity and effectiveness. By just making little knots, you create points of connection all over the quilt. These points stop the batting from shifting. They distribute the stress on the fabric when the quilt is used or washed. Using strong embroidery floss for quilting ensures these connection points are durable. The steps for making secure knots on a quilt are not hard. Anyone can learn them. And the look of the tied quilt technique is charming and timeless.
This whole process, from preparing the quilt layers (securing quilt layers) to marking, tying (quilt knotting instructions, hand tying method for quilts), and finishing a tied quilt, is straightforward. It makes finishing a quilt less daunting, especially for new quilters. Getting the right needle for tying quilts and paying attention to spacing quilt ties helps make the project look professional. This quilt tying tutorial aims to make these simple steps clear for everyone.
Frequently Asked Questions (FAQ)
-
Can I use regular sewing thread to tie a quilt?
Regular sewing thread is usually too thin. It can break easily. It might also cut through the fabric over time. Embroidery floss or thicker thread is better for making secure knots on a quilt. -
How long should the floss tails be?
Most people leave tails between 1/4 inch and 1/2 inch long. This makes a nice puff. You can leave them longer or cut them shorter, but avoid cutting right against the knot at first until you are comfortable. -
Do I need to bury the thread ends?
No, with tying, the knots are on the surface. The ends become the visible tufts. You do not need to pull the floss ends into the batting like you might with hand quilting stitches. -
How many strands of embroidery floss should I use?
This is up to you. 3 or 4 strands are common. Fewer strands make smaller, neater knots. More strands make bigger, puffier knots. Try a few on a scrap piece to see what you like. -
What if a knot comes out after washing?
This happens sometimes. It is easy to fix. Just put the needle through the same spot, bring the floss up, and tie a new double knot. -
Can I tie a quilt with a sewing machine?
No, tying is a hand tying method for quilts. Sewing machines do quilting stitches (lines) or sometimes make little tacking stitches, but not the kind of knots used in hand tying. -
Does tying work for all types of batting?
Tying works well for most battings, especially thicker ones. Check the batting package for its recommended maximum spacing for stitches or ties. Make sure your spacing quilt ties is equal to or less than that distance. -
Is the back of a tied quilt different?
Yes, on the back of the quilt, you will see tiny stitches at each tie point. They will be very small because you brought the needle down and up very close together.
Tying a quilt is a simple skill to learn. It is a fast and fun way to finish your quilt projects. Using embroidery floss for quilting gives you lots of color choices. Just follow these simple steps, and you will have your quilt tied in no time!
Putting It All Together
You have learned about why tying is useful for securing quilt layers. You saw that embroidery floss for quilting is a great choice. We went through the supplies you need, including the right needle for tying quilts. We talked about prepping your quilt and deciding on spacing quilt ties.
The main part was the quilt tying tutorial. We covered cutting floss, threading the needle, pushing through the layers, and the important quilt knotting instructions for making secure knots on a quilt. You learned how to repeat the process for the whole quilt.
Finally, we looked at finishing a tied quilt by trimming the tails. We also touched on caring for your new tied quilt.
The hand tying method for quilts is a simple, effective tied quilt technique. It’s perfect for adding a handmade touch and cozy texture. Now you have the simple steps to tie your quilt with embroidery floss today!