
Ever dreamed of putting your own designs on t-shirts, tote bags, or even pillowcases? Imagine wearing a shirt with your unique artwork or gifting a custom-made item that truly shows you care. Iron-on transfer paper makes this dream a reality, turning your digital creations into wearable art!
But let’s be honest, staring at the shelves or scrolling online, the sheer number of iron-on transfer papers can be overwhelming. Which one is best for light fabrics? What about dark ones? Do you need a special printer? It’s easy to feel lost and worried about wasting money on the wrong product. We get it, and that’s why we’re here to help.
In this post, we’ll break down the confusing world of iron-on transfer paper. We’ll explore the different types available, explain what makes them work, and share tips for getting perfect results every time. By the end, you’ll feel confident picking the right paper for your next project and ready to start creating amazing custom items!
Our Top 5 Iron On Transfer Paper Recommendations at a Glance
Top 5 Iron On Transfer Paper Detailed Reviews
1. TransOurDream Tru-Heat Transfer Paper for Inkjet Printer (10 Sheets

Rating: 8.7/10
Unleash your creativity on dark fabrics with the TransOurDream Tru-Heat Transfer Paper! This pack of 10 sheets, along with a reusable A3 Teflon sheet, lets you bring your designs to life on t-shirts and other dark garments. It’s perfect for making personalized gifts and unique DIY projects.
What We Like:
- Stretchable and Durable Designs: The advanced AI edge technology makes your transfers super stretchy, so they won’t crack or break even when stretched up to twice their size.
- Vibrant and Soft Transfers: Your printed images will look bright and feel soft on the fabric. Plus, they are machine washable, meaning your creations will last.
- Easy to Cut: Whether you use scissors or a cutting machine, this paper is simple to trim to your desired shape.
- Simple Transfer Process: The instructions are clear and easy to follow, with a helpful video tutorial available if you need extra guidance.
- Versatile Applications: Great for printing photos, images, and text onto 100% cotton dark fabrics for any occasion, from birthdays to holidays.
- Includes Teflon Sheet: You get a reusable Teflon sheet in the pack, which is essential for a smooth and successful transfer.
What Could Be Improved:
- Ink Compatibility: Make sure you use pigment or dye ink; sublimation ink will not work with this transfer paper.
- Printer and Machine Requirements: You need an inkjet printer, scissors or a cutting machine, and an iron or heat press machine to use this product.
This TransOurDream transfer paper offers a fantastic way to personalize dark fabrics with your own designs. It’s user-friendly and produces impressive results for all your DIY needs.
2. TransOurDream Upgraded Iron on Heat Transfer Paper for T Shirts (8.5×11”
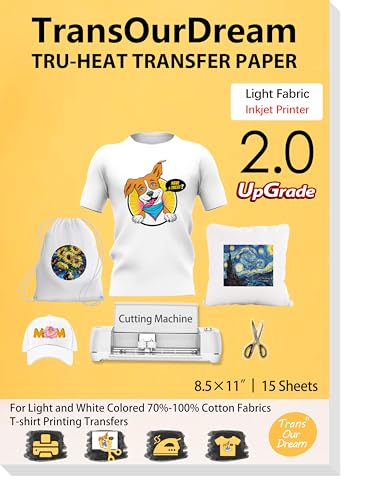
Rating: 9.2/10
Unleash your creativity with the TransOurDream Upgraded Iron on Heat Transfer Paper! This pack comes with 15 sheets of light transfer paper and 3 sheets of reusable Teflon paper. It’s designed for inkjet printers and makes it super easy to put your own designs onto T-shirts and other light-colored fabrics. Whether you’re making a gift or a custom shirt, this paper is a fun way to get started.
What We Like:
- It’s the 2nd generation of light transfer paper, making it even better.
- You can use it easily with Cricut machines.
- It has a lower melting point, so it’s simple to iron on.
- You don’t need to mirror your print, which saves time.
- The transfers come out super bright, can stretch without cracking, and last a long time.
- It works on light or white cotton fabrics (70%-100% cotton).
- You can transfer text, pictures, and photos.
- It’s perfect for making personalized gifts for holidays and birthdays.
- The instructions are easy to follow, and there’s a video tutorial available.
- TransOurDream is a company with 20 years of experience in making transfer paper.
What Could Be Improved:
- It only works with Inkjet printers, and you need to use either Pigment Ink or Dye Ink. Sublimation ink won’t work.
- It’s specifically for light or white fabrics, so it won’t show up well on dark colors.
This transfer paper offers a fantastic way to personalize your clothing and accessories. Get ready to create unique items with ease!
3. TransOurDream Heat Transfer Paper for Dark and Light T Shirts (5+5 Sheets

Rating: 9.1/10
Unleash your creativity with the TransOurDream Heat Transfer Paper Mix Pack! This pack offers everything you need to bring your custom designs to life on both dark and light fabrics. You get 5 sheets of Dark 1.0 paper and 5 sheets of Light 2.0 paper, plus a reusable Teflon sheet. These papers produce bright, vibrant colors. Your transferred designs will feel soft and breathable on your shirts.
What We Like:
- Versatile mix pack for both dark and light fabrics.
- Prints in vivid and vibrant colors.
- Transferred images are soft and breathable.
- Easy to use with common inkjet printers and household irons.
- Great for creating personalized DIY gifts for any occasion.
- Includes a reusable Teflon sheet for protection.
- Backed by a manufacturer with 20 years of experience.
What Could Be Improved:
- Requires specific ink types (pigment or dye, not sublimation).
- Needs a cutting machine or scissors for precise cutting.
This TransOurDream Heat Transfer Paper is a fantastic choice for crafters and DIY enthusiasts. It makes personalizing clothing and fabric items simple and fun.
4. TransOurDream Upgraded Iron on Heat Transfer Paper for T Shirts (20 Sheets

Rating: 8.7/10
Unleash your creativity with the TransOurDream Upgraded Iron on Heat Transfer Paper! This pack of 20 sheets, sized 8.5×11 inches, is designed for light-colored fabrics and works with your inkjet printer. It’s perfect for adding custom designs to t-shirts, hoodies, tote bags, and so much more. Whether you’re making a special gift or starting a small business, this transfer paper makes it easy to bring your ideas to life.
What We Like:
- The upgraded formula makes it easy to cut with scissors or a cutting machine like Cricut.
- Colors transfer vibrantly, making your designs pop.
- It’s compatible with most inkjet printers and works with both dye and pigment inks.
- The pack includes 4 reusable teflon sheets, which is a great bonus.
- The step-by-step instructions and video tutorials make the process simple for beginners.
- You can transfer photos, text, and images onto various light fabrics like cotton.
- It’s perfect for creating personalized gifts for holidays and special occasions.
What Could Be Improved:
- The transfer paper is specifically for light-colored fabrics, so it won’t work on dark materials.
- You need specific supplies like an inkjet printer and teflon paper (though it is included).
This transfer paper offers a fantastic way to create custom apparel and gifts. With its user-friendly design and vibrant results, it’s a top pick for DIY projects.
5. Avery Printable Heat Transfer Paper for Dark Fabrics

Rating: 9.1/10
Unleash your creativity with Avery Printable Heat Transfer Paper for Dark Fabrics! This pack of five 8.5″ x 11″ sheets lets you print your own designs onto dark cotton and cotton/poly blend fabrics. It’s perfect for making custom t-shirts, unique gifts, or even sprucing up your home décor. Your creations will look amazing and last a long time!
What We Like:
- You can print your own awesome designs easily.
- The Color Shield formula makes colors super bright and fade-resistant.
- Your designs can last through up to 20 washes.
- It works with regular irons and heat presses.
- Step-by-step instructions make the process simple.
- You can use scissors or a cutting machine to get neat edges.
- Avery Design & Print Online tool helps you create designs with your own pictures, logos, and words.
What Could Be Improved:
- The pack only comes with 5 sheets, so you might need more for big projects.
- It’s designed for dark fabrics only, so you can’t use it on light colors.
This Avery heat transfer paper makes custom projects a breeze for everyone. Get ready to make some seriously cool, personalized items!
Your Go-To Guide for Iron-On Transfer Paper
Want to add your own cool designs to t-shirts, tote bags, or even pillowcases? Iron-on transfer paper is your secret weapon! It’s a super easy way to customize fabric items at home. This guide will help you pick the best paper for your projects.
What to Look For: Key Features
- Type of Fabric: Some papers work best on light fabrics, while others are made for dark ones. Always check the packaging!
- Printer Compatibility: Make sure the paper works with your printer. Most papers are for inkjet printers.
- Ease of Use: Look for papers with clear instructions. Some are peel-and-stick, others require a bit more care.
- Durability: You want your designs to last! Check reviews for how well the transfers hold up after washing.
- Finish: Do you want a glossy look or a matte finish? Some papers offer different textures.
Important Materials You’ll Need
- Iron-On Transfer Paper: This is your main tool!
- Your Design: You can draw, print, or find designs online.
- Fabric Item: T-shirts, bags, hats – anything made of fabric!
- Iron: A regular household iron works great.
- Scissors or Craft Knife: To cut out your design.
- Hard, Flat Surface: An ironing board or a sturdy table.
- Parchment Paper or Thin Cloth: This protects your iron and the design.
What Makes a Transfer Great (or Not So Great)
Factors That Improve Quality:
- High-Quality Printer Ink: Bright, true colors make your design pop.
- Using the Right Fabric: Cotton and cotton blends usually give the best results.
- Following Instructions Exactly: Temperature, time, and pressure are important.
- Cooling Properly: Letting the transfer cool down before peeling helps it stick.
Factors That Reduce Quality:
- Using the Wrong Paper for Fabric Color: Light paper on dark fabric won’t show up well.
- Not Enough Heat or Pressure: The design might peel or fade.
- Ironing on a Flexible Surface: This can cause uneven transfer.
- Washing Too Soon: Wait at least 24 hours after ironing.
User Experience and Fun Use Cases
Using iron-on transfer paper is a blast! It’s perfect for birthday shirts, team uniforms for kids’ sports, or making personalized gifts. You can create unique holiday decorations, custom tote bags for shopping, or even iron-on patches for backpacks.
Kids love it because they can put their own drawings on shirts. Adults enjoy it for creating matching family outfits or making custom merchandise for small businesses. The process is usually straightforward. You print your design, trim it, place it on your fabric, and iron. Then, you peel off the backing, and voilà – your design is on your item!
Some papers are “peel hot,” meaning you peel the backing right after ironing. Others are “peel cool,” where you wait for it to cool down. Always read the instructions for your specific paper.
Remember to iron on a flat, hard surface. A wobbly ironing board can make the transfer uneven. Also, use parchment paper or a thin cotton cloth between your iron and the transfer paper. This protects your iron and prevents the design from sticking to it.
With a little practice, you’ll be an iron-on pro in no time, turning plain fabric into awesome, personalized creations!
Frequently Asked Questions (FAQ) about Iron-On Transfer Paper
Q: What is iron-on transfer paper?
A: It’s special paper that lets you print a design on it, then iron that design onto fabric items like t-shirts.
Q: What kind of printer do I need?
A: Most iron-on transfer paper works with standard inkjet printers.
Q: Can I use iron-on transfer paper on dark fabrics?
A: Yes, but you need to buy transfer paper specifically made for dark fabrics. It has a white background to make your design show up.
Q: How long will my iron-on design last?
A: If you follow the instructions and care for it properly, your design can last for many washes.
Q: What is the difference between “peel hot” and “peel cool” paper?
A: “Peel hot” means you remove the backing paper right after ironing. “Peel cool” means you wait for the paper to cool down before removing the backing.
Q: Can I wash my fabric item right after ironing?
A: No, it’s best to wait at least 24 hours before washing your item to make sure the design sticks well.
Q: What temperature should my iron be?
A: The temperature varies depending on the paper. Always check the package for the correct heat setting.
Q: What if my design looks faded after ironing?
A: This can happen if the iron wasn’t hot enough, or you didn’t press hard enough for long enough. Make sure to follow the instructions precisely.
Q: Can I use a heat press instead of an iron?
A: Yes, a heat press often gives more consistent results and is great for larger projects or making many items.
Q: Where can I buy iron-on transfer paper?
A: You can find it at most craft stores, office supply stores, and online retailers.
In conclusion, every product has unique features and benefits. We hope this review helps you decide if it meets your needs. An informed choice ensures the best experience.
If you have any questions or feedback, please share them in the comments. Your input helps everyone. Thank you for reading.