
Can you hem a dress with a sewing machine? Yes, absolutely! Sewing machine hemming is a fundamental skill for anyone looking to tailor their clothing, and it’s surprisingly accessible. Whether you’re aiming for a professional finish or a quick fix, mastering how to hem a dress with a sewing machine will open up a world of possibilities for your wardrobe. This guide will walk you through the essential steps, from choosing the right stitch to achieving that perfect fold, ensuring your dress hemming techniques are spot on.
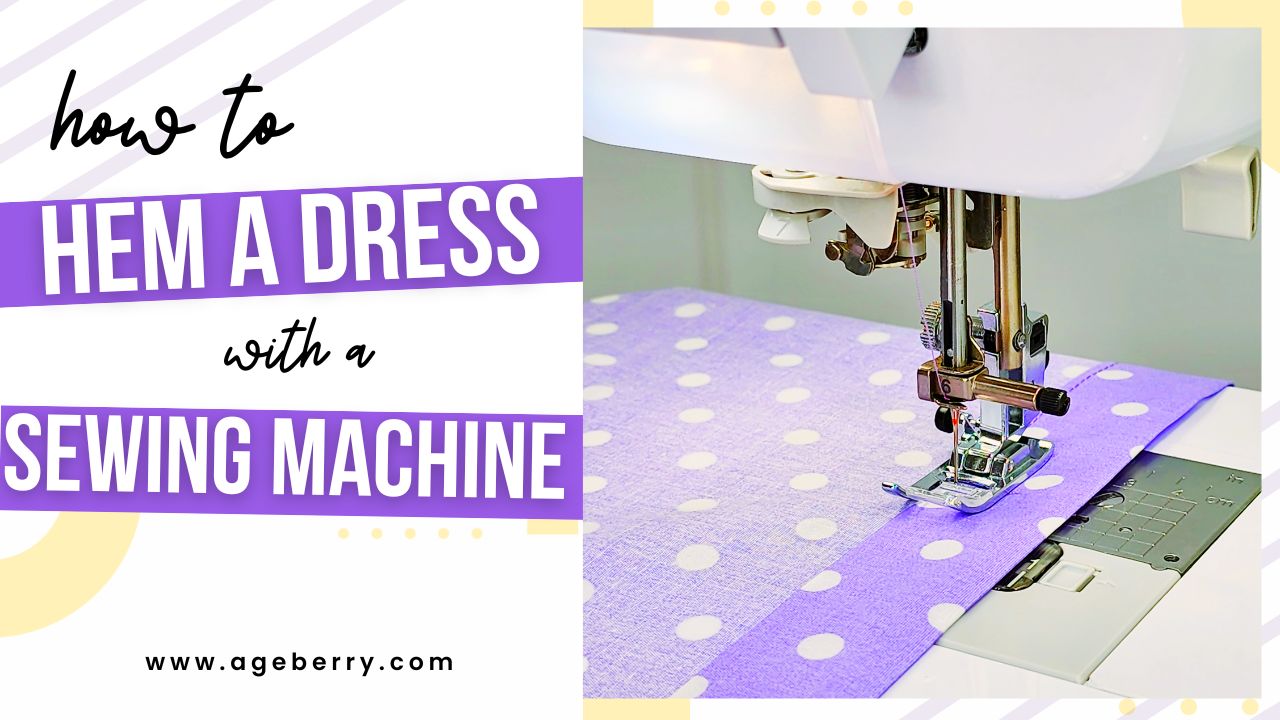
Image Source: www.ageberry.com
Getting Started: What You’ll Need
Before you dive into sewing a hem, gather your supplies. Having the right tools makes the process smoother and the results better.
Essential Tools for Sewing Machine Hemming
- Sewing Machine: Your trusty companion for this task. Ensure it’s in good working order.
- Sewing Machine Needle: The correct sewing machine needle for hemming is crucial. A universal needle (size 80/12 or 90/14) is often suitable for most dress fabrics. For delicate fabrics like silk or chiffon, a finer needle (size 60/8 or 70/10) is recommended. For heavier fabrics like denim, a heavier duty needle is better.
- Thread: Choose a good quality polyester thread that matches your dress.
- Fabric Scissors: Sharp scissors are essential for clean cuts.
- Measuring Tape or Ruler: For accurate measurements.
- Fabric Marker or Chalk: To mark your hemline.
- Straight Pins: To hold the hem in place while you sew.
- Iron and Ironing Board: Crucial for pressing seams and hems.
- Seam Ripper: For any inevitable mistakes.
- Sewing Machine Manual: Always a good reference if you’re unsure about specific machine functions.
Preparing Your Dress for Hemming
Proper preparation is key to a successful hem. This stage ensures your final stitch is neat and even.
Measuring and Marking the Hemline
- Wear Your Dress: Put on the dress and the shoes you plan to wear with it. This helps determine the correct length and ensures the hem falls as intended.
- Pin the Hem: With someone’s help, or by carefully using a mirror, fold up the excess fabric to the desired length. Pin it securely in place all around the dress.
- Mark the Hemline: Take off the dress. Using your fabric marker or chalk, mark a clear line along the folded edge where you pinned. For extra accuracy, measure from the marked line down to the original raw edge of the fabric. This is your cutting line.
- Remove Pins and Cut (Optional): You can either press the hem first and then cut, or cut the excess fabric now. If you cut, remember to leave an allowance for your hem fold. A common allowance is 1 inch to 2 inches, depending on the type of hem you plan to create.
Pressing the Hem Allowance
Pressing is a vital step in hemming a garment. It creates a crisp fold and makes sewing much easier.
- First Fold: Fold the fabric along your marked hemline, wrong sides together. Press with your iron.
- Second Fold (if applicable): For a double-fold hem, fold the fabric up again by the desired amount (usually 1/2 inch to 1 inch). Press this second fold firmly. This creates a neat, enclosed edge that won’t fray.
Choosing the Right Sewing Machine Stitch for Hems
The type of stitch you use significantly impacts the look and durability of your hem.
Common Sewing Machine Stitches for Hems
- Straight Stitch: The most basic and common stitch. It’s perfect for most hems, especially on sturdy fabrics. Ensure your stitch length is set appropriately – not too long, not too short (usually 2.0-2.5mm).
- Zigzag Stitch: A versatile stitch that can be used to finish raw edges before folding or as the visible stitch on certain hem styles. It provides stretch and prevents fraying.
- Blind Hem Stitch: This specialized stitch is designed to be nearly invisible from the right side of the fabric. It’s ideal for creating a clean, professional finish on skirts, trousers, and dresses. You’ll often need a special blind hem foot for your sewing machine to achieve the best results.
- Rolled Hem Sewing Machine Stitch: This creates a very narrow, neat hem, often used for lightweight and sheer fabrics like chiffon, silk, or organza. Some sewing machines have a dedicated rolled hem foot that guides the fabric into a tiny fold as you sew.
Sewing a Hem: Step-by-Step
Now that your dress is prepped and you’ve chosen your stitch, it’s time for the actual sewing.
Sewing a Straight Hem
This is a straightforward method, great for beginners.
- Set Up Your Machine: Thread your sewing machine with matching thread and insert the correct sewing machine needle for your fabric. Select the straight stitch.
- Position the Fabric: Place the folded hem under the presser foot, aligning the edge of the fold with your desired seam allowance (e.g., 1/2 inch from the folded edge).
- Start Sewing: Lower the presser foot and the needle. Backstitch a couple of stitches to secure the beginning of the seam.
- Sew Along the Hem: Sew slowly and steadily along the folded edge, keeping the fabric straight. Try to maintain an even distance from the folded edge. If you’re sewing a double-fold hem, you’ll be sewing along the top folded edge.
- Finish Sewing: When you reach the end, backstitch again to secure the seam.
- Trim Threads: Trim any excess threads.
- Press Again: Give the hem a final press from the right side of the fabric to set the stitch and ensure a crisp finish.
Creating an Invisible Hem Sewing
For that “professional” look, the invisible hem is your best friend.
- Prepare the Hem: Press up your hem allowance twice, as described in the preparation section.
- Secure the Hem: Use a blind hem foot if you have one. If not, you can still achieve a good result by carefully guiding the fabric. Pin the hem securely in place.
- Set Up Your Machine for Blind Hem:
- Thread your machine with matching thread.
- Select the blind hem stitch. Your machine manual will guide you on which stitch to use and how to set the stitch width and length.
- Position the fabric so that the needle swings over the folded edge of the hem and catches only a few threads of the main garment fabric on the left side. The wider swing of the needle should go into the hem fold itself.
- Sew the Invisible Hem:
- Place the fabric under the presser foot with the folded hem edge towards the left.
- Align the fabric so the needle swings to catch a few threads of the garment.
- Begin sewing, guiding the fabric carefully. The needle should catch a few threads of the main fabric, then swing into the hem fold.
- Continue sewing around the entire hem.
- Finish and Press: Once you’ve completed the hem, backstitch to secure. Trim threads. Turn the dress right side out. You should see very few, if any, visible stitches on the outside. Press the hem gently.
Mastering the Rolled Hem Sewing Machine Technique
This technique is perfect for delicate fabrics that tend to fray easily.
- Use a Rolled Hem Foot: If your sewing machine has a rolled hem foot, attach it. These feet have a small metal guide that folds the fabric for you.
- Prepare the Fabric: You’ll typically start with a small fold. For a narrow rolled hem, you might start by folding the very edge over about 1/8 inch and pressing.
- Guide the Fabric into the Foot: Carefully feed the folded edge into the slot of the rolled hem foot.
- Sew the Rolled Hem: Begin sewing slowly. The foot will guide the fabric, folding it again as you stitch. You’ll be sewing with a straight stitch or a very narrow zigzag stitch, depending on your machine and the foot.
- Continue and Finish: Keep the fabric feed consistent. Sew all the way around the hem. Backstitch at the end.
- Press: Gently press the finished rolled hem.
Advanced Hemming Techniques and Tips
As you gain confidence, explore these tips to elevate your sewing machine hemming.
Finishing a Hem Properly
Finishing the raw edge prevents fraying and gives a professional look.
- Serger/Overlocker: If you have a serger, it’s the quickest way to finish raw edges. It trims and stitches in one go.
- Zigzag Stitch: As mentioned, a zigzag stitch close to the raw edge will secure it nicely.
- Pinked Edges: Use pinking shears to create a zigzag edge, which helps prevent fraying on some fabrics. This is often used in conjunction with a single fold hem where the raw edge is visible.
- French Seam (for very sheer fabrics): This is a more advanced technique that encloses the raw edge within the seam itself, creating a very neat finish, though it’s not typically a standalone hemming technique.
Selecting the Right Sewing Machine Needle for Hemming
The choice of needle impacts stitch quality and fabric integrity.
| Fabric Type | Recommended Needle Size | Needle Type | Notes |
|---|---|---|---|
| Lightweight Cottons | 70/10 or 80/12 | Universal, Sharps | |
| Silks, Chiffon, Rayon | 60/8 or 70/10 | Fine Universal, Microtex, or Silk needles | Prevents snags and pulls on delicate fibers. |
| Medium Weight Cottons | 80/12 | Universal | Good all-rounder. |
| Denim, Canvas, Twill | 90/14 or 100/16 | Denim/Jeans needle | Stronger needle to penetrate thicker weaves without breaking. |
| Knits, Jersey | 70/10 or 80/12 | Ballpoint or Jersey needle | The rounded tip pushes fabric fibers aside instead of cutting them, preventing runs. |
| Velvet, Upholstery | 90/14 or 100/16 | Jeans or Leather needle | For very dense or tough fabrics. |
Dealing with Difficult Fabrics
Some fabrics present unique challenges for hemming.
- Stretchy Fabrics (Knits): Use a ballpoint or jersey needle. A zigzag stitch or a specialized stretch stitch on your machine is often best. You can also use a twin needle for a professional-looking finish.
- Sheer Fabrics (Chiffon, Organza): A fine needle and a rolled hem are ideal. You might also consider a very narrow double-fold hem or a French seam.
- Heavy Fabrics (Denim, Canvas): Use a heavy-duty needle (jeans needle). You may need to lower your presser foot pressure slightly or use a hump jumper (a small plastic device) to help the needle clear the thicker fabric when starting a seam. Sew slowly and deliberately.
Frequently Asked Questions (FAQ)
What is the best sewing machine stitch for hemming a dress?
The best stitch depends on the fabric and the desired look. A straight stitch is good for many fabrics, especially woven ones. A blind hem stitch offers a near-invisible finish. For knits, a zigzag or stretch stitch is preferable. For very delicate fabrics, a rolled hem is often the most suitable.
How much fabric should I leave for a hem?
This varies, but a common amount is 1 to 2 inches. A wider hem allowance allows for a double-fold hem, which provides a clean finish and prevents fraying. For very sheer fabrics, you might use a narrower allowance or a rolled hem. Always consider the fabric’s weight and drape.
Can I hem a dress without cutting the fabric?
Yes, if the dress is too long and you want to shorten it without removing fabric permanently, you can use temporary hemming methods like fabric tape or a no-sew hem. However, for a durable and professional finish, sewing machine hemming is recommended.
How do I get a perfectly straight hem?
Accurate measuring and marking are crucial. Pressing the hem allowance before sewing also helps create a crisp fold. Sewing slowly and steadily, and using pins to keep the fabric in place, will ensure a straight line. A seam guide on your sewing machine or painter’s tape can also help you maintain a consistent distance from the folded edge.
What is a sewing machine needle for hemming?
A sewing machine needle for hemming is simply the needle you insert into your sewing machine for the task. The key is choosing the right type and size of needle for your specific fabric. Universal, sharps, ballpoint, jersey, and specialized needles (like denim or leather needles) are all options depending on what you’re sewing.
By following these steps and tips, you can confidently hem your dresses with your sewing machine, achieving beautiful and lasting results. Happy sewing!