
Image Source: i.ytimg.com
How To Put In Bobbin Brother Sewing Machine Easy
Putting a bobbin into your Brother sewing machine is a fundamental skill that every sewer needs to master. If you’re wondering, “How do I put a bobbin in a Brother sewing machine?” the answer is straightforward: you need to thread the bobbin, place it correctly in the bobbin case or housing, and ensure it’s ready to feed thread. This guide will walk you through each step, making the process simple and efficient. Whether you’re a beginner or just need a refresher, this comprehensive tutorial will cover everything from winding the bobbin to troubleshooting common Brother bobbin issues.
Getting Ready: What You’ll Need
Before you start, ensure you have the essentials. You’ll need:
- Your Brother sewing machine.
- A bobbin (ensure it’s the correct type for your Brother sewing machine model).
- Thread for your project.
- A spool of thread for winding the bobbin.
- Your sewing machine’s manual (always a good backup!).
Step 1: Filling the Bobbin (Winding a Bobbin)
The first crucial step is to fill the bobbin with thread. This process is often called winding a bobbin. Most Brother sewing machines have a dedicated bobbin winding unit for this.
How to Wind Bobbin Brother Sewing Machine:
- Place the Spool: Locate the spool pin on your Brother sewing machine. Usually, it’s near the top. Place your spool of thread on the spool pin with the thread coming off the top.
- Thread the Winding Unit: Now, you need to thread the bobbin winder.
- Find the thread guide near the spool pin.
- Take the end of the thread from your spool and pass it through this guide.
- Follow the path indicated by your machine’s manual for the bobbin winder. This typically involves looping the thread around a tension disc or a small metal piece on the bobbin winding unit.
- Thread the end of the thread through the small hole in your bobbin.
- Secure the Thread: Wrap the thread around the bobbin a few times to hold it in place. You can gently hold the thread end against the bobbin as you start winding.
- Engage the Winder: Push the bobbin onto the bobbin winder spindle. There’s usually a small clutch mechanism that disengages the sewing mechanism and engages the winder. You might need to push the bobbin assembly sideways or down.
- Start Winding: Gently press the foot pedal. The bobbin will start to wind. Ensure the thread winds evenly across the bobbin. Many machines have an automatic stop when the bobbin is full.
- Cut and Remove: Once the bobbin is full, stop the machine. Cut the thread between the spool and the bobbin. Remove the wound bobbin from the spindle.
- Prepare for Next Use: Make sure the bobbin winding unit is disengaged and returned to its normal position so your machine can sew.
Tips for a Good Bobbin Wind:
- Consistent Tension: Ensure the thread moves smoothly from the spool to the bobbin winder.
- Even Winding: Watch the thread as it winds to prevent unevenness, which can cause sewing problems.
- Correct Thread: Use good quality thread. Cheap or old thread can break easily.
- Check Bobbin Type: Always use bobbins recommended for your Brother sewing machine model. Using the wrong size or type can cause significant Brother bobbin issues.
Step 2: Loading the Bobbin (Inserting the Bobbin)
Once your bobbin is filled, it’s time to load it into your sewing machine. The way you load the bobbin depends on whether your Brother sewing machine has a front-loading or a drop-in bobbin system.
h4: Front-Loading Bobbin System (Removable Bobbin Case)
Many older and some current Brother sewing machines use a front-loading system where the bobbin sits in a removable bobbin case.
How to Insert Bobbin Case Brother Sewing Machine (Front-Loading):
- Open the Needle Plate: Remove the needle plate cover or throat plate to access the bobbin area.
- Remove the Bobbin Case: Gently pull out the bobbin case, which usually contains the bobbin.
- Insert the Wound Bobbin: Take your newly wound bobbin.
- Look for a small slot or notch on the side of the bobbin.
- Hold the bobbin with the thread end pointing towards you.
- Insert the bobbin into the bobbin case.
- Guide the thread into the small slot on the bobbin case. The thread should be coming off the top of the bobbin and going in the direction indicated in your manual.
- Check the Thread Path: Ensure the thread is seated correctly in the tension spring of the bobbin case. The thread should be able to move freely but with a slight resistance.
- Re-insert the Bobbin Case: Carefully slide the bobbin case back into its housing in the machine. There’s usually a small lever or hook on the bobbin case that needs to align with a corresponding notch in the machine.
- Replace Needle Plate: Put the needle plate cover back on.
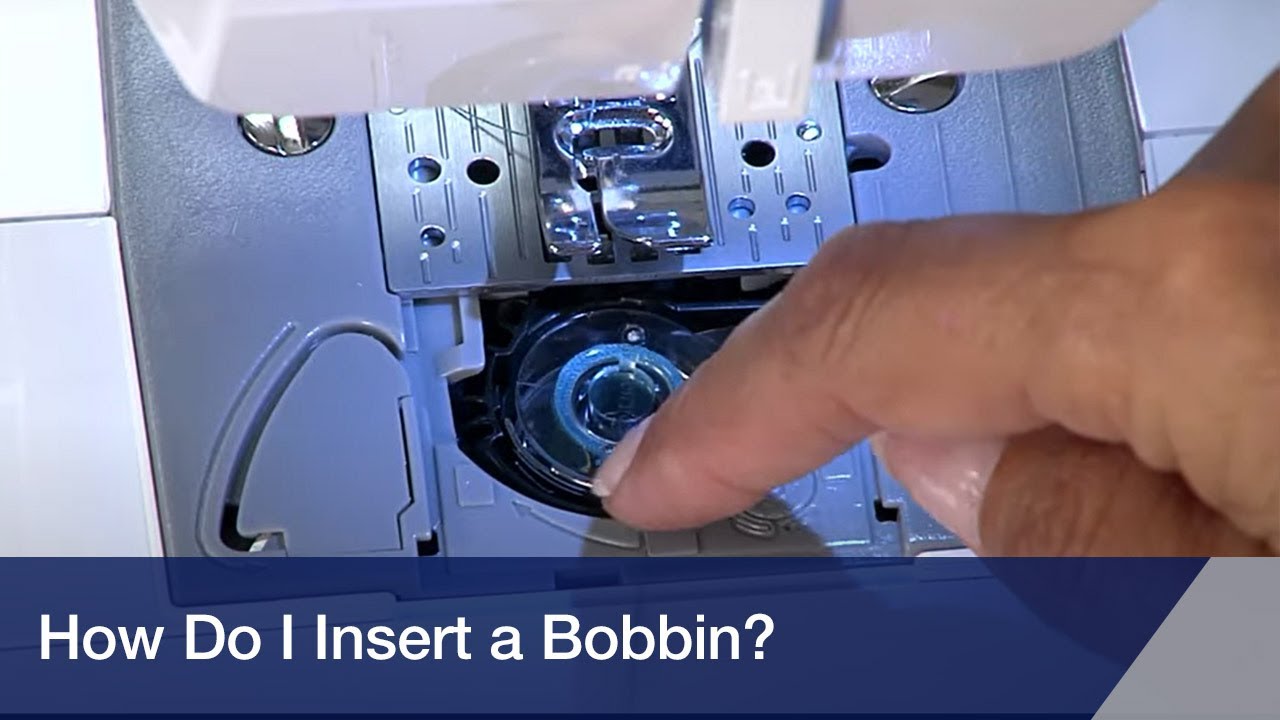
h4: Drop-In Bobbin System
Most modern Brother sewing machines feature a convenient drop-in bobbin system. This means the bobbin housing is directly accessible from the top, and there’s no separate bobbin case to remove and insert.
How to Load Bobbin Brother Sewing Machine (Drop-In):
- Access the Bobbin Area: Remove the needle plate cover or accessory tray to reveal the bobbin area. You’ll see a bobbin cover (often a clear plastic piece). Remove this cover.
- Place the Bobbin: Take your wound bobbin.
- Look at the bobbin cover and the bobbin area. There’s usually an arrow or a guide indicating the correct direction the thread should unwind.
- Place the bobbin into the bobbin holder with the thread unwinding counter-clockwise (this is the most common direction for Brother machines, but always check your manual). The thread should be coming off the top of the bobbin.
- Thread the Bobbin Holder: Gently pull the thread end. You’ll see a small slot or channel where the thread needs to be guided.
- Feed the thread through this slot.
- Ensure the thread is seated in the tension spring.
- Pull the thread to the left and under a small clip, and then back towards you, often through another small guide.
- Replace the Bobbin Cover: Put the bobbin cover back in place.
Step 3: Bringing Up the Bobbin Thread
After loading the bobbin, you need to bring the bobbin thread up to meet the needle thread. This allows you to start sewing with both threads.
How to Bring Up the Bobbin Thread:
- Hold the Top Thread: With one hand, gently hold the end of the top thread that’s coming from the needle.
- Lower and Raise the Needle: Using the handwheel (turn it towards you), slowly lower the needle to its lowest point (piercing the fabric or just below the needle plate). Then, slowly turn the handwheel towards you again to raise the needle back to its highest position.
- Catch the Bobbin Thread: As the needle rises, it will catch the bobbin thread and pull a loop of it up through the bobbin area.
- Retrieve the Loop: Use your fingers or a seam ripper to gently pull the loop of bobbin thread completely out.
- Position the Threads: You should now have two thread tails: one from the needle and one from the bobbin. Place both threads behind the presser foot and towards the back of the machine.
Important Note: Always hold the top thread when bringing up the bobbin thread. If you don’t, the bobbin thread might not come up correctly, or it could get tangled.
Step 4: Adjusting Bobbin Tension
Proper bobbin tension is critical for creating neat and strong stitches. If your stitches look messy, loop on the top, or the thread breaks, you might need to adjust the bobbin tension or the upper thread tension.
Bobbin Tension Brother Sewing Machine:
- The Bobbin Case: In machines with a separate bobbin case, there’s usually a small screw on the bobbin case that adjusts tension. Turning this screw slightly can tighten or loosen the bobbin thread.
- Tightening: If the bobbin thread is too loose (loops appear on the fabric’s top side), turn the screw on the bobbin case clockwise a tiny bit.
- Loosening: If the bobbin thread is too tight (loops appear on the underside of the fabric), turn the screw counter-clockwise a tiny bit.
- The Drop-In Bobbin: Machines with a drop-in bobbin system usually have the tension adjustment primarily on the upper thread. However, some models might have a way to adjust bobbin tension, though it’s less common. If you suspect bobbin tension issues with a drop-in system, it’s often related to how the thread is threaded through the bobbin holder or if the bobbin itself is damaged.
General Tension Troubleshooting:
- Test Stitch: Always perform a test stitch on a scrap piece of your project fabric after making any tension adjustments.
- One Adjustment at a Time: Make small adjustments and test. Changing both upper and bobbin tension at once can make it harder to pinpoint the problem.
- Upper Thread Tension: If the bobbin thread looks fine on the underside but you have loops on the top, you likely need to increase the upper thread tension. If the upper thread is too tight and breaking, decrease the upper thread tension.
Common Brother Bobbin Issues and How to Fix Them
Even with careful attention, you might encounter problems. Here are some frequent Brother bobbin issues:
| Issue | Possible Cause | Solution |
|---|---|---|
| Thread Bunching/Nesting Underneath | Bobbin thread too loose. Upper thread tension too high. Incorrect threading. | Adjust upper thread tension lower. Ensure bobbin is wound evenly and inserted correctly. Check that the thread is properly seated in the bobbin case tension spring or drop-in holder. |
| Thread Breaking | Bobbin thread too tight. Upper thread tension too high. Poor quality thread. | Adjust bobbin tension looser or upper thread tension lower. Use good quality thread. Ensure the needle is sharp and inserted correctly. Check for any burrs or rough spots on the needle plate or bobbin area. |
| Skipped Stitches | Incorrect bobbin insertion. Needle is bent or dull. Incorrect thread path. | Re-thread the bobbin and upper thread, ensuring all guides and tension discs are used. Replace the needle with a new, sharp one. Ensure the bobbin is wound correctly and seated properly. |
| Uneven Stitch Quality | Bobbin winding is uneven. Tension is off. | Rewind the bobbin to ensure even winding. Adjust upper and bobbin thread tensions. Ensure the fabric is fed evenly under the presser foot. |
| Bobbin Stops Spinning Mid-Wind | Bobbin winding unit not fully engaged. Thread snagged. | Ensure the bobbin winding unit is pushed fully into the winding position. Check the thread path for tangles or snags. Ensure the bobbin is properly seated on the spindle. |
| Bobbin Not Feeding Thread | Thread tangled in bobbin area. Bobbin inserted incorrectly. | Stop sewing immediately. Remove the bobbin. Check for thread nests or tangles around the bobbin. Re-insert the bobbin correctly, ensuring the thread is guided through all the necessary slots and tension areas. |
Replacing the Bobbin
Sometimes, you’ll need to replace the bobbin because you’ve run out of thread or you’re changing thread colors. The process is essentially the same as the initial loading:
How to Replace Bobbin Brother Sewing Machine:
- Stop Sewing: Always stop your machine and lift the presser foot before changing a bobbin.
- Remove Existing Bobbin: If there’s thread left, you can either finish it or remove it. Gently pull the bobbin out from its housing.
- Thread New Bobbin: Wind a new bobbin with the desired thread color.
- Load New Bobbin: Insert the newly wound bobbin into the bobbin area, following the instructions for your specific Brother sewing machine model (front-loading or drop-in).
- Bring Up Thread: Bring the bobbin thread up to meet the needle thread.
Advanced Tips and Maintenance
To ensure your Brother sewing machine runs smoothly and your bobbins are always perfect, consider these tips:
- Clean the Bobbin Area: Regularly clean out lint and dust from the bobbin area. This is crucial for preventing thread jams and skipped stitches. Use a small brush or a can of compressed air.
- Lubricate: Consult your manual for specific lubrication points. Proper lubrication can prevent many mechanical issues.
- Use Genuine Accessories: For best results, use bobbins and other accessories recommended by Brother for your specific model.
- Needle Maintenance: Change your needle regularly (every 6-8 hours of sewing or when you notice issues). A dull or bent needle can affect stitch quality and cause thread breaks.
- Thread Quality: Invest in good quality thread. It makes a significant difference in your sewing.
- Manual is Your Friend: Never hesitate to refer to your Brother sewing machine’s manual. It contains model-specific information and diagrams that can be invaluable.
Frequently Asked Questions (FAQ)
Q: What is the correct way to thread a bobbin for my Brother sewing machine?
A: You need to place the thread spool on the spool pin, guide the thread through the bobbin winder’s tension guides, then through the hole in the bobbin. Wind the bobbin until it’s full, then cut the thread and remove it.
Q: My Brother sewing machine is making a funny noise when the bobbin is in use. What could be wrong?
A: This can be due to several reasons: lint or debris in the bobbin area, the bobbin not being seated correctly, or a problem with the bobbin case itself. Clean the bobbin area thoroughly. Ensure the bobbin is inserted properly and the thread is guided correctly. If the noise persists, it might be time for a professional service.
Q: Can I use any bobbin with my Brother sewing machine?
A: No, it’s essential to use bobbins specifically designed for your Brother sewing machine model. Using the wrong size or type of bobbin can cause significant damage and Brother bobbin issues, affecting stitch quality and the machine’s internal mechanisms. Always check your manual for the correct bobbin type.
Q: How often should I wind a new bobbin?
A: This depends on the length of your stitches and the size of the bobbin. As a general rule, you’ll need to wind a new bobbin every time the thread runs out during your sewing project, or before starting a new project if the current bobbin is low.
Q: My stitches are looping on the top of the fabric. What’s wrong with my bobbin?
A: This is usually an upper thread tension issue, not a bobbin problem itself. It means the upper thread is too loose or the bobbin thread is too tight. Try increasing the upper thread tension or decreasing the bobbin tension slightly if your machine allows. Ensure the bobbin thread is correctly seated in its tension guide.
Q: How do I know if I need to replace the bobbin on my Brother sewing machine?
A: You replace the bobbin when it runs out of thread. You don’t typically “replace” the bobbin itself unless it’s damaged (cracked, warped, or has burrs). If a bobbin is damaged, it can cause thread snagging and poor stitch quality.
Mastering how to put in a bobbin on your Brother sewing machine is a key step in your sewing journey. By following these detailed steps and understanding common Brother bobbin issues, you can ensure smooth, beautiful stitches every time. Happy sewing!