
Learning how to tie a knot sewing is a fundamental skill for any crafter. A well-tied knot ensures your stitches are secure and your projects last. Can you tie a knot that won’t unravel? Yes, with a few simple techniques! This guide will show you how to create a strong sewing thread knot that keeps your work neat and tidy. We’ll cover everything from simple knotting thread for sewing to advanced methods for preventing thread slippage.
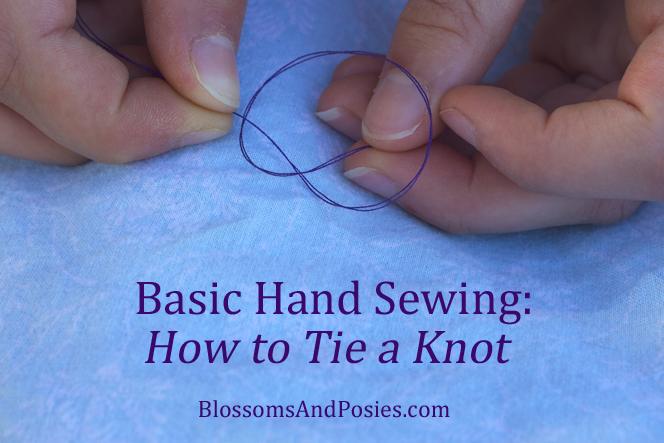
Image Source: blossomsandposies.com
The Basics of a Secure Knot Sewing
At its core, a secure knot sewing is about creating friction and tension to hold the thread in place. Think of it like a handshake – the tighter the grip, the less likely it is to slip. The goal is to create a knot that is small enough to be unobtrusive but strong enough to withstand the tugging and pulling of sewing. This prevents your stitches from coming undone, which is especially important for seams and decorative elements.
Why Proper Knotting Matters
A poorly tied knot can lead to several problems:
- Unraveling stitches: Your work can fall apart if the thread slips out.
- Messy appearance: Large, bulky knots can be unsightly.
- Weak seams: The strength of your sewn item depends on secure knots.
- Wasted thread: Re-doing work because of loose knots wastes precious materials.
Essential Tools for Knotting
While you can tie knots with just your fingers and a needle, a few tools can make the process easier and more precise:
- Sewing Needles: Different needle sizes are suited for different threads and fabrics. A needle with a slightly larger eye can be helpful for beginners learning to thread the needle.
- Thread Clippers or Small Scissors: For a clean cut close to the knot.
- Thimble: Protects your fingertip when pushing the needle through fabric.
- Pliers (optional): For those with dexterity challenges, small needle-nose pliers can help grip the thread for tying.
Knotting Thread for Sewing: The Foundational Techniques
There are several ways to tie a knot, each with its own strengths. We’ll start with the most common and reliable methods.
The Simple Knot (Single Knot)
This is the most basic knot. While easy to learn, it can sometimes come undone if not done correctly.
How to Tie:
- After you’ve finished your last stitch, loop the thread around the needle tip two or three times.
- Pull the needle through the loops, bringing them close to the fabric.
- Hold the knot taut with your fingertip against the fabric as you pull the needle away.
Why it might not be enough: For heavier fabrics or when a very strong hold is needed, a single knot might not be sufficient.
The Double Knot Sewing
This is a slightly more robust version of the simple knot, offering extra security. It’s a great go-to for most everyday sewing tasks.
How to Tie:
- After completing your stitch and bringing the needle up through the fabric, hold the thread tail taut.
- Wrap the thread tail around the needle tip two or three times, creating a small coil.
- Gently slide the needle through these coils, pulling the knot towards the fabric.
- As the knot tightens, pinch it between your thumb and forefinger against the fabric.
- Pull the needle away to secure the knot firmly.
Benefits: The extra loop adds bulk and friction, making it much harder for the sewing thread knot to slip.
The Surgeon’s Knot
This knot is exceptionally secure and is a favorite for many sewers, especially when preventing thread slippage is paramount. It’s similar to the double knot but with an added wrap.
How to Tie:
- After your last stitch, bring the needle up through the fabric.
- Wrap the thread tail around the needle tip twice instead of just once or twice.
- Pull the needle through these two loops, creating a slightly larger knot.
- Hold the knot firmly against the fabric and pull the needle away.
When to use: Ideal for slippery fabrics, when sewing with thicker threads, or when you need an extra-strong finish.
Advanced Knotting Techniques for Maximum Security
For projects that require the utmost durability or when working with challenging materials, these advanced techniques offer superior strong sewing knot capabilities.
The Weaver’s Knot
This knot is known for its neatness and strength, making it excellent for hand sewing where a small, secure knot is desired.
How to Tie:
- With the thread tail, create a small loop.
- Bring the needle through the fabric and then loop it around the thread tail twice, creating a double wrap.
- Insert the needle through the loop you created at the beginning, ensuring the double wraps are captured within this loop.
- Hold the knot tight against the fabric and pull the needle away.
Key Advantage: The interlacing nature of the knot makes it very resistant to slipping.
The Traveler’s Knot (or Backstitch Knot)
This technique combines a finishing stitch with a knot, creating a very compact and secure finish.
How to Tie:
- After completing your last stitch, bring the needle up through the fabric.
- Instead of pulling the needle all the way through, create a small loop by wrapping the thread around the needle tip once.
- Pass the needle through this loop.
- Now, take a tiny stitch back into the fabric, just catching a few threads.
- Bring the needle up again, right next to where you just went in.
- Wrap the needle tip twice around the thread going into the fabric.
- Pull the needle through these two loops, snugging it down next to your small stitch.
Why it’s effective: This method essentially anchors the knot with a small stitch, providing a very secure finish. This is an excellent way of tying off thread securely.
The Fisherman’s Knot (for thicker threads or multiple strands)
While often used for fishing line, a modified version can be useful for thick sewing threads or when sewing with multiple strands of thread.
How to Tie:
- Hold the two thread ends together (or the single thread tail doubled over).
- Tie a simple overhand knot with one of the threads around the other. Pull it snug.
- Now, tie another overhand knot with the second thread around the first. Pull it snug.
- Gently pull both ends of the knot outwards simultaneously. The two knots will slide together, creating a compact and strong union.
Caution: This knot can be bulkier, so it’s best used when the knot will be hidden or when dealing with very thick materials.
Thread Tail Knot: Managing the End of Your Thread
The thread tail knot is what you create at the end of your sewing session or when you need to start a new length of thread.
Best Practices for Thread Tails
- Leave enough tail: Don’t cut your thread too short after tying off. Leaving about 4-6 inches gives you enough to handle and prevent accidental unraveling.
- Trim close but not too close: After securing the knot, use sharp scissors or thread clippers to trim the excess thread as close as possible without cutting into the knot itself or the fabric.
Securing the Thread Tail Knot
A good needle knot sewing technique ensures the tail stays put.
- After tying your final knot, hold it firmly.
- Carefully trim the excess thread, leaving a small tail (about ¼ inch or less).
- For extra security on slippery fabrics, you can use a tiny dab of fabric glue or fray check on the knot itself.
Preventing Thread Slippage: Tips for a Strong Sewing Knot
Preventing thread slippage is crucial for long-lasting stitches. Here’s how to ensure your knots hold:
- Use the right thread: Mercerized cotton, polyester, and silk threads have good tensile strength and are less prone to slipping than some natural fibers.
- Thread conditioner: For particularly slippery threads or fabrics, using a thread conditioner (like Beeswax or specialized thread balms) can add grip and prevent fraying. Rub the thread lightly over the conditioner before sewing.
- Double your thread: Using two strands of thread instead of one creates a thicker thread that is less likely to slip and also makes your stitches stronger.
- Fabric type matters: Delicate fabrics like silk or satin are more prone to knot slippage. Use smaller, tighter knots and consider a tiny drop of fray check. Sturdy fabrics like denim or canvas can handle larger knots more easily.
Table of Knot Types and Their Best Uses
| Knot Type | Description | Best For | Ease of Tying | Security Level |
|---|---|---|---|---|
| Simple Knot | Basic single loop around needle. | Quick fixes, temporary stitches, very light fabrics. | Very Easy | Low |
| Double Knot | Two loops around needle. | General sewing, most fabrics, everyday seams. | Easy | Medium |
| Surgeon’s Knot | Three loops around needle. | Slippery fabrics, thicker threads, when extra security is needed. | Easy | High |
| Weaver’s Knot | Involves a loop and double wraps captured within it. | Neat finishes, hand sewing, when a small but strong knot is required. | Medium | Very High |
| Traveler’s Knot | Combines a small stitch with a double-looped knot. | Finishing seams, securing ends of thread, robust anchoring. | Medium | Very High |
| Fisherman’s Knot | Two overhand knots tied around each other. | Thick threads, multiple strands, joining two ends of thread (for repairs or extending length). | Medium | Very High |
Tying Off Thread: The Art of Finishing
Tying off thread correctly is the final step to a professional and durable sewing project. It’s not just about making a knot; it’s about making a knot that will last.
The Importance of Multiple Knots
For critical seams, like those on clothing or upholstery, a single knot is rarely sufficient. You want to build in layers of security. This is where the double knot sewing or surgeon’s knot becomes invaluable.
Securing the Knot at the Fabric Edge
When tying off thread, aim to create the knot as close to the fabric as possible without piercing it. This minimizes any visible knot.
- After your last stitch, bring the needle to the surface of the fabric.
- Loop the thread around the needle tip two or three times.
- Gently pull the needle through the loops, guiding the knot down to the fabric surface.
- Hold the knot with your fingertip and pull the needle away to tighten. Repeat this process once or twice more in the exact same spot for maximum security.
The Tiny Stitch Method
A slightly different approach to finishing stitch knot involves a tiny stitch right next to your final stitch before making the knot.
- Make your last stitch as usual.
- Bring the needle up through the fabric, leaving a loop.
- Make a tiny stitch (just a few threads) back into the fabric, catching the loop.
- Pull the needle through the loop and then through the fabric.
- Now, wrap the needle around the thread twice and pull through to create a secure knot.
This method creates a very solid anchor point for your knot.
Frequently Asked Questions About Sewing Knots
What is the best knot for preventing thread slippage?
The Surgeon’s Knot or the Weaver’s Knot are excellent for preventing thread slippage. Their extra loops create more friction, making them very secure.
Can I use a knot for every sewing situation?
While knots are essential for hand sewing, some machine sewing applications can be self-securing through stitch types like backstitching. However, for hand sewing, knots are crucial.
How do I tie a knot when threading a needle?
You typically don’t tie a knot before threading the needle. You thread the needle first, then tie a knot at the end of the thread tail once it’s through the needle’s eye. For thicker threads, you might double the thread and tie a knot at the folded end.
What if my thread keeps breaking when I tie a knot?
If your thread is breaking, it might be too thin for the fabric or you might be pulling too hard. Consider using a thicker thread, doubling your thread, or using a thread conditioner.
How do I hide my sewing knots?
To hide a knot, try to tie it on the wrong side of the fabric. You can also poke the needle through the fabric to the wrong side and tie the knot there. After tying, trim the excess thread close to the knot. For very delicate fabrics, you might try to catch the knot within a seam allowance or under a decorative stitch.
Do I need a knot at the beginning and end of a seam?
Yes, you generally need to tie off your thread at both the beginning and end of a seam in hand sewing to ensure it’s secure.
By mastering these techniques for knotting thread for sewing, you’ll be well on your way to creating beautiful, durable, and professional-looking stitches every time. Remember, practice makes perfect, so keep trying these methods until they feel natural!