
Can you hem jeans with a sewing machine? Yes, absolutely! Learning how to hem jeans with a sewing machine is a fundamental skill for anyone looking to alter their clothing. This guide will walk you through the process, whether you’re looking to shorten a beloved pair of jeans or tackle a new sewing project. We’ll cover everything from choosing the right needle to finishing your hem, ensuring your DIY jeans hem looks professional. Sewing jeans can seem daunting, but with a few basic sewing techniques and the right approach, you’ll be expertly altering jeans in no time. This sewing machine tutorial is designed for beginners and those looking to refine their denim hemming skills.
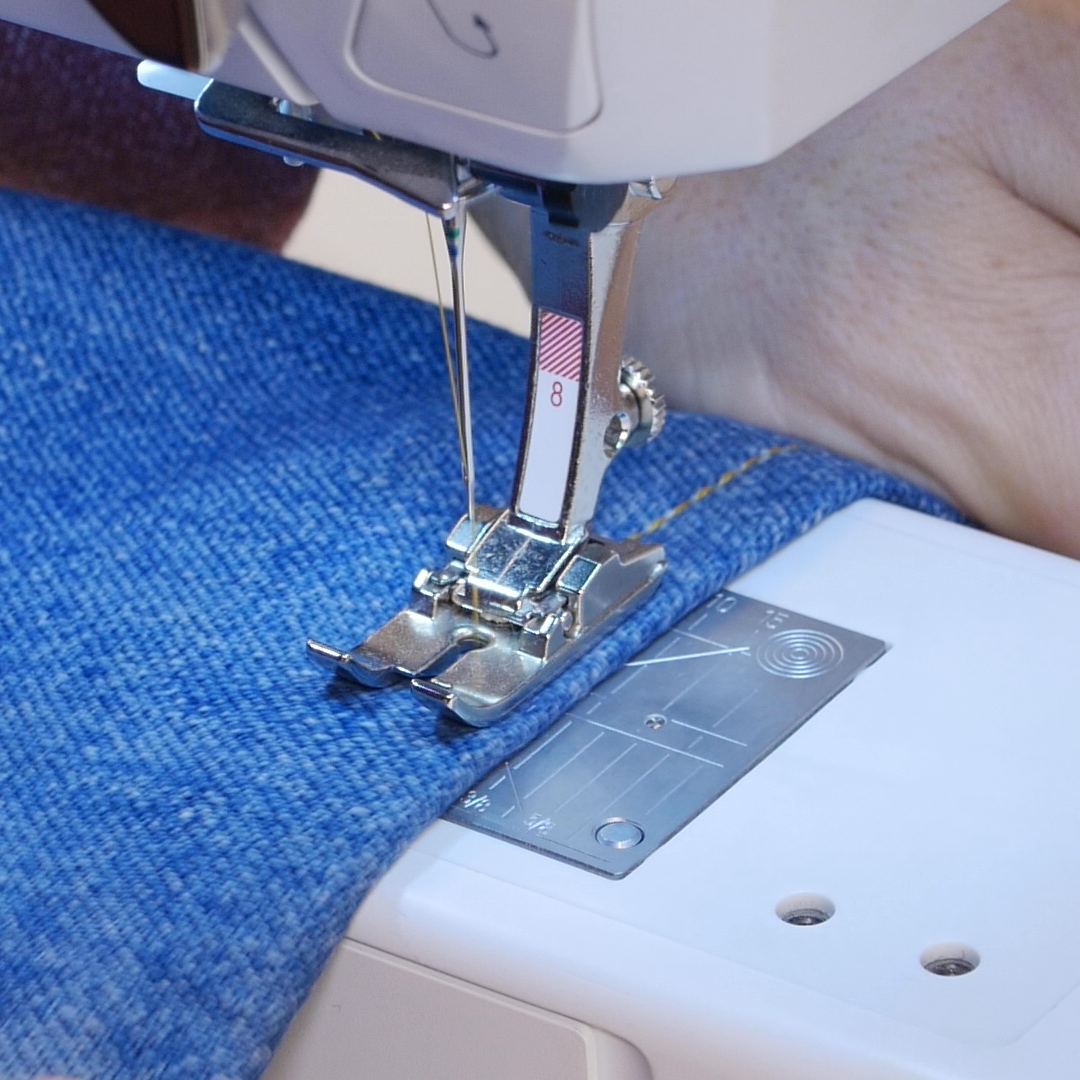
Image Source: weallsew.com
Why Hem Your Jeans?
There are many reasons to hem your jeans. Perhaps you’ve bought a pair that’s too long, or maybe they’ve stretched out over time. Sometimes, you might even want to give an old pair a new look by shortening them. Whatever your reason, a properly hemmed pair of jeans not only fits better but also looks much neater. Mastering hemming denim is a valuable skill that saves money and allows for personalized fits.
Common Reasons for Hemming Jeans:
- Fit: Jeans are often too long straight off the rack, leading to bunching or tripping.
- Style: You might want to change the length for a different look, like cropped jeans.
- Wear and Tear: As jeans age, the original hem can fray or wear out.
- Alterations: Purchasing second-hand jeans often requires adjustments.
Preparing Your Jeans for Hemming
Before you even thread your needle, taking the time to prepare your jeans properly will make the hemming process smoother and the final result much better. This includes washing, drying, and deciding on the new length.
Washing and Drying
Always wash and dry your jeans before hemming them. Denim can shrink, especially after the first few washes. If you hem them at their original length and then they shrink, you’ll end up with jeans that are too short. This step is crucial for accurate jean alteration machine work.
Deciding on the New Length
This is a personal step. Try on your jeans with the shoes you typically wear them with to get the perfect length. You can use pins to mark where you want the new hem to fall.
How to Mark the New Length:
- Put on the jeans: Wear the shoes you’ll usually wear with these jeans.
- Stand in front of a mirror: Smooth the fabric down.
- Pinch and pin: Pinch the excess fabric at the hem to the desired length. It’s often easier to have a friend help with this step.
- Mark both legs: Ensure the markings are even on both sides.
- Lay them flat: Once pinned, lay the jeans flat and measure the distance from the pinned hem to the floor or to the original hem to confirm the desired outcome.
Removing the Old Hem
If you want to keep the original factory hem for a more authentic look, you’ll need to carefully remove it. This is a common technique for denim hemming to retain the original look of the jeans.
Steps to Remove the Original Hem:
- Locate the stitching: Find the stitches holding the original hem in place.
- Use a seam ripper: Carefully insert a seam ripper under the stitches and cut them one by one. Go slowly to avoid damaging the denim fabric.
- Unroll the cuff: Once the stitches are removed, unroll the existing hem. You’ll likely have a small amount of folded fabric.
- Press the hem flat: Iron the unrolled hem flat. This will reveal the original stitching line.
Gathering Your Sewing Supplies
Having the right tools is essential for successful sewing jeans. For machine sewing pants, especially denim, you need specific supplies to handle the thick fabric.
Essential Sewing Supplies:
- Sewing Machine: Any functional sewing machine will work, but a sturdy one is better for denim.
- Denim Needles: These are thicker and sharper than regular needles, designed to pierce through heavy fabrics like denim. They come in various sizes (e.g., 90/14, 100/16, 110/18).
- Heavy-Duty Thread: Use a strong polyester or cotton-wrapped polyester thread. Consider a denim-specific thread that often has a slight sheen.
- Seam Ripper: For removing the old hem.
- Fabric Scissors: Sharp scissors are crucial for cutting denim cleanly.
- Measuring Tape or Ruler: For accurate measurements.
- Fabric Pins or Wonder Clips: To hold the fabric in place. Wonder Clips are excellent for denim as they grip thicker fabric well.
- Iron and Ironing Board: To press seams and hems.
- Chalk or Fabric Marker: For marking the fabric.
- Optional: Jeans Button or Rivet: If you want to replace any hardware.
Choosing the Right Sewing Machine and Needle
The type of sewing machine and needle you use significantly impacts the quality of your hemming denim. Denim is a tough fabric, so using the right equipment prevents skipped stitches, broken needles, and frustration.
Sewing Machine Considerations:
- Sturdiness: A machine with a metal internal frame is generally better for tackling thick layers of denim.
- Stitch Quality: Ensure your machine produces consistent stitches.
- Presser Foot Pressure: Some machines allow you to adjust the presser foot pressure, which can be helpful for feeding thick fabric evenly.
Needle Selection for Denim:
- Denim Needles (Jeans Needles): These are specifically designed for sewing through denim. They are sharper and have a stronger shaft than universal needles.
- Size: For most denim, a size 90/14 or 100/16 needle is suitable. If you are sewing through multiple thick layers, a 110/18 might be necessary.
- Replacement: Change your needle after every few pairs of jeans or when you notice it snagging or skipping stitches. A dull needle is a common cause of sewing problems with denim.
Step-by-Step Guide to Hemming Jeans
Now, let’s get to the actual sewing! This guide focuses on creating a clean, durable hem that looks as good as the original.
Step 1: Measure and Mark
We’ve already covered marking the new length. Once marked, lay your jeans flat and use your ruler and chalk to draw a straight line for your cutting guide.
Step 2: Cut the Excess Fabric
Carefully cut along your marked line. Ensure you cut both legs evenly. If you’re aiming to keep the original hem, you’ll be cutting off the excess fabric below that original folded edge.
Step 3: Prepare the New Hem
There are a few ways to create a new hem, depending on the look you want.
Option 1: Keeping the Original Hem (Recommended for Authenticity)
If you removed the old hem, you’ll have a raw edge.
- Fold: Fold the raw edge up by about 1/2 inch (1.25 cm) towards the inside of the jeans. Press this fold firmly with your iron.
- Second Fold: Fold the fabric up again by the desired amount (e.g., 1 inch or 2.5 cm). This second fold should encompass the first fold, creating a clean, double-folded hem. Press this second fold firmly.
- Secure: Use pins or Wonder Clips to hold the folded hem in place.
Option 2: Creating a New, Simple Hem
This method is quicker if you don’t need the original factory look.
- Fold: Fold the raw edge up by 1/2 inch (1.25 cm) towards the inside of the jeans and press.
- Second Fold: Fold the fabric up again by the desired amount (e.g., 1 inch or 2.5 cm). Press this second fold.
- Secure: Pin or clip the folded hem in place.
Option 3: Creating a Blind Hem (More Advanced)
A blind hem stitch on your sewing machine creates a nearly invisible hem. This is a bit more advanced but yields a very clean finish. You’ll need to consult your sewing machine manual for how to use the blind hem foot and stitch.
Step 4: Sewing the Hem
This is where your sewing machine tutorial really comes into play.
- Thread your machine: Use your heavy-duty thread and denim needle. If you are trying to match the original stitching color, use that. If you want the stitching to be visible and decorative, choose a contrasting color.
- Position the jeans: Place the jeans under the presser foot, with the folded hem aligned along the original stitching line if you’re keeping it, or along your marked line. Ensure the side you want to be “right side out” is facing up.
- Backstitch: Start sewing at one side seam. Lower the presser foot and sew a few stitches forward, then backstitch to secure the beginning of the seam.
- Sew around the leg: Sew slowly and steadily, following the edge of the folded hem. Guide the fabric with your hands, but don’t push or pull it. Let the machine feed the fabric.
- Crossing thick seams: When you reach a thick seam (like the side seam or inseam), you might need to adjust your sewing machine.
- Lower presser foot: Ensure the presser foot is as low as possible.
- Handwheel: Turn the handwheel towards you to slowly lower the needle through the thick seam.
- Specialty Feet: Some machines have a “hump jumper” or a leveling foot that helps sew over thick seams.
- Finishing the seam: When you reach your starting point, sew forward a few stitches and then backstitch to secure the end of the seam.
- Trim excess threads: Snip any loose threads.
Step 5: Finishing Touches
To make your DIY jeans hem look even more professional, consider these steps.
Pressing the Hem
After sewing, press the hem with your iron. This sets the stitches and gives the hem a crisp, finished look. You might want to press from the inside and then lightly from the outside.
Matching Original Stitching (Optional)
If you want your hem to look exactly like the original, you can try to match the stitch length and thread color. Some jeans have a double stitch line. You can achieve this by sewing twice, either right next to each other or with a slightly wider gap, depending on the original.
Dealing with the Original Bottom Hem for an Authentic Look
If you kept the original hem, you’re sewing through multiple layers of denim plus the original stitch line. This is the trickiest part of hemming denim to preserve the original look.
- Sewing through the original hem: As mentioned in Step 4, go slowly over the thick parts. You can also use a seam ripper to carefully pick out a few stitches from the original hem’s seam before you sew your new hem, creating a slightly less thick transition.
- Stitch placement: Try to sew your new hem as close as possible to the original stitching line.
Advanced Techniques and Tips for Perfect Denim Hemming
Beyond the basic steps, a few advanced techniques can elevate your hemming denim to a professional level. These tips are invaluable for altering jeans and making your machine sewing pants projects look polished.
Table: Common Denim Hemming Problems and Solutions
| Problem | Cause | Solution |
|---|---|---|
| Skipped stitches | Dull or bent needle, wrong needle type, incorrect tension, thick fabric | Use a new, sharp denim needle; check needle insertion; adjust tension; ensure machine can handle denim. |
| Puckered fabric | Thread tension too tight, fabric fed unevenly, wrong stitch length | Loosen upper or lower tension; guide fabric gently without pushing or pulling; adjust stitch length (usually slightly longer for denim). |
| Broken needle | Needle hitting an obstruction, needle bent, needle not inserted correctly | Ensure you’re using a denim needle; ensure needle is straight and fully inserted; clear any obstructions; sew slowly over thick seams. |
| Uneven stitching | Presser foot pressure too low, feeding fabric unevenly | Increase presser foot pressure (if adjustable); guide fabric smoothly; use a walking foot for very thick denim if your machine supports it. |
| Raw edge fraying excessively | Not folding hem properly, fabric too prone to fraying | Ensure a double fold hem; consider using a serger or zigzag stitch on the raw edge before folding if keeping the original hem isn’t a priority. |
| New hem doesn’t match original stitch line | Inaccurate measurement or cutting, original hem removed carelessly | Use a seam ripper to expose original stitching line; measure carefully; use a chalk line to guide your cutting and sewing. |
Using a Walking Foot
A walking foot is a presser foot that has built-in “teeth” that grip the top layer of fabric and feed it along with the bottom layer. This is incredibly helpful for sewing jeans as it prevents the layers of denim from shifting, leading to smoother seams and more even stitching, especially when working with multiple layers or thick seams.
Thread Tension Adjustment
Denim often requires slight adjustments to thread tension. If your stitches look loopy on the underside, your upper tension might be too tight or your bobbin tension too loose. Conversely, if stitches are loopy on the top, the upper tension might be too loose or the bobbin tension too tight. Always test your tension on a scrap piece of denim. A good starting point for denim is usually a medium stitch length (around 2.5-3.0 mm).
Sewing Over Thick Seams
As mentioned, thick seams are the bane of denim hemming.
* “Stair Step” the Seam: Before sewing over a thick seam (like the side seam), place a small, folded piece of fabric (scrap denim of similar thickness) under the presser foot on the side of the seam that is higher. This levels out the presser foot, allowing the needle to enter the thick seam more smoothly. Then, as you sew over the seam, you can gradually remove this fabric shim.
* Slow and Steady: Always slow down when approaching and sewing over thick seams. Use the handwheel for precise control.
Preserving the Original Wash and Fray
If you’re keeping the original hem, you’re likely doing so to preserve the worn, faded, or whiskered look of the jeans’ original cuff. When you remove the old hem, be careful not to disturb this existing wear. When you fold your new hem, try to align your stitches as closely as possible to the original stitch line.
Frequently Asked Questions About Hemming Jeans
Q: How much fabric do I need to leave for the hem?
A: It’s generally recommended to leave at least 1 to 1.5 inches (2.5 to 3.8 cm) of fabric below your desired finished hem length. This provides enough material for a sturdy double-fold hem.
Q: Can I use a regular sewing machine for hemming jeans?
A: Yes, most standard sewing machines can handle denim, provided you use the correct needle and thread and sew slowly over thicker areas. A heavy-duty or older mechanical machine might perform better than a very lightweight computerized one.
Q: What is the best stitch length for hemming jeans?
A: A stitch length of 2.5 to 3.0 mm is usually a good starting point for denim. For very thick seams, a slightly longer stitch might be beneficial to prevent skipped stitches. Always test on a scrap.
Q: My stitches are skipping. What should I do?
A: This is usually due to a dull or bent needle, the wrong type of needle, or incorrect thread tension. Ensure you are using a sharp denim needle (size 90/14 or 100/16), that it’s correctly inserted, and test your tension.
Q: How do I make the new hem look like the original?
A: To achieve an authentic look, carefully remove the original hem with a seam ripper, preserve the original faded cuff, and then re-fold the fabric to the new length, stitching as close as possible to the original stitch lines. Using a thread color that matches the original stitching is also key.
Q: Is it difficult to hem jeans with a sewing machine?
A: While it might seem intimidating, with practice and the right tools, hemming denim is a very achievable skill. This sewing machine tutorial is designed to make it straightforward.
Q: What if my jeans are too thick for my sewing machine?
A: Ensure you are using a denim needle and heavy-duty thread. Slow down and use techniques like the “stair step” method with a fabric shim to get over thick seams. If your machine consistently struggles, consider a more robust jean alteration machine or a sewing machine known for handling heavy fabrics.
Conclusion
Learning to hem jeans with a sewing machine is a rewarding skill that opens up a world of possibilities for personalizing your wardrobe. Whether you’re aiming for a precise fit or a specific style, these steps and tips will guide you through the process of denim hemming. From selecting the right denim needle to mastering the technique of machine sewing pants, each step contributes to a professional-looking finish. Embrace the process of DIY jeans hem and enjoy the satisfaction of perfectly fitting trousers. With a little practice, you’ll be an expert at altering jeans and creating a polished look for your favorite denim. Happy sewing!