
Can I tighten sleeves without sewing? Yes, you absolutely can! This guide will show you multiple ways to adjust your sleeves without a needle and thread, making it simple to achieve a more flattering fit. Whether you’re looking for sleeve shortening no sew solutions or general DIY sleeve adjustment techniques, these clothing alteration sleeve tips are perfect for quick shirt sleeve mods no stitch.
Sometimes, your favorite shirts just don’t fit quite right. The sleeves might be too long, too baggy, or simply not the style you want. Before you toss them aside or spend money on professional alterations, know that you can achieve a tailored look with these simple, no-sew methods. This guide will walk you through various ways to alter your sleeves, from making them shorter to giving them a slimmer silhouette, all without touching a sewing machine or needle.
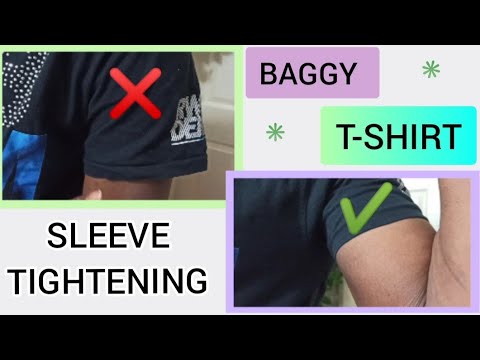
Image Source: i.ytimg.com
Why Adjust Your Sleeves?
There are many reasons why you might want to alter your sleeves. A perfect fit can make a significant difference in how a garment looks and feels.
- Improved Fit: Sleeves that are too long can make your arms look shorter or overwhelm your frame. Too-wide sleeves can look sloppy.
- Style Updates: Sometimes, a style change can breathe new life into an old shirt. Turning long sleeves into short sleeves or three-quarter sleeves is a common and easy update.
- Comfort: Loose or tight sleeves can be uncomfortable. Adjusting them ensures a comfortable fit for everyday wear.
- Proportions: A well-fitted sleeve can balance your body proportions and create a more polished appearance.
Quick Sleeve Fixes No Needle: Top No-Sew Methods
Here are some of the most effective and easy ways to tighten or shorten your sleeves without any sewing.
Method 1: Fabric Glue for a Clean Hem
Fabric glue is your best friend for no-sew hemming. It’s strong, flexible, and dries clear, creating a neat finish. This is a fantastic option for hemming sleeves DIY when you want a permanent or semi-permanent adjustment.
What You’ll Need:
- Fabric glue (look for one specifically designed for clothing)
- Iron (optional, but recommended for a crisp finish)
- Measuring tape or ruler
- Fabric scissors (if you need to trim excess fabric)
- Pins or clips
- Cardboard or a thin book to place inside the sleeve
Step-by-Step Guide:
- Measure and Mark: Try on the shirt and decide how much you want to shorten the sleeves. Use a measuring tape to mark the desired length. You can use chalk, a pencil, or pins to mark the line. Remember to add about 1/2 inch to 1 inch for the hem allowance.
- Prepare the Sleeve: Lay the shirt flat. Carefully fold the sleeve hem to the inside along your marked line. Ensure the fold is straight and even. If the original hem is very bulky, you might want to trim some of the excess fabric before folding, leaving your hem allowance.
- Apply Fabric Glue: Open the folded hem slightly. Apply a thin, even line of fabric glue along the raw edge of the fabric that will be hidden inside the fold. Don’t use too much, as it can seep through.
- Press and Hold: Carefully fold the hem back over the glue. Press the fabric firmly to ensure good contact. Use pins or clips to hold the hem in place while the glue dries. If you’re using an iron, set it to the appropriate heat setting for your fabric (usually a medium heat, no steam). Place a piece of cardboard inside the sleeve to prevent glue from transferring to the other side. Gently press over the folded hem for about 10-15 seconds.
- Allow to Dry: Let the fabric glue dry completely according to the manufacturer’s instructions. This might take several hours or overnight. Once dry, remove the pins or clips.
- Test the Strength: Gently tug on the hem to ensure it’s secure. You can reinforce it with a second application of glue if needed, after the first layer has dried.
This method is excellent for reducing sleeve length DIY and achieving a professional-looking finish for altering shirt sleeves without sewing.
Method 2: Fabric Tape for Temporary or Quick Adjustments
Fabric tape, also known as hem tape or fusible webbing (though fusible webbing often requires ironing), is a fantastic no-sew solution for temporary or quick adjustments. It’s like double-sided tape for fabric.
What You’ll Need:
- Fabric tape (available in different widths)
- Iron (for some types of fabric tape, like fusible webbing)
- Measuring tape or ruler
- Fabric scissors
- Pins or clips
- Cardboard or a thin book
Step-by-Step Guide (for non-fusible fabric tape):
- Measure and Mark: Determine the desired sleeve length and mark where you want the new hem to be. Add your hem allowance (usually 1/2 inch to 1 inch).
- Prepare the Sleeve: Lay the sleeve flat. Fold the sleeve hem to the inside along your marked line.
- Apply Fabric Tape: Cut a piece of fabric tape to the length of the sleeve opening. Peel off the backing from one side of the tape and stick it along the raw edge of the fabric that will be hidden inside the fold.
- Press and Hold: Carefully fold the hem back over the tape, ensuring it lies flat. Press firmly to activate the adhesive. You can use clips to hold it in place while the tape adheres.
- Test: This type of tape often adheres immediately or with minimal pressure. Give it a gentle tug to check its hold.
Step-by-Step Guide (for fusible fabric tape/webbing – requires ironing):
- Measure and Mark: As before, mark your desired sleeve length, including a hem allowance.
- Prepare the Sleeve: Lay the sleeve flat. Fold the sleeve hem to the inside along your marked line.
- Insert Fusible Webbing: Cut a strip of fusible webbing to the length of the sleeve opening. Place the webbing inside the folded hem, against the raw edge.
- Iron: Place a piece of cardboard inside the sleeve. Following the manufacturer’s instructions for your fusible webbing and fabric type, iron over the folded hem. Hold the iron in place for the recommended time (usually 10-15 seconds) to melt the adhesive and bond the fabric.
- Cool and Check: Allow the hem to cool completely before removing the pins or clips. Gently test the hold.
Fabric tape is a versatile tool for no sew clothing hacks and can be used for various clothing alteration sleeve tips. It’s particularly good for quick sleeve fixes no needle when you’re in a hurry.
Method 3: Safety Pins for a Quick and Temporary Fix
If you need a super-fast solution and don’t mind a slightly less polished look, safety pins are a great option. This is a temporary fix, perfect for getting you through an event or a day.
What You’ll Need:
- Small, sturdy safety pins
- Measuring tape or ruler (optional, for evenness)
Step-by-Step Guide:
- Try On and Pinch: Put on the shirt. Pinch the sleeve fabric at the bottom to gather the excess material and create the desired length.
- Secure with Pins: While holding the gathered fabric in place, discreetly insert safety pins from the inside of the sleeve, catching the folded fabric. Use several pins for a secure hold. Ensure the pins are facing inwards so they aren’t visible from the outside.
- Even It Out: If you want a more precise look, you can take the shirt off, lay it flat, and adjust the pins to ensure the gathered hem is even all around.
This is one of the simplest shirt sleeve mods no stitch and is ideal for easy sleeve tailoring no sewing when time is of the essence.
Method 4: Elastic Band for a Gathered Sleeve Effect
Want to shorten and add a slight gather or cuff to your sleeves? An elastic band is a great no-sew solution. This works well for T-shirts, blouses, and even some lighter jacket sleeves.
What You’ll Need:
- Elastic band (1/4 to 1/2 inch wide is usually good)
- Fabric glue or fabric tape
- Measuring tape or ruler
- Fabric scissors
- Pins or clips
- Cardboard or a thin book
Step-by-Step Guide:
- Measure and Cut Elastic: Try on the shirt. Determine how much you want to shorten the sleeve. Cut a piece of elastic that is the width of the sleeve opening where you want the gathered effect to sit (usually at the original hem or slightly above). You might want to make it slightly shorter than the opening to create a gentle gather.
- Prepare the Sleeve: Lay the shirt flat. Fold the sleeve hem to the inside, creating a channel for the elastic. The width of the channel should be just enough to fit your elastic band comfortably.
- Apply Glue/Tape to the Channel: Apply a thin line of fabric glue or use fabric tape along the raw edge of the fabric that will be folded inside the channel.
- Insert Elastic: Thread the elastic band through the channel you’ve created. You can use a safety pin attached to one end of the elastic to help guide it through.
- Secure Elastic Ends: Once the elastic is in place, overlap the ends by about 1/2 inch and secure them firmly with fabric glue. Hold until dry, or use clips. If using fabric tape, you can adhere the overlapped ends with another piece of tape.
- Seal the Channel: Fold the hem over the elastic and press firmly. Use fabric glue or tape along the folded edge to seal the channel, securing the elastic in place. You can also use pins to hold it while it dries. If using fabric glue for the final seal, ensure you press the hem down securely over the elastic.
- Iron (Optional): If using fabric glue, you can gently iron over the sealed hem (with cardboard inside the sleeve) to help set the glue for a stronger hold.
This method is excellent for DIY sleeve adjustment and can give your sleeves a stylish, cuffed look.
Method 5: Hemming Clips for Precise Folding
Hemming clips are designed to hold fabric edges together while you work, making folding and securing much easier. They are perfect for any of the above methods.
What You’ll Need:
- Hemming clips (various sizes are available)
- Fabric glue, fabric tape, or sewing machine (if you decide to sew later)
- Measuring tape or ruler
- Fabric scissors
Step-by-Step Guide:
- Measure and Mark: Decide on your desired sleeve length and mark it. Add your hem allowance.
- Prepare the Sleeve: Lay the shirt flat. Fold the sleeve hem to the inside along your marked line.
- Clip the Hem: Use hemming clips to hold the folded edge in place. Space them evenly along the sleeve opening. This ensures a clean, even fold, which is crucial for both fabric glue and tape.
- Apply Adhesive or Sew: Once clipped, you can proceed with applying fabric glue or tape along the raw edge. The clips keep the fabric perfectly aligned. If you ever decide to sew, the clips ensure a perfectly folded edge ready for stitching.
Hemming clips are a game-changer for achieving neat finishes in hemming sleeves DIY and are a must-have for various no sew clothing hacks.
Tips for Success in Sleeve Adjustments
- Choose the Right Method: Consider if you want a permanent or temporary fix. Fabric glue and fusible webbing are more permanent, while safety pins and some fabric tapes are temporary.
- Fabric Type Matters: Thicker fabrics might require stronger adhesives or more secure methods. Delicate fabrics might be best suited for fabric glue or careful use of fabric tape. Always test your chosen method on a scrap piece of fabric from an inconspicuous area if possible.
- Pressing is Key: For methods involving heat (fusible webbing) or for ensuring good adhesion with fabric glue, pressing with an iron can make a significant difference. Always use a pressing cloth or place cardboard inside the sleeve to protect the fabric and prevent glue transfer.
- Work on a Flat Surface: Lay your garment on a clean, flat surface to ensure your folds are straight and measurements are accurate.
- Inside Out is Your Friend: For most methods, working with the sleeve inside out makes it easier to fold, apply adhesive, and secure the hem without visible marks on the outside.
- Patience is a Virtue: Allow adhesives to dry completely before putting on the garment or washing it. Rushing the process can lead to the hem coming undone.
- Wash and Care: After your no-sew alterations, check the care label on your garment. Avoid harsh detergents or high heat in the dryer, especially if you’ve used fabric glue or tape, as high temperatures can sometimes weaken the adhesive.
Advanced No-Sew Sleeve Modifications
Beyond simply shortening or taking in sleeves, you can achieve other styles without sewing.
Slimming Baggy Sleeves
If your sleeves are too wide but the length is fine, you can create a slimmer silhouette using fabric glue or tape.
Method: Inside Fold and Glue/Tape
- Measure: Try on the shirt and pinch the excess fabric on the inside of the sleeve seam to achieve your desired width.
- Mark: Mark the desired fold line on the inside of the sleeve.
- Fold and Secure: Fold the excess fabric inward along your marked line. Use fabric glue or tape to secure this fold along the entire length of the sleeve seam. Ensure the fabric lies flat and the glue/tape is applied neatly to avoid bulk.
This is a great technique for DIY sleeve adjustment when the problem is width rather than length.
Creating a Cuffed Sleeve (No Sew)
You can mimic the look of a cuff using fabric glue or tape.
Method: Double Fold and Secure
- Shorten the Sleeve: First, shorten the sleeve to your desired length using fabric glue or tape as described earlier.
- Create a Cuff Fold: Decide how wide you want your “cuff” to be. Fold the bottom edge of the sleeve up by this amount.
- Apply Glue/Tape: Apply fabric glue or tape along the raw edge of the fabric hidden inside this cuff fold.
- Press and Seal: Press the cuff firmly into place. You can add another layer of glue or tape to the top edge of the cuff for extra security if needed.
This is a fantastic way to add style and achieve easy sleeve tailoring no sewing.
When to Consider Professional Alterations
While these no-sew methods are incredibly useful, there are times when professional tailoring might be a better option:
- Delicate Fabrics: Silks, satins, or very fine knits can be tricky to work with for no-sew techniques, and mistakes are more visible.
- Complex Designs: Garments with intricate details, embellishments, or structured shoulders might require professional expertise.
- Heavyweight Fabrics: Very thick materials like denim or heavy wool might not adhere well with fabric glue or tape, and a sewn hem will be more durable.
- Perfect Fit is Crucial: If you need a truly flawless, tailored fit for a special occasion or a high-end garment, a tailor can provide the best results.
Frequently Asked Questions (FAQ)
Q1: Will fabric glue wash out?
A1: Most fabric glues are designed to be permanent and machine washable and dryable once fully cured. However, always check the product label for specific instructions. Some fabric tapes are semi-permanent or temporary.
Q2: Can I use hot glue instead of fabric glue?
A2: It’s generally not recommended to use hot glue on clothing. Hot glue can be stiff, crack easily, and may even melt or damage certain fabrics. It’s also more prone to showing through the fabric. Always opt for a fabric-specific adhesive.
Q3: How do I make sure the hem is even?
A3: The best way to ensure an even hem is to wear the shirt and mark the desired length carefully. Using a measuring tape and chalk or pins is essential. For very precise results, a tailor’s chalk wheel or a clear ruler can help.
Q4: What if the fabric glue leaves a stiff line?
A4: This can happen if too much glue is used or if it’s not spread evenly. For future attempts, use a thinner layer of glue and try to spread it with a craft stick or the applicator tip of the glue. Some fabric glues are more flexible than others.
Q5: Can these methods be used on knit fabrics?
A5: Yes, most of these methods work well on knit fabrics. Fabric glue and tape are often flexible enough to move with the stretch of the knit. For elastic bands, ensure the elastic has good recovery so it doesn’t lose its stretch.
Q6: How long will a no-sew hem last?
A6: Properly applied fabric glue or fusible webbing can last for the lifetime of the garment, resisting multiple washes. Fabric tapes might have varying durability; some are designed for temporary holds, while others are more permanent. Safety pins are always temporary.
By mastering these no sew clothing hacks, you can easily update your wardrobe, fix ill-fitting sleeves, and achieve a more polished look without ever needing a needle and thread. These easy sleeve tailoring no sewing techniques empower you to be your own seamstress for minor clothing adjustments, making DIY sleeve adjustment a simple and satisfying skill.