
Image Source: i.ytimg.com
How To Thread Bobbin On Sewing Machine: Simple Steps
How do you thread the bobbin on a sewing machine? Threading a sewing machine bobbin involves winding thread onto a small spool that fits into the machine’s bobbin case, providing the lower thread for your stitches. This process is crucial for a functioning sewing machine, and mastering sewing machine bobbin winding is a fundamental skill for any sewer.
Getting the bobbin wound correctly is key to a smooth sewing experience. A properly threaded bobbin ensures consistent stitch formation and prevents skipped stitches or thread breakage. This guide will walk you through the entire process, from preparing your bobbin to installing it in your machine. We’ll cover everything you need to know for successful sewing machine bobbin loading guide.
Preparing for Bobbin Winding
Before you can wind thread onto your bobbin, a few preparatory steps ensure everything goes smoothly. This includes selecting the right bobbin, thread, and preparing the bobbin winder setup.
Choosing the Right Bobbin:
Not all bobbins are created equal. Your sewing machine manual will specify the type and size of bobbins it uses. Using the wrong bobbin can lead to poor stitch quality or even damage to your machine.
- Material: Bobbins are typically made of plastic or metal. Plastic bobbins are common in modern machines.
- Size and Shape: Bobbins come in various diameters and heights. Some are flat, while others have slightly rounded edges.
- Compatibility: Always use bobbins recommended by your sewing machine manufacturer.
Selecting Your Thread:
The thread you use on your bobbin should generally match the thread you’re using in the needle, especially for visible seams.
- Weight: Ensure the thread weight is appropriate for your fabric and needle.
- Material: Cotton, polyester, and silk are common thread materials. Polyester is a good all-purpose choice.
- Color: Match the bobbin thread to your upper thread or choose a neutral color like white or gray if the bobbin thread won’t be seen.
Setting Up the Bobbin Winder:
Each sewing machine has a dedicated bobbin winder. This mechanism engages when you prepare to wind a bobbin.
- Locate the Winder: The bobbin winder is usually a spindle or post on the top or side of your machine.
- Spool Pin: You’ll also need a spool pin to hold your spool of thread. Some machines have a secondary spool pin for bobbin winding.
- Tension Disc: The thread passes through a tension disc on the winder to ensure even tension as it winds.
Step-by-Step Bobbin Winding Process
Now, let’s get down to the actual sewing machine bobbin winding. Follow these steps carefully for a perfect bobbin every time.
1. Place the Bobbin on the Winder:
Slide the empty bobbin onto the bobbin winder spindle. Make sure it sits securely. Some machines have a small notch or groove on the spindle that helps lock the bobbin in place.
2. Thread the Bobbin Winder:
This is where the proper bobbin threading begins.
- Thread the Spool Pin: Place your spool of thread onto the designated spool pin. Some machines have a vertical spool pin for bobbin winding, while others use a horizontal one.
- Guide the Thread: Bring the thread from the spool. Pass it through any thread guides on the winder assembly.
- Through the Tension Disc: Crucially, the thread must pass through the bobbin winder’s tension disc(s). This is usually a pair of small metal plates that the thread goes between. This step is vital for bobbin tension sewing machine consistency.
- Tie to the Bobbin: Bring the thread end to the empty bobbin. You can secure it in a small hole on the bobbin or simply wrap it around the bobbin a few times. It’s often recommended to tie a small knot to the bobbin’s starting end, leaving a tail, or tuck the tail into the bobbin hole to prevent unraveling.
- Hold the Tail: Hold the thread tail firmly with your finger as you start the winding process.
3. Engage the Bobbin Winder:
Most sewing machines have a mechanism to switch between sewing and bobbin winding.
- Disengage the Needle: Often, you need to disengage the needle mechanism. This is usually done by pushing the bobbin winder spindle to one side. This action separates the handwheel from the main drive, so only the bobbin winder turns.
- Check Your Manual: Consult your sewing machine’s manual for specific instructions on how to engage the winder for your model.
4. Start Winding:
Gently press the foot pedal to start the machine.
- Initial Wind: As the machine starts, the thread will begin to wind onto the bobbin. Hold onto the thread tail for the first few rotations to ensure it stays in place.
- Even Winding: Try to guide the thread with your fingers to ensure it winds evenly across the bobbin. As the bobbin fills, the machine may automatically stop or slow down.
- Automatic Stop/Cut-off: Many machines have an automatic stop feature when the bobbin is full. Some even have a thread cutter.
- Cutting the Thread: Once the bobbin is full, or when you decide to stop winding, release the foot pedal. Cut the thread with your machine’s thread cutter or scissors. Remove the wound bobbin.
5. Trim the Tail:
After cutting the thread, make sure to trim any excess thread tail from the bobbin.
Loading the Bobbin into the Sewing Machine
Once your bobbin is wound, the next step is loading bobbin sewing machine. The method varies depending on whether your machine has a top-loading (drop-in) bobbin or a front-loading (removable bobbin case) system.
Top-Loading Bobbin System
This system is popular for its ease of use.
1. Locate the Bobbin Area: The bobbin case is integrated into the sewing machine bed, usually under a removable plate.
2. Place the Bobbin:
* Direction: Place the wound bobbin into the bobbin holder. The thread should unwind in the correct direction, usually counter-clockwise for most top-loading machines. Check your manual for the specific direction.
* Thread Path: The thread then passes through a small slot or guide in the bobbin case and up through the tension mechanism.
3. Pull the Thread:
Gently pull the thread so it sits in the guide. Leave a tail of about 4-6 inches.
4. Replace the Cover:
Put the removable plate back over the bobbin area.
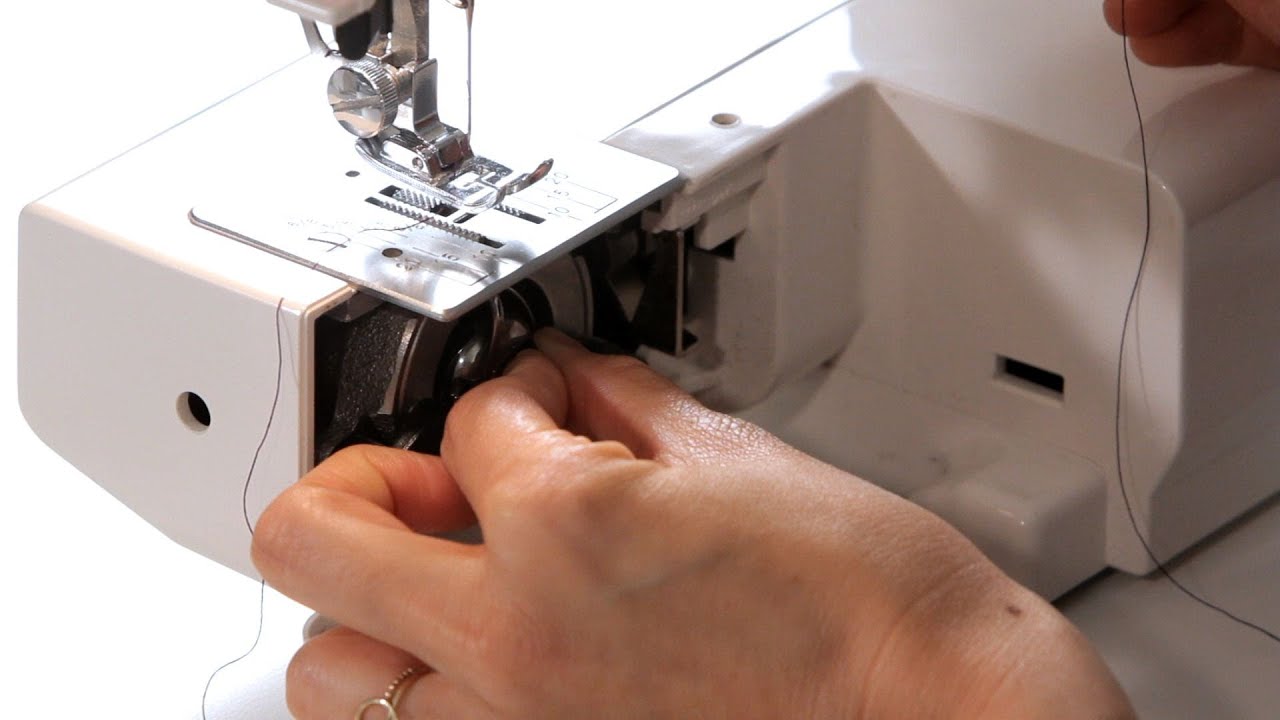
Front-Loading Bobbin Case System
This system involves a separate bobbin case that is inserted into a shuttle mechanism.
1. Remove the Bobbin Case:
If your machine has a removable bobbin case, it’s usually located at the front, accessed by opening a small cover. Gently pull out the empty bobbin case.
2. Place the Bobbin in the Case:
* Orientation: Place the wound bobbin into the bobbin case.
* Thread Direction: The thread should unwind in a specific direction (usually clockwise for front-loading systems).
* Thread the Case: Guide the thread through the small slot in the bobbin case. Then, pull it under a small spring or tension tab. This is where how to thread a bobbin case is critical. The thread should be held firmly but not too tightly.
3. Insert the Bobbin Case:
* Timing: Carefully insert the bobbin case back into the machine’s shuttle mechanism. The shape of the bobbin case and the shuttle will only allow it to be inserted in one correct way.
* Positioning: Ensure the bobbin case is properly seated. There’s usually a small hook or lever that catches the case.
4. Thread the Lower Thread:
After inserting the bobbin case, you’ll need to bring the lower thread up to the needle.
- Hold the Tail: Hold the thread tail from the needle.
- Turn the Handwheel: Slowly turn the handwheel towards you. This will pull the upper thread down through the needle eye and loop around the bobbin thread.
- Catch the Loop: As the needle comes back up, a loop of bobbin thread will appear. Use your fingers or a seam ripper to catch this loop and pull it up through the needle plate.
- Position Threads: Bring both thread tails (from the needle and the bobbin) to the back of the machine, letting them lie loosely under the presser foot. This is the final step in threading lower thread sewing machine.
Troubleshooting Common Bobbin Issues
Sometimes, despite your best efforts, you might encounter problems. Here’s a guide to bobbin troubleshooting sewing machine:
1. Bobbin Thread Not Feeding:
* Problem: The machine is sewing, but no bobbin thread is appearing.
* Cause: The bobbin may not be loaded correctly, or the thread is not properly seated in the bobbin case tension.
* Solution: Re-load the bobbin, ensuring the thread is threaded through all guides and the tension spring. Check that the bobbin is inserted in the correct direction.
2. Looping or Puckering on the Underside of Fabric:
* Problem: The bobbin thread is forming loops on the bottom of your fabric, causing puckering.
* Cause: This often indicates the upper thread tension is too high, or the bobbin thread tension is too low.
* Solution: Check the upper thread tension; try reducing it. Ensure the bobbin is wound evenly and loaded correctly. If the problem persists, your bobbin tension sewing machine might need adjustment, or there might be an issue with the upper thread path.
3. Thread Breaking:
* Problem: Thread is breaking frequently.
* Cause: This can be due to rough thread, a sharp edge on the needle plate or bobbin case, incorrect thread weight for the needle, or the bobbin being wound too loosely or too tightly.
* Solution: Use good quality thread. Check your needle for burrs or damage. Ensure your needle is the correct size for your fabric and thread. Try re-winding the bobbin to ensure even tension. If you are using a metal bobbin, ensure it’s not warped.
4. Uneven Stitches:
* Problem: Stitches are not consistent in size or appearance.
* Cause: This can be caused by an unevenly wound bobbin, incorrect bobbin tension, or issues with the upper thread tension.
* Solution: Re-wind the bobbin smoothly. Adjust the upper thread tension and check the bobbin thread path.
Advanced Tips for Bobbin Perfection
To achieve truly professional results, consider these advanced tips:
1. Bobbin Tension Adjustment:
While most machines have pre-set bobbin tension, some allow for minor adjustments to the bobbin case itself. This is usually a tiny screw on the bobbin case. Caution: Make very small adjustments, testing after each change. Over-tightening can cause thread breakage. If you’re unsure, it’s best to leave this to a professional.
2. Using Different Bobbin Threads:
* Specialty Threads: For decorative stitching or specific effects, you might use a thicker or thinner bobbin thread, or even metallic or monofilament thread. Be prepared to adjust upper thread tension accordingly.
* Color Matching: Always try to match bobbin thread color to your fabric if the underside of your stitching will be visible.
3. Winding Multiple Bobbins:
Keep a selection of pre-wound bobbins with different thread colors ready for quick project changes. This saves significant time.
Sewing Machine Bobbin Loading Guide Summary
Mastering sewing machine bobbin loading is a straightforward process once you break it down.
- Preparation: Choose the correct bobbin and thread.
- Winding: Guide the thread through the winder, tension discs, and onto the bobbin evenly. Hold the tail initially.
- Loading: Place the wound bobbin into the bobbin holder or case, ensuring the thread unwinds in the correct direction.
- Bringing Up Thread: Turn the handwheel to bring the bobbin thread up to the needle.
- Testing: Make a few test stitches on a scrap of fabric to check tension and stitch quality before starting your project.
By following these steps, you’ll ensure your sewing machine is always ready to create beautiful stitches. This guide to proper bobbin threading should equip you with the knowledge to handle bobbin troubleshooting sewing machine and achieve consistent results.
Frequently Asked Questions (FAQ)
Q1: Can I use any thread on my bobbin?
A1: It’s best to use thread that is compatible with your machine and fabric. While you can use different types, try to match the weight and material of your upper thread for the best stitch quality. Always refer to your sewing machine manual for recommendations.
Q2: Why is my bobbin thread looping on the bottom?
A2: This usually means your upper thread tension is too tight, or your bobbin thread tension is too loose. Try reducing the upper thread tension first. Ensure the bobbin is wound evenly and inserted correctly.
Q3: My sewing machine is making a strange noise when I sew. Could it be the bobbin?
A3: A strange noise can be caused by several things. If it’s a clicking or grinding sound originating from the bobbin area, it could be that the bobbin isn’t seated correctly, or there’s a piece of lint or debris in the bobbin case or shuttle hook. Stop sewing, clean the bobbin area, and re-insert the bobbin.
Q4: How do I know if I’m winding the bobbin correctly?
A4: A correctly wound bobbin will have thread wound evenly across its surface, with no loose spots or overlaps. It should feel firm but not so tight that the thread is straining. The thread should be smooth and consistent.
Q5: What happens if I use a bobbin that is too full or too empty?
A5: If a bobbin is overfilled, the thread can snag or break as it unwinds, leading to skipped stitches or thread breakage. If it’s too empty, you’ll run out of thread quickly and have to stop and change it frequently. Aim to fill the bobbin about 90% full.