
Cutting fabric right is key to sewing success. When you cut fabric for your sewing pattern, you make sure your finished project fits well and looks good. This guide walks you through each step, helping you get neat, accurate cuts every time. We will cover getting ready, laying out your pattern pieces, securing them, cutting carefully, and marking your fabric. Getting good at this step makes sewing much easier and more fun.
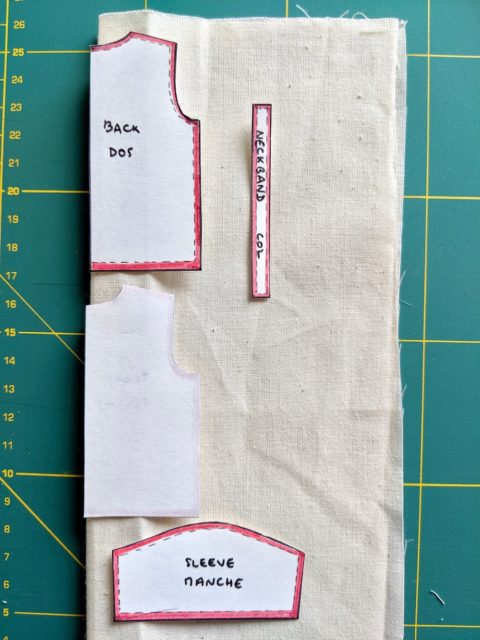
Image Source: camimade.com
The Importance of Accurate Fabric Cutting
Sewing starts with cutting. If your cuts are not right, your project can have problems. Pieces might not match up, or the finished item might be too big or too small. Accurate fabric cutting for sewing means following the pattern exactly. It helps everything fit together later. Think of it like building with blocks; if the first blocks are cut wrong, the whole building can be wobbly. Taking time to cut carefully saves you time and frustration later on.
Getting Ready to Cut
Before you even touch your scissors or rotary cutter, you need to get ready. This means finding the right space, making sure your fabric is ready, and gathering all your tools.
Setting Up Your Workspace
You need a large, flat surface. A dining table, a crafting table, or even the floor can work. Make sure the area is clean. Fabric picks up dirt easily. You also need good light so you can see the pattern lines clearly. Your space should be big enough to lay out all the fabric and pattern pieces flat without hanging over the edges.
Preparing Your Fabric
Most fabrics need to be washed and dried before you cut them. This is called pre-washing. Fabric often shrinks the first time it gets wet and dries. If you cut your fabric before pre-washing, your finished item might shrink and not fit. So, wash and dry your fabric the way you will wash and dry the finished item. After washing, press your fabric to get rid of wrinkles. A smooth fabric surface helps you lay the pattern flat and cut straight.
Gathering Your Fabric Cutting Tools
Having the right tools makes a big difference. Here are the main fabric cutting tools you will need:
- Scissors: Sharp fabric scissors are a must. Do not use these scissors for paper or other things, as it will dull them. Paper is harder on the blades than fabric. Keep them just for fabric.
- Rotary Cutter: A rotary cutter is like a pizza cutter but for fabric. It has a sharp, round blade. Using rotary cutter for sewing with a mat lets you cut through multiple layers of fabric at once. It gives very clean, straight cuts.
- Cutting Mat: If you use a rotary cutter, you need a self-healing cutting mat underneath. This protects your table and keeps your blade sharp. Mats come in different sizes. Get the largest one you can.
- Pattern Weights: These are heavy objects you place on top of your pattern pieces to hold them down on the fabric. Using pattern weights for cutting is helpful, especially with delicate or slippery fabrics. You can buy special weights or use anything heavy like cans, washers, or even big stones.
- Pins: Pins are used for pinning pattern to fabric. They hold the pattern pieces firmly in place. Choose sharp, fine pins that will not damage your fabric.
- Measuring Tape or Ruler: Useful for checking grainlines and measuring fabric.
- Fabric Marking Tools: You will need something to mark darts, notches, buttonholes, and other details from the pattern onto the fabric. Options include tailor’s chalk, fabric pens, or tracing wheels with tracing paper. We will talk more about transferring pattern markings later.
Here is a quick look at tools:
| Tool Type | Best Use | Notes |
|---|---|---|
| Fabric Scissors | Cutting large pieces, curves | Keep sharp, use only for fabric |
| Rotary Cutter | Straight lines, cutting multiple layers | Needs a cutting mat |
| Cutting Mat | Protects surface, used with rotary cutter | Self-healing is best |
| Pattern Weights | Holding pattern pieces down without pins | Good for slippery fabrics or cutting with mats |
| Pins | Pinning pattern to fabric securely | Use fine, sharp pins |
| Marking Tools | Transferring details like darts and notches | Choose based on fabric type |
Laying Out the Sewing Pattern
The next step is placing your pattern pieces on the fabric. This is called the sewing pattern layout. Your pattern guide sheet will show you how to do this. It often shows diagrams for different fabric widths and sizes. Following the layout diagram helps you fit all the pieces onto your fabric and use the fabric efficiently.
Reading the Pattern Guide Sheet
Your pattern envelope contains important information. The guide sheet inside shows how to place the pattern pieces. It will show you:
- Which pieces to cut.
- How many of each piece to cut.
- How to fold your fabric (usually in half, either lengthwise or crosswise).
- The layout diagrams showing where to place each piece.
Pay close attention to these diagrams. They are designed to save fabric and ensure pieces are cut correctly regarding the fabric’s grain.
Folding the Fabric
Most layout diagrams show the fabric folded in half. The way you fold it matters.
- Lengthwise Fold: The fabric is folded parallel to the selvage edges. The selvages are the finished edges along the length of the fabric. This is the most common fold.
- Crosswise Fold: The fabric is folded perpendicular (across) the selvage edges. The cut edges are brought together.
- Open/Single Layer: Sometimes pieces are cut on a single layer of fabric. This is often for asymmetrical pieces or large items.
Make sure your fold is straight and lies flat. Laying the fabric on your large table helps with this.
Aligning Pattern Grainline
This is one of the most critical steps: aligning pattern grainline. Every pattern piece has a line with arrows on it. This is the grainline. It tells you how to place the pattern piece on your fabric relative to the fabric’s grain. The grain refers to the threads that make up the fabric.
- Lengthwise Grain: Runs parallel to the selvage. This is the strong, stable grain with little stretch. Pattern grainlines are usually placed parallel to this grain.
- Crosswise Grain: Runs from selvage to selvage. It has a little more stretch than the lengthwise grain.
- Bias: Diagonal to the grainlines. The true bias (45 degrees) has the most stretch and drape.
To align the grainline:
- Find the grainline on your pattern piece.
- Find the lengthwise grain on your fabric (parallel to the selvage).
- Place the pattern piece on the fabric.
- Measure the distance from each end of the grainline arrow to the selvage edge (or the fold, if cutting on the fold).
- Adjust the pattern piece until the distance is the same at both ends of the grainline. This ensures the grainline is perfectly straight and parallel to the selvage/fold.
Doing this right is vital. If you do not align the grainline correctly, your fabric will hang and stretch strangely. Garments might twist or not fit right. Take your time on this step for accurate fabric cutting for sewing.
Securing the Pattern Pieces
Once your pattern pieces are laid out correctly, with grainlines aligned, you need to hold them in place. You have two main options: pins or pattern weights.
Pinning Pattern to Fabric
Pinning is a classic method. You use sharp pins to attach the pattern paper to the fabric.
- Start by pinning the corners of the pattern piece.
- Then, place pins along the edges.
- Space pins closer together on curves to keep the paper from shifting.
- Place pins within the pattern piece, too, especially for large pieces, to keep the center flat.
- Make sure your pins are inside the cutting lines, not on them, so your scissors or rotary cutter do not hit them.
- Keep the fabric and pattern flat as you pin. Do not let the fabric bunch up underneath.
Pinning is good for many fabrics. It holds the pattern securely even if you move the fabric slightly.
Using Pattern Weights for Cutting
Using pattern weights for cutting is an alternative to pins. Weights sit on top of the pattern pieces, holding them flat without poking holes.
- Lay your pattern pieces on the fabric, aligning grainlines.
- Place weights strategically on the pattern pieces. Put weights on the corners and along the edges, especially on points and curves.
- Add weights to the center of larger pieces.
- Ensure the entire pattern piece is held down flat.
Pattern weights are great for:
- Slippery fabrics where pins might snag or shift.
- Delicate fabrics that could be damaged by pins.
- When using a rotary cutter, as you do not have to worry about cutting over pins.
You might use a mix of pins and weights depending on the fabric and pattern piece.
The Cutting Process
Now comes the actual cutting! Whether you use scissors or a rotary cutter, the goal is to cut smoothly and accurately along the cutting lines shown on your pattern.
Using Fabric Shears (Scissors)
- Use your sharp fabric-only scissors.
- Place one hand flat on the pattern piece to hold it steady near where you are cutting.
- Open the scissors blades wide.
- Make long, smooth cuts, guiding the fabric into the blades.
- Try not to lift the fabric too much as you cut. Keep it as flat on the table as possible.
- Cut carefully around curves and corners.
Cutting with scissors gives you more control, especially on curves and corners. It is often preferred for delicate fabrics or intricate shapes.
Using Rotary Cutter for Sewing
Using rotary cutter for sewing is fast and gives very clean edges, especially on straight lines.
- Always use a cutting mat underneath your fabric and pattern.
- You will need a clear ruler or straight edge to guide the rotary cutter for straight lines. Place the ruler on the pattern line.
- Hold the rotary cutter upright and press down firmly.
- Roll the blade smoothly along the edge of the ruler or the pattern line.
- Keep your fingers away from the blade! Many rotary cutters have a safety lock or guard. Use it when you are not cutting.
- For curves, you can often guide the rotary cutter freehand, but it takes practice.
Rotary cutters are excellent for cutting multiple layers at once, which saves time. They are also great for cutting fabric strips for things like quilting.
Cutting Notches
Notches are little marks on the edge of pattern pieces. They help you match up pieces later when sewing. Patterns show notches as diamonds, triangles, or small lines.
- If using scissors: Cut small snips outward from the cutting line, about 1/4 inch deep. Or, you can cut tiny triangles away from the fabric edge. Do not snip into the seam allowance towards the stitching line, as this can weaken the seam.
- If using a rotary cutter: Some patterns include notch templates to use with the cutter. Or, you can make small snips with scissors after cutting the main piece.
Consistency in how you cut notches helps you match pieces correctly.
Cutting on the Fold
When a pattern piece says “Place on Fold,” you line up that edge of the pattern piece exactly on the fold of your fabric. Do not cut this edge. The fold itself forms the edge of the fabric piece. This gives you a mirrored piece when you unfold it, perfect for things like bodice fronts or skirt backs.
Handling Special Fabric Types
Some fabrics need extra care when cutting.
Cutting Knit Fabric Patterns
Knit fabrics stretch. This stretchiness can make them tricky to cut accurately. Cutting knit fabric patterns requires a gentle touch.
- Lay knit fabric flat in a single layer if possible, or fold it carefully. Avoid stretching it as you lay it out.
- Use pattern weights instead of pins to avoid distorting the fabric. If you must pin, use fine ballpoint pins designed for knits. Pin only within the seam allowance.
- A rotary cutter is often best for knits. It slices cleanly without shifting the fabric as scissors might.
- Support the fabric as you cut. Do not let pieces hang off the table.
- Cut slowly and deliberately.
Taking extra care with knit fabrics ensures the stretch is kept even and the pieces retain their shape before sewing.
Cutting Slippery Fabric Patterns
Slippery fabrics like silk, satin, or rayon can slide around easily, making accurate cutting hard. Cutting slippery fabric patterns needs patience and specific techniques.
- Use pattern weights. They hold the fabric down without disturbing it.
- Lay the fabric on a non-slip surface. A large piece of felt, an old sheet, or a cutting mat can help grip the fabric.
- Cut in a single layer if possible. This is slower but much more accurate for very slippery fabrics.
- Use very sharp scissors or a new rotary blade. Dull blades can snag or push the fabric.
- Consider laying the fabric between two layers of tissue paper or pattern paper. Pin or weight through all layers and cut. The paper stabilizes the slippery fabric.
- Cut slowly and keep the fabric as flat as possible.
Do not rush when cutting slippery fabrics. Small shifts can ruin a piece.
Transferring Pattern Markings
After cutting your fabric pieces, you need to transfer markings from the pattern paper onto the fabric. These markings tell you where to sew darts, place pockets, attach zippers, gather fabric, and more. Transferring pattern markings accurately is as important as accurate cutting.
Common markings to transfer include:
- Darts
- Pleats
- Pocket placement
- Button and buttonhole placement
- Gathering lines
- Fold lines
- Center front/back lines
Methods for transferring markings:
- Tailor’s Chalk: Chalk pencils or blocks. Easy to use, brushes away easily, but can smudge. Choose a color that shows on your fabric.
- Fabric Pens: Water-soluble or air-erasable pens. Make clear lines. Test on a scrap first to ensure it comes out cleanly.
- Tracing Wheel and Paper: Place special tracing paper (with chalk or ink) between the pattern piece and the fabric. Roll a tracing wheel over the lines you want to transfer. The wheel creates dots or lines on the fabric. Use a contrasting color paper. Test on a scrap.
- Tailor’s Tacks: Using needle and thread to make small loops of thread through the pattern and fabric layers at key points. This is good for delicate fabrics or when you need markings on both sides.
- Snips: For some markings, like the ends of darts or pocket placement, you can make tiny snips (1/8 inch) into the seam allowance, similar to cutting notches. Be careful not to snip too far.
Transfer markings while the pattern piece is still pinned or weighted to the fabric. This ensures the markings are in the correct spot relative to the pattern. Markings are usually placed on the wrong side of the fabric.
Tips for Accurate Fabric Cutting for Sewing
Making sure every cut is just right helps your sewing project turn out well. Here are extra tips for accurate fabric cutting for sewing:
- Keep tools sharp: Dull scissors or rotary blades can lead to jagged edges or distorted cuts. Sharpen or replace them regularly.
- Work on a firm, flat surface: Bumps or unevenness underneath the fabric can cause inaccurate cuts.
- Take your time: Rushing leads to mistakes. Cut slowly and carefully along the lines.
- Use the right tools for the job: Choose scissors or a rotary cutter based on the fabric type and shape you are cutting.
- Hold the fabric flat: Use your free hand, weights, or pins to keep the fabric smooth and still while cutting.
- Cut notches and markings carefully: Do this before removing the pattern pieces.
- Double-check grainlines: Always confirm your pattern pieces are aligned with the fabric grain before securing and cutting.
- Handle cut pieces gently: Especially with delicate or stretchy fabrics, avoid pulling or stretching the cut pieces. Stack them neatly until you are ready to sew.
Why Accurate Fabric Cutting Matters in Sewing
Getting the cutting step right is fundamental. It impacts every step that follows.
- Ensures proper fit: Pieces cut to the correct size and shape will fit together as the designer intended. This leads to garments that fit your body well.
- Aids in construction: When notches and markings are accurate and pieces are cut precisely, they match up easily during assembly. This makes sewing faster and less frustrating.
- Improves drape and hang: Cutting on the correct grainline ensures the fabric behaves as it should. Garments will hang nicely and have the desired drape.
- Saves fabric: Following the pattern layout helps you cut all pieces efficiently from the required fabric amount.
- Professional finish: Accurate cutting contributes to clean seams and a well-made final product.
Think of cutting as the blueprint stage. If the blueprint is wrong, the building will have problems. If your fabric is cut wrong, your sewing project will have problems. Investing time and care in this early step pays off greatly in the end result.
Troubleshooting Common Cutting Problems
Even with care, issues can arise. Here are a few common problems and how to fix or avoid them:
- Fabric Shifted During Cutting: Make sure you are using enough pins or weights. Cut with the fabric flat on the table, not hanging off. Use a cutting mat and rotary cutter for straighter lines and less shift.
- Edges are Jagged: Your scissors or rotary blade might be dull. Sharpen or replace them. Do not lift the fabric as you cut.
- Pattern Pieces Don’t Match Up: Check if you cut on the correct grainline. Did the fabric stretch while cutting? Were notches cut correctly? Re-cut the pieces if the mistake is major.
- Fabric is Snagging: Your pins might be too thick or not sharp enough for the fabric. Your scissors/blade might be dull. Or the fabric might be very delicate; consider using tissue paper backing or cutting in a single layer.
- Cannot Fit All Pieces on Fabric: Double-check the pattern layout diagram. Are you using the correct fabric width shown on the pattern? Did you pre-wash and press the fabric? Sometimes minor pattern piece Tetris is needed, but always respect the grainline.
Practice makes perfect. The more you cut fabric, the better you will become at handling different types and getting accurate cuts.
Reviewing Pattern Cutting Knowledge
Getting good at cutting fabric for sewing patterns involves several key steps:
- Prepare Your Space and Fabric: Ensure a clean, flat surface and pre-wash/press your fabric.
- Gather Your Tools: Have sharp scissors, possibly a rotary cutter and mat, pins, pattern weights, and marking tools ready (fabric cutting tools).
- Study the Layout: Look at your pattern guide sheet for the correct sewing pattern layout.
- Fold Fabric Correctly: Fold your fabric as directed (lengthwise, crosswise, or single layer).
- Place Pattern Pieces: Lay pieces out according to the diagram.
- Align Grainlines: This is crucial! Measure from the grainline to the selvage or fold (aligning pattern grainline).
- Secure Pattern: Use pins (pinning pattern to fabric) or pattern weights (pattern weights for cutting) to hold the pattern still.
- Cut Carefully: Use sharp tools and cut smoothly along the lines (using rotary cutter for sewing, accurate fabric cutting for sewing). Pay attention to notches.
- Cut Special Fabrics with Care: Use specific techniques for cutting knit fabric patterns and cutting slippery fabric patterns.
- Transfer Markings: Mark darts, notches, etc., onto your fabric (transferring pattern markings).
By following these steps with care, you set yourself up for a successful sewing project. Accurate cutting is the foundation of good sewing.
Frequently Asked Questions (FAQ)
Q: Can I use paper scissors to cut fabric?
A: No, you should not use paper scissors to cut fabric. Paper dulls fabric scissors very quickly. Fabric scissors are sharper and designed specifically for cutting fabric smoothly. Using paper scissors on fabric will result in jagged cuts and make cutting harder.
Q: What are pattern weights, and why use them?
A: Pattern weights are heavy objects used to hold pattern pieces flat against the fabric instead of using pins. They are useful for preventing delicate or slippery fabrics from snagging or shifting. Using pattern weights for cutting also makes it easier to use a rotary cutter, as you don’t have to cut around pins.
Q: How do I know which way the fabric grain goes?
A: The lengthwise grain runs parallel to the selvage, which are the finished edges of the fabric that do not fray. The crosswise grain runs perpendicular to the selvage, from one selvage edge to the other. The pattern grainline must be placed parallel to the lengthwise grain (or sometimes the crosswise grain, if directed by the pattern).
Q: Is it better to use scissors or a rotary cutter?
A: Both have pros and cons. Scissors offer more control for curves and detailed shapes. A rotary cutter, used with a mat and ruler, is faster for straight lines and can cut multiple layers cleanly (using rotary cutter for sewing). Many sewers use both depending on the specific cutting task and fabric type.
Q: Why is transferring pattern markings important?
A: Pattern markings show you key construction details like where to sew darts, place pockets, or align seams. Transferring pattern markings accurately ensures you assemble the garment correctly, leading to a better fit and finish. Without markings, you would have to guess or constantly refer back to the pattern, increasing the chance of errors.
Q: My fabric is very slippery. How can I cut it accurately?
A: Cutting slippery fabric patterns is challenging. Use plenty of pattern weights. Lay the fabric on a non-slip surface. Consider cutting in a single layer. You can also try sandwiching the fabric between layers of tissue paper or pattern paper before pinning/weighting and cutting. Use very sharp tools. Go slowly and keep the fabric flat.