
Do you want to add fun shapes and designs to your fabric projects? Applique embroidery is a great way to do it! What is applique embroidery? It is a sewing method where you attach pieces of fabric onto a larger background fabric. You can use it to make pictures, letters, or patterns. Can I do applique by hand? Yes, you can sew applique pieces by hand. Can I do applique by machine? Absolutely, you can also use a sewing machine for applique. This guide will show you how to do applique embroidery, step by step, for both hand and machine methods. You will learn how to prepare your fabric, attach your shapes, and finish your work.
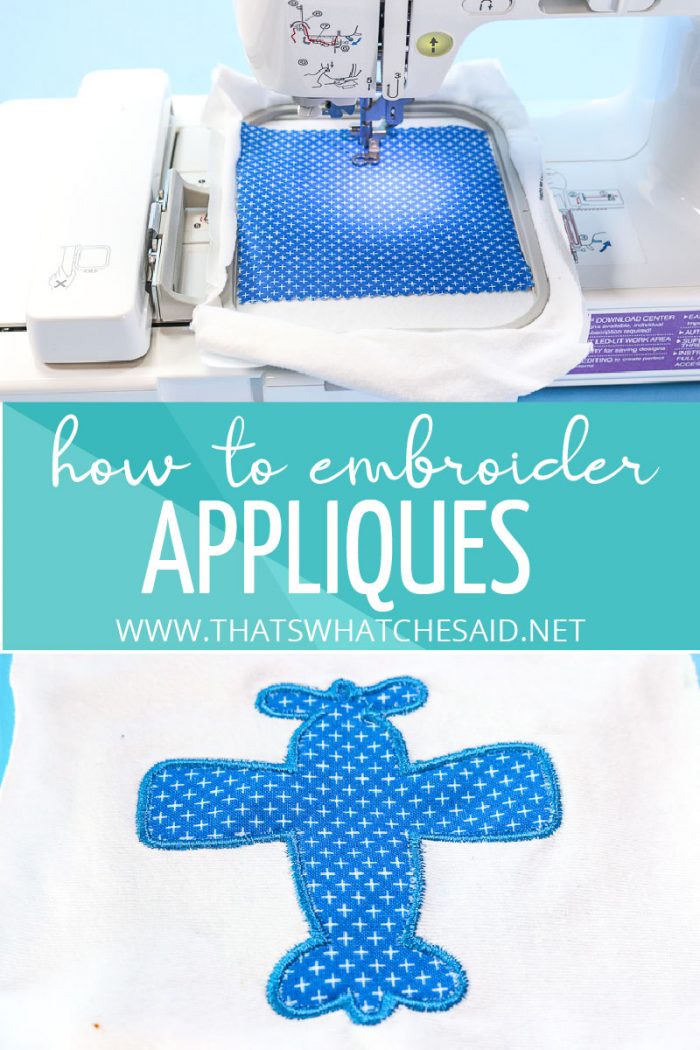
Image Source: www.thatswhatchesaid.net
What is Applique?
Applique is like painting with fabric. Instead of paint, you use pieces of cloth. You cut shapes from one fabric and sew them onto another fabric. This adds color, texture, and design to things like quilts, clothes, bags, or wall hangings. It is a very old craft used worldwide. You can make simple shapes or complex pictures.
What You Need to Start
Before you begin, gather your tools and materials. Having everything ready makes the process smooth and easy.
Basic Supplies
- Background Fabric: This is the main fabric your shapes will go on. Choose a fabric that is stable and not too stretchy. Cotton is a good choice.
- Applique Fabrics: These are the fabrics you will cut your shapes from. You can use different colors and patterns. Make sure they are suitable for sewing and match your background fabric.
- Thread: You will need thread to sew the pieces down. Match the thread color to your applique fabric so it blends in, or use a contrasting color for effect.
- Needles: If you are sewing by hand, you need hand sewing needles. For machine sewing, use sewing machine needles that fit your fabric type.
- Scissors: Sharp fabric scissors are a must for cutting fabric cleanly. Small, sharp scissors are helpful for cutting detailed shapes.
- Pins: Pins hold your fabric pieces in place before you sew.
- Iron and Ironing Board: You will use these to press your fabric and sometimes to use fusible web.
- Fabric Marker or Pencil: For tracing patterns onto fabric. Use one that disappears or washes out.
Optional but Helpful Supplies
- Applique Patterns and Templates: These are drawings or shapes you use to cut your fabric pieces accurately. You can buy them, find them online, or draw your own. Templates are often made from paper, cardboard, or plastic.
- Fusible Web for Applique: This is a special material with glue on both sides. You iron it onto the back of your applique fabric. It helps stick the shape onto the background fabric before you sew. It is very helpful for machine applique.
- Applique Stabilizer: This material goes under the background fabric, especially for machine applique. It stops the fabric from puckering or stretching while you sew. There are different types of stabilizer, like tear-away, cut-away, or wash-away.
- Tweezers: Useful for placing small pieces or pulling out small threads.
Deciphering Applique Methods
There are two main ways to do applique: by hand and by machine. Each method has its own look and feel.
Hand Applique
This method gives a classic, often delicate look. You sew the fabric shapes onto the background using small, hidden stitches. The edge of the fabric shape is usually turned under slightly.
Machine Applique
This method is often faster and can create bold effects. You use a sewing machine to stitch around the edges of the fabric shapes. You can use different machine applique techniques and stitches.
Getting Applique Shapes Ready
Before you sew, you need to prepare your fabric shapes. This involves choosing or making a pattern and cutting your fabric.
Finding or Making Applique Shapes
You can get shapes in several ways:
* Use ready-made applique patterns and templates.
* Trace shapes from pictures in books or online.
* Draw your own designs directly onto paper.
To make a reusable template, trace your pattern onto a piece of cardboard or thick plastic. Cut it out carefully.
How to Cut Applique Fabric
Cutting is important for good results.
1. Place your pattern or template on your applique fabric.
2. Trace around the shape onto the wrong side (the back) of the fabric. Use a fabric marker that will disappear.
3. For turned edge applique method: Add extra fabric around your traced line. This extra fabric is for turning under. The amount you add depends on how easily the fabric turns, usually about 1/8 to 1/4 inch (3-6 mm).
4. For raw edge applique tutorial: Cut exactly on the traced line. You do not add extra fabric for turning under. The edges will be left raw (uncut and un-turned).
Using Fusible Web for Applique
Fusible web for applique is a great tool, especially for machine applique. It makes shapes stick in place while you sew and can prevent fraying on raw edges.
How to use fusible web:
1. Place the rough side of the fusible web (it feels bumpy) onto the wrong side of your applique fabric.
2. Follow the product instructions. Usually, you iron it for a few seconds to stick it to the fabric.
3. Let it cool.
4. Trace your pattern onto the paper backing of the fusible web. Remember, if your design is not symmetrical (like letters), you need to trace it in reverse (mirror image).
5. Carefully how to cut applique fabric through the fabric and the fusible web along the traced line.
6. Peel off the paper backing. Your fabric shape now has a sticky side.
7. Place the fabric shape onto your background fabric, sticky side down.
8. Iron it in place. The heat activates the glue, sticking the shape firmly to the background.
Now your shapes are ready to be sewn down, either by hand or machine.
Doing Hand Applique, Step by Step
Hand applique takes time and practice, but it gives a lovely, soft look. It often uses the turned edge applique method.
Step 1: Prepare Your Fabric
Wash, dry, and iron your background fabric. Make sure it is flat and smooth.
Step 2: Position the Shapes
Place your prepared applique shapes onto the background fabric. Arrange them according to your design. If you used fusible web for applique, iron them down now. If not, pin them carefully in place.
Step 3: Prepare the Edge (Turned Edge Method)
For turned edge applique method, you need to turn the raw edge of your applique shape under. As you sew, you will turn under a small amount of the fabric edge (the extra you left when cutting). You can press the edge under slightly with a mini-iron before sewing, or simply tuck it under with your needle as you go.
Step 4: Start Sewing
Thread your needle with thread that matches your applique fabric. Make a small knot at the end of your thread.
Come up from the back of the background fabric, right on the edge of where your applique shape will sit (or is sitting, if pinned/fused). Hide the knot between the layers.
Step 5: Use Hand Applique Stitches
The most common stitch for hand applique is the blind stitch or slip stitch. This stitch is nearly invisible from the front.
- Blind Stitch (Slip Stitch):
- Bring your needle up through the background fabric very close to the folded edge of the applique shape.
- Take a tiny stitch (maybe 1/16 inch or 1-2 mm) just within the folded edge of the applique shape. Make sure the needle goes through the fold but does not come out the front of the applique piece.
- Bring the needle back down through the background fabric, right where you came up the first time, or just a tiny bit forward.
- Move forward a small distance (about 1/4 inch or 6 mm) under the background fabric.
- Come up again through the background fabric right next to the folded edge of the applique shape.
- Repeat the tiny stitch into the folded edge of the applique shape.
This stitch catches the folded edge of the applique piece and pulls it down flat onto the background. From the front, you only see small stitches on the background fabric or very tiny dots right at the edge.
Other hand applique stitches include:
- Whip Stitch: This stitch is visible. Bring the needle up from the back, near the edge of the applique. Loop the thread over the edge and take the needle down through both layers just past the edge. Repeat, making small, angled stitches over the edge.
- Buttonhole Stitch (Blanket Stitch): This decorative stitch makes a loop around the edge. It is also visible and neatens the raw edge. Bring the needle up near the edge. Make a loop with the thread. Insert the needle back down into the fabric and come up through the loop you made. Pull tight to create a small knot on the edge.
Step 6: Sew Around the Shape
Continue sewing with your chosen stitch around the entire edge of the applique shape. Keep your stitches small and even. Turn corners carefully, making sure the fabric edge is folded neatly.
Step 7: Finish Sewing
When you get back to where you started, take a few tiny stitches in place to secure the thread. Bury the thread end by running your needle through the layers of the background fabric for about an inch, then snip the thread.
Repeat for all your applique shapes.
Doing Machine Applique, Step by Step
Machine applique is faster and very popular. It uses a sewing machine to sew around the fabric shapes. You can use the raw edge applique tutorial method or secure a turned edge.
Step 1: Prepare Your Fabric
Wash, dry, and iron your background fabric. Place applique stabilizer under your background fabric. This is very important for machine applique. The stabilizer helps keep the fabric from stretching and puckering as the machine sews many stitches close together. Pin or baste (loosely stitch) the stabilizer in place, or use spray adhesive designed for fabric.
Step 2: Position the Shapes
Place your applique shapes onto the background fabric. If you used fusible web for applique, iron them down now according to the fusible web instructions. This holds them firmly in place for sewing. If you did not use fusible web, pin the shapes securely, using plenty of pins.
Step 3: Set Up Your Sewing Machine
This is key for successful machine applique techniques.
- Sewing machine settings for applique:
- Needle: Use a sharp needle. A universal needle works for many fabrics, but a new one is best. Size 70/10 or 80/12 is common.
- Thread: Use good quality thread. Cotton or polyester thread works well. You might use a slightly finer thread than usual.
- Stitch Type: You can use several stitches. Common ones are zigzag, satin stitch for applique, or a straight stitch.
- Stitch Length and Width: This depends on the stitch you choose and the look you want.
- Zigzag: Set the stitch width to cover the edge of the applique shape. Set the stitch length very short (close to zero) so the stitches are very close together, creating a solid line of thread. This is sometimes called a close zigzag.
- Satin Stitch: This is a very dense zigzag stitch. Your machine might have a specific satin stitch setting. You want the stitches so close they touch each other, forming a smooth, shiny band of thread over the raw edge.
- Straight Stitch: Use a standard stitch length. This is good for raw edge applique tutorial.
- Tension: Check your thread tension. You don’t want loops on the top or bottom. Sew a test piece on scraps of your fabrics with the stabilizer underneath.
Step 4: Start Sewing
Lower your presser foot. For machine applique, especially with dense stitches, using a specialized foot like an open toe applique foot or a clear view foot helps you see exactly where you are stitching.
Start sewing slowly around the edge of your applique shape.
Step 5: Choose Your Machine Stitch Technique
Here are common machine applique techniques:
- Satin Stitch for Applique: This creates a thick, smooth border.
- Place the needle so it goes just off the edge of the applique shape on one swing and just inside the edge on the other swing. This covers the raw edge completely and prevents fraying.
- Sew slowly, guiding the fabric carefully. When you reach a curve or corner, you may need to stop with the needle down in the fabric, lift the presser foot, pivot the fabric slightly, lower the foot, and continue sewing.
- Close Zigzag: Similar to satin stitch but maybe slightly less dense. Adjust width and length to cover the raw edge well.
- Straight Stitch (Raw Edge Applique Tutorial): For this method, you leave the fabric edge raw.
- Cut your shapes precisely on the line.
- Iron shapes in place with fusible web for applique.
- Use a straight stitch very close to the edge (about 1/8 inch or 3 mm). You can sew around the edge once or twice. The raw edge will soften and fray slightly over time, which is part of the look. This is the simplest raw edge applique tutorial.
- Triple Straight Stitch (Applique): Some machines have a stitch that sews each straight stitch three times. This gives a slightly bolder look than a single straight stitch for raw edge applique.
- Buttonhole/Blanket Stitch (Machine): Many machines have decorative stitches, including a machine version of the buttonhole or blanket stitch. This can be used to sew around the turned edge of a hand applique piece or directly over a raw edge for a decorative finish.
Step 6: Sew Around the Shape
Continue sewing around the entire edge of the applique shape with your chosen stitch. Take your time, especially on curves and points. Stop and pivot the fabric as needed.
Step 7: Finish Sewing
When you get back to where you started, sew a few stitches over your starting point to secure the thread. Trim your threads close to the fabric.
Repeat for all your applique shapes.
Step 8: Remove Stabilizer
Once all your machine applique is finished, remove the applique stabilizer from the back. How you remove it depends on the type of stabilizer:
* Tear-away: Gently tear it away from the stitching.
* Cut-away: Carefully cut it away from the stitching, leaving a small margin.
* Wash-away: Wash it out according to the product instructions.
Bringing It All Together: Finishing Steps
After sewing your applique shapes down, you are almost done.
Pressing
Press your applique work from the back. Use a pressing cloth if needed, especially with fusible web or synthetic fabrics. Pressing helps to smooth out the fabric and make the applique lie flat.
Trimming Threads
Check both the front and back of your work and carefully trim any stray threads.
Adding Details (Optional)
You can add more details with embroidery stitches, fabric paint, or other embellishments.
Simple Tips for Great Applique
- Practice: If you are new, try applique on scrap fabric first.
- Sharp Tools: Use sharp scissors and needles.
- Pressing is Key: Press your fabric and applique often.
- Test Stitches: Always test your machine stitches on scraps before sewing on your project. Check sewing machine settings for applique like width, length, and tension.
- Use Stabilizer: Do not skip the applique stabilizer for machine work.
- Cut Carefully: How you how to cut applique fabric affects the final look. Precision is important, especially for turned edges or raw edges.
- Go Slow: Slow down when sewing curves and points, especially with machine applique.
- Hide Knots: When sewing by hand, hide your thread knots.
Trying Out Applique Projects
Start with simple projects to build your skills.
* Make a simple shape (like a heart or star) on a fabric square for practice.
* Applique initials onto a tote bag or pillow cover.
* Add simple fabric circles or squares to a tea towel.
* Try a small quilt block with one or two applique shapes.
As you get more comfortable with hand applique stitches or machine applique techniques like the satin stitch for applique or the raw edge applique tutorial, you can try more complex designs.
Tables for Quick Info
Here is a simple comparison table for the main methods:
| Feature | Hand Applique | Machine Applique |
|---|---|---|
| Speed | Slower | Faster |
| Look | Classic, soft, subtle | Can be bold or subtle, often more defined |
| Edge Finish | Usually turned under (turned edge applique method) | Can be raw (raw edge applique tutorial) or finished (zigzag, satin stitch for applique) |
| Stitches Used | hand applique stitches (blind stitch, whip stitch) | machine applique techniques (zigzag, satin, straight) |
| Stabilizer | Not usually needed | Often needed (applique stabilizer) |
| Fusible Web | Optional, helpful for placement | Often used (fusible web for applique), helps with placement and raw edges |
Here are some common stitches used:
| Stitch Type | Method | Look | Used For | Notes |
|---|---|---|---|---|
| Blind Stitch (Slip Stitch) | Hand | Nearly invisible | Securing turned edge applique method | Hides stitches in the fold. |
| Whip Stitch | Hand | Visible, over the edge | Simple edge finish for hand applique | Can be decorative. |
| Buttonhole Stitch (Hand/Machine) | Both | Visible, loops around edge | Decorative edge, securing raw or turned edges | Can be done by hand or machine. |
| Straight Stitch | Machine | Simple line near the edge | raw edge applique tutorial | Allows edge to fray slightly. |
| Zigzag Stitch | Machine | Over the edge | Securing raw edges, decorative edge finish | Width and length can be adjusted. |
| Satin Stitch for Applique | Machine | Thick, smooth band of thread | Covering raw edges completely | Very dense zigzag, requires good tension. |
Frequently Asked Questions about Applique
Q: What kind of fabric works best for applique?
A: Tightly woven fabrics like quilting cotton are usually best, especially when starting out. They do not fray too much and are easy to work with. Avoid very slippery or very stretchy fabrics until you have more practice.
Q: How do I make sure my applique shapes stay in place while I sew?
A: For hand applique without fusible web, use plenty of pins. For machine applique, fusible web for applique is excellent for holding shapes securely. You can also use fabric glue sticks or temporary spray adhesive, but test them on scraps first.
Q: Do I need an applique stabilizer for hand applique?
A: Generally, no. Hand stitches are not as dense or forceful as machine stitches, so they do not cause the fabric to stretch or pucker as much. Stabilizer is mainly for machine applique.
Q: Can I wash items with applique?
A: Yes, but be gentle. Use cold water and a gentle cycle or wash by hand. Air drying is best. If you used the raw edge applique tutorial method, the edges will fray a bit more with washing, which is expected.
Q: My machine applique stitches are looping on the back. What is wrong?
A: This is usually a thread tension problem. Check your sewing machine settings for applique. The top tension might be too loose or the bobbin tension might be off. Test on scraps and adjust the tension dial until stitches look good on both sides. Make sure your machine is threaded correctly and the presser foot is down. Using applique stabilizer also helps prevent this.
Q: What’s the difference between raw edge applique tutorial and turned edge applique method?
A: Turned edge applique method hides the raw edge of the applique fabric by turning it under before sewing. This gives a very clean finish. Raw edge applique tutorial means you do not turn the edge under; you sew directly over the raw cut edge using stitches like a straight stitch, zigzag, or satin stitch. The raw edge look is more casual and can fray slightly.
Q: How do I handle small or detailed applique shapes?
A: Small shapes can be tricky. Using fusible web for applique is highly recommended as it stabilizes the small piece and holds it firmly. For detailed shapes, take your time when cutting (how to cut applique fabric). When sewing by machine, sew slowly and pivot the fabric often. For hand sewing, make very small stitches.
Conclusion
Applique embroidery is a rewarding craft. It lets you add beautiful designs to almost any fabric item. Whether you choose the classic look of hand applique stitches with the turned edge applique method or the speed and variety of machine applique techniques like the satin stitch for applique or the raw edge applique tutorial, the process is about layering fabric and securing it neatly. With the right tools like fusible web for applique, applique stabilizer, and careful work following applique patterns and templates and knowing how to cut applique fabric and your sewing machine settings for applique, you can create wonderful pieces. Start with a simple design, take your time, and enjoy watching your fabric art come to life. Happy stitching!