
Can you thread a sewing machine needle with a needle threader? Yes, you absolutely can! Needle threaders are a fantastic tool that makes sewing machine threading much easier, especially for those with vision challenges or when working with fine threads. This comprehensive guide will walk you through using both common types of needle threaders found on sewing machines today. Whether you have an automatic needle threader built into your machine or a separate manual needle threader, by the end of this sewing tutorial, you’ll be expertly threading a sewing machine needle with confidence.
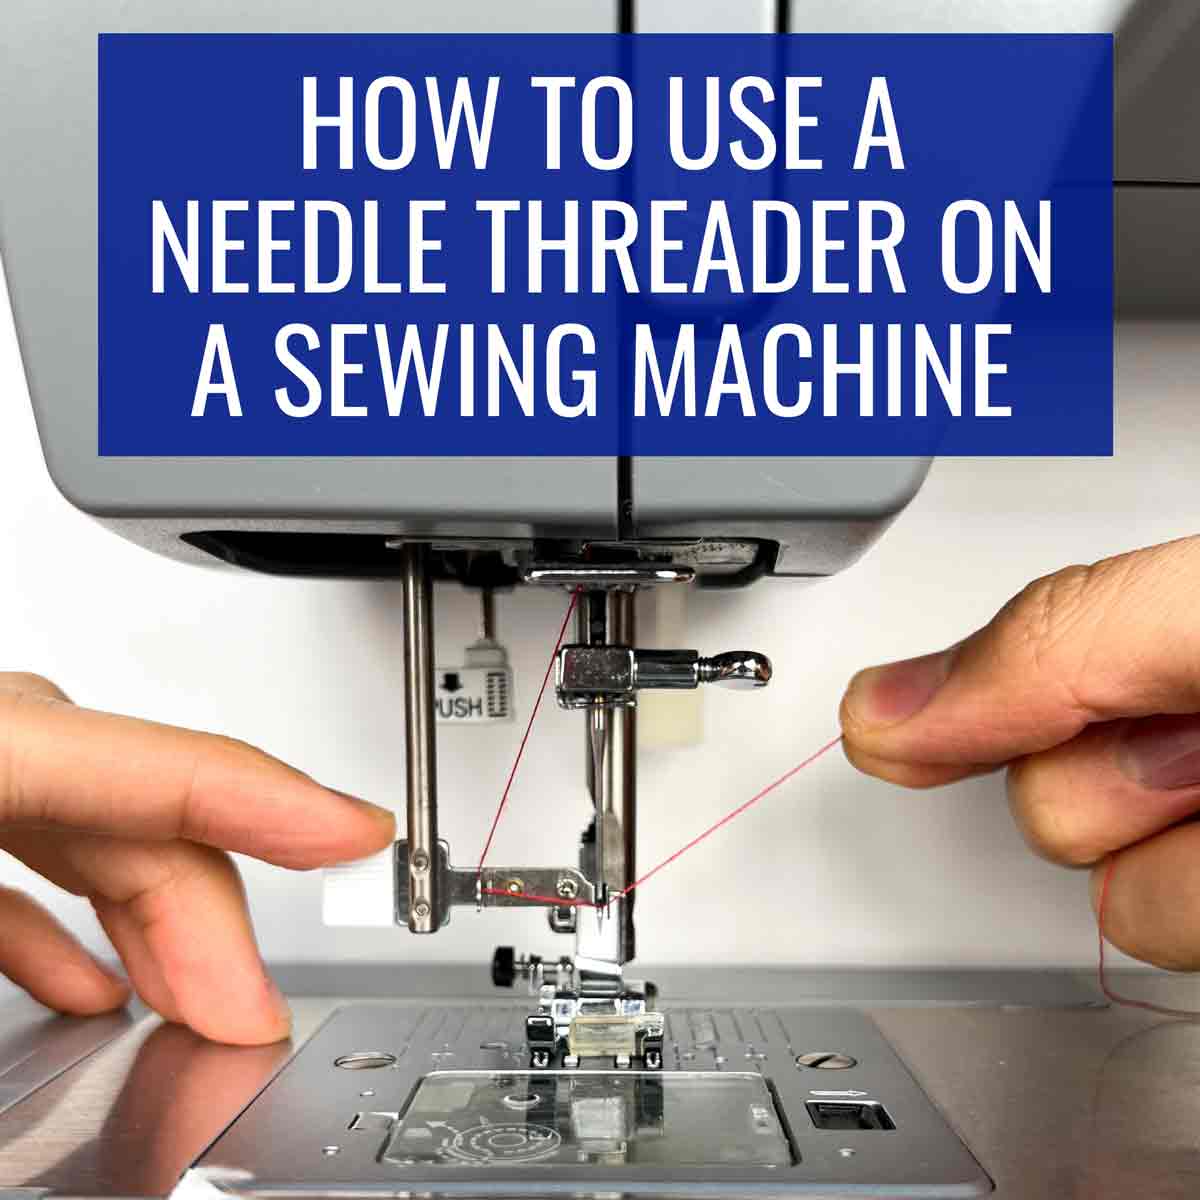
Image Source: mindymakes.com
What is a Needle Threader and Why Use One?
A needle threader is a small device designed to help you guide the sewing thread through the eye of the sewing machine needle. It acts as an extension of your fingers, allowing for a more precise and less frustrating threading experience.
There are two primary types of needle threaders:
- Automatic Needle Threader: These are built directly into many modern sewing machines. They typically have a small hook or wire that swings out to grab the thread and push it through the needle’s eye.
- Manual Needle Threader: These are separate, small tools, often made of plastic or wire, that you hold and manipulate yourself. They are common with older machines or as an accessory for any sewing machine.
Using a needle threader can save you time and prevent eye strain. It’s a fundamental skill for anyone learning beginner sewing, and mastering it will make your sewing projects much more enjoyable.
Getting Ready: Essential Sewing Machine Parts and Preparation
Before we dive into the threading process, let’s briefly touch upon some key sewing machine parts you’ll need to identify and ensure are in the correct position. Proper setup is crucial for successful sewing machine threading.
- Needle: This is the sharp point that pierces the fabric. Ensure it’s correctly inserted and fully tightened in the needle clamp. Refer to our section on needle insertion if you’re unsure.
- Presser Foot: This holds the fabric down against the feed dogs. It must be in the down position for the automatic needle threader to engage.
- Thread Spool Pin: Where you place your spool of thread.
- Thread Guides: Various posts and loops that guide the thread from the spool to the needle.
- Tension Discs: These control how tightly the thread is pulled.
Preparation Checklist:
- Select the Right Needle: Ensure your needle is appropriate for your fabric and thread type.
- Wind a Bobbin: Make sure you have a filled bobbin.
- Place Thread Spool: Put your thread spool on the spool pin.
- Check the Presser Foot: Ensure the presser foot is in the down position. This is vital for most automatic needle threaders.
- Turn Off the Machine: For safety, it’s always a good idea to turn off your sewing machine before making adjustments like needle threading, though many automatic threaders can be operated while the machine is on.
Using the Automatic Needle Threader: A Step-by-Step Guide
Many modern sewing machines feature an automatic needle threader, a wonderful convenience that significantly simplifies threading a sewing machine needle. While the exact mechanism can vary slightly between brands and models, the core principles remain the same.
Step 1: Prepare Your Machine and Thread
- Place the Spool of Thread: Put your thread spool on the spool pin, ensuring the thread unwinds in the correct direction as indicated in your machine’s manual.
- Follow the Thread Path: Guide the thread from the spool through all the designated thread guides on your machine. This usually involves going up, then down through the tension discs, and finally towards the needle. Refer to your sewing machine’s manual for the precise thread path for your specific model.
- Bring the Thread to the Needle: After passing through the final thread guide, bring the thread loosely to the front of the needle.
- Lift the Presser Foot: Ensure the presser foot is down. This is a critical step for the automatic threader to work. If the presser foot is up, the threader mechanism will not engage or will not work correctly.
Step 2: Engage the Automatic Needle Threader Mechanism
This is where the magic happens! There are generally two common types of automatic needle threaders:
Type 1: The Lever-Style Automatic Needle Threader
This is the most common type. You’ll typically see a small plastic or metal lever near the needle clamp.
- Position the Thread: Hold the end of the thread loosely in your left hand, near the needle.
- Push the Lever: Gently push the needle threader lever towards the needle. As you push it, a small hook or wire will swing out from behind the needle.
- Catch the Thread: The hook is designed to catch the thread you’re holding. Try to position the thread so it rests in the groove of the hook as it swings out. Some machines have a small notch or guide to help you place the thread.
- Pull the Lever Back: Once the hook has snagged the thread, pull the lever back towards its original position. As you pull it back, the hook will draw a small loop of thread through the eye of the needle.
- Remove the Loop: A small loop of thread will now be dangling through the needle’s eye. Carefully pull this loop off the hook.
- Pull the Thread Through: Gently pull the thread tail through the loop, so the thread passes through the needle’s eye. You should now have a doubled thread, with one tail coming out the front and the other from the back of the needle.
Type 2: The Push-Button or Dial-Style Automatic Needle Threader
Some machines have a more integrated system where a button or dial activates the threader.
- Position the Thread: As with the lever style, hold the thread loosely in your left hand near the needle.
- Activate the Threader: Locate the button or dial designated for the needle threader. Press or turn it according to your machine’s instructions. This will cause a small arm with a hook to extend, catch the thread, and push it through the needle’s eye.
- Catch the Thread: Ensure the thread you are holding is positioned correctly to be caught by the mechanism.
- Retrieve the Thread: Once the thread is pushed through, a loop will be created. Carefully pull this loop off the mechanism.
- Pull the Thread Through: Gently pull the thread tail through the loop, ensuring the thread passes cleanly through the needle’s eye.
Important Notes for Automatic Threaders:
- Presser Foot Down: I cannot stress this enough – the presser foot must be down for most automatic needle threaders to function.
- Needle Position: Ensure your needle is in the highest position. You can achieve this by turning the handwheel towards you or by using the machine’s needle up/down function.
- Thread Tension: While the machine is on, the thread should be lightly held, not pulled taut.
- Manual Assistance: If the threader struggles, a tiny bit of help from your fingers can sometimes be all it needs. Gently guiding the thread into the hook can make a difference.
Using the Manual Needle Threader: A Step-by-Step Guide
If your machine doesn’t have an automatic needle threader, or if you prefer using a separate tool, a manual needle threader is your best friend. These are simple yet effective tools for threading a sewing machine needle.
Step 1: Prepare Your Machine and Thread
- Place the Spool of Thread: Put your thread spool on the spool pin.
- Follow the Thread Path: Guide the thread through all the necessary thread guides on your sewing machine, from the spool down to the needle area. Consult your sewing machine manual if you’re unsure of the exact path.
- Cut a Clean Thread End: Using sharp scissors, snip the very end of the thread to create a clean, sharp point. This makes it much easier to pass through the threader. Avoid frayed ends.
- Position the Needle: Ensure your sewing machine needle is in its highest position. Turn the handwheel towards you until the needle is at its peak.
Step 2: Position the Manual Needle Threader
Manual needle threaders typically have two main parts: a wire loop and a handle.
- Insert the Wire Loop: Take the wire loop part of the threader and slide it through the eye of the sewing machine needle from front to back. The loop should emerge from the back of the needle.
- Guide the Thread into the Loop: Take the clean, cut end of your sewing thread and carefully guide it into the wire loop. You want the thread to lie flat within the loop.
Step 3: Pull the Thread Through
- Grasp the Threader Handle: Hold the handle of the manual needle threader firmly.
- Pull Back Slowly: Gently and steadily pull the threader handle away from the needle, backwards. As you pull, the wire loop will drag the thread with it, pulling a small loop of thread through the needle’s eye.
- Remove the Loop: Once a loop of thread has passed through the needle’s eye, carefully slide this loop off the wire.
- Pull Thread Through: Gently pull the thread tail completely through the loop, so the thread is now properly threaded through the needle. You should have one tail of thread coming out the front and one from the back.
Types of Manual Needle Threaders:
Manual needle threaders come in various forms, but they all work on the same principle.
| Type of Manual Threader | Description | How It Works |
|---|---|---|
| Wire Loop Threader | A simple wire loop attached to a plastic or metal handle. The most common type. | Wire loop passes through the needle eye. Thread is laid into the loop. Pulling the handle drags the thread through. |
| Swinging Arm Threader | Features a thin metal arm that swings out and has a tiny hook. Often combined with a thread cutter. | Arm swings through the needle eye. Thread is placed on the hook. Arm retracts, pulling the thread. |
| Built-in Threader Card | Some sewing kits include a thin plastic card with various slot sizes and a hook for threading needles. | Thread is passed through a slot or onto a hook on the card, then the card is maneuvered to pull the thread through the needle eye. |
Tips for Using Manual Threaders:
- Good Lighting: Always ensure you have good lighting so you can see what you’re doing.
- Clean Thread End: A clean, sharp thread end is essential. Trim any frayed bits.
- Patience: If it doesn’t work the first time, don’t get discouraged. Adjust the thread’s position in the loop and try again.
- Threader Condition: Make sure your manual threader isn’t bent or damaged, as this can affect its performance.
Troubleshooting Common Needle Threading Issues
Even with the best tools, you might run into a few snags. Here are some common problems and their solutions for sewing machine threading.
Problem: The Automatic Needle Threader Isn’t Engaging or Working
- Cause: Presser foot is up.
- Solution: Lower the presser foot. This is the most common reason for automatic threader failure.
- Cause: Needle is not in the highest position.
- Solution: Turn the handwheel towards you until the needle is at its highest point, or use the machine’s needle up/down function.
- Cause: Thread is not positioned correctly.
- Solution: Make sure you’re holding the thread loosely near the needle. Guide it gently into the hook mechanism.
- Cause: Thread is too thick or too thin for the mechanism.
- Solution: Try a different type or weight of thread. Some machines have specific recommendations.
- Cause: Needle is bent or damaged.
- Solution: Check your needle. If it’s bent, replace it. A damaged needle can interfere with the threader.
- Cause: Lint or debris in the threader mechanism.
- Solution: Consult your sewing machine manual for instructions on cleaning the needle threader area.
Problem: The Manual Needle Threader Isn’t Pulling the Thread Through
- Cause: Thread end is frayed.
- Solution: Trim the thread end with sharp scissors to create a clean point.
- Cause: Thread is not properly seated in the wire loop or hook.
- Solution: Remove the thread from the loop/hook, reposition it, and try pulling the threader back again. Ensure the thread lies flat.
- Cause: The needle threader itself is bent or damaged.
- Solution: Inspect your manual threader. If it’s damaged, it might be time to replace it.
- Cause: The needle eye is obstructed.
- Solution: Ensure the needle eye is clean. A tiny bit of compressed air or a fine needle might help dislodge any lint.
- Cause: The thread is too thick for the needle eye or threader.
- Solution: Use a finer thread or a needle with a larger eye.
Problem: The Thread Keeps Breaking While Threading
- Cause: Needle is inserted incorrectly or is bent.
- Solution: Ensure the needle is inserted correctly with the flat side to the back (for most machines) and is not bent. If it’s bent, replace it. This falls under needle insertion best practices.
- Cause: Thread is snagged somewhere along the thread path.
- Solution: Rerun the thread through all the guides, making sure it’s not caught on anything.
- Cause: Thread is old or damaged.
- Solution: Try a new spool of thread. Old thread can become brittle and break easily.
- Cause: Machine tension is set too high.
- Solution: While threading the machine, ensure the thread is not being pulled too tightly. The tension discs should be slightly separated.
Keeping Your Sewing Machine in Good Shape: Basic Maintenance
Proper sewing machine maintenance plays a role in how smoothly your sewing machine threading will go. A clean and well-oiled machine is less likely to cause issues.
- Regular Cleaning: Dust and lint can build up inside your machine, especially around the bobbin area and needle plate. Clean these areas regularly with a small brush.
- Oiling: Follow your sewing machine manual’s instructions for oiling. Proper lubrication reduces friction and wear.
- Needle Changes: Change your needle frequently. A dull or damaged needle can cause skipped stitches and thread breakage, making threading more difficult.
- Professional Servicing: Periodically, have your sewing machine professionally serviced to ensure all parts are working correctly.
Advanced Threading Techniques and Tips
Once you’ve mastered the basics of using a needle threader, here are some extra sewing tips to make your beginner sewing experience even smoother.
Using a Contrasting Thread for Visibility
When practicing or if you’re having trouble seeing the thread, use a brightly colored thread that contrasts sharply with your sewing machine and your fabric. This makes it easier to track the thread as you guide it.
Threading Without a Threader (The Old-Fashioned Way)
While needle threaders are excellent, it’s good to know how to thread without one in a pinch.
- Cut a Clean End: Snip the thread cleanly.
- Moisten the Thread: You can lightly moisten the very end of the thread with water or saliva. This helps it hold together and makes it stiffer, like a tiny needle.
- Pinch and Push: Pinch the stiffened thread end between your thumb and forefinger. Hold the needle steady and try to guide the thread end directly into the eye. It takes a steady hand and good eyesight!
Threading the Upper and Lower Thread Together
After successfully threading the needle, you need to bring the bobbin thread (lower thread) up to meet the needle thread (upper thread).
- Hold the Upper Thread: With the presser foot still up, hold the upper thread tail loosely in your left hand.
- Turn the Handwheel: Slowly turn the handwheel towards you by one full rotation.
- Catch the Bobbin Thread: As the needle goes down and then comes back up, it will catch the bobbin thread. A loop of bobbin thread will appear near the needle eye.
- Pull the Bobbin Thread Up: Use your fingers or a seam ripper to gently pull this loop of bobbin thread up through the needle plate opening.
- Position Threads: Pull both the upper and lower thread tails about 4-6 inches towards the back of the machine, under the presser foot.
Quick Reference Table: Needle Threader Usage
| Feature | Automatic Needle Threader | Manual Needle Threader |
|---|---|---|
| Mechanism | Built into the machine. | Separate tool. |
| Activation | Lever, button, or dial. | Hand manipulation. |
| Presser Foot | Must be in the down position. | No specific presser foot requirement for threading itself. |
| Needle Position | Must be in the highest position. | Must be in the highest position. |
| Thread End | Can be slightly frayed, but cleaner is better. | Must be clean and not frayed. |
| Ease of Use | Very easy, especially for those with dexterity issues. | Easy, but requires more manual coordination. |
| Troubleshooting | Presser foot, needle position, thread guide. | Thread end, threader condition, thread fit. |
Frequently Asked Questions (FAQ) about Needle Threaders
Q1: Why does my automatic needle threader not work?
A1: The most common reasons are the presser foot being up, the needle not being in its highest position, or the thread not being held correctly. Always check these first.
Q2: Can I use a needle threader with any sewing machine?
A2: Automatic needle threaders are found on many modern machines. Manual needle threaders can be used with almost any sewing machine, regardless of its age.
Q3: What if my thread is too thick for the needle eye even with a threader?
A3: You might need to change your needle to one with a larger eye or use a thinner thread. Always ensure your needle is appropriate for your fabric and thread.
Q4: How do I know which way to thread my sewing machine?
A4: Your sewing machine manual will have diagrams showing the exact thread path for your specific model. It’s essential to follow this path correctly.
Q5: My manual needle threader broke, what should I do?
A5: You can easily purchase replacement manual needle threaders at most fabric or sewing stores, or online. They are quite inexpensive.
Mastering the use of a needle threader is a foundational skill that enhances the beginner sewing experience significantly. Whether you use an automatic needle threader or a manual needle threader, patience and practice will make sewing machine threading a breeze. Happy sewing!