
What is a sewing knot, and how do you tie one? A sewing knot is a small loop or twist of thread used to secure the end of your stitches, preventing them from unraveling. Tying a good sewing knot is a fundamental skill for any sewer, whether you’re hand-sewing a button or tackling a complex garment. This guide will show you the quickest and easiest methods for creating a secure sewing knot, ensuring your stitches stay put.
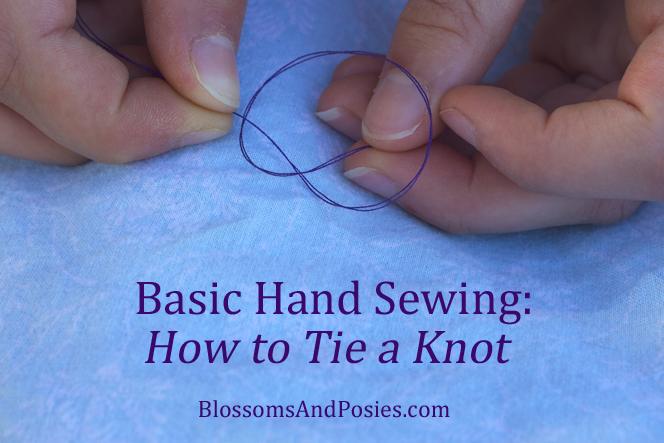
Image Source: blossomsandposies.com
The Essential Skill of Sewing Knot Tying
Learning to tie off a sewing knot effectively is more than just finishing a seam; it’s about ensuring the longevity and neatness of your sewing projects. A poorly tied knot can come undone, leaving you with loose threads and a potentially damaged item. Conversely, a strong sewing knot creates a clean, secure finish that holds up to wear and washing. We’ll explore several simple sewing knot techniques suitable for various fabrics and thread types, focusing on creating a strong sewing knot with minimal fuss.
Why Secure Sewing Knots Matter
Imagine spending hours on a beautiful hand-sewn piece, only for the threads to start fraying after a few uses because the final knot wasn’t secure. That’s a sewer’s nightmare! A secure sewing knot acts as an anchor for your stitches. It’s the final step in many hand sewing knots and is crucial for finishing sewing projects cleanly. Whether you are creating a simple sewing stitch knot to join two pieces of fabric or a more intricate decorative stitch, the knot is your foundation.
Basic Sewing Knot: The Foundation for Success
When we talk about basic sewing knots, we’re referring to the simplest yet most effective ways to secure your thread. These are the building blocks for all your sewing endeavors. Let’s dive into the most common and reliable methods.
The Single Overhand Knot: A Classic
This is arguably the most basic sewing knot, but its simplicity doesn’t diminish its effectiveness when done correctly. It’s a fundamental knot for sewing thread.
Steps for Tying a Single Overhand Knot:
- Thread Your Needle: Pass your sewing thread through the eye of your needle.
- Create a Loop: Leave a tail of thread at the end (about 4-6 inches, depending on your project).
- Wrap Around Your Finger: Take the tail end of the thread and wrap it around the tip of your index finger once, creating a loop.
- Pass Through the Loop: Bring the tail end of the thread towards the loop you just made.
- Grasp and Pull: Use your thumb and index finger to grasp the thread that is going into the loop. Pull the needle and the working end of the thread away from your finger. As you pull, the thread will slide off your finger and cinch down, forming a knot.
- Tighten: Gently pull the knot down towards the fabric, ensuring it sits snugly against the last stitch.
Tips for a Better Overhand Knot:
- Thread Thickness: Thicker threads might need a slightly larger loop or an extra wrap.
- Fabric Type: For delicate fabrics, a very small, tight knot is best to avoid damage.
The Double Overhand Knot: Extra Security
If you need a bit more security, the double overhand knot provides it. This is essentially tying an overhand knot twice. It’s a slightly more robust knot for sewing thread.
Steps for Tying a Double Overhand Knot:
- Thread Your Needle: As before, thread your needle with your sewing thread.
- Leave a Tail: Leave a tail of about 4-6 inches.
- First Wrap: Wrap the tail end of the thread around your index finger once.
- Second Wrap: Without letting go, wrap the tail end around your finger a second time, right next to the first loop. You’ll now have two loops.
- Pass Through Both Loops: Bring the tail end of the thread towards the two loops.
- Grasp and Pull: Use your thumb and index finger to grasp the thread going into the loops. Pull the needle and the working end of the thread away from your finger. The thread will slide off your finger and cinch down, forming a double knot.
- Tighten: Gently pull the knot down to your fabric.
This knot is excellent for situations where you need a stronger hold, such as when sewing on buttons or reinforcing stress points.
Advanced but Simple: The Weaver’s Knot (Modified for Sewing)
While the traditional weaver’s knot is for joining two pieces of yarn or thread, a modified version can be used as a very secure sewing knot. It’s a bit more involved but results in a knot that’s less likely to slip. This is a great knot for sewing thread when you need maximum security.
Steps for a Modified Weaver’s Knot:
- Thread Your Needle: Thread your needle and leave a tail.
- Create a Loop: Make a loop with the tail end of the thread, but cross the tail under the working thread.
- Form a Second Loop: Take the tail end and bring it around the working thread again, this time passing it through the first loop you created. It will look like you’re making a “figure 8” with the thread.
- Grasp and Pull: Pinch both ends of the thread and the loop.
- Tighten: Pull both the needle end and the tail end simultaneously. The knot will slide and tighten. You might need to adjust your grip to ensure it cinches down correctly.
This knot creates a very compact and secure sewing stitch knot.
Tying Off Stitches: The Art of the Final Knot
Tying off stitches is the crucial step at the end of a sewing line. It prevents your work from coming undone. Here’s how to master tying off stitches for a clean finish.
The Backstitch Knot: A Reliable Method
This is a favorite for many hand sewers because it’s discreet and strong. It’s a common technique for finishing sewing projects.
Steps for the Backstitch Knot:
- End of Your Stitching: When you’ve completed your row of stitches and are at the end, make a small stitch back over the last one you made.
- Loop the Thread: Before pulling the needle completely through the fabric, create a small loop with the thread.
- Pass Through the Loop: Pass your needle through this loop.
- Pull Snugly: Gently pull the needle and thread. This creates a small, secure knot right next to your last stitch.
- Repeat (Optional): For extra security, you can repeat this process one more time, making another small stitch back over the first knot and passing the needle through the new loop.
- Trim: Once the knot is secure, trim the excess thread close to the knot, being careful not to cut the fabric or the knot itself.
This is a highly effective method for a strong sewing knot.
The Loop Knot: Simple and Effective
This is very similar to the backstitch knot but often involves creating the loop before the final pass of the needle.
Steps for the Loop Knot:
- Final Stitch: Bring your needle up through the fabric at the end of your seam.
- Create a Loop: Before pulling the needle all the way through, loop the thread around the needle tip once or twice.
- Pass Through Fabric: Push the needle back down through the fabric very close to where you just came up, passing through the loop you created.
- Tighten: Pull the thread taut, forming a knot against the fabric.
- Trim: Trim the excess thread.
This simple sewing knot is quick and creates a neat finish.
Hand Sewing Knots: Best Practices for Different Threads
When it comes to hand sewing knots, the type of thread and fabric you’re using can influence which knot works best.
Thread Types and Knot Security
- Cotton Thread: Generally strong and takes knots well. Both overhand and backstitch knots work beautifully.
- Polyester Thread: Also strong and durable. Can sometimes be a bit slippery, so a double overhand knot or a more intricate knot like the modified weaver’s knot can be beneficial.
- Silk Thread: Smooth and strong. Knots can sometimes slip, so double knots are often recommended.
- Embroidery Floss: Usually made of multiple strands. For a clean knot, you might want to use fewer strands or even a single strand for small knots. A well-tied single overhand knot is usually sufficient.
Fabric Considerations
- Woven Fabrics (Cotton, Linen): These generally hold knots well. Be mindful of the needle size to avoid making the holes too large.
- Knit Fabrics (Jersey): These can be stretchy and sometimes snag. A small, tight knot is preferred. The backstitch knot is excellent here as it’s less likely to pull through the knit structure.
- Delicate Fabrics (Silk, Chiffon): Use a fine needle and a single thread. A very small, tight single overhand knot or a backstitch knot done carefully is essential to avoid damaging the fabric. A knot that’s too bulky can create a noticeable bump.
- Heavy Fabrics (Denim, Canvas): You can often get away with slightly larger or double knots. A strong sewing knot is important here to withstand the fabric’s weight and potential stress.
Creating a Strong Sewing Knot Every Time
What makes a sewing knot strong? It’s about how tightly the thread cinches down and how many “gripping points” it has against itself.
Key Elements of a Strong Sewing Knot:
- Snugness: The knot needs to be pulled tight against the fabric.
- Multiple Wraps/Loops: More loops or wraps often mean more friction, which makes the knot harder to slip.
- Thread Friction: The texture of the thread itself plays a role. Rougher threads grip better.
- Placement: A knot placed directly over a previous stitch provides more support.
The “No-Knot” Method: An Alternative Approach
While not technically tying a knot, some sewers prefer methods that create a secure end without a traditional knot. This is often done with a few tiny stitches that are almost invisible.
Steps for a “No-Knot” Finish:
- Sew a Few Tiny Stitches: At the end of your sewing line, make 2-3 very small stitches, going back and forth over the same spot on the wrong side of the fabric.
- Catch a Few Threads: Ensure these stitches catch a few threads of the fabric itself, not just going through the fabric.
- Trim: Trim the thread close to the fabric.
This method results in a very neat finish, especially on delicate or visible areas. It’s a type of finishing sewing knot in practice.
Visualizing Your Knot Tying
Sometimes, seeing is believing. Let’s break down the visual aspect of creating these knots.
Table: Knot Tying Visual Breakdown
| Knot Type | Key Visual Step | Resulting Knot Appearance | Best For |
|---|---|---|---|
| Single Overhand | Wrapping thread around finger and pulling through the loop | A single, small bulge in the thread. | General sewing, quick fixes, securing thread ends. |
| Double Overhand | Wrapping thread around finger twice and pulling through. | A slightly larger, more prominent bulge. | Stronger hold needed, buttons, areas with tension. |
| Backstitch Knot | Making a small stitch back and looping the needle through | A tiny, almost invisible knot pressed flat against fabric. | Discreet finishes, neat seams, knit fabrics. |
| Loop Knot | Looping needle before final pass through fabric. | Similar to backstitch, a small, secure bump. | Quick and discreet finishing, similar uses to backstitch knot. |
Common Pitfalls in Sewing Knot Tying
Even experienced sewers can run into issues. Here are common problems and how to avoid them.
Issues and Solutions:
- Knot Slipping:
- Cause: Thread is too slippery, knot not tight enough, wrong knot for the thread.
- Solution: Use a double overhand knot or the modified weaver’s knot. Ensure the knot is pulled snugly against the fabric. Try a different thread type if possible.
- Knot Too Big/Bulky:
- Cause: Using too much thread, tying a double knot when not necessary, fabric is too thin.
- Solution: Use a single thread. Practice tying smaller knots. For delicate fabrics, use the backstitch knot or the “no-knot” method.
- Thread Breaking During Tying:
- Cause: Thread is weak or old, pulling too hard on a tight knot.
- Solution: Use fresh, good-quality thread. Don’t yank the thread; pull steadily. If the thread is consistently breaking, consider a stronger type.
- Knot Pulling Through Fabric:
- Cause: Fabric is too thin or has a loose weave, knot is too small for the needle hole.
- Solution: Use a finer needle. Make a slightly larger knot, or use the backstitch knot that spreads the tension. For very delicate fabrics, consider the “no-knot” method.
Practice Makes Perfect
Like any skill, mastering sewing knot tying takes practice. Don’t be discouraged if your first few knots aren’t perfect.
- Start with Scrap Fabric: Grab a piece of scrap fabric and practice tying knots at the end of your sewing lines.
- Try Different Threads: Experiment with different types and thicknesses of thread to see how they behave.
- Focus on Consistency: Aim for the same knot quality each time.
Conclusion: The Power of a Well-Tied Knot
Learning how to tie off a sewing knot is a foundational skill that elevates the quality and durability of your sewing projects. From the simple yet effective single overhand knot to the discreet backstitch knot, each method has its place. By understanding the nuances of sewing knot tying and practicing these techniques, you can ensure every stitch is secure and every finish is neat. A strong sewing knot isn’t just about holding things together; it’s about pride in your craftsmanship and the lasting beauty of your creations. Mastering these basic sewing knots will serve you well in all your sewing adventures, from simple repairs to complex garments.
Frequently Asked Questions (FAQ)
Q1: What is the easiest knot to tie for sewing?
A: The single overhand knot is generally considered the easiest and quickest knot to tie for sewing.
Q2: How many times should I knot my thread?
A: For most general sewing, one knot is sufficient. If you need extra security, especially on thicker fabrics or for items that will undergo a lot of stress (like buttonholes or stress points), a double overhand knot is recommended.
Q3: Can I sew without tying a knot at all?
A: Yes, some methods, often called “no-knot” finishes, involve making a few tiny stitches back and forth on the wrong side of the fabric to secure the thread end discreetly. This is a good option for very fine fabrics where knots might show.
Q4: What’s the best knot for embroidery floss?
A: For embroidery floss, especially if you’re using multiple strands, a single overhand knot is usually best. If the floss is particularly slippery or you want extra security, a double overhand knot can be used. Ensure the knot isn’t too large, as floss can be bulky.
Q5: How do I prevent my knot from pulling through thin fabric?
A: To prevent your knot from pulling through thin fabric, use a finer needle and a single strand of thread. Alternatively, try the backstitch knot, which distributes the tension over a small area, or the “no-knot” method. Ensure the knot is snug but not so tight that it tears the fabric.