
Can you tailor a dress yourself? Absolutely! With a few basic tools and some patience, you can easily learn how to tailor a dress to fit you perfectly. This guide will walk you through the essential dress alteration techniques, from simple hemming to more complex adjustments, making your sewing a dress projects a success.
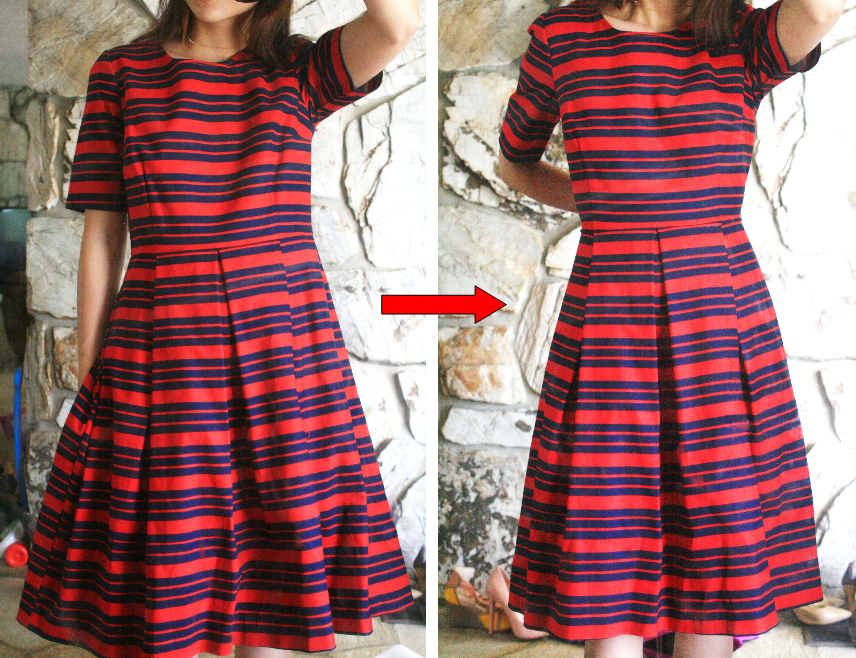
Image Source: 1.bp.blogspot.com
Why Tailor Your Dresses?
Tailoring a dress isn’t just about fixing a poor fit; it’s about transforming a garment into something uniquely yours. A dress that fits impeccably makes you feel confident and polished. It can revitalize an old favorite or make a budget-friendly find look like a high-end designer piece. Learning to alter a dress opens up a world of possibilities for your wardrobe.
Benefits of Dress Alteration Techniques
- Perfect Fit: Get a custom fit without the custom price tag.
- Extended Wardrobe: Revive out-of-style or ill-fitting garments.
- Confidence Boost: Feel great in clothes that hug your body just right.
- Saves Money: Avoid costly professional alterations.
- Creative Outlet: Express your personal style by adjusting patterns and designs.
Essential Tools for Dress Tailoring
Before you start adjusting a dress, gather your supplies. Having the right tools makes the process much smoother.
- Sewing Machine: While hand-sewing is possible, a machine speeds things up and creates stronger seams.
- Needles: Have a variety of needles for both hand and machine sewing.
- Thread: Choose thread that matches or complements your dress fabric.
- Measuring Tape: A flexible measuring tape is crucial for accurate measurements.
- Fabric Scissors: Dedicated scissors for fabric ensure clean cuts.
- Pins: Straight pins are used to hold fabric in place.
- Seam Ripper: Essential for undoing stitches if you make a mistake.
- Tailor’s Chalk or Fabric Marker: For marking fabric.
- Iron and Ironing Board: Pressing seams as you go is key to professional results.
- Handheld Mirror: To check the fit of the dress as you work.
- Dress Form (Optional): Helpful for fitting and draping, but not strictly necessary.
Preparing Your Dress for Alterations
Proper preparation ensures your tailoring efforts are precise and effective. Always start with a clean garment.
- Wash and Dry: Clean the dress according to its care label. This removes any shrinkage that might occur later.
- Press: Iron out all wrinkles. This will make it easier to see the current shape of the dress and mark accurate adjustments.
- Identify the Fit Issues: Try the dress on and carefully assess where it’s too big, too small, or just not sitting right. Use a mirror and have a friend help if possible.
Common Dress Alteration Techniques
Let’s dive into the practical aspects of adjusting a dress. These dressmaking tips will guide you through the most frequent alterations.
1. Hemming a Dress: Getting the Length Just Right
Hemming a dress is one of the most common alterations. Whether you’re shortening a maxi dress or lengthening a skirt, a neat hem makes a big difference.
Adjusting a Dress Hem: Step-by-Step
- Try it On: Wear the shoes you plan to wear with the dress. This ensures the hem length is perfect for your intended outfit.
- Pin the Length:
- Standing in front of a mirror, use pins to mark your desired hemline. Start from one side and work your way around.
- To get a straight line, you can ask a friend to help pin or use a yardstick to measure from the floor up at consistent points around the dress.
- Ensure the pins are placed perpendicular to the raw edge of the fabric.
- Mark the Cut Line:
- Once pinned, take the dress off.
- Measure down from your pinned line the amount needed for your hem. This usually includes a hem allowance (e.g., 1-3 inches, depending on the fabric and desired finish). Mark this new line with tailor’s chalk or a fabric marker.
- Cut off the excess fabric, leaving your hem allowance. If you’re lengthening, you’ll need to have extra fabric available, perhaps from an existing hem or a contrasting piece.
- Prepare the Hem:
- Turn and Press: Fold the fabric up along your marked hem allowance line. Press it flat with an iron.
- Second Fold (for a clean finish): For most hems, fold the fabric up again by about ½ inch to ½ inch (or slightly less than your first fold). Press this second fold. This encloses the raw edge.
- Sew the Hem:
- Machine Sewing: Use your sewing machine to stitch along the folded edge. A straight stitch is common. Backstitch at the beginning and end to secure the seam.
- Hand Sewing: For a nearly invisible hem, use a blind hem stitch.
- Final Press: Press the finished hem one last time.
Hemming Tips:
- Fabric Weight: Thicker fabrics might require a wider hem allowance or a different hemming technique (like a double-folded hem).
- Stretch Fabrics: Use a stretch stitch or a twin needle on your sewing machine for hems on knits to prevent the stitches from breaking when stretched.
- Curved Hems: These require careful easing and may need small clips in the seam allowance to lay flat.
2. Taking in a Dress: Addressing Too-Loose Areas
Taking in a dress is a common alteration when a garment is too big in the waist, hips, or bust.
Adjusting a Dress to Fit Tighter:
- Pin for Fit: Try the dress on inside out. Pinch the excess fabric at the sides, back, or shoulders where the dress is too loose. Pin it smoothly.
- Mark the Seam Line:
- Once you have a good fit, remove the dress carefully.
- Using tailor’s chalk, draw a new seam line along the pinned excess fabric, tapering it to the original seam. This is your stitching line.
- Add a seam allowance (usually ½ to 1 inch) beyond your new seam line for trimming.
- Sew the New Seam:
- If taking in side seams, sew along your marked seam line.
- If adjusting the back seam or shoulders, follow the same process.
- Ensure you sew a smooth, tapered line so the new seam looks natural.
- Trim and Finish:
- Trim the excess fabric beyond the new seam allowance.
- Finish the raw edge with a serger, zigzag stitch, or pinking shears to prevent fraying.
- Press: Press the new seam open or to one side, depending on the original construction.
Taking in a Dress – Specific Areas:
- Waist and Hips: This is typically done on the side seams.
- Bust: You might need to take in the side seams or the shoulder seams. If the bust is significantly too large, darts might be necessary.
- Shoulders: Taking in the shoulder seam can fix a gaping neckline or sleeves that are too wide.
3. Letting Out a Dress: Creating More Room
Letting out a dress is trickier than taking it in, as it relies on having extra fabric within the seams.
Expanding a Dress Fit:
- Inspect Seams: Turn the dress inside out and examine all the seams (side seams, back seams). Look for a generous seam allowance that hasn’t been fully used.
- Unpick Stitches: Carefully use a seam ripper to unpick the stitching in the areas where you need more room. Be gentle to avoid damaging the fabric.
- Press Seams Open: Press the seams flat, ensuring the seam allowances are fully opened out.
- Check for Fabric: See how much extra fabric is available. You might be able to let out ½ inch to 1 inch in total (½ inch to ½ inch on each side of a seam).
- Pin and Sew:
- Try the dress on inside out again.
- If you have enough fabric, you can re-pin the seams to your desired fit.
- Sew along the original seam line, using the newly opened-out fabric.
- Finish and Press: Trim excess fabric if needed, finish the raw edges, and press the seams.
Letting Out a Dress – What to Consider:
- Limited Fabric: If there isn’t enough seam allowance, you’ll need to insert fabric panels. This requires matching the fabric as closely as possible.
- Original Seams: Sometimes, even if there’s allowance, the stitching pattern or seam type might make letting out difficult.
4. Adjusting the Waistline
The waistline is a critical area for a flattering fit.
Waist Alterations:
- Taking In the Waist: This is done by adjusting the side seams or back seams, tapering the excess fabric from the underarm or shoulder down to the hem.
- Letting Out the Waist: Requires opening up the side or back seams and utilizing any available seam allowance. If insufficient, fabric panels may be needed.
5. Fixing Gaping Necklines and Armholes
A gaping neckline or armhole can make a dress look sloppy.
Neckline and Armhole Adjustments:
- Gaping Back Neckline: Often fixed by taking in the shoulder seams at the back. You’ll unpick the shoulder seam, fold the excess fabric from the back portion, and re-sew.
- Gaping Armholes: Usually means the sleeve cap or armhole is too large. You can take in the seam where the sleeve joins the body or adjust the sleeve cap itself. This can be more complex and may involve recutting the sleeve.
6. Shortening or Lengthening Sleeves
Sleeves that are too long or too short can be adjusted.
Sleeve Length Alterations:
- Determine New Length: Try on the dress and mark your desired sleeve length.
- Shortening:
- Turn the sleeve inside out.
- Unpick the hem.
- Measure down from the cuff edge the amount you need to shorten.
- Trim the excess fabric, leaving a hem allowance.
- Re-fold, press, and sew the new hem.
- Lengthening:
- Check if there’s a usable hem allowance at the cuff. If so, unpick the hem, unfold the fabric, press, and re-fold to the new length.
- If there’s no hem allowance, you’ll need to insert a cuff or a band of matching or contrasting fabric.
Working with Different Fabrics
The type of fabric significantly impacts dress alteration techniques.
Fabric Considerations for Dressmaking Tips:
- Woven Fabrics (Cotton, Linen, Silk): Generally easier to alter. They hold their shape well.
- Knit Fabrics (Jersey, Spandex): Require special stitches (stretch stitch, twin needle) to prevent seams from breaking when the fabric stretches. Pins can sometimes leave permanent holes.
- Delicate Fabrics (Chiffon, Silk): Need careful handling. Use fine needles and thread. French seams or rolled hems might be preferred for a clean finish.
- Heavy Fabrics (Wool, Denim): May require stronger needles and a more robust sewing machine. Seam allowances might be wider.
Advanced Dress Alteration Techniques (Beyond Basic Fitting)
Once you’ve mastered the basics, you can explore more involved adjustments.
Dress Pattern Adjustments and Style Changes
- Adding Darts: For a more fitted silhouette, you can add darts to the bodice or waist to shape the fabric to your body.
- Changing Necklines: This is a more advanced alteration that might involve recutting and finishing the neckline.
- Adding or Removing Sleeves: A significant alteration that essentially changes the structure of the dress.
- Reshaping the Skirt: You can taper a skirt, add fullness, or change the silhouette by altering the side seams.
Sewing a Dress: From Pattern to Perfection
Learning to tailor a dress is closely related to sewing a dress from scratch. Understanding how a dress is constructed from a dress pattern provides valuable insight into how to alter it.
Dressmaking Tips for Beginners:
- Start Simple: Begin with easy alterations like hemming or taking in side seams.
- Practice on Scraps: Test stitches and techniques on fabric scraps before working on your actual dress.
- Read Patterns Carefully: If you’re venturing into sewing from a pattern, take the time to read and understand all the instructions.
- Seam Finishes: Learn different ways to finish raw edges to make your alterations look professional.
Fitting a Dress: The Art of Precision
The fitting process is where you assess the dress and mark your adjustments.
Fitting a Dress: Key Points
- Wear the Right Undergarments: Wear the bra and underwear you’d typically wear with the dress.
- Stand Naturally: Don’t suck in your stomach or hold yourself unnaturally.
- Check Multiple Angles: Look in a mirror from the front, back, and sides.
- Comfort is Key: The dress should fit comfortably without restricting movement.
Frequently Asked Questions (FAQ)
Q1: How much seam allowance do I typically need for alterations?
A1: For most alterations like taking in seams, a ½ inch to 1 inch seam allowance is usually sufficient. For hemming, it can range from 1 inch to 3 inches or more, depending on the style of the hem.
Q2: Can I let out a dress if there’s no seam allowance?
A2: If there’s absolutely no extra fabric in the seams, you cannot let out the dress without adding new fabric. You might need to insert panels or use decorative elements like lace inserts to achieve a larger size.
Q3: What’s the best way to shorten a dress with a lining?
A3: You’ll need to shorten both the outer fabric and the lining separately. Hem the outer fabric as usual. Then, attach the lining to the new hem of the outer fabric, ensuring it hangs smoothly without pulling or creating bulk.
Q4: How do I deal with patterns on fabric when altering?
A4: Matching patterns, especially stripes or plaids, can be challenging. When taking in seams, try to shift the fabric so the pattern aligns as closely as possible. If you’re adding fabric, matching the pattern to the existing fabric is crucial for a seamless look.
Q5: Is it possible to alter the fit of a dress that’s too small?
A5: Letting out a dress is possible if there’s enough seam allowance. However, if the dress is significantly too small, especially in the bust or hips, it might be difficult or impossible to alter without adding fabric. In such cases, it’s often better to find a new dress.
By following these dress alteration techniques and dressmaking tips, you can confidently adjust a dress to achieve a perfect fit. Happy tailoring!