
Image Source: i.ytimg.com
Easy How To Hem Slacks With Sewing Machine
Can you hem slacks with a sewing machine? Yes, you absolutely can! Learning to hem slacks with a sewing machine is a fundamental skill for anyone who sews, whether you’re a beginner or looking to refine your techniques. This guide will walk you through the entire process, from preparing your slacks to achieving a professional finish. We’ll cover everything you need to know about sewing a pant hem, machine sewing trousers, and stitch slack bottoms to perfection.
Gathering Your Supplies
Before you begin hemming pants with a machine, ensure you have all the necessary tools. Having everything ready will make the process smoother and more enjoyable.
- Sewing Machine: A standard sewing machine is all you need. Make sure it’s in good working order.
- Thread: Choose a thread that matches your slacks. All-purpose polyester thread is a good choice for most fabrics.
- Sewing Machine Needles: Use a needle appropriate for your fabric type. A universal needle (size 80/12) is a good starting point for many common fabrics. For finer fabrics, you might need a smaller needle, and for heavier fabrics, a larger one.
- Fabric Scissors: Sharp scissors are crucial for a clean cut.
- Measuring Tape: A flexible measuring tape is best for measuring the length.
- Fabric Marker or Chalk: For marking your hemline. Test it on an inconspicuous area first to ensure it doesn’t stain the fabric.
- Straight Pins: To hold the hem in place while you sew.
- Iron and Ironing Board: Pressing is key to a neat hem.
- Seam Ripper: In case you need to undo any stitches.
- Optional: Hemming Tape or Interfacing: For specific types of hems or fabric stabilization.
- Optional: Blind Hem Foot: This presser foot makes creating a blind hem much easier.
Preparing Your Slacks for Hemming
Proper preparation is vital for a successful hem. This involves deciding on the new length and ensuring your slacks are ready to be worked on.
Determining the Desired Length
First, decide how long you want your slacks to be. Try them on with the shoes you plan to wear with them.
- Put on the Slacks: Wear them with the shoes you’ll typically pair with them.
- Fold and Pin: While wearing the slacks, fold the excess fabric upwards until you reach your desired length. Use straight pins to hold the fold in place. Get someone to help you pin if possible, as it can be tricky to do it yourself evenly.
- Check the Length: Step back and look in a mirror. Ensure the hemline is even and at the length you want. Make sure the slacks hang nicely without puckering.
Marking the Hemline
Once you’re happy with the pinned length, it’s time to mark the hemline.
- Take Off the Slacks: Carefully remove the slacks without disturbing the pins. Lay them flat on a clean surface, like your ironing board or a table.
- Smooth the Fabric: Ensure the fabric is smooth and free of wrinkles around the pinned area.
- Measure and Mark: Use your measuring tape to measure from the pinned edge down to the original bottom edge of the pant leg. This will tell you how much fabric you need to fold up for the hem allowance. A common hem allowance is 1 to 1.5 inches, but this can vary.
- Draw a Line: Using your fabric marker or chalk, draw a straight line parallel to the original hem. This line marks the fold line for your hem.
- Marking the Cut Line: Now, mark your cut line. This is typically 1/4 inch below your fold line, if you are creating a double-fold hem (which is the most common and neatest way to hem trousers). So, if your fold line is 1.5 inches from the bottom, your cut line will be 1.75 inches from the bottom.
Trimming Excess Fabric
After marking, you’ll need to trim the excess fabric.
- Cut Carefully: Using your sharp fabric scissors, cut along the marked cut line. Be precise.
- Repeat for All Legs: Make sure to repeat this process for all pant legs, ensuring consistency in length.
Creating a Standard Double-Fold Hem
This is the most common and durable method for sewing pants. It involves folding the fabric twice to create a clean, finished edge.
Folding the Hem
This is where the magic begins for stitch slack bottoms.
- First Fold: Fold the raw edge of the pant leg up to meet your marked fold line (the one 1.5 inches or your chosen allowance from the bottom edge). Press this fold firmly with your iron.
- Second Fold: Now, fold the fabric over again, encasing the raw edge. This second fold should be along the original bottom edge of the pant leg you previously pinned. Press this second fold very well. You should now have a neat hem that is about 1/2 to 3/4 inch wide.
Securing the Hem with Pins
Once folded and pressed, secure the hem with pins.
- Pinning: Place straight pins perpendicular to the folded edge, about every 2-3 inches. Ensure the pins go through all layers of the fabric and hold the hem securely in place.
- Check for Evenness: Take a moment to ensure the hem is still even and the folds are crisp.
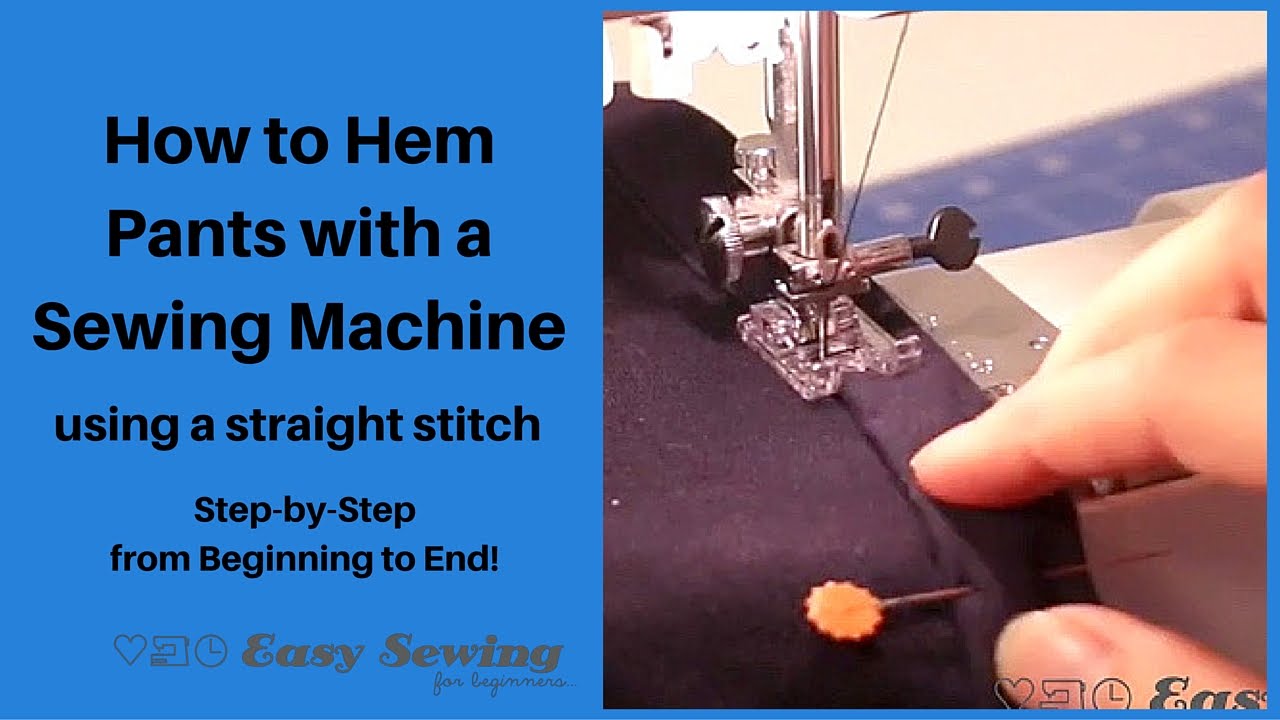
Machine Sewing the Hem
Now it’s time to bring out your sewing machine hem expertise.
Setting Up Your Sewing Machine
- Thread Your Machine: Thread your sewing machine with matching thread. Ensure the bobbin is also wound with matching thread.
- Select a Stitch: A straight stitch is usually sufficient for machine sewing trousers. Set your stitch length to a medium setting (around 2.5 mm).
- Attach a Regular Presser Foot: Unless you are using a blind hem foot, attach your standard presser foot.
Sewing the Hem
- Position the Slacks: Place the slacks under the sewing machine needle, with the folded hem facing you and the seam allowance extending outwards. Align the edge of the folded hem with the edge of the presser foot or use a guide on your machine to ensure a straight line of stitching.
- Start Sewing: Lower the presser foot and the needle into the fabric at the beginning of the hem. Backstitch for a few stitches to secure the beginning of your seam.
- Sewing the Seam: Sew slowly and steadily along the folded edge. Aim to keep your stitching line straight and about 1/8 to 1/4 inch from the folded edge.
- Navigating the Seam: When you reach a side seam or inseam, you may need to manoeuvre the fabric carefully. You can lift the presser foot and pivot the fabric to sew over thicker areas. For particularly thick seams, you might need to use a seam ripper to carefully take out a few stitches in the original seam to reduce bulk before sewing your new hem.
- Finishing the Seam: When you reach the beginning of the hem again, stop with the needle down. Backstitch over your starting stitches to secure the end of your seam.
- Trim Threads: Cut the threads close to the fabric.
Finishing the Raw Edge (Optional but Recommended)
To prevent fraying and give your hem a more professional look, you can finish the raw edge inside the hem.
- Zigzag Stitch: Sew a zigzag stitch along the raw edge of the fabric within the hem allowance. This encloses the raw edge.
- Serger: If you have a serger, you can use it to finish the raw edge for an even cleaner look.
Creating a Blind Hem
A blind hem is a nearly invisible stitch that is ideal for formal trousers or when you want a very clean finish. This is how you achieve that professional look when sewing a pant hem.
Using a Blind Hem Foot
A blind hem foot is specifically designed for this technique.
- Attach the Blind Hem Foot: Replace your regular presser foot with the blind hem foot.
- Adjusting the Foot: Most blind hem feet have a small guide on the side. This guide will ride along the folded edge of your hem.
- Adjusting the Stitch: Set your sewing machine to a blind hem stitch. This stitch typically looks like a short straight stitch followed by a wider zigzag stitch. When the wider stitch hits the guide, it will catch only a few threads of the main fabric. Consult your sewing machine manual for specific instructions on how to set up the blind hem stitch.
Folding for a Blind Hem
The folding technique for a blind hem is slightly different.
- Fold and Press: Fold the raw edge of the pant leg up to your marked fold line (e.g., 1.5 inches from the bottom). Press firmly.
- Second Fold: Now, fold the fabric again, but this time only about 1/4 to 3/8 inch of the raw edge should be folded back on itself. The bulk of the hem allowance should be against the pant leg.
- Pin: Pin the hem in place, making sure the folded edge sits neatly against the pant leg.
Sewing the Blind Hem
- Positioning: Place the slacks under the blind hem foot. Position the fabric so that the guide on the blind hem foot is running along the folded edge of the hem. The needle should be set to make the blind stitch.
- Sewing: Sew slowly, allowing the guide on the foot to keep the stitches consistent. The needle will swing from side to side, catching only a few threads of the main fabric on one side and then stitching securely into the hem allowance on the other.
- Finishing: When you reach the end, backstitch to secure the seam.
Finishing the Blind Hem
- Turn Right Side Out: Turn the pant leg right side out.
- Press: Gently press the hem from the right side. You should see very few, if any, visible stitches on the outside of the pant leg.
How to Sew a Cuff on Slacks
While not all slacks have cuffs, sewing pants with cuffs can add a stylish touch. This process is a bit different from a standard hem.
Preparing for Cuffs
- Determine Cuff Height: Decide on the desired height of your cuff (e.g., 1.5 to 2 inches).
- Add Hem Allowance: You’ll need to add extra fabric for the cuff itself. Add the cuff height plus an additional amount for the hem allowance within the cuff (typically 1/2 inch). So, if you want a 1.5-inch cuff, you’ll need to add 2 inches to your original desired length.
- Cut the Fabric: Trim your slacks to the new desired length, which now includes the fabric for the cuff.
Creating the Cuff
There are a few ways to create a cuff, but a common method involves folding the extra fabric.
- Fold for Cuff: Fold the extra fabric upwards towards the inside of the pant leg by the desired cuff height. Press firmly. This creates the cuff.
- Secure the Cuff: The raw edge of this fold needs to be secured.
Sewing the Cuff
- Fold and Pin: Fold the fabric up to create the cuff. Pin it in place.
- Stitch the Hem:
- Option 1: Catch Stitch: The most traditional method is to use a catch stitch (or blind stitch) from the inside. This involves carefully catching a few threads of the pant leg with your needle and thread, then going back into the cuff fabric to create a nearly invisible stitch on the outside. This can be done by hand or with a machine using a blind hem stitch.
- Option 2: Topstitching: For a more casual look, you can topstitch the cuff in place from the outside. Use a straight stitch, sewing about 1/8 inch from the folded edge of the cuff. Ensure your stitches are even and go through all layers.
- Option 3: Inner Hem: You can create a small inner hem within the cuff itself for a cleaner finish. Fold the raw edge of the fabric that forms the cuff under by 1/4 to 1/2 inch, press, and then stitch this inner hem in place. Then, proceed to attach the cuff to the pant leg.
Finishing Trouser Hems: Advanced Tips
For truly professional finishing trouser hems, consider these advanced tips.
Interfacing for Structure
- For lightweight fabrics or to ensure a crisp fold, you can add lightweight fusible interfacing to the wrong side of the hem allowance before folding. This provides extra stability.
Adding Weight to the Hem
- Some trousers, especially dress pants, have a weighted hem for better drape. You can purchase hem weights and stitch them into the inside of the hem, or you can use a bit of fusible hemming tape to add body.
Stitching a Split Hem
- Some slacks have a split hem, meaning the hem doesn’t go all the way around. This is common on the outer side seam. You’ll hem the front and back portions of the leg separately, leaving the side seam open at the bottom. You’ll typically fold and press these hems as usual, then sew them closed.
Common Issues and Solutions
Even experienced sewers encounter challenges. Here are some common issues when sewing pants and how to fix them.
Uneven Hem
- Problem: The hemline looks crooked or uneven.
- Solution: This usually happens during the pinning or cutting stage. If it’s already sewn, you may need to unpick the stitching and re-mark and re-cut. Next time, measure carefully and consider using chalk or a fabric marker to draw the line before cutting.
Puckering
- Problem: The fabric puckers or bunches up along the stitch line.
- Solution: This can be due to several factors:
- Tension: Check your sewing machine’s thread tension. It might be too tight.
- Needle: Ensure you’re using the correct needle size and type for your fabric. A dull or bent needle can cause puckering.
- Stitch Length: A stitch that is too short can cause puckering. Try a slightly longer stitch length.
- Pressing: Pressing as you sew helps to control the fabric.
Skipped Stitches
- Problem: The sewing machine skips stitches.
- Solution:
- Needle: Ensure the needle is sharp, inserted correctly, and the right type for your fabric.
- Thread: Make sure the thread is good quality and not old or frayed.
- Bobbin: Check that the bobbin is wound evenly and inserted correctly.
- Lint Buildup: Clean the feed dogs and bobbin area of your machine.
Thread Bunching Underneath
- Problem: Thread is bunching up on the underside of the fabric.
- Solution: This is usually an indicator of improper upper thread tension or incorrect needle insertion. Re-thread your machine, ensuring the presser foot is up when threading. Check your bobbin case and ensure it’s clean and free of lint.
Frequently Asked Questions (FAQ)
What is the best stitch for hemming pants with a sewing machine?
For a standard hem, a straight stitch is usually best. For a nearly invisible hem, the blind hem stitch is ideal.
Can I hem slacks without a sewing machine?
Yes, you can hem slacks by hand using a blind stitch or a catch stitch, but it will take more time and may not look as neat or durable as machine sewing.
How wide should a hem allowance be?
A common hem allowance for trousers is 1 to 1.5 inches, but this can vary depending on the fabric and the desired look.
What kind of needle should I use for denim slacks?
For denim, use a sturdy denim needle (size 90/14 or 100/16) and strong all-purpose thread.
How do I get a perfectly straight hem when machine sewing trousers?
Careful measuring, marking, and using a seam guide on your sewing machine or a hemming guide attachment can help achieve a straight hem. Pressing the folds crisply before sewing is also crucial.
By following these detailed steps, you can confidently hem your slacks with a sewing machine, achieving professional results that will make your clothes fit perfectly. Happy sewing a pant hem!