
What is a sewing pattern? A sewing pattern is like a blueprint for making clothes or other fabric items. It shows you exactly where to cut fabric and how to sew the pieces together. Can I use a sewing pattern even if I am new to sewing? Yes, absolutely! Many patterns are perfect for beginners. Who is a sewing pattern for? Anyone who wants to make their own clothes, home decor, or gifts can use a sewing pattern. It helps you create professional-looking items without guessing. This guide will show you everything about sewing patterns, from picking your first one to making it fit just right.
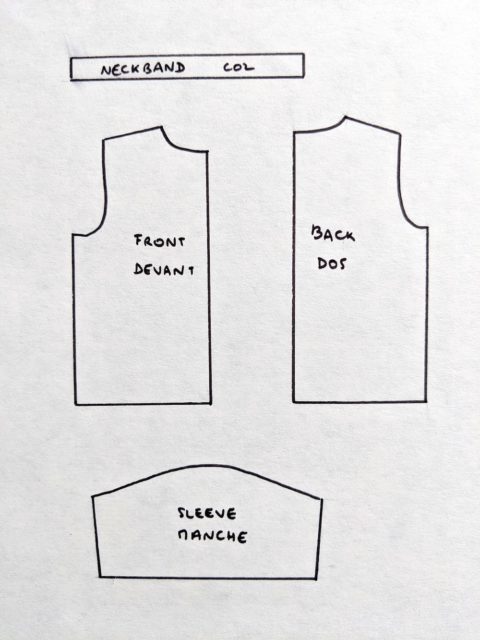
Image Source: camimade.com
Getting Started with Sewing Patterns
Sewing patterns open up a world of creativity. They turn a flat piece of fabric into a wonderful garment or item. Learning to use them is a key skill for any sewer.
What Is a Sewing Pattern?
Think of a sewing pattern as a map. It has lines and symbols. These show you the size and shape of each fabric piece you need. The pattern also gives instructions. These tell you how to sew the pieces together. Patterns can be printed on paper or downloaded as digital files. They include all details like seam allowances, grainlines, and notches. These details help you get a perfect result every time.
Why Use Sewing Patterns?
Sewing patterns offer many benefits. First, they save you time. You do not have to design anything yourself. The pattern does the hard work for you. Second, they help you avoid mistakes. The clear steps reduce errors. Third, patterns help you get a good fit. They come in different sizes. You can also change them to fit your body perfectly. Finally, patterns let you make a huge range of items. From dresses to bags, the options are endless. They guide you from start to finish.
Choosing Your First Pattern: Beginner Sewing Patterns
Picking your first pattern is an exciting step. For newcomers, choose simple designs. Look for patterns marked “beginner” or “easy.” These patterns often have fewer pieces. They also use basic sewing steps. Simple projects build your confidence.
Here are great projects for beginner sewing patterns:
* Simple T-shirts: These often have only a few pieces.
* Elastic-waist skirts: Easy to fit and quick to sew.
* Pillow covers: A great way to learn straight seams.
* Tote bags: Useful and teach basic construction.
* Pajama pants: Very forgiving in terms of fit.
Start with something small. This lets you learn the basics without feeling rushed. You will quickly see your skills grow.
Interpreting Sewing Pattern Symbols
Sewing patterns have a language of their own. It uses special symbols and lines. Learning these symbols is very important. They tell you how to cut and sew your fabric pieces. Without Grasping sewing pattern symbols, you might make mistakes.
Decoding Pattern Markings
Every pattern piece has markings. These are like secret codes. They guide your cutting and sewing. Look for a legend or key in your pattern booklet. This chart explains each symbol. Knowing what each symbol means is a must. It helps you get the right shape and fit.
Here is a table of common Grasping sewing pattern symbols and their meanings:
| Symbol | Meaning | What it tells you |
|---|---|---|
| Grainline | A long line with arrows on both ends. | Place this line parallel to the fabric’s selvage. |
| Fold Line | A bracketed line with an arrow. | Place this edge of the pattern on a fabric fold. |
| Notches | Small triangles, diamonds, or lines. | Match these marks when joining fabric pieces. |
| Dots/Squares | Circles or squares of different sizes. | Mark these points on your fabric for details. |
| Cutting Line | The outermost solid line of the pattern piece. | This is where you cut the fabric. |
| Stitching Line | A dashed line, often inside the cutting line. | This is where you will sew. |
| Darts | V-shaped lines. | Sew along these lines to shape the fabric. |
| Buttonhole/Button | Lines or symbols showing button placement. | Mark where to sew buttons and buttonholes. |
| Lengthen/Shorten Line | Two parallel lines, often with arrows. | Cut and spread or overlap here to adjust length. |
Always check your pattern’s specific legend. Some pattern companies use slightly different symbols. Reading the legend helps you know exactly what to do. Take your time to study these markings. They are your best friends in sewing.
Picking the Right Pattern and Fabric
Choosing the right pattern and fabric is half the battle. They work together. A good choice makes sewing easier and more fun.
Selecting Your Project
Before you buy a pattern, think about your skills. Are you a beginner? Pick simple designs. Are you more advanced? Try something with more detail. Also, think about what you want to make. Do you need a new dress? A cozy quilt? Pick a project you are excited about. This keeps you motivated. Look at the finished garment photos. Read the pattern description. This helps you know if it is right for you.
Fabric Choice: A Crucial Step
The fabric you pick is very important. The pattern will suggest types of fabric. These suggestions are there for a reason. Different fabrics behave differently.
* Woven fabrics (like cotton, linen) are stable. They are easy for beginners to use.
* Knit fabrics (like jersey) stretch. They can be trickier to sew but make comfy clothes.
* Draping fabrics (like rayon, silk) flow nicely. They need more careful handling.
Always check the pattern’s fabric recommendations. Using the wrong fabric can change how your finished item looks. It can also make sewing harder. If a pattern calls for “medium-weight woven,” do not use a stretchy knit. Test a small piece of your chosen fabric first. See how it drapes and stitches.
Sizing Up Your Pattern
Sewing patterns use different sizing than ready-to-wear clothes. Do not just pick your usual clothing size. Take your body measurements. Use a tape measure. Measure your bust, waist, and hips. Compare these numbers to the pattern’s size chart. This chart is usually on the back of the pattern envelope or in the instructions. You might find your measurements fall into different sizes. For example, your bust might be a size 12, but your hips a size 14. In these cases, pick the size that best matches your largest measurement, then adjust as needed. Or, you can blend sizes. This means drawing a line between two sizes on the pattern. This gives you a custom fit.
Preparing Your Pattern and Fabric
Good preparation saves time and trouble later. It helps ensure your project turns out well. Do not skip these steps.
Printing and Assembling: PDF Sewing Patterns
Many modern patterns are PDF sewing patterns. You buy them online and print them at home. This is a great way to get patterns right away.
* Check the print scale: Most PDF patterns have a test square. Print this first. Measure it to make sure your printer settings are correct. It must be the right size.
* Print all pages: Make sure you print every page.
* Assemble carefully: PDF patterns often come on many small pages. You need to trim the edges. Then tape them together like a puzzle. Match the lines perfectly. This step needs patience. Take your time for accuracy. A misaligned pattern can lead to cutting errors.
Using PDF sewing patterns is convenient. It gives you instant access to new designs.
Laying Out Your Fabric: Fabric Cutting Guide
Before you cut, prepare your fabric. Wash and dry it first. This is called pre-shrinking. It stops your finished item from shrinking later. Iron your fabric smooth. Wrinkles can make your cuts uneven.
Now, lay out your pattern pieces. Follow the pattern’s fabric cutting guide. This guide shows you the best way to place pieces on your fabric. It helps you save fabric. It also makes sure your pieces are cut correctly.
* Grainline first: Place pattern pieces with the grainline arrow parallel to the selvage edge of the fabric. This is very important. It makes sure your garment hangs well.
* On the fold: If a piece says “place on fold,” line it up exactly on the folded edge of your fabric.
* Pin or weigh: Use pins to hold pattern pieces in place. Or use pattern weights. Make sure the pieces lie flat. Do not stretch the fabric.
A smart layout minimizes waste. It also makes cutting easier.
Precise Cutting Techniques
Cutting is a key step. Bad cuts mean a bad fit. Use sharp fabric shears or a rotary cutter.
* Cut accurately: Cut exactly along the cutting lines. Do not wobble.
* Notches: Cut notches outwards, or snip them inwards a tiny bit. These are vital for matching pieces later.
* Markings: Transfer all pattern markings to your fabric. Use tailor’s chalk, a fabric pen, or tracing paper. Mark dots, darts, buttonholes, and fold lines. These marks are your guides for sewing.
Careful cutting sets you up for sewing success. It is worth taking your time.
Altering Patterns for a Perfect Fit
Few people fit a pattern size perfectly. Sewing pattern adjustments are often needed. This is where your garment truly becomes custom-made. Learning to change a pattern means your finished items will look and feel great.
The Art of Sewing Pattern Adjustments
Pattern adjustment is about making the flat paper pattern fit your unique body shape. It is not about changing your body. It is about making the clothes fit you. This skill takes practice. But it is very rewarding. It means no more clothes that are too tight here or too baggy there. You gain control over the fit. Basic sewing pattern adjustments can make a huge difference. You do not need to be an expert. Simple changes can solve common fit issues.
Common Pattern Alterations
Many body shapes have similar fit problems. Here are some sewing pattern alterations you might need to make:
- Lengthening or Shortening:
- Need: Pants are too long or too short. A shirt is too long or too short.
- How to: Most patterns have “lengthen/shorten” lines. Cut the pattern along this line. Spread the pieces apart to add length. Overlap them to remove length. Then redraw the side seams smoothly.
- Full Bust Adjustment (FBA) or Small Bust Adjustment (SBA):
- Need: The bust area is too tight or too loose.
- How to: This involves slashing the pattern and spreading or overlapping pieces to add or remove fabric from the bust area. This keeps the armhole and shoulder fit correct.
- Adjusting for Hips:
- Need: Pants or skirts are too tight or loose at the hips.
- How to: Grade between sizes at the side seams. If your waist is a size 10 and hips a size 12, start cutting the waist at 10 and curve out to 12 at the hip line.
- Waist Adjustments:
- Need: Waistband is too loose or too tight.
- How to: For a separate waistband, make it longer or shorter. For a garment with a waist seam, adjust the side seams in or out.
- Shoulder Adjustments:
- Need: Shoulders are too wide or too narrow.
- How to: For wide shoulders, add width at the shoulder seam. For narrow shoulders, take away width. This can be complex.
- Sleeve Adjustments:
- Need: Sleeves are too tight, too loose, or too long.
- How to: Adjust sleeve width by altering side seams. Adjust length using the lengthen/shorten lines on the sleeve pattern piece.
Always make your adjustments on the paper pattern before cutting fabric. It is also a good idea to make a “muslin” or “toile.” This is a test garment made from cheap fabric. It lets you check the fit before cutting into your good fabric.
Beyond Store-Bought: Crafting Your Own Patterns
What if you cannot find the perfect pattern? Or you have a unique design in mind? You can create your own! This is sewing pattern drafting. It gives you total freedom.
Introduction to Sewing Pattern Drafting
Sewing pattern drafting is the art of drawing pattern pieces from scratch. You use your own body measurements. Or you can use standard measurement charts. It is a more advanced skill than just using existing patterns. But it is very empowering. You learn how clothes are built. You can make patterns for any idea you have. It sounds hard, but you can start with simple shapes.
A Basic Pattern Making Tutorial
Let’s look at a very basic pattern making tutorial concept: a simple skirt block.
1. Measure: You need your waist, hip, and skirt length.
2. Draw a rectangle: Draw a rectangle on a large sheet of paper. Its width will be half your hip measurement. Its length will be your desired skirt length. This is your basic skirt shape.
3. Add waist curve: Mark a point for your waist on the top edge. Draw a slight curve down to the side. This shapes the top of the skirt.
4. Add a dart (if needed): If your waist is much smaller than your hips, you will need a dart. A dart is a triangular fold that takes in extra fabric. It helps the garment fit your body’s curves.
5. Add seam allowance: Remember to add extra space around all edges for seams. Usually, this is 5/8 inch (1.5 cm).
6. Label: Write “Front Skirt,” “Back Skirt,” “Cut 1 on fold,” etc. Mark the grainline.
This is a simplified example. Real DIY garment patterns require more details. But it shows the core idea. You build shapes based on measurements.
DIY Garment Patterns: Your Creative Journey
Creating DIY garment patterns lets you be a true designer. You are not limited by what is available. You can make clothes that fit your style and body perfectly. You can combine elements from different garments. For example, the sleeve from one shirt with the body of another. This is called “pattern hacking.” It is a form of DIY pattern making. Start small. Draft a basic block (like a skirt or a simple top). Then, you can change that block into many different styles. Books and online courses can help you learn more advanced sewing pattern drafting techniques. The more you practice, the better you will become.
Where to Find Patterns and Keep Learning
The world of sewing patterns is huge. There are many places to find them. And there are endless ways to keep growing your skills.
Exploring Free Sewing Patterns Download Options
You do not always have to buy patterns. There are many places to find free sewing patterns download options. These are great for beginners. They let you try out new styles or techniques without spending money.
* Independent designers: Many indie pattern companies offer free patterns as tasters.
* Fabric companies: Some fabric manufacturers provide free patterns to showcase their fabrics.
* Sewing blogs and websites: Countless sewing blogs offer free patterns, especially for simple projects.
* Online communities: Websites like Pinterest or specific sewing forums often have links to free patterns.
* Magazine websites: Some sewing magazines offer free downloads of patterns from past issues.
When using free sewing patterns download options, always check the quality. Read reviews if possible. Make sure the instructions are clear. Free patterns are a fantastic resource for building your collection.
Building Your Sewing Skills
Sewing is a journey of continuous learning.
* Classes and Workshops: Local fabric stores or community centers often offer sewing classes. These give you hands-on help.
* Online Courses: Websites like Skillshare, Creativebug, or Craftsy have tons of video courses. You can learn at your own pace.
* Books and Magazines: Traditional resources are still very valuable. They offer detailed instructions and inspiration.
* YouTube Tutorials: Many sewers share their knowledge for free on YouTube. You can find videos for almost any technique.
* Sewing Communities: Join online forums or local sewing groups. You can ask questions, share projects, and get advice. Learning from others is a great way to improve.
Do not be afraid to try new things. Each project teaches you something new. Every stitch builds your skill.
Frequently Asked Questions (FAQ)
Q: What tools do I need to start with sewing patterns?
A: You will need fabric shears, pins, a tape measure, a seam ripper, tailor’s chalk or fabric marker, and of course, a sewing machine. A rotary cutter and mat are also very useful for cutting.
Q: How do I know which size to cut if I am between sizes?
A: Most often, you should choose the size that fits your largest measurement. Then, you can grade out or in at other points to match your body. For example, if your bust is a size 10 and hips a size 12, cut the top part of the pattern for size 10 and curve out to size 12 at the hip line.
Q: What is a “muslin” and why should I make one?
A: A muslin (or toile) is a test garment. You make it from cheap, similar-weight fabric. It lets you check the fit of the pattern before cutting into your good fabric. This helps you find and fix any fit issues first. It saves valuable fabric and avoids disappointment.
Q: Can I reuse sewing patterns?
A: Yes! Paper patterns can be reused many times if you handle them carefully. It is a good idea to trace the pattern pieces onto tracing paper. This way, the original pattern stays safe. You can also trace different sizes if you plan to make the item for different people.
Q: How do I care for my printed paper patterns?
A: Store your patterns flat or rolled to prevent creases. Keep them in a dry place. You can put them in large envelopes or plastic sleeves. This protects them from damage and moisture.
Q: How do I choose the right sewing needle for my fabric?
A: Your pattern or fabric store can advise you. Generally, use a universal needle for most woven fabrics. Use a ballpoint or stretch needle for knit fabrics. Needle size depends on fabric weight. Thicker fabrics need larger needles. Fine fabrics need smaller needles.
Conclusion
Mastering how to use sewing patterns is a journey. It starts with simple steps. You learn to read symbols. You pick the right fabric. You cut with care. Then, you can make sewing pattern adjustments for a perfect fit. You can even try sewing pattern drafting to create your own designs. With beginner sewing patterns and free sewing patterns download options, anyone can start. Remember to check Grasping sewing pattern symbols and use a fabric cutting guide. Whether you are using PDF sewing patterns or traditional paper ones, each project builds your confidence. Keep learning, keep creating, and enjoy the wonderful world of sewing!