
Image Source: thriftdiving.com
Easy Steps: How To Make A Pillowcase Without A Sewing Machine
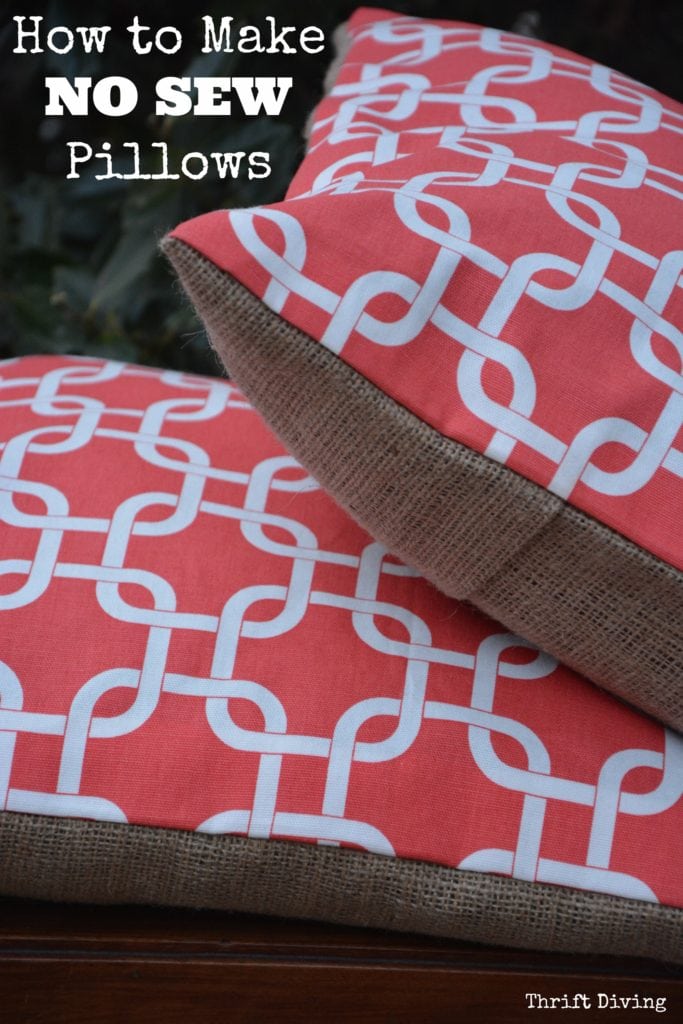
Can you make a pillowcase without a sewing machine? Yes, you absolutely can! Many simple ways exist to create a beautiful pillow cover without sewing. This easy no-sew pillowcase tutorial will show you how. You can craft a comfy pillowcase even without a sewing machine. This guide helps beginners make a DIY pillow cover without sewing. We will cover methods like the fabric glue pillowcase method and the iron-on hem tape pillow project. You will learn hand sew pillowcase instructions too. Making an easy no-sew pillow sham is also possible. We will even touch on an envelope pillowcase no stitch design. If you want a fleece no-sew pillowcase pattern, we have tips for that. These are perfect beginner fabric crafts no sewing needed.
Why Choose No-Sew Pillowcases?
Making a pillowcase without sewing is great for many reasons. It is perfect for people new to crafting. It needs fewer tools. This makes it a cheap way to update your home decor. No-sew projects are also very fast. You can make a new pillowcase in an afternoon. This method lets you be creative with fabric. You can pick any color or pattern. It is also safe for kids to help with. No sharp needles or fast machines are needed. This way, everyone can enjoy making things.
Gathering Your Supplies
Before you start, get your tools ready. The exact items will change a bit based on the method you pick. But some items are useful for all no-sew pillowcase projects.
Basic Tools You Will Need
- Fabric: Choose cotton, flannel, or fleece. Make sure it is soft and washable.
- Scissors: Sharp fabric scissors cut clean lines.
- Measuring Tape or Ruler: Needed to get the right pillowcase dimensions for no-sew projects.
- Iron and Ironing Board: For making hems flat and neat. This is key for many methods.
- Fabric Pins or Clips: To hold fabric in place.
Extra Tools for Specific Methods
- Fabric Glue: Look for a strong, flexible glue. It must dry clear and be washable.
- Iron-On Hem Tape: This tape melts with heat. It creates a bond between fabric layers.
- Needle and Thread: For the hand sew method. Pick thread that matches your fabric color.
- Fabric Marker or Chalk: To mark cutting lines on your fabric.
Pillowcase Dimensions for No-Sew Projects
Getting the right fabric size is very important. Pillowcase dimensions for no-sew projects are a bit bigger than the pillow itself. This allows for hems and seams. Here are common sizes and how much fabric you need.
Standard Pillow Sizes and Fabric Cuts
| Pillow Size | Pillow Dimensions | Fabric Width Needed | Fabric Length Needed |
|---|---|---|---|
| Standard | 20 x 26 inches | 42 inches | 36 inches |
| Queen | 20 x 30 inches | 42 inches | 40 inches |
| King | 20 x 36 inches | 42 inches | 46 inches |
- Why bigger? You need extra fabric. This extra space makes the pillow fit well. It also gives room for folding and gluing or taping edges. This is often called a seam allowance, even if you are not sewing.
- Note on Width: The 42-inch width is common for cotton fabric. This size often works for standard, queen, and king pillows. It is usually enough to go around the pillow with some overlap.
- Adjusting Length: The length needs to cover the pillow’s length. It also needs extra for the opening hem. For an envelope pillowcase no stitch, you will need more length. This extra length creates the flap.
Method One: The Fabric Glue Pillowcase Method
This is a very popular way to make a DIY pillow cover without sewing. It is fast and easy. The fabric glue pillowcase method is great for beginners.
Supplies for Fabric Glue Method
- Your chosen fabric
- Fabric scissors
- Measuring tape
- Fabric pins or clips
- Fabric glue (make sure it is washable and flexible)
- Iron and ironing board (optional, but helpful for crisp edges)
Step-by-Step Glue Instructions
h4. Prepping Your Fabric
- Wash and Dry Fabric: Wash your fabric first. This helps it shrink before you cut it. It also makes sure your glue holds well. Dry and iron the fabric flat.
- Measure and Cut Fabric: Lay your fabric flat. Measure the correct dimensions for your pillow. For a standard pillow (20×26 inches), cut a piece of fabric 42 inches wide by 36 inches long.
- Fold Fabric: Fold the fabric in half lengthwise. The wrong side (the side that will be inside) should be facing out. The folded fabric should now be 21 inches wide by 36 inches long. Pin the open long edge together.
h4. Gluing the Sides
- Glue First Long Edge: Unfold one of the long open edges. Fold it over about 1/2 inch towards the wrong side. Press it flat with an iron. Add a thin line of fabric glue under this fold. Press down firmly. Let it dry for a few minutes.
- Glue Second Long Edge: Repeat step 1 for the other long open edge. Now both long sides have neat glued hems.
- Fold and Glue Short Edge (Opening): For the opening, fold one short edge over about 1/2 inch. Press it. Then fold it over again by 2 inches. This makes a double hem. Pin it in place. Apply a line of fabric glue along the inside edge of this double fold. Press down firmly. Let it dry well. This forms the finished opening of your pillowcase.
h4. Assembling the Pillowcase
- Fold Fabric: Fold your fabric in half again, with the right sides together. The fabric should now be 21 inches wide by 36 inches long. The long sides should be on the left and right. The hemmed opening is at one end.
- Glue the Side Seam: Along one long open edge, apply a thin line of fabric glue about 1/2 inch from the edge. Press the two fabric layers together firmly. Use clips or pins to hold it. Let it dry completely.
- Glue the Bottom Seam: Along the bottom raw edge, apply a thin line of fabric glue about 1/2 inch from the edge. Press the fabric layers together firmly. Use clips or pins. Let it dry completely.
- Curing Time: Let the pillowcase cure for at least 24-72 hours. Check the glue bottle for exact times. Do not rush this step.
h4. Finishing Up
- Turn Right Side Out: Once fully dry, turn your pillowcase right side out.
- Insert Pillow: Place your pillow inside. Your new no-sew pillowcase is ready!
Tips for Gluing Success
- Thin Glue Lines: Use thin lines of glue. Too much glue can make the fabric stiff. It can also seep through.
- Press Firmly: Press the glued areas firmly. This helps the glue bond well.
- Cure Time: Always let the glue dry fully. This makes sure it holds up over time and washes.
- Washable Glue: Use only fabric glue labeled as washable.
Method Two: The Iron-On Hem Tape Pillow Project
This is another simple and clean way to make a DIY pillow cover without sewing. The iron-on hem tape pillow project uses heat to bond fabric. It gives a very neat finish.
Supplies for Iron-On Hem Tape Method
- Your chosen fabric
- Fabric scissors
- Measuring tape
- Iron-on hem tape (look for “fusible web” or “no-sew hemming tape”)
- Iron and ironing board
- Fabric pins or clips
Step-by-Step Hem Tape Instructions
h4. Fabric Preparation
- Wash and Dry: Wash, dry, and iron your fabric. This removes wrinkles and pre-shrinks it.
- Measure and Cut: Cut your fabric to the right dimensions. For a standard pillow, use 42 inches wide by 36 inches long.
- Fold Fabric: Fold the fabric in half lengthwise. The wrong side should be out. Pin the open long edge.
h4. Creating Hems with Tape
- Hem the Long Sides: Unfold one long open edge. Fold it over about 1/2 inch towards the wrong side. Press it flat with the iron. Place a strip of iron-on hem tape under this fold. Press with a hot iron according to tape directions. Hold the iron for 10-15 seconds. Repeat for the other long edge.
- Hem the Opening: For the pillowcase opening, fold one short edge over 1/2 inch. Press it. Then fold it over again by 2 inches. This creates a strong double hem. Place strips of hem tape under this double fold. Press with a hot iron. Make sure the tape is fully melted and bonded.
h4. Assembling with Tape
- Fold Right Sides Together: Fold your fabric in half lengthwise. The right sides should be facing each other. The fabric is now 21 inches wide by 36 inches long. The hemmed opening is at one end.
- Tape the Side Seam: Along the open long edge, place strips of iron-on hem tape about 1/2 inch from the edge. Press with the iron, melting the tape. Make sure to press firmly.
- Tape the Bottom Seam: Along the raw short edge (the bottom), place strips of iron-on hem tape about 1/2 inch from the edge. Press with the iron, melting the tape.
- Cool Down: Let the pillowcase cool down completely. The bond gets stronger as it cools.
h4. Final Step
- Turn Right Side Out: Turn your pillowcase right side out.
- Check Edges: Check all edges. If any part did not stick, go back and press it again with the iron.
Tips for Hem Tape Success
- Right Heat Setting: Use the correct heat for your fabric and tape. Test on a scrap piece.
- Enough Tape: Use enough tape. Overlap pieces slightly if needed.
- Firm Pressure: Press down firmly with the iron. Do not just glide it.
- Cool Completely: Let the fabric cool before handling too much. This sets the bond.
Method Three: Hand Sew Pillowcase Instructions
Even if you do not have a machine, you can still sew! Hand sew pillowcase instructions are simple. This method gives a more classic, durable finish. It is a true beginner fabric crafts no sewing machine needed option.
Supplies for Hand Sewing Method
- Your chosen fabric
- Fabric scissors
- Measuring tape
- Needle (a sharp “all-purpose” needle works well)
- Thread (polyester thread is strong and good for most fabrics)
- Fabric pins or clips
- Iron and ironing board (optional, but good for neat edges)
Step-by-Step Hand Sewing Instructions
h4. Preparing Your Fabric
- Wash and Iron: Wash, dry, and iron your fabric.
- Measure and Cut: Cut your fabric to the correct dimensions. (Standard: 42 inches wide by 36 inches long).
- Fold Fabric: Fold the fabric in half lengthwise, wrong sides out. Pin the open long edge.
h4. Forming Hems by Hand
- Hem Long Sides: Unfold one long open edge. Fold it over 1/2 inch towards the wrong side. Press it. Use a simple running stitch or whipstitch along this fold. Make small, even stitches. Repeat for the other long edge.
- Running Stitch: Push the needle in and out of the fabric in a straight line.
- Whipstitch: Bring the needle up through the fabric, then wrap the thread over the edge and push the needle down into the fabric again, forming small diagonal stitches over the edge.
- Hem the Opening: For the pillowcase opening, fold one short edge over 1/2 inch. Press it. Then fold it over again by 2 inches. Pin this double hem. Hand stitch this hem in place using a running stitch or a backstitch. A backstitch is stronger.
- Backstitch: Push the needle through the fabric from the back, then bring it back through a bit behind the first stitch. Go forward, then back again. This makes a strong, solid line of stitches.
h4. Sewing the Pillowcase Together
- Fold Right Sides Together: Fold your fabric in half lengthwise. The right sides should be facing each other. The fabric is 21 inches wide by 36 inches long. The hemmed opening is at one end.
- Stitch the Side Seam: Use a backstitch or a sturdy running stitch about 1/2 inch from the open long edge. Sew all the way down the edge. Make your stitches even and close together.
- Stitch the Bottom Seam: Use the same backstitch or running stitch about 1/2 inch from the raw short edge (the bottom). Sew across this edge.
- Secure Stitches: At the start and end of each seam, make a few extra stitches in place (a knot or small backstitches) to secure the thread.
h4. Final Touch
- Turn Out: Turn your pillowcase right side out.
- Press (Optional): Give it a final press with an iron for a crisp look.
Tips for Hand Sewing Success
- Good Light: Work in a well-lit area.
- Short Thread: Use a thread length no longer than your arm. This prevents tangles.
- Thimble: Use a thimble if your fingers get sore pushing the needle.
- Practice Stitches: If new to hand sewing, practice on a scrap of fabric first.
Method Four: Envelope Pillowcase No Stitch (Folding Method)
This is perhaps the simplest way to make a DIY pillow cover without sewing. An envelope pillowcase no stitch uses smart folding. It does not need glue, tape, or sewing! It is perfect for an easy no-sew pillow sham.
Supplies for Folding Method
- Your chosen fabric (fleece or felt works very well for this method)
- Fabric scissors
- Measuring tape
Step-by-Step Folding Instructions
h4. Fabric Selection and Cut
- Fabric Choice: This method works best with fabrics that do not fray. Fleece is excellent. Felt also works. If using cotton, you might need to hem the edges first with glue or hem tape.
- Measure and Cut: This method needs a longer piece of fabric.
- Width: The fabric width needs to be your pillow’s width PLUS about 1 inch for ease. So for a 20-inch wide pillow, cut fabric 21 inches wide.
- Length: The fabric length needs to be your pillow’s length TIMES TWO, PLUS another 10-12 inches for the overlap. For a 26-inch long pillow, cut fabric 26 x 2 + 12 = 52 + 12 = 64 inches long.
- Example for Standard Pillow: Cut a piece of fabric 21 inches wide by 64 inches long.
h4. Folding the Envelope
- Lay Fabric Flat: Lay your fabric piece right side up on a flat surface.
- Fold Ends In: Take one short end of the fabric. Fold it towards the center. Measure so it overlaps the pillow’s length by about 5-6 inches. Pin it or hold it.
- Fold Other End: Take the other short end. Fold it over the first folded end. It should also overlap the pillow’s length by 5-6 inches. This creates the “envelope” opening. The two folded ends should overlap each other in the middle.
h4. Creating the Sides
- Fold in Half: Now, fold the entire fabric piece in half lengthwise. The folded ends will be on the inside. The right side of the fabric will be on the outside.
- Cut Fringe (for Fleece): If using fleece, this is where you can make it fun. Cut small strips (fringe) along the two open raw long edges. Cut about 1 inch deep and 1/2 inch wide. Do this on both sides.
- Tie Knots (for Fleece): Take the top and bottom fringe pieces. Tie them together in a double knot. Work your way down the entire length of both sides. This creates a closed side seam. If not using fleece, you would need to glue or tape these sides.
h4. Inserting Pillow
- Open and Insert: Open the envelope flap in the middle. Slide your pillow inside. The overlapping flaps will hold the pillow securely.
Tips for Folding Success
- No-Fray Fabric: This method shines with fabrics that do not fray, like fleece or felt.
- Accurate Cuts: Precise cutting helps the pillow fit snugly.
- Generous Overlap: Make sure you have enough overlap for the envelope closure. This stops the pillow from falling out.
Specific Projects: Beyond the Basics
Now that you know the main methods, let’s look at specific projects.
Easy No-Sew Pillow Sham
An easy no-sew pillow sham is simply a decorative pillowcase. You can use any of the above methods. The key is choosing the right fabric.
* Fabric: Pick richer fabrics. Think velvet, faux silk, or heavy cotton with a nice pattern.
* Embellish: Add details. Use fabric glue to attach trim, pompoms, or appliques. Iron-on patches also work well.
* Envelope Style: The envelope pillowcase no stitch method works great for shams. It hides the pillow and gives a clean look.
Fleece No-Sew Pillowcase Pattern (Tying Knots)
This is a favorite beginner fabric crafts no sewing project. It is super simple and makes a cozy fleece no-sew pillowcase pattern.
h5. Supplies
- Fleece fabric (cut to size for your pillow, plus enough for fringes)
- Fabric scissors
- Pillow
- Ruler (optional)
h5. Steps
- Cut Fabric: Cut two pieces of fleece fabric. Each piece should be the same size as your pillow, plus 1 inch on all four sides. For a 20×26 inch pillow, cut two pieces of fleece 21×27 inches.
- Lay Together: Place the two pieces of fleece on top of each other. The wrong sides should be facing each other. Line up all edges.
- Cut Fringes:
- Along all four edges, cut strips of fleece about 1 inch deep and 1/2 inch wide. Cut through both layers of fabric at once.
- At each corner, cut out a 1×1 inch square. This removes bulk.
- Tie Fringes: Start at one corner. Take the top fringe strip and the bottom fringe strip. Tie them together in a double knot.
- Work Around Three Sides: Continue tying knots all along three sides of the pillowcase. Leave one short side open. This is where you will put the pillow in.
- Insert Pillow: Slide your pillow inside the open side.
- Tie Last Side: Now, tie the knots on the last side to close the pillowcase.
This makes a cuddly pillowcase. It is very soft and fun to make.
Tips for Beginner Fabric Crafts No Sewing
Here are general tips for all your no-sew projects. They will help you get the best results.
- Fabric Choice Matters:
- Cotton and Flannel: Good for glue and hem tape. They hold creases well.
- Fleece and Felt: Ideal for no-stitch, no-fray methods like tying or folding. They do not unravel.
- Avoid Silky or Stretchy Fabrics: These are hard to work with without a machine. They slip and stretch too much.
- Pre-Wash Fabric: Always wash and dry your fabric before cutting. This stops shrinkage later. It makes sure your pillowcase stays the right size.
- Ironing is Your Friend: Ironing makes crisp, neat folds. This is very important for straight lines, even without sewing. It makes glue and tape bonds stronger.
- Measure Twice, Cut Once: Double-check your measurements. It is easy to make a mistake. Cutting carefully saves time and fabric.
- Use Clips or Pins: These hold fabric securely while you glue, tape, or hand sew. This stops fabric from moving.
- Ventilation for Glue: If using fabric glue, work in a room with fresh air. Some glues can have strong fumes.
- Patience: No-sew projects are easy. But taking your time helps. Let glue dry fully. Press tape well. Do not rush.
- Practice on Scraps: If trying a new method, test on a small piece of fabric first. See how the glue holds or how the tape melts.
Caring for Your No-Sew Pillowcase
Your no-sew pillowcase needs care. Proper care makes it last longer.
- Read Product Labels: Check the label on your fabric glue or hem tape. It will tell you how to wash it.
- Gentle Wash: Most no-sew pillowcases do best with gentle washing. Use cold water. Use a gentle cycle on your washing machine.
- Air Dry or Low Heat: Air dry your pillowcase if possible. Or tumble dry on low heat. High heat can weaken glue or tape bonds over time.
- Ironing: If ironing, iron on a low setting. Avoid direct heat on glued or taped areas. Use a pressing cloth if needed.
Frequently Asked Questions (FAQ)
Q1: Can I use hot glue for a no-sew pillowcase?
A1: Hot glue is not the best choice for pillowcases. It becomes stiff and hard. It might crack and break when washed or used. Fabric glue is much better. It stays flexible and holds up to washing.
Q2: How long does fabric glue take to dry?
A2: Drying times vary by glue type. Most fabric glues need at least 24 hours to fully dry. Some may need 72 hours to “cure” for a strong, washable bond. Always read the glue bottle’s instructions.
Q3: Will iron-on hem tape hold up in the wash?
A3: Yes, good quality iron-on hem tape is made to be washable. It forms a strong bond when applied correctly with heat and pressure. Follow the tape’s washing instructions. Use a gentle cycle and lower heat for drying to make it last.
Q4: What type of fabric is best for no-sew projects?
A4: Cotton, flannel, and fleece are excellent choices. Cotton and flannel are good for glue and hem tape. Fleece is perfect for knot-tying or envelope-style no-stitch projects because it does not fray. Avoid slippery or very stretchy fabrics.
Q5: Can I make a no-sew pillowcase for a throw pillow?
A5: Yes, you can! The methods in this guide work for all pillow sizes. Just adjust your fabric dimensions. Measure your throw pillow first. Then cut fabric bigger to allow for folds, glue, or tape. This is great for an easy no-sew pillow sham.
Q6: Are no-sew pillowcases as durable as sewn ones?
A6: Sewn pillowcases are usually more durable. But no-sew ones can last a long time with proper care and good materials. Using quality fabric glue or hem tape helps them last. Hand-sewn ones can be very strong too if stitches are done well.
Conclusion
Making a pillowcase without a sewing machine is easy and fun. You do not need fancy skills or lots of tools. With fabric glue, iron-on tape, hand stitches, or clever folding, you can create lovely pillow covers. This no-sew pillowcase tutorial shows you many ways. Now you can make a DIY pillow cover without sewing. Try the fabric glue pillowcase method. Or use the iron-on hem tape pillow project. You can even use hand sew pillowcase instructions. Explore an easy no-sew pillow sham or a fleece no-sew pillowcase pattern. These beginner fabric crafts no sewing needed projects are simple. Enjoy making your new, custom pillowcases today!