
Image Source: i.ytimg.com
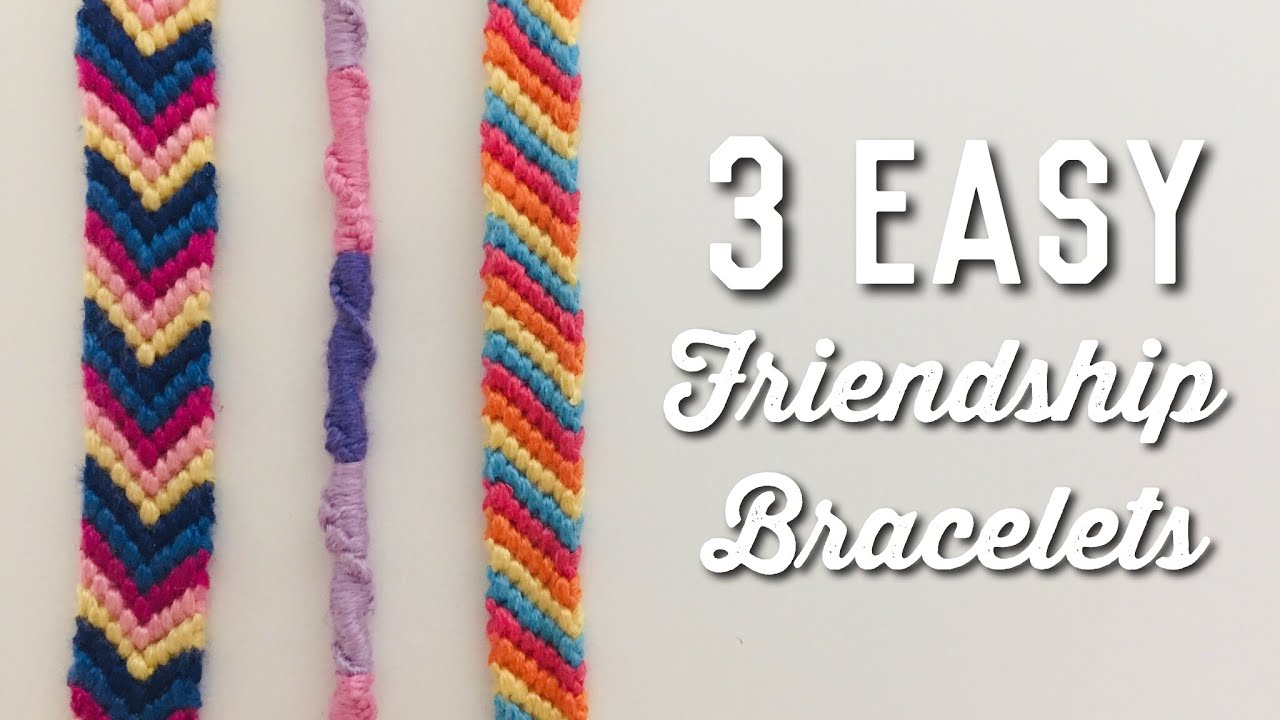
DIY How To Make Friendship Bracelets With Embroidery Thread
Friendship bracelets are pretty bands you make by hand. You give them to friends to show you care. Many people ask, “What is a friendship bracelet?” It is a woven bracelet, often made of colorful string, given as a symbol of friendship. Can anyone make them? Yes, anyone can learn! Making these bracelets is fun and easy. You use colorful threads to tie special knots. This guide will show you how to make them step-by-step. You will learn how to make easy ones and some a bit harder. This is a great craft for all ages, perfect for DIY jewelry making for kids or adults.
Gathering Your Tools
Before you start, you need a few things. These items are easy to find. Having everything ready makes crafting fun and smooth. Here is a friendship bracelet supplies list you will need:
H4 Essential Items
- Embroidery Thread: This is the best string to use. It comes in many bright colors. You can find it at craft stores or even big stores like Walmart. Choose colors you like or colors that your friends will love.
- Scissors: You need sharp scissors to cut your thread.
- Tape or Clipboard: You need a way to hold your threads still while you tie knots.
- Tape: Use strong tape, like masking tape or painter’s tape, to stick your threads to a table.
- Clipboard: Clip your threads to the top of a clipboard.
- Safety Pin: Pin your threads to your jeans or a pillow.
- Measuring Tape or Ruler: You will use this to cut your threads to the right length.
H4 Picking the Right Thread
Embroidery floss patterns look best with good thread. Embroidery floss is made of six thin strands. You can use all six strands together for a thicker bracelet. Or, you can separate them into three strands for a thinner one. For your first bracelets, use all six strands. This makes the knots bigger and easier to see.
Here is a table of common supplies:
| Item | What it is for | Where to find it |
|---|---|---|
| Embroidery Thread | Making the bracelet | Craft stores, big box stores |
| Scissors | Cutting thread | Home, craft stores, office stores |
| Tape/Clipboard/Pin | Holding threads steady | Home, office stores |
| Measuring Tape/Ruler | Getting the correct thread length | Home, craft stores |
Getting Started: The Basic Knots
All DIY knotted bracelets use basic knots. If you can tie a simple knot, you can make these bracelets. There are two main knots you will use: the forward knot and the backward knot. These knots are like building blocks. You use them over and over.
H4 Preparing Your Threads
First, cut your threads. For most bracelets, you need strands that are about 60 inches (150 cm) long. This sounds like a lot, but it is better to have too much than too little. You can always trim extra thread later. For a bracelet with many colors, you will need one strand of each color.
Let’s say you want a bracelet with four colors: red, blue, green, and yellow.
1. Cut one strand of red thread, 60 inches long.
2. Cut one strand of blue thread, 60 inches long.
3. Cut one strand of green thread, 60 inches long.
4. Cut one strand of yellow thread, 60 inches long.
H4 Starting Your Bracelet
After cutting your threads, gather them together.
1. Line up the ends of all your threads.
2. Tie all the threads together in one big knot about 3 inches (7.5 cm) from the top. This makes a loop. This loop will be part of how you tie on your bracelet later.
3. Now, tape this loop to a table. Or, clip it to your clipboard. Or, pin it to your jeans. Make sure the threads hang down. They should be straight and not tangled.
H4 The Forward Knot (F Knot)
This knot makes a diagonal line of color. It is very important for many easy string bracelet designs.
1. Pick two threads next to each other. Let’s call the left thread Thread A. Let’s call the right thread Thread B.
2. Take Thread A. Make a number “4” shape over Thread B. Thread A should go over Thread B.
3. Now, pull Thread A under Thread B. Pull it through the loop you just made.
4. Pull Thread A up towards the top. Pull it tight. Make sure the knot sits nicely at the top of Thread B.
5. This is only half of a forward knot. You need to make two of these same knots for one full knot. So, do steps 2-4 again with the same Thread A and Thread B.
6. When you make two “4” knots, you have made one full forward knot. Thread A will now sit to the right of Thread B.
H4 The Backward Knot (B Knot)
This knot is the opposite of the forward knot. It also makes a diagonal line.
1. Again, pick two threads next to each other. Let’s call the left thread Thread A. Let’s call the right thread Thread B.
2. Take Thread B. Make a backward “4” shape (like a P) over Thread A. Thread B should go over Thread A.
3. Now, pull Thread B under Thread A. Pull it through the loop you just made.
4. Pull Thread B up towards the top. Pull it tight. Make sure the knot sits nicely at the top of Thread A.
5. This is only half of a backward knot. You need to make two of these same knots for one full knot. So, do steps 2-4 again with the same Thread B and Thread A.
6. When you make two backward “4” knots, you have made one full backward knot. Thread B will now sit to the left of Thread A.
Simple Styles for New Makers
You have learned the basic knots. Now you can make real bracelets! Here are some beginner friendship bracelet tutorial ideas. They are great for learning.
H4 The Candy Stripe Bracelet Instructions
The candy stripe bracelet is one of the simplest to make. It uses only the forward knot. This bracelet makes stripes that go in one direction. It looks like a candy cane.
What you need:
* 3 or more colors of embroidery thread.
* Scissors, tape/clipboard/pin.
Candy Stripe Bracelet Steps:
1. Cut Threads: Choose your colors. For example, pink, blue, green. Cut one strand of each color, about 60 inches (150 cm) long. If you want a thicker bracelet, cut two strands of each color.
2. Start Your Bracelet: Gather your threads. Tie them all together in a big knot about 3 inches (7.5 cm) from the top. Tape or clip this knot down.
3. Order Your Colors: Lay your threads out in the order you want your stripes to appear. The color on the far left will be your first stripe. For example, pink, blue, green.
4. Make the First Row:
* Take the far left thread (pink). This is your working thread.
* Make two forward knots on the thread next to it (blue). Remember, a full forward knot is two half knots.
* After two forward knots, the pink thread will have moved one spot to the right.
* Now, take the same pink thread. Make two forward knots on the next thread (green).
* Keep making two forward knots on each thread, moving from left to right.
* When the pink thread has gone across all the other threads and is now on the far right, you have finished one stripe (one row).
5. Start the Next Row:
* Now, take the new far left thread (this will be blue if you started with pink, blue, green). This is your new working thread.
* Repeat step 4. Make two forward knots on each thread to its right. Move it all the way to the far right.
6. Keep Going: Keep making rows. Each time, use the far left thread as your working thread. Make two forward knots on every thread to its right. This moves the working thread all the way to the right.
7. Finish the Bracelet: When your bracelet is long enough to fit your wrist, stop knotting. Gather all the threads together. Tie them in a big knot. You can trim the ends.
The Chevron Friendship Bracelet Steps
The chevron bracelet makes a “V” shape or zigzag pattern. It looks a bit more complex but uses the same basic knots. You will use both forward and backward knots.
What you need:
* 4 or more colors of embroidery thread. You need an even number of strands.
* Scissors, tape/clipboard/pin.
Chevron Friendship Bracelet Steps:
1. Cut Threads: Choose your colors. You will need an even number of threads. For example, if you want four colors, cut two strands of each color. Cut each strand about 60 inches (150 cm) long. You will have 8 strands in total (2 red, 2 blue, 2 green, 2 yellow).
2. Start Your Bracelet: Gather all threads. Tie them in a big knot about 3 inches (7.5 cm) from the top. Tape or clip this knot down.
3. Order Your Colors: Lay your threads out in a mirror image. The colors on the left side should match the colors on the right side. The middle two threads should be the same color.
* Example order: Red, Blue, Green, Yellow, Yellow, Green, Blue, Red.
4. Make the Left Side (Forward Knots):
* Take the far left thread (red). This is your working thread for the left side.
* Make two forward knots on the next thread (blue).
* Make two forward knots on the next thread (green).
* Make two forward knots on the next thread (yellow).
* Stop here. The red thread should now be in the middle of your threads. It will be to the left of the other yellow thread.
5. Make the Right Side (Backward Knots):
* Now, take the far right thread (the other red thread). This is your working thread for the right side.
* Make two backward knots on the thread next to it (blue).
* Make two backward knots on the next thread (green).
* Make two backward knots on the next thread (yellow).
* Stop here. This red thread should now be in the middle of your threads. It will be to the right of the first red thread.
6. Join the Middle (Forward-Backward Knot):
* You now have your two working threads (both red) in the middle. They are next to each other.
* Take the left red thread. Make one forward knot on the right red thread. This joins the two sides.
7. Start the Next Row:
* Now, the first set of red threads is done. They have made a “V” shape.
* The new far left thread is blue. The new far right thread is also blue.
* Repeat steps 4-6. Work from the left with the left blue thread (forward knots). Work from the right with the right blue thread (backward knots). Join them in the middle with a forward knot.
8. Keep Going: Keep making rows. Each row, you will use the new outer threads. They will meet in the middle.
9. Finish the Bracelet: When your bracelet is long enough, stop knotting. Gather all the threads together. Tie them in a big knot. You can trim the ends.
Exploring More Designs
Once you master the candy stripe and chevron, you can explore many other embroidery floss patterns. Some bracelets use different knots. Some just change the way you use the basic knots. Handmade thread bracelets offer endless creative fun.
H4 Simple Braided Bracelets
These are great DIY knotted bracelets for beginners, especially for DIY jewelry making for kids. They do not use the special knots above. They use a simple braid.
How to make a braided bracelet:
1. Cut three groups of threads. Each group can be one color or many. For example, three strands of pink, three strands of blue, three strands of green.
2. Tie all nine strands together in a big knot at one end.
3. Divide the nine strands into three equal groups. Each group should have three strands.
4. Braid the three groups together, just like you braid hair.
5. When it is long enough, tie a big knot at the end. Trim the extra thread.
H4 Simple Twisted Bracelets
This is another super easy design. It makes a cool twisted look.
1. Cut two strands of thread. Each strand should be about 30 inches (75 cm) long. Use different colors for a nice effect.
2. Tie them together in a knot at one end. Leave a loop.
3. Tape or clip the knot down.
4. Hold one thread in one hand. Hold the other thread in the other hand.
5. Twist each thread tightly in the same direction (e.g., both clockwise). Twist them until they are very tight and start to curl.
6. Bring the two twisted threads together. Let them twist around each other. They will naturally coil.
7. Tie a knot at the end before they untwist. Trim the extra thread.
H4 Moving Beyond Basic Knots: Macrame Friendship Bracelets
Some macrame friendship bracelets use other knots. These can make more complex designs. The forward and backward knots are actually types of macrame knots. Other common macrame knots include the half hitch and square knot. For now, focus on the forward and backward knots. They let you make many beautiful patterns. As you get better, you can look up these new knots. They open up even more embroidery floss patterns.
Making Bracelets with Kids
DIY jewelry making for kids is a wonderful activity. It helps kids with their hands. It also lets them be creative. Here are some tips for making bracelets with children.
H4 Tips for Young Crafters
- Start with Easy Designs: Begin with braided bracelets or simple candy stripes. These are easier for little hands to manage.
- Use Fewer Threads: For candy stripes, start with only 3-4 threads. This keeps it from being too overwhelming.
- Cut Shorter Threads: Long threads can tangle easily. Cut threads around 40-50 inches (100-125 cm) for kids. They can always add more if needed.
- Pre-Measure and Cut: Have all threads cut and ready before starting. This saves time and frustration.
- Use Simple Language: Explain steps in very simple terms. Show them clearly. Do each step with them.
- Be Patient: Kids learn at their own pace. Do not rush them. It is about fun, not perfection.
- Celebrate Small Wins: Praise their effort. Say “Good job!” when they make a knot.
- Make it a Group Activity: Making bracelets with friends is even more fun.
H4 Safety First
- Scissors: Supervise kids when using scissors. Make sure they use kid-safe scissors if very young.
- Small Parts: Ensure small children do not put thread ends or small tools in their mouths.
- Clean Up: Make sure to pick up any small thread bits.
Tips for Great Bracelets
Making handmade thread bracelets takes practice. Here are some tips to help you make your bracelets look their best.
H4 Keeping Tension Even
This is one of the most important tips.
* Pull Each Knot the Same: When you pull a knot tight, pull it with the same amount of force every time.
* Look at Your Knots: If some knots look loose and some look tight, your tension is uneven. Try to pull them more gently or more firmly to match.
* Even tension makes your bracelet straight and neat. It also makes your DIY knotted bracelets strong.
H4 Measuring Threads Correctly
- It is always better to cut threads too long than too short. You can trim extra thread. You cannot add more thread easily.
- A general rule is to cut threads about 60 inches (150 cm) long for an adult bracelet. For very thick bracelets, you might need more.
- If you find you often run out of thread, cut your next set a little longer.
H4 How to Fix Mistakes
Everyone makes mistakes! Do not worry.
* Untie Carefully: If you make a wrong knot, you can often untie it. Use a pin or needle to gently loosen the knot. Then pull the threads apart.
* Go Slow: Taking your time helps prevent mistakes.
* Practice: The more you make, the fewer mistakes you will make.
H4 Finishing Strong
How you finish your bracelet matters. It makes it wearable.
* Simple Knot: After you are done knotting, tie all threads together in a big knot at the end. You can trim the loose ends short.
* Braids: You can braid the remaining threads at each end. Make two braids, one from the starting loop and one from the ending knot. You tie these braids together to wear the bracelet.
* Loop and Tie: Some people make a loop at one end (like the starting knot we talked about). At the other end, they just tie a simple knot with all threads. To wear it, you put the knot through the loop.
* Button Closure: For a fancier finish, you can sew a button to one end. Then, make a loop at the other end that fits around the button.
Caring for Your Bracelets
Your handmade thread bracelets can last a long time if you take care of them.
H4 Washing Your Bracelets
- Gentle Hand Wash: If your bracelet gets dirty, gently hand wash it with mild soap and cool water.
- Rinse Well: Rinse all the soap out.
- Air Dry: Lay it flat to air dry. Do not put it in a dryer.
H4 Wearing Tips
- Avoid Harsh Chemicals: Try not to get your bracelet covered in harsh chemicals like bleach or strong cleaners.
- Take Off for Water Activities: If you swim a lot, especially in chlorine or salt water, your bracelet might fade faster. It is best to take it off.
- Do Not Pull Too Hard: Be gentle when putting it on or taking it off. Rough pulling can break the threads.
Troubleshooting Common Issues
Sometimes, things do not go as planned. Here are answers to common problems.
H4 Uneven Knots
Problem: Some parts of my bracelet look tight, and some look loose.
Reason: This often happens because you are pulling some knots tighter than others. Your tension is not even.
Fix: Try to pull each knot with the same gentle, firm pull. Practice helps you get a feel for the right tension. It is okay if your first bracelets are not perfect!
H4 Running Out of Thread
Problem: One of my threads is too short before the bracelet is done.
Reason: You did not cut the thread long enough. Or, that thread was used more often than others.
Fix:
* If you are almost done: You might be able to tie a tiny, hidden knot with a new piece of thread. This is tricky.
* Best Fix: Try to learn from this. For your next bracelet, cut your threads a bit longer, especially the main “working” threads that go across many times.
H4 Bracelet Twisting
Problem: My bracelet keeps twisting as I knot it.
Reason: This often happens with the candy stripe when you only use forward knots. The knots naturally want to twist.
Fix:
* Tape it Down Well: Make sure your starting loop is taped down firmly.
* Keep Straight: Try to keep your work flat as you knot.
* Gentle Tension: Uneven tension can make it twist more.
* For Candy Stripe: Some twisting is normal for candy stripe. It adds to its unique look. For patterns that need to be very flat, you might need to use a mix of forward and backward knots.
Advanced Knot Ideas
Once you are comfortable with easy string bracelet designs like the candy stripe and chevron, you can try more complex embroidery floss patterns.
* Heart Pattern: This uses a mix of knots to make little heart shapes.
* Diamond Pattern: This also uses a mix of knots to make diamond shapes.
* Alpha Patterns: These let you knot letters or numbers into your bracelet. They are very detailed and use many tiny knots. They are a big step up!
* Kumihimo: This is a Japanese braiding method that uses a special disc. It makes round or flat braids. It is a different kind of macrame friendship bracelets.
These advanced patterns show how much you can do with just thread and knots. It all starts with the basic forward and backward knots. Keep practicing, and you can make amazing handmade thread bracelets.
Frequently Asked Questions (FAQ)
H4 How long should my threads be?
For most bracelets, cut each thread about 60 inches (150 cm) long. If you are making a very wide or very long bracelet, you might need more. For kids, 40-50 inches (100-125 cm) might be enough.
H4 What is the best way to start a friendship bracelet?
The most common way is to tie all your threads together in one big knot about 3 inches (7.5 cm) from the top. This creates a loop. You then tape or pin this loop down to hold your work.
H4 Can I use regular string instead of embroidery thread?
Yes, you can. But embroidery thread is usually best. It is strong, does not fray easily, and comes in many bright colors. Other strings might be too thick, too thin, or break easily.
H4 How do I know when my bracelet is long enough?
Stop knotting when your bracelet is long enough to wrap comfortably around your wrist, plus a bit extra for tying. You can hold it up to your wrist or use a ruler to check the length.
H4 My knots are not tight enough. What am I doing wrong?
You might not be pulling the working thread hard enough when you make the knot. Make sure you pull it all the way up so it sits snug against the previous knot. Remember, each full knot is two half-knots. Pull each half-knot tight.
H4 How do I add beads to my friendship bracelets?
You can add beads to many DIY knotted bracelets. Before you make a knot, you can thread a bead onto the non-working thread. Then, make your knot around the bead. This takes practice.
H4 What’s the difference between a forward knot and a backward knot?
A forward knot makes the working thread move to the right. A backward knot makes the working thread move to the left. You use both in patterns like the chevron to make shapes.
Making DIY knotted bracelets is a fun hobby. It is a simple way to show kindness. With practice, you can make beautiful handmade thread bracelets for all your friends and family. Enjoy your crafting!