
Image Source: i.ytimg.com
How To Make A Blanket With Fleece Without Sewing Easily
Can you make a blanket with fleece without sewing? Yes, you absolutely can! It is one of the simplest and most fun craft projects you can do. A no-sew fleece blanket is a soft, cozy blanket made by cutting and tying fleece fabric together. This project is perfect for beginners. It does not need any special skills or tools like a sewing machine. You just need a few basic supplies and a little time. You will have a warm, custom blanket ready to use or give as a gift. This easy fleece blanket project is a great way to make something special with your own hands.
Why Make a No-Sew Fleece Blanket?
Making a blanket without sewing offers many great benefits. It is a creative and rewarding project.
Fast and Simple Creation
One of the biggest reasons to make a no-sew fleece blanket is how fast it is. You can often finish a blanket in just a few hours. This makes it perfect for last-minute gifts. It is also great for people who want a quick craft fix. There is no need to thread a needle or worry about stitches. You simply cut and tie. This makes it a truly easy fleece blanket project for anyone.
No Sewing Skills Needed
You do not need to know how to sew. This project does not use a needle and thread. You do not need a sewing machine either. This means anyone can make a beautiful blanket. This makes it ideal for kids, teens, and adults who are new to crafting. It is a fantastic way to start making things with fabric.
A Great Gift Idea
A handmade fleece gift is very thoughtful. People love getting something made just for them. You can pick colors and patterns that fit the person’s taste. This makes the gift feel extra special. These blankets are perfect for birthdays, holidays, graduations, or baby showers. They offer warmth and comfort, showing you care.
Budget-Friendly
Compared to buying a ready-made blanket, making your own can save money. Fleece fabric is often affordable, especially when you find sales. You also avoid the cost of expensive sewing notions or machines. This project uses simple tools you might already have at home.
Fully Customizable
You get to pick every part of your blanket. You choose the fabric colors. You decide on the size. You can even mix two different fleece fabrics for a unique look. This lets you make a blanket that is just right for you or the person you are making it for. It is a chance to let your creativity shine. This makes it a truly unique DIY fleece blanket.
Picking Your Fleece Fabric
The right fabric is key to a good no-sew fleece blanket. Fleece is wonderful because it does not fray when cut. This makes it perfect for tying without needing sewn hems.
Types of Fleece
There are many kinds of fleece. Knowing the differences helps you pick the best one for your blanket.
- Anti-Pill Fleece: This is the top choice for no-sew blankets. Anti-pill fleece is treated to resist those small fabric balls that form over time. These are called pills. This means your blanket will look newer and softer for longer. It feels good and holds up well to washes. For any anti-pill fleece projects, this type of fabric is your best friend.
- Polar Fleece: This is a common and soft type of fleece. It is warm and comes in many colors. It can sometimes pill more easily than anti-pill fleece. But it is still a good choice for blankets.
- Microfleece: This fleece is very lightweight and soft. It is often used for clothing linings or thin blankets. It might be less thick than polar or anti-pill fleece. This means it might not be as warm.
- Blizzard Fleece: This is often a mid-weight fleece. It is warm and durable. It is a good choice for a cozy blanket. It is generally less prone to pilling than basic polar fleece.
- Printed Fleece: Many fleece fabrics come with fun patterns or pictures. These can add a lot of personality to your blanket. If you pick a patterned fleece, think about how the pattern will look when cut into strips.
Fabric Yardage Guide
How much fleece do you need? This depends on the size of the blanket you want. For a no-sew blanket, you usually use two layers of fleece. This makes the blanket extra warm and cozy. You will need the same amount of fabric for each layer.
Here is a table showing common blanket sizes and the typical fabric needed for each layer. Remember, fleece usually comes in widths of 58 or 60 inches. This chart assumes that width.
| Blanket Size | Approximate Dimensions (inches) | Fabric Needed Per Layer (yards) |
|---|---|---|
| Baby/Receiving | 30 x 30 | 1 |
| Toddler/Crib | 40 x 50 | 1.5 |
| Throw | 50 x 60 | 1.75 – 2 |
| Twin | 60 x 90 | 2.5 – 3 |
| Full/Queen | 90 x 90 | 2.5 – 3 (may need to seam) |
| King | 108 x 90 | 2.5 – 3 (may need to seam) |
- Note on Full/Queen/King: For these larger sizes, you might need to buy fabric that is wider than 60 inches or seam two pieces together. However, for a no-sew blanket, sticking to throw or twin sizes is simpler as it avoids seams. Most people make throws.
- Pro Tip: Always buy a little extra fabric. It is better to have too much than too little.
Picking Colors and Patterns
This is the fun part! You get to decide how your blanket will look.
- Two-Tone Look: If you are using two layers, pick two different colors or patterns. One side can be solid, the other patterned. Or you can pick two different patterns that go well together. Think about colors that contrast nicely. For example, a bright solid color with a patterned fleece that has that bright color in its design.
- Match Themes: If the blanket is a handmade fleece gift, pick colors or patterns that match the person’s favorite sports team, hobby, or room decor.
- Child-Friendly: For kids, bright colors and fun cartoon patterns are always a hit.
- Neutral Options: For a general purpose throw, neutral colors like gray, cream, or navy are good. They fit into most home decor styles.
Consider how the patterns will look when you do your cutting fleece for blanket. Large, spaced-out patterns might get lost if your fringe is very wide. Small, repeating patterns usually work well.
Gathering Your Tools and Supplies
You do not need many tools for this project. The few you need are common and easy to find.
- Fleece Fabric: Two pieces of the same size. Pick your colors or patterns as discussed above.
- Sharp Fabric Scissors: Good, sharp scissors are very important. Dull scissors will make cutting hard and uneven. They can make the fleece stretch and pull. This leads to a messy edge. If you are serious about crafting, invest in scissors just for fabric. Do not use them on paper or other materials. This keeps them sharp.
- Rotary Cutter (Optional, but Recommended): A rotary cutter makes cutting much faster and more accurate. It looks like a pizza cutter but for fabric. If you use one, you also need a self-healing cutting mat to protect your surface.
- Large Ruler or Yardstick: This helps you measure straight lines. A clear ruler is best for seeing your fabric underneath.
- Fabric Marker or Chalk: You will use this to mark your cutting lines. Make sure it is a type that disappears with water or vanishes over time.
- Pins (Optional): These can help hold your two fabric pieces together while you cut.
Preparing Your Fleece for Cutting
Proper prep makes the project go smoothly. Do not skip these steps. They help ensure your blanket comes out looking good and lasting long.
Washing and Drying Fleece
Before you cut your fleece, you should wash and dry it. This step is important for a few reasons:
- Pre-Shrinkage: Fabric can shrink a little the first time it is washed. Washing it before you cut ensures your blanket will stay the size you want. It also means the two layers will shrink the same amount.
- Remove Chemicals: New fabric often has chemicals or sizing on it from manufacturing. Washing helps remove these. This makes the fabric softer and better for skin contact.
- Check for Imperfections: Washing can sometimes reveal small flaws in the fabric. It is better to find these before you start cutting.
How to Wash: Wash fleece in cold water on a gentle cycle. Use mild detergent.
How to Dry: Tumble dry on a low heat setting. Take it out of the dryer as soon as it is dry. Over-drying can damage the fibers or make them less soft. Do not use fabric softener or dryer sheets. They can hurt the water-repellent properties of fleece.
Laying Out Your Fabric
Once your fleece is clean and dry, it is time to set it up for cutting.
- Find a Large, Flat Surface: A clean floor is often the best place. A large table works too if you have one. Make sure the surface is smooth.
- Layer the Fleece: Place one piece of fleece flat on your surface. Smooth out all wrinkles. Then, place the second piece of fleece directly on top of the first. Make sure the edges line up perfectly.
- Wrong Sides Together: Usually, you want the “wrong” or less attractive sides of the fabric facing each other. This means the “right” or good sides of both pieces will be facing outwards once your blanket is done. This makes the blanket reversible. If your fleece has a distinct right and wrong side, check this. Some fleece is the same on both sides.
- Secure the Layers (Optional): If your fabric is shifting, you can use a few pins around the edges to hold the two layers together. This helps keep them from sliding while you cut.
Smooth everything out very well. Any bumps or wrinkles now will lead to uneven cutting later.
The Art of Cutting Your Fleece
Cutting fleece for blanket projects is the most hands-on part. Taking your time here makes a big difference in the final look of your tied fleece throw.
Trimming the Edges
Even new fabric from the store often has uneven edges. These are called selvages. You need to trim these off first to create a clean, straight starting point.
- Align Edges: Make sure your two layers of fleece are perfectly aligned.
- Trim One Long Edge: Using your ruler and sharp scissors or rotary cutter, cut a perfectly straight line down one long side of your layered fabric. This will be your reference edge. Discard the selvage strips.
- Trim One Short Edge: Do the same for one of the short sides. Now you have a clean corner.
- Measure and Cut to Size: From your newly trimmed edges, measure and cut your fabric to the final desired dimensions for your blanket. For example, if you want a 50×60 inch throw, measure and cut 50 inches from your straight short edge and 60 inches from your straight long edge. Remember to cut both layers at once. Take your time. Use your ruler to ensure straight cuts.
Measuring and Marking the Border
You need a border where you will cut your fringe. This border will be the main part of the blanket that does not get cut into strips.
- Decide Border Width: A border of 4 to 6 inches is common for a nice fringe. For a larger blanket, a 6-inch border might look better. For smaller ones, 4 inches works well. Let’s say you pick 5 inches.
- Mark the Border:
- Lay your trimmed fabric flat and smooth.
- Measure in 5 inches from each edge.
- Place small marks with your fabric marker or chalk every few inches along this 5-inch line.
- Connect these marks with your ruler to draw a faint square or rectangle. This inner line is where your fringe cuts will stop. This is a very important step for
fringe fleece blanket instructions.
Making the Fringe Strips
This is where your blanket really starts to take shape. You will be cutting a lot of strips.
- Cut Out Corners: First, cut out a square from each of the four corners of your blanket. The size of this square should match your border width. So, if your border is 5 inches, cut a 5-inch by 5-inch square from each corner. This removes bulk from the corners and makes them easier to tie.
- Cut the Fringe Strips:
- Starting at one corner where you cut out the square, begin cutting strips from the edge of the blanket up to your marked border line.
- Each strip should be about 1 inch wide. Try to make them as even as possible. Even strips look best.
- Keep your scissors sharp. If they feel dull, take a break or sharpen them. Dull scissors can make cuts ragged.
- Cut both layers of fleece at the same time. Each “strip” will actually be two pieces of fabric (one from each layer).
- Continue cutting all the way around the blanket. When you reach a corner, stop your cuts at the border line. The next set of cuts will start from the next side.
- Take your time. This part of
cutting fleece for blanketcan be tedious, but accuracy helps a lot. - The length of your strips will be the border width you chose (e.g., 5 inches). This gives you a nice long
fringe fleece blanket instructionspiece to tie.
You now have a blanket with a big fringe all the way around it. It is ready for the tying part.
Tying Your No-Sew Fleece Blanket Together
This is the most satisfying step! You will turn your cut fringe into strong, soft knots. This forms your knot fleece blanket.
Single Knot Method
The single knot is the easiest and quickest way to tie your blanket.
- Separate the Strips: Take one fringe strip. It will have two pieces: one from the top fabric layer and one from the bottom layer. Separate these two pieces.
- Tie a Simple Knot: Take the top piece and the bottom piece of the same fringe strip. Tie them together in a simple overhand knot. This is just like tying the first part of a shoelace.
- Bring one piece over the other and through the loop.
- Pull it snug. You want it tight enough that it feels secure, but not so tight that it puckers the fabric.
- Work Around the Blanket: Continue tying each pair of fringe strips all the way around the blanket. Work methodically to make sure you do not miss any.
- Check Your Work: As you go, look at your tied sections. Make sure the knots are consistent in tightness and appearance. This forms a neat
tied fleece throw.
Double Knot Method
The double knot makes your knots more secure and durable. It is a good choice for blankets that will get a lot of use or be washed often.
- First Knot: Follow the steps for the single knot. Tie the two pieces of a fringe strip together in a simple overhand knot. Pull it snug.
- Second Knot: Immediately tie a second overhand knot on top of the first one, using the same two pieces of fabric. This makes a double knot.
- Pull Tight: Pull both knots firmly to secure them. Be careful not to pull so hard that you stretch the fabric too much.
- Repeat: Continue this double knot method for all the fringe strips around your blanket.
The double knot method takes a bit longer than the single knot, but it results in a very sturdy knot fleece blanket that will hold up well over time.
Tying the Corners
The corners of your blanket need special attention to look neat. Since you cut out a square from each corner, you will have fewer strips there.
- Identify Corner Strips: At each corner, you will have the last strip from one side and the first strip from the next side.
- Tie Corner Strips Individually: Treat these corner strips just like all the others. Take the top and bottom pieces of a single fringe strip and tie them together using your chosen knot method (single or double).
- Ensure Neatness: Take extra care to make these corner knots tight and uniform. This will give your
DIY fleece blanketa polished finish. Some people like to tie the two closest strips from different sides together for a seamless look, but tying the top and bottom layers of each individual strip works perfectly fine and is simpler.
Once all your knots are tied, your no-sew fleece blanket is complete!
Creative Variations and Personal Touches
Your no-sew fleece blanket can be more than just a basic tied throw. You can add unique touches to make it truly yours. These fleece fabric no sew ideas can make your blanket stand out.
Different Fringe Styles
The basic tied fringe is great, but you can try other ways to finish your edges.
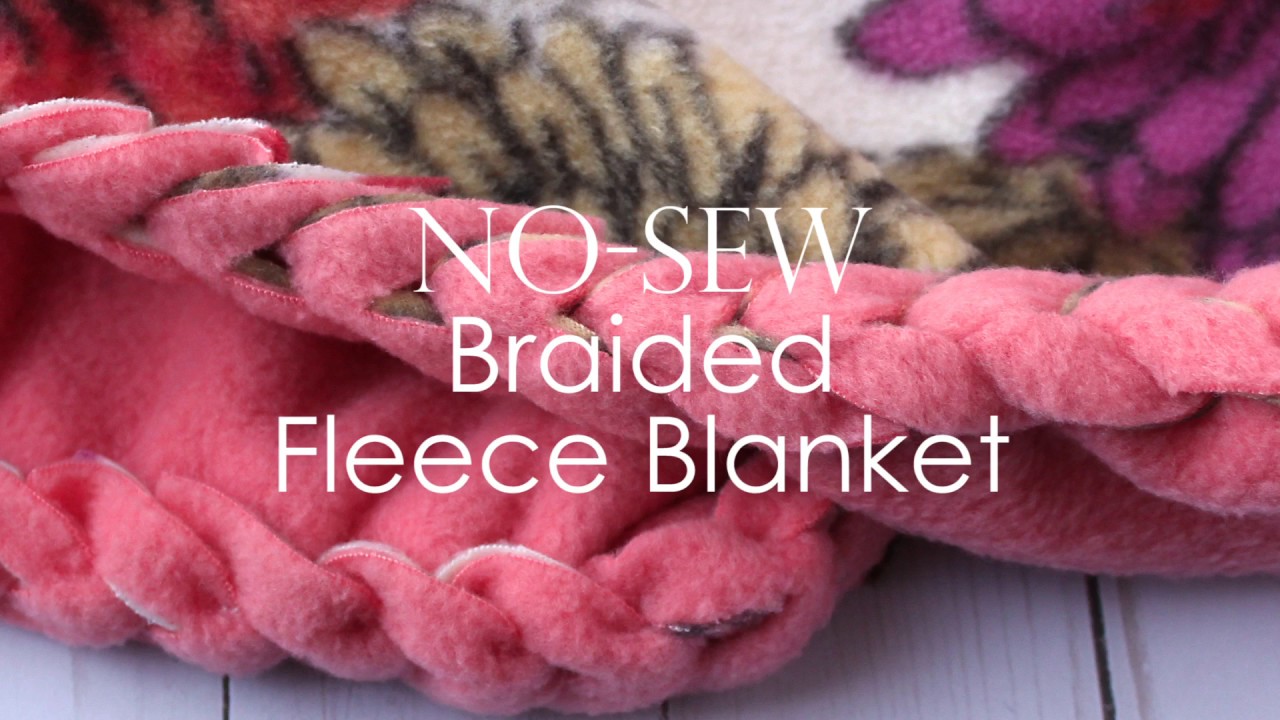
- Braided Fringes:
- Cut your fringe strips a bit longer, maybe 6-8 inches.
- Take three adjacent pairs of strips.
- Treat each pair (top and bottom layer tied together) as one strand.
- Braid these three “strands” together.
- Tie a small knot at the end of the braid to keep it from unraveling.
This creates a beautiful, textured edge. It is a more involvedfringe fleece blanket instructionsbut offers a unique look.
- Twisted Fringes:
- Take one pair of fringe strips (top and bottom).
- Twist the top piece tightly in one direction.
- Twist the bottom piece tightly in the opposite direction.
- Bring the two twisted pieces together. They will naturally twist around each other.
- Tie a knot at the end to secure the twist. This gives a neat, rope-like fringe.
Adding Embellishments
Even without sewing, you can add decorations to your blanket.
- Fabric Paint or Markers: You can use fabric paint or markers to draw designs, names, or messages on the solid section of your fleece. Make sure the paint is suitable for fabric and follow the drying and heat-setting instructions.
- No-Sew Appliques: Many craft stores sell iron-on or fusible applique designs. These can be pressed onto your fleece to add shapes, letters, or images. Look for those specifically designed for no-sew fabric projects. You might need to use a piece of heat-activated adhesive material to attach fabric shapes.
- Ribbon or Yarn Accents: Before tying your knots, you could slip small pieces of coordinating ribbon or yarn into each fringe loop. Then tie your knot. This adds a pop of color or texture within the fringe itself.
Mixing Textures and Patterns
Do not limit yourself to just two solid colors.
- Textured Fleece: Combine a smooth anti-pill fleece with a textured fleece like sherpa or minky dot fleece. This adds a lovely tactile experience to your
handmade fleece gift. - Bold Patterns: Pair a bold, large-scale pattern on one side with a subtle texture or solid color on the other. This makes a strong design statement.
- Unexpected Combinations: Experiment! Try a plaid with a floral, or animal print with stripes. As long as the colors work together, it can create a very unique
fleece fabric no sew ideasblanket.
Caring for Your No-Sew Fleece Blanket
Taking good care of your no-sew fleece blanket will help it stay soft, warm, and looking great for a long time.
Washing Your Blanket
- Machine Wash Cold: Always wash fleece in cold water. Hot water can damage the fibers and cause shrinkage or pilling.
- Gentle Cycle: Use the gentle or delicate cycle on your washing machine. This reduces wear and tear on the knots and fabric.
- Mild Detergent: Use a mild laundry detergent. Avoid harsh chemicals or bleach, which can break down the fleece fibers.
- Wash Separately or With Like Colors: To prevent lint transfer, wash your fleece blanket by itself or with other fleece items.
Drying Your Blanket
- Low Heat or Air Dry: The best way to dry fleece is on a low heat setting in a dryer or by air drying. High heat can melt the synthetic fibers of fleece, making it feel rough or stiff. It can also cause pilling.
- Remove Promptly: Take the blanket out of the dryer as soon as it is dry. This helps prevent static cling and wrinkles.
- No Fabric Softener or Dryer Sheets: Avoid using fabric softeners or dryer sheets with fleece. They can leave a residue that reduces the fabric’s softness and wicking properties. They can also make fleece less fire-resistant.
Storing Your Blanket
- Fold Neatly: Fold your blanket neatly when not in use. This keeps it tidy and helps maintain its shape.
- Avoid Compressing: Do not store fleece in very tightly packed areas for long periods. This can crush the fibers.
- Keep Away from Heat: Store your blanket in a cool, dry place away from direct sunlight or extreme heat.
By following these simple care tips, your tied fleece throw will remain a cozy favorite for many years.
Troubleshooting Common Issues
Even with an easy fleece blanket project, sometimes small issues pop up. Here are some common problems and how to fix them.
Uneven Fringe
- Problem: Some fringe strips are longer or wider than others. This makes the blanket look messy.
- Solution: Before you start tying, lay the blanket flat. Look closely at all the fringe strips. Use your ruler and scissors to trim any strips that are too long. You can also trim strips that are too wide to match the others. It is much easier to fix this before tying the knots. Take your time during the
cutting fleece for blanketstep to prevent this.
Knots Coming Undone
- Problem: After some use or washing, some knots start to loosen or come undone.
- Solution: This usually happens if the knots were not pulled tight enough. Go back to the loose knots. Re-tie them using the double knot method if you only used a single knot before. Make sure you pull them very snug. The
knot fleece blanketrelies on tight knots for durability.
Fleece Shedding
- Problem: Small bits of fleece are coming off the blanket, especially after the first few washes.
- Solution: This is normal for new fleece. The edges you cut might release some loose fibers. Washing the blanket before you cut it helps a lot. After you finish the blanket, wash it once more. This helps remove any remaining loose fibers. Use a lint roller if needed for stubborn bits. Choosing
anti-pill fleece projectshelps reduce shedding over time.
Blanket Puckering
- Problem: The main body of the blanket looks stretched or puckered, especially near the edges.
- Solution: This happens if you pull the knots too tight, which can pull on the main fabric. When tying, aim for a firm, secure knot, but do not tug on the fabric excessively. Also, make sure you did not stretch the fleece while cutting. Fleece is stretchy. Cut slowly and carefully to avoid stretching it out of shape.
Static Cling
- Problem: Your fleece blanket sometimes feels very static-y, especially in dry weather.
- Solution: Fleece can build up static. You can reduce this by:
- Washing in cold water.
- Using less detergent.
- Adding a half cup of white vinegar to the rinse cycle (the smell goes away when dry).
- Air drying or using a very low heat setting.
- Avoiding dryer sheets.
These simple fixes can help you enjoy your DIY fleece blanket without common annoyances.
More No-Sew Fleece Ideas
The world of fleece fabric no sew ideas goes beyond just blankets. Once you master the no-sew blanket, you will find many other simple projects to try. These are great for using up leftover fleece or making quick gifts.
Cozy No-Sew Fleece Pillows
You can make a matching pillow for your blanket!
- Cut two equal squares or rectangles of fleece. Make them about 1-2 inches larger than your pillow insert on each side.
- Place them right sides out, one on top of the other.
- Cut a 1-inch border of fringe around three sides. On the fourth side, cut the fringe only halfway.
- Tie the fringe on the three full sides using single or double knots.
- Insert your pillow form through the opening on the fourth side.
- Tie the remaining fringe strips on the fourth side. You now have a soft, custom pillow!
Simple Fleece Scarves
A no-sew fleece scarf is one of the easiest anti-pill fleece projects.
- Cut a long rectangle of fleece. A common size is 60 inches long by 10-12 inches wide.
- Cut a fringe about 3-4 inches deep at both short ends of the scarf. Make the strips about 1/2 inch wide.
- You can leave these fringe strips as they are, or tie them in small knots for a more finished look.
This makes a quick, warm scarf for winter.
No-Sew Pet Beds
Your furry friends will love a cozy fleece bed.
- Use the same method as the no-sew blanket, but make it smaller.
- Choose two layers of fleece. One layer can be a fun pattern.
- Cut out a border and fringe strips.
- Instead of tying all the way around, leave one side open.
- Stuff the inside with soft batting or old blankets.
- Then, tie the final open side closed. This makes a soft cushion for a pet crate or floor.
Fleece Headbands or Ear Warmers
These are great for using up smaller scraps of fleece.
- Cut a rectangle of fleece that fits around your head (measure from forehead to back of head, plus 1 inch for overlap). The width can be 4-6 inches.
- Cut a small fringe on the short ends.
- Tie the fringe ends together to form a circle. You can also overlap the ends and tie them together to make a seamless circle.
These fleece fabric no sew ideas show how versatile this simple craft can be. Your imagination is the only limit!
Conclusion
Making a no-sew fleece blanket is a wonderful project. It is easy, fun, and gives you a cozy, handmade item. You do not need any special skills, just a few basic tools. From picking your soft anti-pill fleece to cutting fleece for blanket strips and tying the knot fleece blanket, each step is simple.
Whether you are making a tied fleece throw for your couch, a handmade fleece gift for a friend, or exploring more fleece fabric no sew ideas, this project is rewarding. It teaches you basic crafting skills and lets you express your creativity. So, gather your supplies, pick your favorite fleece, and start making your own warm, unique blanket today. You will love the result!
Frequently Asked Questions (FAQ)
Q: Can I use just one layer of fleece for a no-sew blanket?
A: You can, but it will not be as warm or as full as a two-layer blanket. The tying method works best with two layers, as you tie the top layer to the bottom layer. If you use one layer, you would need to tie the fringe strips to themselves, which might not look as neat or be as durable.
Q: How long does it take to make a no-sew fleece blanket?
A: For a standard throw size (around 50×60 inches), it usually takes about 2 to 4 hours. This depends on how fast you cut and tie. It also depends on if you are making single or double knots.
Q: Is a no-sew fleece blanket really durable?
A: Yes, if you tie the knots tightly, especially using the double knot method, your blanket can be very durable. Fleece itself is a strong fabric. The knots hold up well to regular use and washing.
Q: What is the best type of fleece to use?
A: Anti-pill fleece is the best. It resists those little balls of fabric that can form over time. This keeps your blanket looking newer and softer for longer.
Q: How wide should my fringe strips be?
A: Aim for fringe strips that are about 1 inch wide. This size is easy to tie and makes for a nice, full fringe. If they are too thin, they might break easily. If they are too wide, the knots can be bulky.