
Can you make buttonholes without a sewing machine? Yes! You do not need a sewing machine to make buttonholes. Is it hard to sew buttonholes by hand? No, it is a skill you can learn with practice. This guide will show you how to hand sew buttonholes on your clothes or projects. You can make nice buttonholes using just a needle and thread. This manual buttonhole technique is old but still works well. It is perfect for times you do not have a machine, or you want a special look. This sewing buttonholes without machine tutorial will walk you through each step. Get ready to learn hand stitching fabric buttonholes!
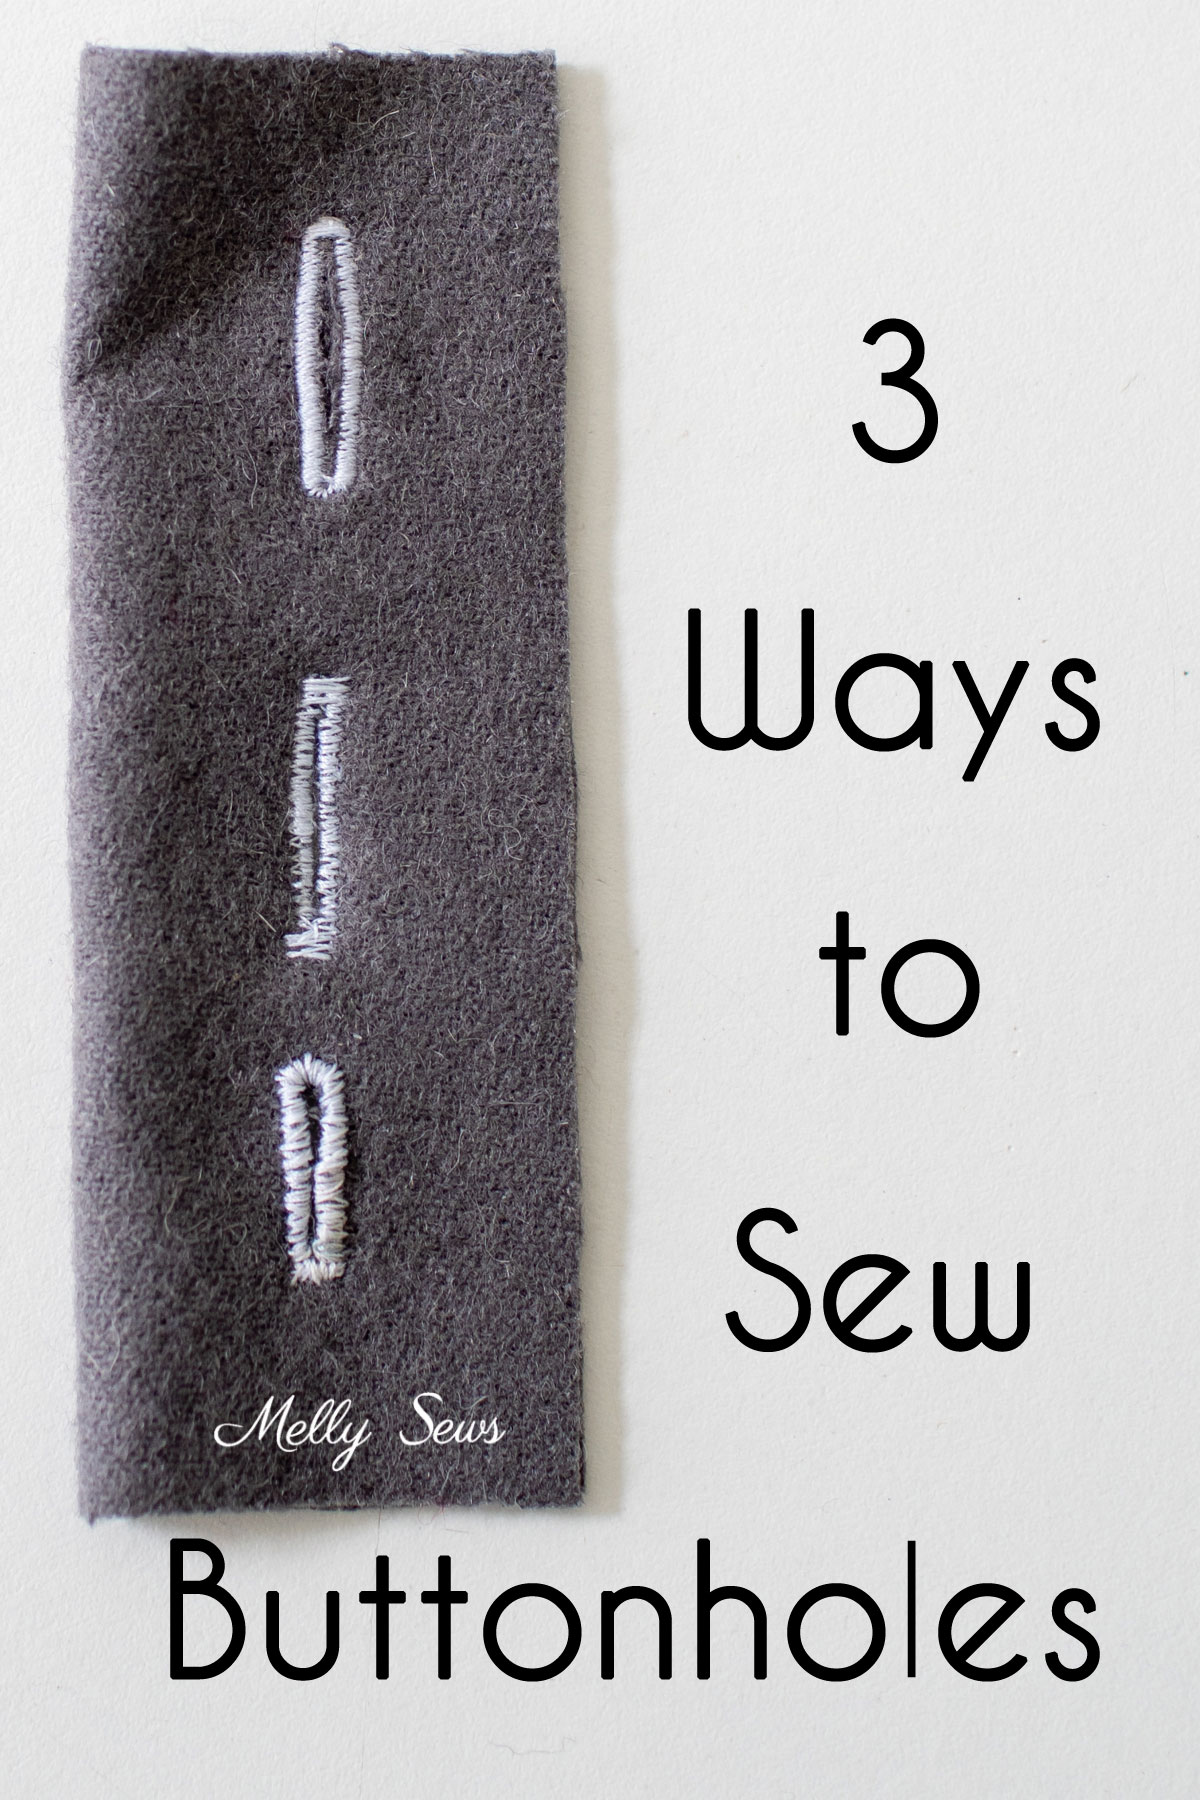
Image Source: mellysews.com
Why Sew Buttonholes By Hand?
You might ask, “Why sew buttonholes by hand?” There are good reasons!
- No Machine Needed: This is the biggest one. If you do not own a sewing machine, you can still finish your project.
- Special Fabrics: Some fabrics are hard for machines. Think of thick tweed, very thin silk, or bumpy knit. Hand stitching can work better.
- Small Projects: For a tiny doll coat or a small bag, a hand worked buttonhole is fast and easy.
- Precise Placement: You have total control over where the buttonhole goes.
- A Unique Look: Hand crafted buttonholes look different from machine ones. They can add a special touch to your project.
- Quiet Sewing: Hand sewing is quiet. You can sew buttonholes late at night without waking anyone up.
- Repair: Need to fix a buttonhole on a finished item? Hand sewing is often the best way.
Making buttonholes by hand is a useful skill. It helps you finish projects any time, any place.
Getting Your Materials Ready
To make a good buttonhole by hand, you need the right things. Having the correct buttonhole making tools hand sewing makes the job easier and the result better.
Tools You Need
- Fabric: The piece you are making the buttonhole on.
- Button: You need the button the hole will fit. The size of the button sets the size of the buttonhole.
- Needle: A sharp hand sewing needle. A size 8 or 9 is usually good. It needs to go through your fabric easily.
- Thread: The best thread for hand sewing buttonholes is strong. Special buttonhole twist thread is great. It is thicker and has a nice sheen. If you do not have buttonhole twist, you can use regular sewing thread. Use two strands of regular thread for more strength. Silk thread is also very strong and smooth.
- Small, Sharp Scissors: Embroidery scissors or small craft scissors work well. They must be sharp to cut the fabric neatly. This cut will be the opening of the buttonhole.
- Fabric Marker or Chalk: Something to mark where the buttonhole will go. Use a color that shows up on your fabric. Make sure it can be removed later.
- Pins: To hold fabric in place.
- Ruler or Measuring Tape: To measure the size and place of the buttonhole.
- Seam Ripper (Optional but Helpful): Sometimes you need to remove stitches.
- Awl or Stiletto (Optional): Helps make a clean starting point for the cut.
Choosing Your Thread
The thread you pick is important. It needs to be strong. It also adds to how the buttonhole looks.
- Buttonhole Twist: This is the top choice. It is made just for buttonholes. It is thicker than normal thread. It gives a raised edge to the buttonhole. It is strong and durable.
- Embroidery Floss: You can use one or two strands of embroidery floss. It is softer than buttonhole twist. It comes in many colors. It works well, especially on less formal items. How to embroider buttonholes often uses this kind of thread.
- Heavy Duty Thread: Stronger than regular thread. It works well if you do not have buttonhole twist.
- Regular Sewing Thread: Use two strands threaded through the needle at the same time. This makes it stronger and thicker. It is a good option if that is all you have.
Pick a thread color that matches or contrasts with your fabric. A contrasting color can make the buttonhole a design feature.
Getting the Fabric Ready
Before you start sewing, you need to get your fabric ready. This means marking where the buttonhole will go and stabilizing the fabric if needed.
Where to Put the Buttonhole
Buttonholes usually go on the part of the garment that goes over the other. For women’s clothing, this is usually the right front piece. For men’s clothing, it’s the left front piece.
- Spacing: Space buttonholes evenly down the front of a shirt or coat.
- Placement: The first buttonhole is often at the neckline. The last is near the hem. Others are spaced in between.
- Edge Distance: Buttonholes are placed a little bit away from the edge of the fabric. The center of the buttonhole should line up with the center line of the garment.
Marking the Buttonhole
Marking is very important. A good mark helps you make a neat buttonhole.
- Measure the Button: Place your button on the fabric where the buttonhole will be. Use your marker to make a line that is just a bit longer than the button is wide. The button needs to fit through, but not too loosely. A good length is the diameter of the button plus about 1/8 inch (3 mm).
- Draw the Line: Draw a straight line the correct length. This is where you will cut later.
- Mark the Ends: Put a small crossbar or dot at each end of the line.
- Mark the Center: Draw a line across the center of the first line. This shows the middle of the buttonhole.
- Mark the Cutting Line: Some people draw a box or two parallel lines around the center line. This helps guide the stitches. The distance between these lines should be about 1/8 inch (3 mm). The cutting line will be between them.
Your mark should look like a capital ‘I’ or a small rectangle with the center line marked. Make sure your marks are accurate!
Stabilizing the Fabric
Sometimes, the fabric needs extra support. This is true for stretchy fabrics or ones that fray easily.
- Interfacing: Iron on a small piece of fusible interfacing to the back of the fabric where the buttonhole will be. This makes the fabric firmer. It stops it from stretching out of shape while you sew. It also helps the edges of the cut fabric stay neat.
- Underlay Stitch: For fabrics where you can’t use interfacing, you can stitch a rectangle of small running stitches where the buttonhole will go. This helps hold the fabric stable.
Good preparation makes the actual sewing much easier.
The Basic Manual Buttonhole Technique
Now for the fun part: the sewing! This is the core of the manual buttonhole technique. You will use a special stitch. This stitch wraps around the raw edge of the cut fabric. It makes a strong, clean border. This process is a step-by-step sewing buttonholes without machine tutorial.
Getting Started: The Stay Stitch
Before you cut, it is a good idea to sew a rectangle of small stitches around the marked buttonhole area. This is called a stay stitch.
- Use a regular sewing needle and thread.
- Sew small running stitches or machine stitches (if you can) just outside the marked lines of your buttonhole box.
- Sew a rectangle shape. This stitching helps keep the fabric from stretching or fraying while you work.
The Cut
This is the scariest part for many! Cutting the fabric opening for the buttonhole.
- Fold the fabric slightly along the center line you marked.
- Use your small, sharp scissors to make a small snip right on the fold, exactly on the center line.
- Carefully cut along the marked center line towards each end mark.
- Cut only up to the end marks you made. Do not cut too far!
- The cut should be the exact length of the center line you marked. It should be straight and clean.
If you have an awl or stiletto, you can push it through at one end mark, then cut from that hole to the other end mark. This can help make a clean cut without folding.
Starting the Buttonhole Stitch
Now you will start the main stitches. This is the buttonhole stitch by hand. You need the stronger thread (buttonhole twist, double regular thread, etc.) and your needle.
- Cut a piece of thread. Do not make it too long; it can get tangled. About 18-24 inches (45-60 cm) is a good length.
- Thread your needle. Do not tie a knot at the end yet.
- Start your thread with a small backstitch or knot a little bit away from the buttonhole opening, on the back of the fabric. Bury the knot between fabric layers if possible.
- Bring the needle up through the fabric very close to one end of the cut line. Let’s start at the bottom left corner if the cut is horizontal. Bring the needle up from the back to the front.
Deciphering the Buttonhole Stitch
The buttonhole stitch is key to making a strong, nice-looking buttonhole by hand. It is a specific stitch that creates a reinforced edge. Here is how to do it. This section works as a buttonhole stitch diagram hand sewing explanation.
How the Stitch Works
The buttonhole stitch is like an overcast stitch, but it has a small knot or loop called a “purl” right at the edge of the fabric cut. This purl protects the fabric edge and makes the buttonhole strong.
Step-by-Step Stitching
- Start: Bring your threaded needle up from the back of the fabric to the front, very close to the cut edge. Let’s say about 1/16 inch (1-2 mm) away from the cut.
- Make the Loop: Put the needle into the cut opening. Bring the needle point back up to the front of the fabric, next to where you first came up. The distance for this second entry/exit point should be very small, maybe 1/16 inch (1-2 mm) or even less away from the first point, along the edge of the buttonhole.
- Catch the Thread: Before you pull the thread all the way through, loop the working thread under the needle point, from right to left.
- Pull Through: Pull the needle and thread through. As you pull, guide the loop of thread with your thumb or finger. The goal is to have the little knot (the purl) form right on the cut edge of the fabric. Pull the thread gently but firmly. Do not pull too hard, or the fabric might pucker.
- Place the Next Stitch: Insert the needle into the fabric again, right next to where the last stitch came out. Aim to place stitches very close to each other. They should touch but not overlap much.
- Repeat: Repeat steps 2-5, working your way around the entire buttonhole opening. Keep the stitches the same length and tension.
Working Around the Ends
The ends of the buttonhole need extra strength because the button pushes against them. There are two main ways to finish the ends:
- Bar Tack End: This is the most common. When you reach the end of the side, take several straight stitches (2-4) across the very end of the cut, right at the edge. These stitches should be parallel to the cut opening. Then, holding the thread taut across these stitches, cover them with buttonhole stitches or blanket stitches worked over the straight stitches and into the fabric slightly beyond the end of the cut. This creates a strong bar. Repeat this on the other end.
- Fan End (or Keyhole End): This end is rounded. It is often used on shirts. When you reach the rounded end, place your buttonhole stitches in a fan shape radiating outwards from the center of the curve. The stitches are slightly longer here. When sewing the other side, meet the fan stitches neatly. A fan end is often used at the end where the button will rest when fastened.
Most buttonholes have one bar tack end and one fan end (the fan end is where the button slides in and rests). Some simple buttonholes have two bar tack ends.
Completing the Stitching
Continue sewing buttonhole stitches all the way around the cut opening.
- Work up one side, make the end (bar tack or fan), work down the other side, and make the second end.
- Aim for stitches that are even in size and spacing. This makes the buttonhole look neat.
- When you finish the last stitch, take the thread to the back of the fabric. Secure it with a few small stitches or a knot hidden in the fabric layers. Trim the thread.
Making a buttonhole by hand takes time and care. The first few might not be perfect. Keep practicing!
Tips for Better Hand Buttonholes
Making nice hand stitched fabric buttonholes takes practice. Here are some tips to help you get better results.
- Practice First: Always practice on a scrap piece of the same fabric before sewing on your real project. This helps you get the feel for the stitch and tension.
- Use Good Thread: As mentioned, the best thread for hand sewing buttonholes makes a big difference. Buttonhole twist is worth getting if you plan to do this often.
- Use Sharp Tools: Sharp scissors are a must for a clean cut. A sharp needle goes through fabric easier.
- Mark Clearly: Accurate marking helps you sew a straight buttonhole of the right size.
- Stitch Close Together: Keep your stitches close. They should touch, but not overlap. This makes a solid edge that does not fray.
- Keep Stitches Even: Try to make each stitch the same length. This takes practice.
- Don’t Pull Too Tight: Pull the thread just enough to make the purl lie neatly on the edge. If you pull too hard, the fabric will gather and look bad.
- Work in Good Light: Make sure you can see what you are doing clearly.
- Take Your Time: Hand sewing is not a race. Go slow and be careful.
- Secure Your Thread: Make sure your starting and ending stitches are secure on the back. You don’t want the buttonhole to unravel.
Making hand crafted buttonholes is a skill that improves with every one you make.
Other Hand Buttonhole Styles
While the basic stitched buttonhole is common, you can also create buttonholes in other ways by hand. Some might be seen as how to embroider buttonholes, using different stitch types or looks.
Bound Buttonholes
These are made by folding fabric strips over the cut opening. They look like narrow lips on either side of the buttonhole slit.
- Mark the buttonhole on the fabric.
- Cut two small strips of fabric (often cut on the bias, meaning at a 45-degree angle to the fabric grain).
- Place the strips on the fabric, right sides together, next to the marked buttonhole line.
- Sew a line of small stitches exactly the length of the buttonhole opening on each side of the center line. The distance between these stitched lines is the desired width of the buttonhole “lips”.
- Cut between the two stitched lines, stopping short of the ends. Cut diagonally into the corners, forming small triangles.
- Turn the fabric strips to the back through the cut opening. The folded edges of the strips form the “lips”.
- Press the lips flat.
- On the back, stitch the small fabric triangles at the ends to the back of the bound strips.
- Neatly finish the edges on the back by hand.
Bound buttonholes look very neat and tailored. They are often used on coats and jackets. They do not use the buttonhole stitch but are made entirely by hand stitching and fabric manipulation.
Worked Buttonholes with Different Stitches
You can use variations of the buttonhole or blanket stitch for slightly different looks.
- Blanket Stitch: A relative of the buttonhole stitch. The purl loop sits on the edge, but the upright stitch is often longer. You can use this for a more rustic look.
- Adding Cording: For very strong buttonholes, you can lay a piece of cording or thick thread along the line before you start stitching. Work your buttonhole stitches over the cording. This gives the buttonhole a raised, strong edge. This is sometimes called “padded” or “corded” buttonholes.
Choosing the style depends on your project and the look you want. The manual buttonhole technique with the standard buttonhole stitch is the most versatile.
Buttonhole Making Tools Hand Sewing: A Summary
Let’s look again at the tools that make this job go smoothly. Having the right gear is part of a good sewing buttonholes without machine tutorial.
| Tool | Why You Need It | Notes |
|---|---|---|
| Needle | To carry the thread through the fabric. | Sharp, sized for your thread and fabric. |
| Thread | Forms the strong edge of the buttonhole. | Buttonhole twist is best; double regular thread works. |
| Sharp Scissors | To cut the fabric opening neatly. | Small embroidery scissors are ideal. |
| Marker/Chalk | To show where the buttonhole goes. | Must be removable. |
| Ruler | To measure buttonhole size and placement. | For accuracy. |
| Pins | To hold things still while you work. | Basic sewing need. |
| Interfacing | To make fabric stable, prevent stretch/fray. | Use if fabric needs support. |
| Awl/Stiletto | Helps make a clean starting hole for the cut. | Optional, but helpful for precise cuts. |
| Seam Ripper | To undo mistakes. | Keep one handy! |
Using the correct tools saves time and makes better hand crafted buttonholes.
When Things Go Wrong: Troubleshooting
Even with care, sometimes buttonholes don’t turn out perfect. Here are some problems you might have and what to do.
- Fabric Fraying After Cutting: This means the fabric was not stable enough. Use interfacing next time. If it’s already cut, you can try putting a tiny bit of fray check liquid along the edge before stitching. Stitching close together with the buttonhole stitch is the best defense against fraying.
- Stitches Are Uneven: This happens with practice. Try to keep your eye on where you put the needle for each stitch. Make sure you are pulling the loop the same way each time.
- Purl (Knot) Is Not On the Edge: You are likely not looping the thread under the needle correctly, or you are pulling the thread in the wrong direction as you tighten the stitch. The loop must be caught under the needle point before you pull it through, and you need to guide it with your finger so it sits right on the fabric edge.
- Fabric Puckering: You are pulling the stitches too tight. Relax your tension. The stitches should be snug, not pulling the fabric.
- Buttonhole Is Too Small: You did not cut the opening long enough for your button. You might be able to carefully lengthen the cut slightly. Or, accept it and find a smaller button!
- Buttonhole Is Too Big: The cut was too long. This is harder to fix. You might have to add stitches at the end or start over. Always measure your button first!
- Ends Are Not Strong: You did not make enough stitches on the bar tack or fan end. Make sure you sew several stitches across the bar and cover them well. For a fan end, make sure the radiating stitches are firm.
Remember, the manual buttonhole technique improves the more you do it. Don’t be afraid to unpick and try again on practice fabric.
Practice Makes Perfect
You will not be a master of hand sew buttonholes the first time. Or maybe even the fifth time! This skill takes practice.
- Start Simple: Practice on plain, stable fabric like cotton muslin or linen.
- Make Samples: Cut small squares of fabric. Practice marking and sewing buttonholes on these squares.
- Compare Your Work: Look at your practice buttonholes. See which ones look better. Try to figure out why. Were the stitches more even? Was the cut straighter?
- Keep Your Samples: Save your practice pieces. Look back at your first ones after you have made ten or twenty more. You will see how much you have improved!
- Try Different Threads: See how buttonhole twist feels compared to double regular thread.
- Try Different Fabrics: See how the stitch works on thinner or thicker fabric once you are comfortable.
Every buttonhole you make adds to your skill. Soon, you will be making beautiful hand crafted buttonholes easily.
FAQ: Questions About Hand Buttonholes
Here are some common questions about making buttonholes by hand.
Q: How long does it take to make a buttonhole by hand?
A: It depends on your speed and the size of the buttonhole. A small shirt buttonhole might take 15-30 minutes once you are used to the stitch. Larger buttonholes on coats take longer.
Q: Is hand sewing buttonholes stronger than machine ones?
A: A well-made hand buttonhole, especially with good thread and cording, can be very strong and durable. Machine buttonholes are also strong but look different. Hand sewing gives you control over the strength of each stitch.
Q: Can I make buttonholes on knit fabric by hand?
A: Yes, but it is harder than on woven fabric. You must use interfacing to stabilize the knit fabric well. Sew the stay stitch rectangle carefully before cutting. The buttonhole stitch is important for keeping the edge from stretching and fraying.
Q: My fabric edge is still fraying even with the stitch. What can I do?
A: Make sure your buttonhole stitches are very close together and the purl is right on the edge. Using a liquid fray check product before you start stitching might help, but test it on a scrap first. Using interfacing is the best prevention.
Q: What if I mess up the cut?
A: If the cut is only slightly off, you might be able to correct it with your stitching. If it’s badly cut (too long or crooked), it’s often best to add a patch of matching fabric behind the cut area and start again. Or, if possible, place the buttonhole somewhere else.
Q: How do I figure out the right size for the buttonhole?
A: The cut opening should be just slightly longer than the diameter of your button. A good rule is button diameter plus 1/8 inch (3 mm). For very thick buttons, you might need slightly longer. Test the size on a fabric scrap with your button before cutting on your project.
Making buttonholes by hand is a rewarding part of sewing. It connects you to old sewing traditions and gives your projects a special touch. Happy stitching!