
Getting clothes that fit just right feels good. A shirt that fits perfectly looks sharp and feels great. But many shirts bought off the rack don’t fit everyone well. Can you tailor a shirt yourself at home? Yes, you absolutely can do shirt alterations home! Many people enjoy DIY shirt tailoring. It takes some basic sewing shirt skills and tools, like a sewing machine for shirts, but it’s very doable. This guide will show you how to get a better fit. You will learn how to do things like taking in shirt sides for a slimming shirt effect, altering shirt sleeves, tapering shirt waist, and shorten shirt length.
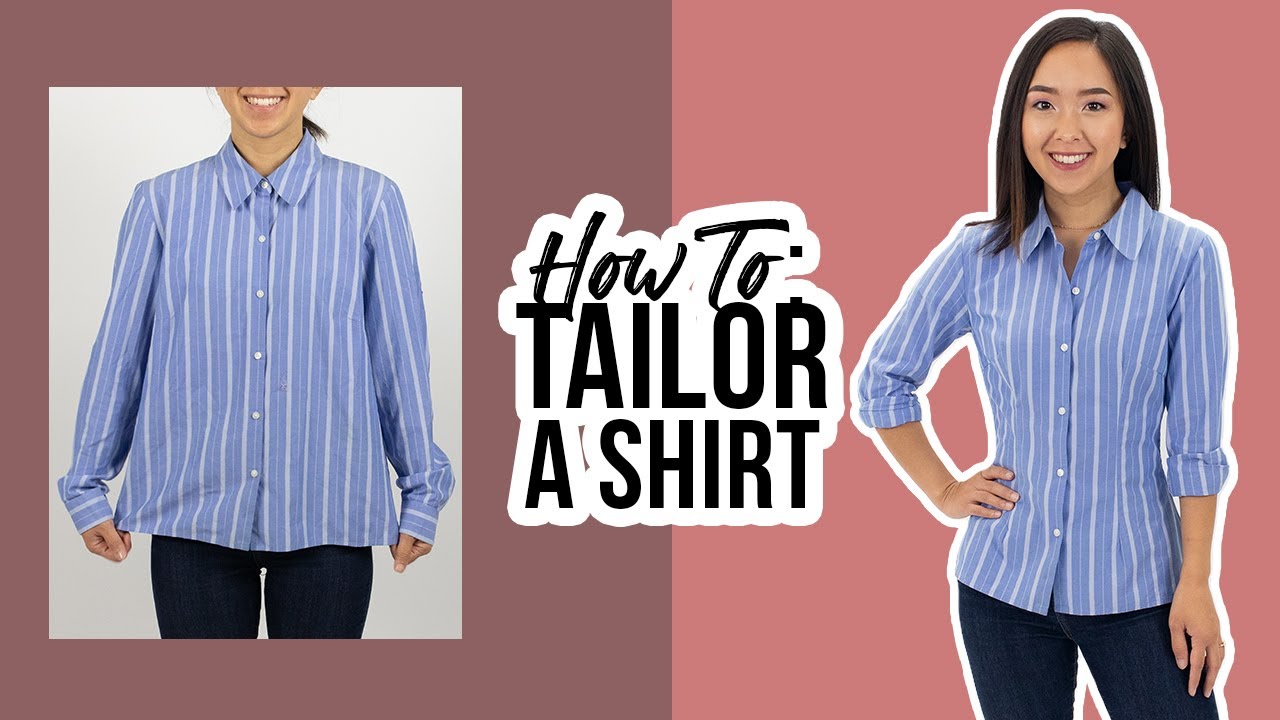
Image Source: i.ytimg.com
Why Make a Shirt Fit Better?
Why bother altering a shirt? A shirt that fits you well does many good things.
- Looks Better: Clothes that fit well make you look sharper. A shirt that is too big looks sloppy. A shirt that is too tight is uncomfortable.
- Feels Better: A good fit means comfort. You can move freely without fabric getting in the way or pulling tight.
- Lasts Longer: Fixing a shirt’s fit can make you wear it more. This gets more value from your clothes.
- Saves Money: Tailoring a shirt you own is cheaper than buying a new custom shirt. It’s also often cheaper than paying a tailor, especially if you do it yourself.
Getting a shirt to fit you just right is worth the effort. It changes how you look and feel in your clothes.
Grasping the Basics of Shirt Tailoring
Before you start cutting into a shirt, it helps to know the basics. Tailoring a shirt means changing its size and shape. You make it match your body better. This is part of fitting a shirt to you.
Think about where your shirts don’t fit well. Is it too wide around the middle? Are the sleeves too long or too baggy? Is the bottom hem too low? These are common areas where shirt alterations home are needed.
Tailoring usually involves sewing new seams inside the shirt. You cut away the extra fabric. This makes the shirt smaller in those spots. Doing this well requires careful measuring and sewing. DIY shirt tailoring is a step-by-step process.
Tools You Need for Shirt Alterations Home
You need some tools to tailor a shirt yourself. Having the right gear makes the job easier and gives better results. Here is what you will likely need:
Sewing Machine for Shirts
You need a sewing machine for shirts. While you could hand sew, a machine gives strong, even stitches quickly. This is important for seams that need to hold up. A basic machine is fine for most shirt alterations. It should do a straight stitch and a zigzag stitch.
Measuring Tools
You need tools to measure your body and the shirt.
* Tape Measure: A flexible tape measure is key. You use it to measure yourself and the shirt.
* Ruler: A straight ruler helps draw straight lines on the fabric.
Marking Tools
You must mark where you want to sew and cut.
* Tailor’s Chalk: This chalk rubs off easily from fabric.
* Disappearing Ink Pen: These pens make lines that fade over time or with water. Test it on a hidden part of your shirt first.
Cutting Tools
You need sharp tools to cut fabric neatly.
* Fabric Scissors: Use sharp scissors meant only for fabric. Paper dulls fabric scissors quickly.
* Seam Ripper: This small tool helps you undo existing seams. You might need to open up parts of the shirt.
Pins
You need pins to hold fabric layers together before sewing.
* Straight Pins: Use fine, sharp pins that won’t snag the fabric.
Thread
You need thread that matches your shirt color. Get good quality thread. It needs to be strong enough for seams.
Iron and Ironing Board
Pressing your seams is very important. It makes your work look neat and professional.
Optional Tools
These are not required but can help.
* Serger Machine: A serger machine finishes fabric edges. It cuts and stitches the edge to stop it from fraying. This gives a very clean finish inside the shirt.
* Tracing Wheel and Paper: Can be used to transfer markings accurately, but chalk or a pen is usually enough for shirts.
Gather all your tools before you start. This saves time and stops you from stopping mid-project.
Getting Ready to Tailor
You can’t just start cutting right away. Some steps come first. This makes sure your work is accurate and lasts.
Wash and Dry the Shirt
Always wash and dry the shirt first. Use the method you normally would. This is important. If the shirt might shrink, it will shrink now. If you tailor it before washing, it might get too tight after the first wash.
Try On and Mark the Fit
This is a very important step for fitting a shirt to you. Put the shirt on. See where it feels too big.
* Sides/Waist: Is it baggy around your stomach or chest? Pinch the extra fabric on one side. See how much extra there is. Have a friend help you pin the excess fabric neatly. Pin vertically down the side seam or a bit inward towards the back. The pins show the line where you want the new seam to be. Mark this line with chalk or a pen.
* Sleeves: Are the sleeves too wide? Pinch the extra fabric in the sleeve and pin it. Mark a line. Are the sleeves too long? Roll or fold the cuff up to where you want it to sit. Mark the desired length.
* Length: Is the bottom too long? Fold the bottom hem up to where you want it to end. Pin it in place. Mark the line.
Mark both sides of the shirt for side and sleeve changes. Make sure the markings are even on both sides. Take the shirt off carefully so the pins don’t fall out.
Altering the Sides: Slimming and Tapering
This is the most common shirt alteration. It helps create a slimming shirt effect by taking in shirt sides and tapering shirt waist.
Laying Out the Shirt
Lay the shirt flat on a large table or floor. Button it up the front. Make sure the front and back layers are flat and smooth.
Marking the New Side Seam
Look at the chalk or pin marks you made while wearing the shirt. These show you how much you need to take in.
* Decide the Amount: Measure the amount of fabric you pinched and marked. If you pinched 2 inches total on one side, you need to take in 2 inches from that side’s fabric. But the shirt has two sides. So, if you want to make the shirt 4 inches smaller in total around the waist, you take in 2 inches on each side seam.
* Draw the Line: Find the original side seam of the shirt. This seam runs from the armpit down to the hem. On the inside of the shirt, draw your new seam line. This line should start at the armpit corner (where the side seam meets the sleeve seam). It should curve gently inwards, reaching your marked line at the widest part of the looseness (usually around the waist or stomach). Then, the line should curve back outwards to meet the original hem edge smoothly. This creates a tapering shirt waist.
Draw the same line on the other side of the shirt. Double-check that the lines are the same on both sides.
Pinning the New Seam
Pin along the line you just drew. Pin through both layers of fabric (front and back of the shirt). Place pins about every inch or two.
Sewing the New Seam
Now you use your sewing machine for shirts.
* Set your machine to a regular straight stitch. A stitch length of 2.5 to 3 mm works well.
* Start sewing right at the armpit corner, next to the original seam.
* Backstitch a few stitches at the start to secure the seam.
* Sew slowly and carefully along your marked line. Keep your eyes on the line and guide the fabric.
* Stop sewing when you reach the hem edge. Backstitch at the end to secure the seam.
* Sew the other side seam the same way.
Trying On Before Cutting
Try the shirt on inside out. Check the fit. Is it better? Is it too tight or still too loose? If it’s still too loose, you can draw a new line further in and sew again. If it’s too tight, you might need to use a seam ripper to take out your new seam and try again, sewing slightly further out. This is easier if you haven’t cut the extra fabric yet.
Trimming Excess Fabric
Once the fit is right, take the shirt off. Lay it flat again. Now you cut off the extra fabric outside your new seam line. Do not cut too close to your stitches! Leave a seam allowance. A seam allowance is the fabric between the stitching and the cut edge. A common size is 1/2 inch (about 1.2 cm). Measure 1/2 inch away from your new seam line and cut along that line from the armpit to the hem. Do this on both sides.
Finishing the Seam
The raw edge of the fabric you just cut will fray over time. You need to finish this edge.
* Zigzag Stitch: The easiest way for DIY shirt tailoring is to use a zigzag stitch on your sewing machine for shirts. Set your machine to a zigzag stitch. Sew along the cut edge of the fabric (not on the seam line itself). This stitch wraps around the edge and stops it from unraveling.
* Serger: If you have a serger, use it to serge the raw edge. This is the neatest finish.
* Turn Under: For a very clean look like store-bought shirts, you can turn the seam allowance under. Fold the 1/2 inch seam allowance in half towards the stitching (making a 1/4 inch fold). Press it. Then stitch that fold down close to the edge. This hides the raw edge completely. This method is more work but looks very professional.
Do this finishing on both side seams.
Pressing the New Seam
Take your shirt to the ironing board. Press the new seam flat. You can press the seam allowance to one side or press it open (if you used the turn-under method). Pressing blends the new seam into the shirt and makes your work look much better.
Altering the Sleeves
Sleeves can be too wide or too long. Altering shirt sleeves deals with these issues.
Making Sleeves Narrower
If the sleeves are too baggy, you can take them in, similar to the sides.
* Try and Mark: Put the shirt on. Pinch the extra fabric in the sleeve. Mark a line with chalk or pins from the armpit down to the cuff. Remember to mark on the inside of the sleeve.
* Lay Out: Lay the sleeve flat. Make sure the underarm seam is straight.
* Draw the Line: Draw a line inside the sleeve, starting at the armpit seam. Curve it gently along your mark down to the cuff edge. Make sure the line curves smoothly.
* Pin: Pin along the line through both layers of fabric.
* Sew: Use your sewing machine for shirts. Sew along the line from the armpit to the cuff. Backstitch at both ends.
* Try On: Check the fit before cutting.
* Trim and Finish: Cut the extra fabric, leaving a seam allowance (e.g., 1/2 inch). Finish the raw edge with a zigzag stitch or serger.
* Press: Press the new seam flat.
Shorten Shirt Length – Sleeves
Often, sleeves are just too long. Shortening shirt length on the sleeves is simpler than making them narrower.
- Decide New Length: Put the shirt on. Fold the cuff up to where you want the sleeve to end. Consider how the cuff will fold or look when done. Add extra fabric for the new hem. How much extra? If the original hem was, say, a 1-inch fold, add 1 inch plus a little extra for turning under the raw edge (maybe 1.5 inches total). Mark this new length line.
- Cut: Take the shirt off. Lay the sleeve flat. Measure carefully from the shoulder or armpit to your marked line. Make sure both sleeves are marked to the exact same length. Cut the end of the sleeve off straight across at your marked line.
- Create the New Hem: You are making a new hem at the end of the sleeve.
- Fold the raw edge up by about 1/4 or 1/2 inch towards the inside of the sleeve. Press this fold flat.
- Fold it up again. The amount you fold up depends on how much seam allowance you left and how wide you want the final hem to be. If you left 1.5 inches and folded 1/2 inch first, you now fold up 1 inch. This hides the raw edge inside the fold. Press this second fold well. Pin it in place around the sleeve end.
- Sew the Hem: Use your sewing machine for shirts. Stitch around the sleeve, sewing the folded hem down. Sew close to the inner folded edge. Use a straight stitch. Backstitch at the start and end. Sew the other sleeve hem the same way.
- Press: Press the finished hem flat.
Shorten Shirt Length – Body
If the shirt is too long at the bottom, you can shorten shirt length there too. This is like shortening sleeves, but on a larger scale.
- Decide New Length: Try the shirt on. Fold the bottom hem up to where you want it to end. Add seam allowance for the new hem. A common amount for a shirt hem is 1 inch or 1.5 inches. Mark your cutting line, adding the seam allowance below your desired finished length.
- Cut: Take the shirt off. Lay it flat. Button it up. Make sure the bottom is flat and smooth. Measure from the collar or shoulder down to your marked line. Check that the line is even all the way around. Cut the bottom of the shirt off straight across at your marked line. Cut through the front and back layers at the same time for accuracy.
- Create the New Hem: You will make a new hem at the cut bottom edge.
- Fold the raw edge up towards the inside of the shirt by about 1/4 to 1/2 inch. Press this fold.
- Fold it up again. The amount you fold depends on your seam allowance and desired hem width. If you left 1.5 inches and folded 1/2 inch first, fold up 1 inch now. This hides the raw edge. Press this second fold well. Pin it in place. Go all the way around the bottom hem.
- Sew the Hem: Use your sewing machine for shirts. Stitch around the hem, close to the inner folded edge. Use a straight stitch. Sew slowly and keep your fabric smooth. Start and end your stitching neatly, overlapping by about 1/2 inch.
- Press: Press the finished hem flat.
Putting It All Together: Your DIY Shirt Tailoring Project
You’ve now learned the main ways of tailoring a shirt: taking in sides (slimming shirt, tapering shirt waist), altering shirt sleeves (making narrower, shortening), and shorten shirt length at the bottom.
DIY shirt tailoring takes practice. Your first attempts might not be perfect. That’s okay! Each shirt you work on will teach you more. These shirt alterations home can really make a difference in how your clothes fit and look. You are essentially performing basic sewing shirt tasks to customize your wardrobe.
Tips for Successful DIY Shirt Tailoring
Here are some tips to help your shirt tailoring projects go well:
- Start Simple: Don’t try to do every alteration on your first shirt. Start with taking in the sides, as it’s the most common and often gives the biggest impact.
- Practice: Use old shirts you don’t wear anymore for practice. This lets you make mistakes without ruining a good shirt.
- Measure Twice, Cut Once: This old saying is very true in sewing. Double-check your measurements and markings before you cut or sew.
- Good Lighting: Work in a well-lit area so you can see your lines and stitches clearly.
- Sharp Tools: Use sharp scissors and needles. Dull tools make the job harder and can damage fabric.
- Press Often: Pressing is your friend! Press seams as you sew them and again when finished. It makes a huge difference in the final look.
- Don’t Rush: Take your time with each step. Rushing leads to mistakes.
- Get Help with Marking: Asking a friend or family member to help pin and mark while you’re wearing the shirt makes it much easier and more accurate. This is key for fitting a shirt well.
- Learn Basic Sewing: If you’re new to sewing, learn how to thread your machine, sew a straight line, and backstitch properly before starting. Practice on scrap fabric.
- Consider Fabric Type: Cotton shirts are usually the easiest to tailor. Silks, satins, or very thin fabrics can be much harder to work with.
These tips will help you with your shirt alterations home projects and make your sewing shirt experience better.
Troubleshooting Common Issues
Even with care, you might run into problems. Here are a few common ones and how to fix them:
- My new side seams look wavy: This can happen if you pull the fabric while sewing or if your machine tension is off. Pressing the seam really well can often fix slight waviness. For major waves, you might need to use your seam ripper and sew the seam again, being careful not to stretch the fabric.
- The fit is still not right: If it’s too loose, you can usually draw a new line further in and sew again, as long as you have enough seam allowance left. If it’s too tight and you haven’t cut the fabric, use the seam ripper to remove your stitches and sew further out from the original seam. If you already cut and it’s too tight, there’s not much you can do for this shirt, but you learned for the next one!
- My hem is not straight: This usually means you didn’t mark or cut in a straight line. Measure carefully from a fixed point (like the shoulder seam) all the way around the hem before cutting. Pressing the folds for the hem before sewing also helps keep it straight.
- Fabric is bunching up while sewing: Check your machine’s tension and stitch length. Make sure you are not pushing or pulling the fabric hard. Let the machine feed the fabric at its own pace.
- Stitches are skipping: Make sure you are using the right needle for the fabric (a universal needle works for most shirts) and that the needle is inserted correctly and isn’t bent or dull.
Don’t get discouraged if something goes wrong. Every mistake is a chance to learn how to sew better.
Frequently Asked Questions (FAQ)
Here are answers to some common questions about tailoring shirts at home.
How much fabric can I take in from the sides?
You can usually take in several inches total around the chest and waist. The limiting factors are how the shirt is made and your body shape. You need to make sure the armholes still fit and don’t get pulled too tight. Start by taking in just the amount you marked as excess. You can always take in more later if needed.
Can I tailor any type of shirt fabric?
Cotton shirts are the easiest for shirt alterations home. Poplin, broadcloth, or oxford cottons are good to start with. Fabrics like silk, rayon, or very lightweight synthetics can be slippery and hard to sew neatly. Thick fabrics like denim or flannel require a stronger needle on your sewing machine for shirts. Knitted shirts (like t-shirts or polos) require different techniques, often needing a serger or a stretch stitch to keep the seams from breaking.
Is a sewing machine absolutely necessary?
For strong, durable seams that look good and hold up to wear and washing, yes, a sewing machine for shirts is highly recommended for these types of shirt alterations. Hand sewing is possible for small tweaks, but major changes like taking in sides or shortening the length are much better done with a machine.
How long does it take to tailor a shirt?
If you are new, altering the sides might take 1-2 hours. Shortening sleeves or the length could take 1 hour each. With practice, you can get much faster. The first time will take the longest as you go slowly and carefully.
What is the hardest part of DIY shirt tailoring?
Many people find getting the measurements and markings just right to be the hardest part. Trying the shirt on, marking accurately, and transferring those marks to a sewing line requires patience and sometimes help from another person. Sewing straight lines comes with practice.
Can I tailor a t-shirt the same way?
T-shirts are usually made from knit fabric, which stretches. Woven shirts (like dress shirts) do not stretch much. To tailor a t-shirt, you need to use a stitch that can stretch, like a zigzag stitch or a special stretch stitch on your machine. A serger is ideal for t-shirts. The process of taking in sides or shortening length is similar, but the sewing method is different to keep the seams flexible.
Conclusion
Tailoring a shirt at home is a rewarding skill. It lets you turn ill-fitting clothes into garments that look and feel great on you. With a little practice and the right tools, you can achieve a perfect fit yourself. So grab an old shirt, your sewing machine for shirts, and give DIY shirt tailoring a try. You’ll be glad you did when you wear a shirt that fits like it was made just for you.