
Do you want to know how to make your sewing stitches strong? Are you wondering what that little lever on your sewing machine does? Backstitching is a basic sewing machine technique. It helps stop your stitches from coming undone. It’s like tying a knot with your machine. You use the reverse stitch sewing machine function to sew backward over your first stitches. This is key for securing seams machine sewing. It is a vital part of machine sewing techniques. This guide will show you how to do it right and why it matters.
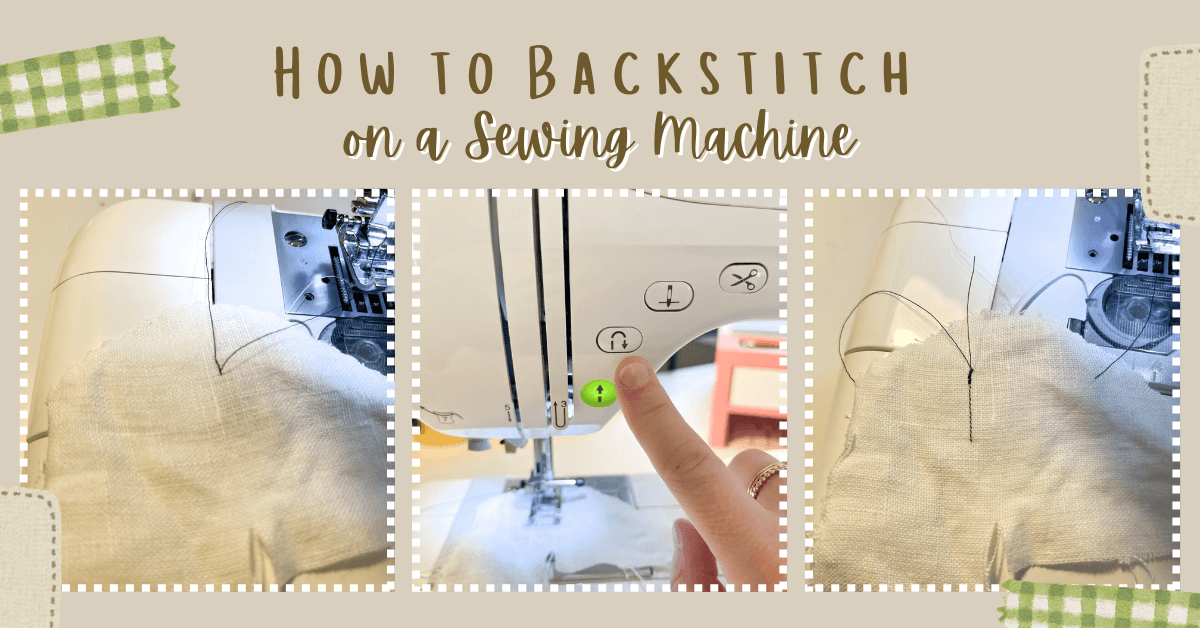
Image Source: dropinblog.net
Learning About Backstitching
Backstitching is sewing over stitches you just made. You stitch forward a little bit, then sew backward over those stitches, then sew forward again. This creates a small stack of stitches. This stack of stitches is very strong. It acts like a knot. It holds the thread ends in place. This helps keep the seam from pulling apart. It stops the fabric from unraveling at the start and end of your sewing line.
It is a simple step. But it makes a big difference in how long your sewing project lasts. Without backstitching, the first and last stitches of your seam are weak. They can easily pull out. This lets the whole seam come apart. Think of a chain. If the first or last link is broken, the whole chain breaks. Backstitching makes those first and last links very strong.
Many sewing machines have a special button or lever for this. It is often called the reverse lever sewing machine or reverse stitch button. Pushing or holding this lets the machine sew backward. We use this function to create the backstitch.
Why Use Backstitching?
Why take the time to backstitch? The main reason is to prevent seam unraveling sewing. A sewing machine creates a lock stitch sewing machine stitch. This stitch is strong along the seam. But the ends are just threads. If you pull on these threads, the stitches can loosen. They can pull right out of the fabric.
Backstitching reinforces the stitches machine makes at the seam ends. It locks them in place. This is super important for areas that get stress. Areas like pockets, zippers, waistbands, or seams in clothes that get pulled often. For example, the armhole seam on a shirt. Or the side seam on pants. These areas need stitches that will not break under pressure.
Even on simple seams, like the side of a cushion cover, backstitching is a good idea. It adds a level of finish and strength. It shows care in your work. Projects that are washed a lot also need good backstitching. Washing and drying can put stress on seams.
Backstitching at beginning of seam is important. It sets a strong anchor. Backstitching at the end finishes the seam strongly. It is part of making your sewing project last. It moves it from just “sewn” to “well-made.”
Knowing When to Backstitch
Where do you need this strong little knot? You use it at the start and end of almost every seam.
- Starting a Seam: Before you sew the main part of your seam, you start with a backstitch. Sew a few stitches forward. Then backstitch over them for a few stitches. Then sew forward again to start your main seam line.
- Ending a Seam: When you reach the end of your seam line, you backstitch again. Sew forward to the end. Then backstitch backward for a few stitches. Then sew forward again for a few stitches right on top of the backstitches. Or just backstitch and stop. We will cover options later.
- Around Stress Points: On things like belt loops, straps, or handles, you might backstitch more. You might sew a small box or X shape over them. This adds extra reinforcing stitches machine strength where needed.
- Closing Darts or Pleats: At the narrow end of a dart or pleat, backstitching holds the point securely.
- Pocket Openings: Where a pocket starts and stops, backstitching keeps the seam strong.
- Zipper Ends: At the top and bottom of a zipper, backstitching locks the stitches holding the zipper tape.
It is a basic rule: Start and end seams backstitch. Make it a habit. Every time you start sewing a line of stitches, backstitch. Every time you finish a line of stitches, backstitch. This one simple habit makes your sewing much more durable.
Seeing How to Backstitch on Your Machine
Backstitching is easy once you know how your machine works. Most sewing machines have a way to sew backward.
- Find the Reverse Control: Look on the front or side of your machine. You will see a button, lever, or switch. It often has a curved arrow symbol. This is your reverse lever sewing machine control. On some electronic machines, it might be a button on the control panel. On older or mechanical machines, it is often a lever you hold down.
- Test It: Turn on your machine. Put a piece of scrap fabric under the needle. Lower the presser foot. Start sewing forward slowly. While sewing forward, push and hold the reverse button or lever. See what happens. The machine should sew backward. Let go of the button or lever. The machine should sew forward again. Do this a few times to get the feel of it.
How to Start a Seam with Backstitching
Here are the steps for backstitch at beginning of seam:
- Place Fabric: Put your fabric under the presser foot. Line up the edge of the fabric with your seam guide. This guide is usually a line on the needle plate.
- Start Sewing: Lower the needle into the fabric at the very start of where you want your seam to be. Sew forward just a few stitches. Three or four stitches are usually enough.
- Go Backward: Stop sewing forward. Push and hold the reverse button or lever. Sew backward slowly over the stitches you just made. Go back the same number of stitches, maybe three or four. Sew right on top of the first stitches.
- Go Forward Again: Let go of the reverse button or lever. Start sewing forward again. You are now sewing over the backstitches and starting your main seam line. Keep sewing forward along your seam guide until you reach the end of your seam.
This creates a little block of stitches at the start. It is strong and locks the thread ends.
How to End a Seam with Backstitching
Here are the steps for backstitch at the end of a seam:
- Sew to the End: Sew your seam line forward until you are just a few stitches away from the end of your fabric or the end of your seam mark.
- Go Backward: Stop sewing forward. Push and hold the reverse button or lever. Sew backward slowly over the stitches you just made. Go back about three or four stitches.
- Go Forward (Optional): Some sewers like to sew forward again right over the backstitches for three or four stitches. This makes the end very secure. Other sewers just stop after backstitching backward. Either way works. Backstitching backward is the key step.
- Stop and Lift: Stop sewing. Lift the needle to its highest point. Raise the presser foot. Gently pull the fabric away from the machine. Cut the threads.
You now have a strong block of stitches at the end of your seam too. This method covers start and end seams backstitch technique.
Learning About Your Machine’s Stitch Functions
Most home sewing machines use a lock stitch sewing machine setup. This means the top thread and bobbin thread twist together inside the fabric. This makes a strong stitch line.
The reverse stitch sewing machine function is a basic feature. It is part of the core sewing machine stitch functions. It simply tells the feed dogs to move the fabric backward instead of forward. The feed dogs are the little teeth under the presser foot that move the fabric.
On some very basic machines, you might not have an instant reverse button. You might have a way to lift the feed dogs or manually move the fabric slightly backward while stitching very carefully. But this is rare on modern machines. Almost all machines made in the last many decades have a reverse function.
Check your machine’s manual. It will show you where the reverse control is. It will also explain other sewing machine stitch functions. Things like stitch length and stitch width. These can also affect seam strength, but backstitching is the main method for securing the ends.
Tips for Good Backstitching
Making strong, neat backstitches is easy with a few tips:
- Go Slow: Backstitching does not need to be fast. Sew slowly and carefully. This helps you sew right over the stitches you just made. It makes the backstitch neat.
- Keep it Short: You only need a few stitches of backstitching. Three or four stitches is usually enough. Sewing too many backstitches can create a thick, messy lump of thread. This is not neat and does not add much extra strength.
- Sew Straight: Try to sew the backstitches in a straight line. Sew right on top of the first stitches. This makes the seam end look good.
- Practice: Use scrap fabric to practice. Sew a few lines. Practice starting and stopping with backstitching. See how it looks. Feel how strong it is. Practice helps you control the machine.
- Match Thread: Use thread that matches your fabric. This makes the backstitches less visible.
- Check Fabric: On very delicate or fine fabrics, too much backstitching can make a thick spot. It can gather the fabric. On these fabrics, you might use fewer backstitches (maybe two or three). Or you might start and end by lowering the stitch length to almost zero for a few stitches instead of using reverse. This is another way of reinforcing stitches machine makes. It creates a very dense stitch that is hard to pull out. But standard backstitching is usually best and easiest.
What If Your Machine Has Auto Backstitch?
Some modern electronic machines have an automatic backstitch or tie-off function. This is a great feature.
- Auto Backstitch Button: On some machines, you press a button at the start and/or end of the seam. The machine will automatically sew forward a few stitches, back a few, then forward again (at the start). Or forward to the end, back a few, forward a few (at the end). You do not have to hold a lever.
- Tie-Off Stitch Button: Other machines have a button that sews several tiny stitches right on top of each other. It is like sewing in place. This makes a very dense, small knot. It is another way of reinforcing stitches machine makes at the end of a seam. It is often neater than traditional backstitching on fine fabrics.
Check your machine’s manual to see if it has these features. Using them correctly is part of using your sewing machine stitch functions well. These auto functions make securing seams machine projects even easier.
Reinforcing Stitches Machine Uses in Special Cases
While backstitching is standard, there are times you might use other reinforcing stitches machine methods.
- Starting with a Knot: On some fabrics or for very delicate work, you might start by lowering the needle, pulling the bobbin thread up, tying a small knot with the top and bobbin threads, and then starting to sew just forward. You would leave long thread tails to weave in later. This avoids the bulk of a backstitch but is more work.
- Lowering Stitch Length: As mentioned, sewing several very short stitches (like 0.5mm) in place is another way to secure ends. This is good for points like on collars or cuffs. It creates a very dense spot of thread that is hard to pull out. This is a great method for reinforcing stitches machine applies in tight spots.
- Hand-Tying Ends: After machine sewing, you can leave long thread tails. Pull the top thread through to the back side. Tie the top and bobbin threads together by hand close to the fabric. This is useful in visible areas where even neat backstitching might show too much.
These are alternatives. But for most everyday sewing, standard backstitching at beginning of seam and start and end seams backstitch is the fastest and strongest way to prevent seam unraveling sewing.
Common Mistakes to Avoid
Even simple backstitching can go wrong. Here are mistakes to watch out for:
- Too Many Stitches: Sewing too many backstitches creates a bulky mess. It can make the seam wavy or hard to press flat. Stick to 3-4 stitches.
- Not Sewing on Top: If you do not sew the backstitches directly over the first stitches, you get a messy line. It does not look good. It is also not as strong. Sew slowly and look closely to stay on the line.
- Starting/Ending Too Far In: Backstitching needs to be right at the very start and end of the seam. If you start or end the backstitch too far into the fabric, you leave the edge unsecured. The first few stitches are still weak.
- Fabric Feeding Issues: Make sure your fabric is feeding smoothly when backstitching. Do not push or pull the fabric hard. Let the feed dogs do their job. Going slowly helps prevent fabric jams or needle breaks.
- Forgetting: The biggest mistake is forgetting to backstitch! Your seam will likely come undone over time if you do not secure the ends. Make it a habit every single time you start and stop.
Correctly using the reverse stitch sewing machine function is key to avoiding these problems. It makes your machine sewing techniques much better.
Stepping Through a Full Seam with Backstitch
Let’s put it all together. Imagine sewing a simple straight seam, like on a pillowcase.
- Set Up: Get your two fabric pieces. Put their right sides together. Line up the raw edges.
- Machine Prep: Sit at your sewing machine. Choose a straight stitch. Set the stitch length (maybe 2.5 mm). Put your fabric under the presser foot at the starting point of your seam. Lower the presser foot.
- Start Backstitch (h4)
- Lower the needle into the fabric.
- Sew forward 3-4 stitches.
- Push/hold the reverse lever sewing machine control.
- Sew backward 3-4 stitches over the first stitches.
- Release the reverse control.
- Sew Main Seam: Keep sewing forward in a straight line. Keep the fabric edge lined up with your seam allowance guide. Sew until you are about 3-4 stitches from the end of the fabric.
- End Backstitch (h4)
- Stop sewing forward.
- Push/hold the reverse lever sewing machine control.
- Sew backward 3-4 stitches over the stitches you just made.
- Release the reverse control.
- Optional: Sew forward 3-4 stitches again right over the backstitches.
- Finish: Stop sewing. Lift the needle to its highest point. Raise the presser foot. Pull the fabric out. Cut the threads close to the fabric.
You have just sewn a seam with secure, reinforced stitches machine applied at both ends. You have used the reverse stitch sewing machine function correctly for securing seams machine. This helps prevent seam unraveling sewing.
Knowing About Different Fabrics
Does backstitching work on all fabrics? Yes, mostly.
- Woven Fabrics: Cotton, linen, denim, etc. Backstitching works great on these. It secures the threads in the weave.
- Knit Fabrics: Jersey, knits. Backstitching can sometimes get a bit messy on very stretchy knits. Use slightly fewer backstitches (2-3). Or consider starting and ending with a short burst of very short stitches instead of reverse. On a serger, you do not typically backstitch. You secure the serger chain differently. But this guide is about sewing machine stitch functions.
- Delicate Fabrics: Silk, chiffon, fine lace. Backstitching can be bulky or gather these fabrics. Try fewer stitches, or use the method of sewing very short stitches in place. Or leave long thread tails to tie by hand.
- Heavy Fabrics: Canvas, upholstery fabric, multiple layers of denim. You will need a strong needle and thread. Backstitching is very important here because these seams take a lot of stress. A standard 3-4 backstitches are needed.
Always test on a scrap of your fabric first. See how the backstitch looks. Make sure it does not make a lump or gather the fabric. Adjust the number of backstitches if needed.
The Lock Stitch Sewing Machine Explained
The stitch your regular sewing machine makes is called a lock stitch. This is different from a chain stitch, which is made by some older machines or sergers.
In a lock stitch, the top thread comes down through the fabric. A hook or bobbin case catches the thread loop and twists the bobbin thread through it. Then the needle pulls the loop back up. Each stitch is basically locked by this twist of the two threads.
This stitch is strong from stitch to stitch along the seam line. But at the very start and end, the first and last loops are not locked to anything beyond themselves. Backstitching locks these end stitches by burying them under more stitches. This prevents them from pulling free. This is why understanding the lock stitch sewing machine system helps see why backstitching is necessary for securing seams machine makes. It reinforces the start and end points of this thread chain.
Practicing Machine Sewing Techniques
Backstitching is one of the first machine sewing techniques you should master. It is as basic as sewing a straight line.
Practice sewing straight lines on paper without thread first. This helps you guide the fabric (or paper).
Then practice on scrap fabric with thread. Focus on:
* Starting right at the edge.
* Sewing forward just a few stitches.
* Using the reverse lever sewing machine control smoothly.
* Sewing backward right on the first stitches.
* Going forward again smoothly.
* Stopping the main seam at the right point.
* Ending with the backstitch.
Repeat this many times. Sew short seams, long seams, seams on curves. Make backstitching automatic. Every seam, start and end with a backstitch. This habit makes your sewing much stronger. It drastically helps prevent seam unraveling sewing. It ensures your projects last.
Table: Common Backstitch Lengths
Here is a simple guide on how many backstitches to sew:
| Fabric Weight / Seam Type | Recommended Backstitch Length | Notes |
|---|---|---|
| Light/Delicate Fabrics | 2-3 stitches | Sew slowly; check for gathering. |
| Medium Weight Fabrics | 3-4 stitches | Standard and most common. |
| Heavy Weight Fabrics | 4 stitches | Provides extra strength for stress points. |
| Very High Stress Areas | 4 stitches + sew over again | Or use multiple lines, box/X shapes. |
Remember, this is a guide. Test on your fabric. The goal is security without bulk.
Keeping Your Machine Ready
A well-kept machine makes backstitching easier.
- Clean Feed Dogs: Dust and lint can build up around the feed dogs. This stops the fabric from moving smoothly backward and forward. Clean this area often.
- Check Needle: A bent or dull needle can skip stitches or snag fabric during backstitching. Use a sharp, new needle.
- Thread Tension: Correct thread tension is important for a good lock stitch sewing machine stitch. If tension is off, the stitches can be weak, even with backstitching. Test tension on scraps before sewing your project.
These small steps help ensure your reverse stitch sewing machine function works perfectly every time.
Frequently Asked Questions (FAQ)
What is the difference between backstitching and locking stitches?
Backstitching is the action of sewing backward over a few stitches at the start and end of a seam. Locking stitches is the general term for securing the ends. Backstitching is the most common way to lock stitches on a sewing machine. Some machines might have a special “lock stitch” button that sews very small stitches in place instead of reversing, but the goal is the same: reinforcing stitches machine ends.
Do I have to backstitch every time?
For seams that will hold fabric together under any kind of stress or washing, yes. Backstitching is essential for preventing the seam from unraveling. For temporary stitches like basting (long stitches you remove later), you do not need to backstitch.
How many stitches should I backstitch?
Usually 3 to 4 stitches is enough. More than that creates bulk. Fewer than 3 might not be strong enough.
Can I backstitch in the middle of a seam?
You can, but you usually do not need to. If a seam line is very long and might come under extreme stress in the middle, you could stop, backstitch a few stitches, then sew forward again. But for normal sewing, securing the ends is enough because the lock stitch itself is strong in the middle.
My machine makes a knot at the start/end, is that backstitching?
Some advanced electronic machines have a “knot” or “tie-off” function. This often involves sewing many tiny stitches in place (almost zero stitch length). This creates a very dense spot of thread that is like a small knot. This is a different method of reinforcing stitches machine uses, but it serves the same purpose as backstitching: securing the end of the seam. It is often neater than traditional backstitching on fine fabrics.
My old machine doesn’t have a reverse lever. What do I do?
Very old machines might not have a reverse function. In this case, you would start your seam by sewing forward a few stitches, lift the presser foot (leave the needle in the fabric), turn the fabric around, lower the foot, sew forward over the first stitches, turn the fabric back, and continue sewing forward. This is more work, but it achieves the same layering of stitches. Alternatively, you can leave long thread tails at the start and end and tie them by hand.
Does backstitching add bulk?
A little bit, yes. That is why you only do a few stitches. Too many backstitches create noticeable bulk. This is why on very delicate fabrics, you might choose an alternative method like sewing very short stitches in place or tying threads by hand.
Mastering the backstitch is a core part of effective machine sewing techniques. It is simple, fast, and makes a huge difference in the quality and durability of your finished projects. Practice using your reverse stitch sewing machine function. Make start and end seams backstitch a natural part of your sewing flow. Your seams will be strong, neat, and ready to last.