
Can you reupholster boat seats without sewing? Yes, you absolutely can reupholster boat seats without sewing. This guide will show you how to give your old boat seats a fresh new look using easy no-sew methods like stapling and gluing. It’s a great DIY project that can save you money and make your boat look much better. You can do boat seat material replacement and recovering boat cushions no sew right in your own garage or workspace. This is perfect for replacing boat seat covers without sewing. We will cover how to do DIY boat seat upholstery no sew.
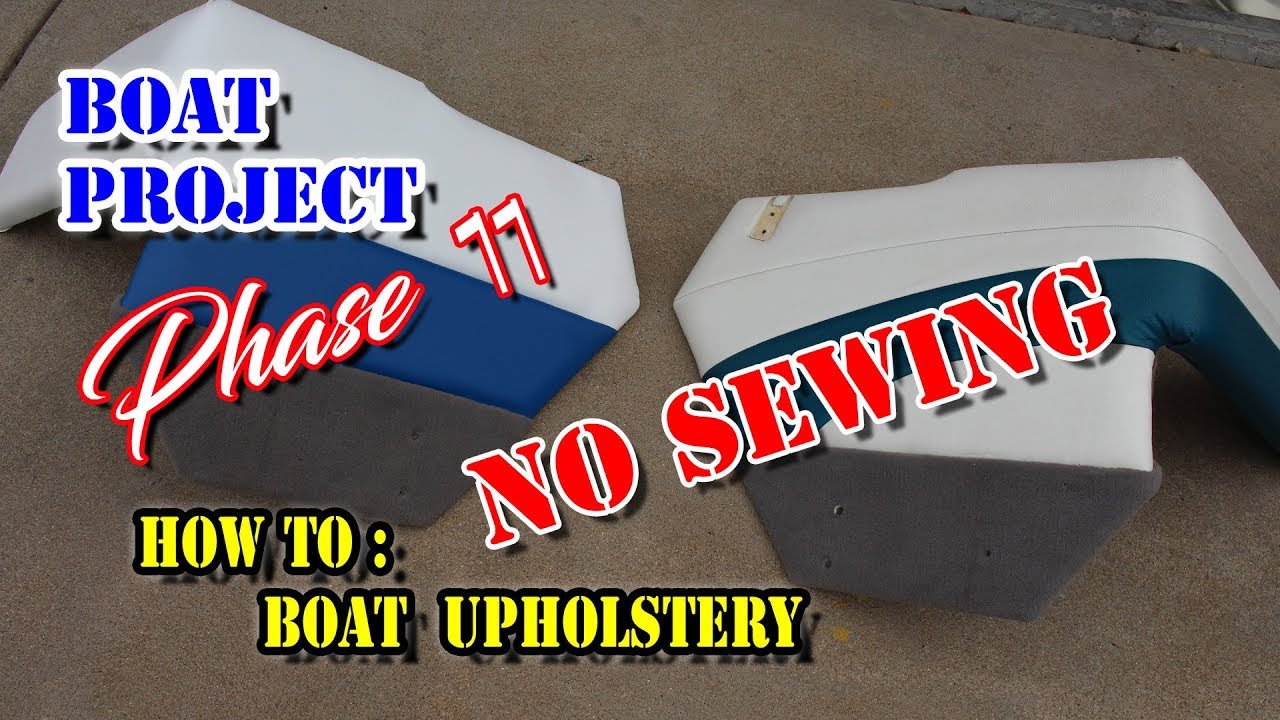
Image Source: i.ytimg.com
Why Reupholster Boat Seats Without Sewing?
Boat seats get old. The sun beats down on them. Water gets on them. They can crack and fade. Old seats make a boat look worn out.
Putting new covers on your boat seats makes a big difference. It makes the boat look newer. It protects the seat foam underneath. It makes sitting on the seats more comfortable.
Why do it without sewing? Sewing boat seat covers can be hard. It needs special skills. You need a sewing machine that can handle thick material like marine vinyl boat upholstery. Many people do not have this machine or the skill.
Doing it without sewing is easier for most people. You can use tools like a staple gun boat seat and marine adhesive boat seats glue. These methods are strong enough for boat seats. They make recovering boat cushions no sew possible for everyone.
Getting Ready: Tools and Materials You Need
Before you start, get everything you need. Having the right tools and materials makes the job go smoothly. It helps you finish the DIY boat seat upholstery no sew project.
Tools For The Job
You will need some basic tools.
These tools help you take the old covers off.
They help you put the new covers on.
- Staple Gun: You need a heavy-duty staple gun. An electric or air-powered one is best. It pushes staples into hard wood or plastic bases. This is key for staple gun boat seat upholstery.
- Staples: Get stainless steel staples. They do not rust. Boat seats get wet. Rusting staples will break and stain your new covers. Get staples the right size for your staple gun.
- Screwdriver or Drill: To take off seat hardware. This includes hinges or mounting brackets.
- Staple Remover: To pull out old staples. A flathead screwdriver or a special staple remover tool works well.
- Pliers: To help pull out stubborn staples.
- Sharp Knife or Box Cutter: To cut old fabric and trim new fabric. Be very careful when using sharp tools.
- Scissors: For cutting fabric. Strong scissors are needed for tough marine vinyl boat upholstery.
- Marker or Pen: To mark the fabric for cutting.
- Measuring Tape: To measure the seat and the fabric.
- Heat Gun (Optional but helpful): A heat gun can make marine vinyl softer. This makes it easier to stretch around curves. Use low heat and keep it moving. Do not hold it in one place. You can burn the fabric.
- Clamps: To hold fabric while gluing. Or to hold parts while staples are set.
- Work Surface: A clean, flat area to work. A large table or workbench is good. It needs to be big enough for the seat parts.
- Safety Glasses: Protect your eyes from flying staples or debris.
- Gloves: Protect your hands while working.
- Camera or Phone: To take pictures of how the old cover came off. This helps you remember how to put the new one on.
Materials For Your Boat Seats
Choosing the right material is important.
You also need glue if you use that method.
Or if you use both staples and glue.
- New Fabric: Marine vinyl boat upholstery is the best choice.
- It is made for boats.
- It fights against UV rays from the sun. This stops it from fading and cracking fast.
- It resists mold and mildew. This is important in a wet boat setting.
- It is waterproof.
- It is strong and lasts a long time.
- Choose a color and texture you like. Make sure it is labeled as “marine grade.” This is important for boat seat material replacement.
- Buy extra fabric. It is good to have more than you think you need. This helps with mistakes or tricky spots.
- Marine Adhesive: If you use glue, get a strong marine adhesive boat seats glue.
- It must be waterproof.
- It should be flexible after it dries. Vinyl stretches a little.
- It should bond well to vinyl, wood, and foam.
- Contact cement made for vinyl works well. So do special upholstery glues. Read the label to be sure it works for marine vinyl and the seat base material (usually wood or plastic).
- New Foam (If Needed): Check the old foam. Is it crumbly? Is it flat? Is it wet or smelly? You might need new foam. Marine-grade foam is best. It does not hold water easily.
- New Plywood Base (If Needed): Is the wood base rotten or broken? You might need to cut a new one. Use marine-grade plywood. It handles moisture better than regular plywood.
Step-by-Step: Taking Apart Your Old Boat Seats
You cannot put new covers on without taking the old ones off. This is the first step in recovering boat cushions no sew.
Removing the Old Material
This part can take time. Be patient.
Look at how the old cover is attached.
Is it stapled? Glued? Screwed on?
- Take Pictures: Before you touch anything, take pictures. Take many pictures. Get close-up shots of corners. See how the fabric is folded. See where the staples or glue are placed. These pictures are your guide later. They help you remember how the original covers were put together.
- Remove Hardware: Use your screwdriver or drill. Take off any hinges, handles, or mounting plates. Put the screws and hardware in a cup or bag. You do not want to lose them. Label the bag so you know which seat they belong to.
- Find Attachment Points: Turn the seat over. Look at the bottom. Where is the fabric fastened? It is usually stapled to the wood or plastic base. Sometimes, edges are glued down.
- Start Removing Staples or Glue:
- For Staples: Use your staple remover tool or flathead screwdriver and pliers. Slide the tool under each staple. Pry it up. Use pliers to pull it out if it is stuck. This takes a long time. Be careful not to damage the wood base. Try not to rip the old vinyl more than needed at the start. You might use pieces of it as a pattern.
- For Glue: If the edges are glued, try to peel the fabric back slowly. A heat gun on low heat can sometimes help loosen old glue. Be careful not to melt the vinyl or the foam.
- Pull Off the Old Cover: Once most staples or glue are gone, carefully pull the old vinyl cover away from the foam and base. Do this slowly. See how the fabric wraps around the edges. See how corners are folded. This is important for the new cover.
- Keep the Old Cover (Maybe): Do not throw the old cover away right away. If it is not too torn up, you can use it as a pattern for cutting your new fabric. Lay it flat and see how it was shaped.
Checking the Foam and Base
Now you can see the inside of the seat.
This is a good time to check its condition.
You might need to fix things now.
- Check the Foam:
- Is the foam dry? Or is it holding water?
- Is it firm? Or is it soft and falling apart?
- Is it the right shape? Or is it lumpy or flat where people sit?
- If the foam is bad, you should replace it. Old wet foam can cause mold and smell bad. New foam makes the seat comfortable again. Cut the new foam to the same shape and size as the old foam.
- Check the Base:
- Is the wood base strong? Or is it soft and rotten in places?
- Are there cracks in a plastic base?
- If the base is bad, you need to fix or replace it. A weak base will not hold the new staples or glue. Marine plywood is best for wood bases.
- Clean Everything: Clean the foam and base. Use a mild cleaner. Let everything dry completely before putting on the new cover. Any moisture trapped inside can cause problems later.
Preparing Your New Material
Now you work with your new marine vinyl boat upholstery.
This is where you get the new cover ready.
Choosing The Right Boat Fabric (Marine Vinyl Boat Upholstery)
We talked about this earlier.
But let’s say more about it.
Marine vinyl is the best for boat seat material replacement.
- Durability: Look for thick, strong vinyl. Check the weight or mil rating. Higher numbers mean thicker vinyl.
- UV Protection: This is key. The sun damages vinyl fast. Make sure the fabric says it has good UV protection.
- Mold and Mildew Resistance: Boats are wet. The vinyl must resist mold.
- Color Fastness: Will the color stay bright? Or will it fade in the sun?
- Stretch: Good marine vinyl has some stretch. This helps a lot when going around corners and curves without sewing.
- Amount: How much do you need? Measure your seats carefully. Measure the longest and widest parts. Add several inches (at least 4-6 inches) on all sides for wrapping around the base. If you have multiple seats, figure out how to lay out all the pieces on the fabric width. Buying a little extra is always smart.
Measuring For Your Seats
Accurate measuring is important.
It makes sure you cut the right size fabric.
Measure the seat parts that will be covered.
- Measure the Top: Measure the length and width of the seat cushion part.
- Measure the Sides: Measure the height of the foam or the side panels.
- Add for Wrapping: This is the most important step for recovering boat cushions no sew. The fabric must wrap around the edge and onto the bottom of the seat base. Add enough extra fabric for this wrap.
- How much extra? It depends on the thickness of the seat and the base.
- A common rule is to add 4 to 6 inches to each side of the top measurement.
- Example: A seat cushion is 20 inches wide and 30 inches long. Add 6 inches to each side of the width (20 + 6 + 6 = 32 inches). Add 6 inches to each side of the length (30 + 6 + 6 = 42 inches). You would need a piece of fabric at least 32×42 inches for that seat part.
- This extra fabric is what you will staple or glue to the base. It replaces the need for sewing side panels.
- Consider Corners: If your seat has rounded corners, you will need even more fabric there to stretch and fold neatly. Look back at your pictures of the old cover.
Cutting Your Fabric Pieces
Use your measurements to cut the new fabric.
Lay the marine vinyl flat on your work surface.
Use your old cover as a pattern if you saved it.
- Lay Out the Fabric: Put the new fabric face down. Make sure it is smooth. No wrinkles.
- Mark Your Cuts: Use your marker or pen. Mark the sizes you need. Use your measuring tape. If using the old cover as a pattern, lay it on the new fabric. Trace around it. Add the extra inches for wrapping after tracing if the old cover already had side panels sewn on. If the old cover was a simple wrap-around like your new one will be, just trace it.
- Use a Straight Edge: For straight lines, use a long ruler or straight piece of wood. This helps you cut clean lines.
- Cut Carefully: Use sharp scissors or a sharp knife/box cutter. Cut slowly and carefully along your marks. Cutting marine vinyl can be tough. A sharp blade makes it easier.
- Label Pieces: If you are doing multiple seats or cushions, label each piece of fabric. Use a sticker or write lightly on the back. Know which piece goes with which seat part.
The No-Sew Way: Putting on the New Cover
This is the main part of the DIY boat seat upholstery no sew project.
You will attach the new marine vinyl boat upholstery.
You will use staple gun upholstery methods or marine adhesive boat seats glue. Or both.
Stapling Method (Staple Gun Upholstery Methods)
Stapling is a very common way to do recovering boat cushions no sew.
It is fast and strong if done right.
You need a good staple gun boat seat tool.
Getting Ready To Staple
Make sure your work area is safe and ready.
Wear your safety glasses.
Have your staple gun loaded with stainless steel staples.
- Center the Fabric: Lay the cut fabric piece over the seat foam and base. Make sure it is centered. The extra fabric for wrapping should be even on all sides.
- Smooth It Out: Smooth the fabric over the top of the seat. Get rid of any wrinkles or bumps on the main seating surface.
- Start in the Middle: Do not start stapling at a corner. Start in the middle of one straight edge.
- Place the First Staples: Fold the edge of the fabric under (about half an inch) for a cleaner edge. Or just wrap it straight. Pull the fabric snugly over the edge and onto the bottom of the base. Place one staple in the middle of one side. Then go to the exact opposite side, pull the fabric taut, and place one staple in the middle there. Do the same for the middle of the other two sides. This anchors the fabric.
Stapling Straight Edges
Work from the middle staples outwards.
This helps keep the fabric smooth.
- Work from Center Out: Go back to the first middle staple. Move a few inches away from it towards a corner. Pull the fabric tight. Make sure it is smooth on the top of the seat. Place another staple.
- Keep Pulling and Stapling: Continue working outwards towards the corners. Always pull the fabric tight before stapling. Put staples about 1 to 2 inches apart. Closer staples hold better.
- Opposite Side: Once one side is done (except the corners), go to the exact opposite side you anchored earlier. Work from the middle out towards the corners on that side. Pull the fabric with the same tension as the first side. This balances the pull on the fabric.
- Do the Other Sides: Repeat this process for the remaining two sides. Work from the middle outwards. Pull tight, staple, move, pull tight, staple. Keep checking the top of the seat. Make sure no wrinkles are forming.
Working With Corners
Corners are the trickiest part of staple gun upholstery methods.
This is where the no-sew method shows its skill.
Look at your pictures of the old corners!
- Excess Fabric: You will have a lot of extra fabric at the corners.
- Folding Options: There are a few ways to fold corners.
- Pleated Corner: This is common. Pull the fabric tight around the corner. Make small, neat folds (pleats) in the excess fabric on the bottom. Staple each pleat down firmly. Try to make the pleats small and flat so the seat sits evenly.
- Gathered Corner: Pull the fabric tight around the corner. Gather the excess fabric together like a ponytail on the bottom. Staple it down firmly. Trim away some of the bulk if needed, but be careful not to cut too close to the staples or the main cover.
- Smooth Corner: This is harder without sewing. It works best if the corner is gently rounded and the vinyl is stretchy (maybe use the heat gun carefully here). Pull the fabric around the corner, stretching it sideways slightly as you wrap it down. Try to smooth out the excess fabric without making big folds. Staple it down, spreading the staples out to hold the stretched fabric.
- Practice: If you have scrap fabric, practice a corner first. See which method looks best and is easiest for you.
- Staple Well: Use plenty of staples on the corners. They get a lot of stress. Make sure the staples go fully into the base.
Handling Curves
Boat seats often have curves, not just sharp corners.
Curves need careful stretching and stapling.
- Small Sections: Work on curves in smaller sections than straight lines. Maybe 1 inch at a time.
- Gentle Pull: Pull the fabric gently around the curve. You need to pull both outwards (away from the seat) and slightly sideways along the curve. The goal is to get the fabric to lay smooth on the top surface.
- Staple Closer: Place your staples closer together on curves. This helps the fabric follow the shape. Staples might be only 1 inch or less apart.
- Check the Front: As you staple the curve on the bottom, keep looking at the front or top of the seat. Make sure the curve looks smooth and has no wrinkles or puckers. If you see one, pull out the last few staples and try again, adjusting your pull on the fabric.
Using The Staple Gun Safely (Staple Gun Boat Seat)
Staple guns are powerful tools.
Use them with care.
- Always wear safety glasses. Staples can bounce.
- Keep your fingers away from the front of the gun.
- Make sure the gun is pressed firmly against the base before pulling the trigger. This helps the staple go all the way in.
- Never point the staple gun at yourself or others.
- Unplug electric guns or disconnect air on air guns when not in use or when clearing a jam.
Gluing Method (Marine Adhesive Boat Seats)
Using glue is another way for DIY boat seat upholstery no sew.
It can give a very smooth finish, especially on edges.
It requires marine adhesive boat seats glue.
Choosing the Right Glue
Not all glue works.
You need a strong, flexible, waterproof glue.
- Marine Contact Cement: This is a popular choice. You put glue on both the fabric and the base. Let it dry a little. Then press the two glued surfaces together. They stick instantly and strongly. It needs careful placement because you cannot move it once the two glued surfaces touch.
- Upholstery Adhesive: Some sprays or brush-on glues are made for fabric and foam. Check if they are marine grade and waterproof.
- Polyurethane Adhesive: Some strong construction adhesives work, but check if they stay flexible enough for vinyl.
Read the glue product description carefully. Make sure it is suitable for marine vinyl, the base material (wood or plastic), and foam.
Applying the Glue
Follow the glue instructions.
Application methods can differ.
- Prepare Surfaces: Make sure the base is clean and dry. The back of the vinyl should also be clean.
- Apply Glue:
- Contact Cement: Apply a thin, even coat to both the seat base wrap-around area and the back of the vinyl fabric where it will attach. Let the glue dry to the touch. This usually takes 5-20 minutes depending on the glue and temperature. Read the can!
- Other Glues: Apply the glue to one surface as directed. It might be the base or the fabric.
- Work in Sections: Do not put glue on the whole seat base at once. Work on one side or section at a time. This stops the glue from drying too much before you are ready.
Pressing and Holding
This is key for glue to bond well.
- Position Fabric: Carefully position the fabric over the seat. Remember, with contact cement, once it touches, it sticks! Line it up correctly the first time.
- Press Down: Starting from the middle of the side you are gluing, press the fabric down firmly onto the glued base.
- Smooth Out: Use your hands to smooth the fabric. Work outwards from the middle. Push out any air bubbles or wrinkles.
- Hold or Clamp: Some glues need clamping or pressure while they dry. Use clamps to hold the fabric edge against the base. If you cannot clamp, press firmly by hand for a few minutes. Place weights on the edge if possible.
- Let It Cure: Let the glue dry completely. This can take from a few hours to 24 hours or more. Do not stress the glued seam until it is fully cured.
Gluing Corners and Curves
Gluing corners and curves needs extra care.
- Corners: Apply glue to the base and fabric around the corner area. Let it get tacky (if using contact cement). Carefully pull the fabric around the corner. Fold or gather the excess fabric on the bottom just like with stapling. Press the folds or gathers into the glue. Use clamps or weights to hold them tightly while the glue dries.
- Curves: Apply glue to a small section of the curve on the base and fabric. Let it get tacky. Carefully pull and stretch the fabric around the curve. Press it down firmly. Use clamps along the curve if possible to hold it until the glue sets. Work on small parts of the curve at a time.
Combining Staples and Glue (Replacing Boat Seat Covers Without Sewing)
You can use both methods.
This can give extra strength and a clean look.
This is a great way of replacing boat seat covers without sewing.
- Use glue on the straight edges for a smooth finish.
- Use staples on the corners where there is a lot of tension and folds need to be held firmly while the glue dries or just for extra strength.
- Use staples on edges that are not seen. Use glue on edges that might be visible.
- Some people use glue first to position the fabric, then use a few staples to hold it permanently, especially around curves or corners.
This combined method gives you the benefits of both staple gun upholstery methods and marine adhesive boat seats. It makes recovering boat cushions no sew very secure.
Dealing With Tough Spots and Problems
Sometimes things do not go perfectly.
You might get wrinkles or loose spots.
Here is how to fix them.
Fixing Wrinkles
Wrinkles happen if you do not pull the fabric tight enough.
Or if you pull one side much tighter than another.
- Identify the Wrinkle: Find where the fabric is not smooth.
- Release Tension: If the wrinkle is near an edge you just stapled or glued, you might need to release the hold. Pull out the nearest staples. Or gently try to unstick the glued section (hard with contact cement!).
- Pull and Refasten: Pull the fabric tighter in the direction needed to remove the wrinkle. Smooth it out on top. Then refasten the edge with staples or glue. Work outwards from the smooth area towards the edge.
- Use Heat (Carefully): A heat gun on a very low setting can sometimes help. Warm the vinyl gently over the wrinkled spot. Then smooth it with your hand. Do not get it too hot! You can melt or damage the vinyl. Do this only on the top surface, not on the edge you are fastening.
Making Corners Look Good
Corners are the hardest part.
They can look bulky or messy.
- Trim Bulk: If your corner folds (pleats or gathers) are too thick on the bottom, you can carefully trim away some of the excess fabric under the folds. Do not cut too close to the staples or edge. Leave enough material for the staples or glue to hold.
- Neaten Folds: Try to make the pleats or gathers small and flat against the base. Use enough staples or glue to hold them down firmly.
- Consider Caps: For very visible corners, you can buy plastic corner caps made for boat seats. These screw on and cover the fabric corner for a clean finish.
What To Do About Loose Spots
If a section of fabric is not tight against the foam or base, it looks baggy.
- Find the Area: See where the fabric is loose.
- Pull Tighter: You need to pull the fabric tighter from the edge where it is fastened.
- Refasten: Pull out staples or loosen glue in the area near the loose spot. Pull the fabric tighter over the seat and refasten it to the base. Work towards the loose area, pulling tight as you go.
- Add Staples/Glue: Sometimes just adding more staples or glue to the edge near the loose spot helps pull the fabric tighter.
Small Tears (Boat Seat Vinyl Repair)
What if your new cover gets a small tear?
Or what if the old seats had small tears you didn’t fix?
This guide is about replacing the whole cover without sewing. Small tear repair is different. It usually involves a vinyl repair kit.
A repair kit uses a liquid vinyl patch or a piece of matching vinyl glued over the tear.
This guide is for bigger jobs, like full boat seat material replacement.
If the old seats had many tears, replacing the cover is better than trying to patch everything. If your new cover gets a small tear right away, you can try a repair kit, but it might not be invisible. Prevention is best: avoid sharp objects on the seats.
Finishing Up Your Boat Seats
You are almost done with your DIY boat seat upholstery no sew project!
The new marine vinyl boat upholstery should be attached.
Now do the final steps.
Trimming Extra Fabric
You likely have extra fabric hanging off the edges where you stapled or glued.
- Let Glue Dry: If you used glue, let it dry fully before trimming.
- Identify Excess: See the fabric that hangs past the staples or glue line on the bottom of the seat base.
- Cut Carefully: Use a sharp knife or scissors. Carefully trim away the extra fabric. Do not cut too close to your staples or the edge of the base. Leave about half an inch to an inch of fabric past the staples or glue. This stops the edge from pulling free.
Putting Hardware Back On
Remember those hinges, brackets, or handles you took off?
Now they go back on.
- Check Your Pictures: Look at the pictures you took at the start. See exactly where each piece of hardware was placed.
- Position Hardware: Line up the hardware on the seat base. The new fabric is now covering the old screw holes. You might be able to feel the holes under the fabric.
- Make Pilot Holes: You can use a sharp awl or a small drill bit to make tiny holes through the new fabric where the screws will go. This stops the fabric from getting twisted or wrapped around the screw.
- Reattach Hardware: Use the screws you saved. Screw the hardware back onto the seat base. Do not overtighten.
Keeping Your New Seats Looking Good
You did a great job with your boat seat material replacement.
Now, take care of your new marine vinyl boat upholstery.
Good care helps it last longer.
Simple Cleaning Tips
Clean your seats often.
This stops dirt, grime, and mildew from building up.
- Mild Soap and Water: Use a soft brush or cloth. Clean the seats with mild soap and water. Dish soap works well.
- Rinse Well: Rinse off all the soap with clean water.
- Dry: Wipe the seats dry with a clean towel. Do not let water sit on the seams or edges.
- Avoid Harsh Cleaners: Do not use strong chemicals, bleach, or ammonia-based cleaners. They can damage the vinyl.
- Mold Spots: For mildew spots, use a specific marine vinyl cleaner made for mildew. Test it in a small, hidden spot first.
Protecting From The Sun
UV rays are the biggest enemy of marine vinyl boat upholstery.
- Use a Boat Cover: When the boat is not being used, cover it. A boat cover protects the seats from sun, rain, and dirt.
- Vinyl Protectant: Use a marine vinyl protectant spray. These sprays have UV blockers. They also help keep the vinyl soft and prevent cracking. Apply it regularly as the product instructions suggest. Make sure the protectant is safe for marine vinyl.
Is No-Sew Right For You?
Reupholstering boat seats without sewing using staple gun upholstery methods or marine adhesive boat seats glue is a good option if:
- You want to save money compared to a professional.
- You do not have a heavy-duty sewing machine or sewing skills for thick vinyl.
- You are comfortable using a staple gun and/or glue.
- You have the time and a place to work.
- Your seat bases and foam are in good shape, or you are willing to fix them.
It takes patience and effort, but the result is very rewarding. You can make your boat look much better yourself!
Questions People Ask (FAQ)
Q: What is the best material for boat seats?
A: The best material is marine-grade vinyl upholstery. It is made to stand up to sun, water, and mildew. It is strong and flexible.
Q: How much fabric do I need to recover a boat seat?
A: Measure the length and width of the seat cushion. Add at least 4 to 6 inches extra to each side for wrapping the fabric under the base. It is safer to buy a little more than you calculate.
Q: Can I use regular fabric for boat seats?
A: No, regular indoor or outdoor fabric will not last on a boat. It will fade fast, hold water, and grow mold. You must use marine-grade vinyl.
Q: How do you remove old boat seat vinyl?
A: You typically use a staple remover and pliers to pull out the old staples from the bottom of the seat base. If edges are glued, carefully peel them away, maybe using a heat gun on low heat.
Q: What kind of staple gun do I need for boat seats?
A: You need a heavy-duty staple gun. Electric or air-powered ones are best. They have enough power to drive staples into the wood or plastic base. Use stainless steel staples.
Q: What kind of glue works for boat seats without sewing?
A: You need a strong, waterproof, flexible marine adhesive. Marine contact cement or special upholstery glue for vinyl works well. Make sure it bonds to vinyl and the base material.
Q: How do you get vinyl to stretch around boat seat corners?
A: Marine vinyl has some natural stretch. You pull it firmly. For tight curves or corners, you can use a heat gun on low heat to make the vinyl softer and more stretchy. You manage the extra fabric by folding it neatly into pleats or gathers on the bottom before stapling or gluing.
Q: Can I reupholster boat seats if the foam is bad?
A: You should replace the foam if it is wet, moldy, or falling apart. Putting new vinyl over bad foam is not a good idea. Marine-grade foam is recommended.
Q: How long does reupholstering boat seats take?
A: It depends on the seat size, how many seats you have, and your skill level. Removing old staples can take a lot of time. Putting on the new cover carefully also takes time. A single simple seat might take a few hours. Doing a whole boat might take a weekend or longer.
Q: How do you clean new marine vinyl seats?
A: Clean them with mild soap and water and a soft brush or cloth. Rinse well and dry. Use specific marine vinyl cleaners for tougher dirt or mildew. Use a marine vinyl protectant spray with UV protection.
Q: Is boat seat vinyl repair easy?
A: Small tear repair using a kit is different from full reupholstery. It’s possible for small issues, but replacing the entire cover is often better for larger damage or a worn-out look. This guide focuses on replacing the cover without sewing, which fixes all tears by covering them.