
Image Source: clothhabit.com
Step By Step: How To Draft Sewing Patterns For Your Projects
Pattern drafting is a skill that lets you create clothing patterns from scratch. You measure a body or a form and draw the pattern pieces needed to make a garment that fits just right. This is how many professional designers work, and it’s a wonderful skill for anyone who loves sewing. Can you draft your own sewing patterns? Yes, absolutely! It takes practice, but it is a rewarding process that leads to truly custom-fit sewing patterns. Learning garment drafting methods opens up a whole new world of creative possibilities for your sewing projects.
Making your own DIY sewing patterns means you are not limited by store-bought sizes. You can make clothes that fit your unique shape perfectly. This guide will walk you through the steps to start drafting patterns.
Why Draft Your Own Patterns?
Why would you spend time drawing patterns when you can buy them? There are many great reasons!
- Get a Perfect Fit: Store patterns come in standard sizes. Bodies do not. Drafting lets you make patterns exactly to your measurements. This is the heart of bespoke pattern making. Your finished clothes will feel and look much better.
- Design Your Own Styles: Want a dress with a specific neckline and sleeve? Or pants with a unique pocket? Drafting lets you bring your own fashion design patterns to life. You are the designer!
- Learn How Clothes Are Made: Drafting teaches you how flat fabric turns into a 3D shape on a body. This deepens your pattern making techniques and helps you sew better, even with store patterns.
- Save Money: Once you learn, you do not need to buy every pattern. You can make variations from basic shapes.
- Custom Fit Sewing Patterns: This is the biggest plus. No more guessing what size to buy or doing lots of tricky alterations. The pattern starts with your body shape.
Getting Started: What You Need
Before you start drawing lines, gather your tools. Having the right supplies makes the process much easier and more accurate.
h4: Essential Tools for Pattern Drafting
- Pattern Paper: This is wide paper, often on a roll. It can be simple craft paper, specialized pattern paper with grids (like dot-and-cross), or even exam table paper. Find something sturdy but easy to draw on.
- Pencils: Use mechanical pencils for fine, clear lines. Have an eraser ready.
- Rulers:
- A long straight ruler (at least 18-24 inches or 50-60 cm).
- A L-square ruler (also called a tailor’s square). This helps draw perfect right angles.
- A curved ruler or French curve set. These are vital for drawing smooth curves like armholes, necklines, and hip curves. A hip curve ruler is also very useful.
- Measuring Tape: A flexible cloth or fiberglass tape measure is a must for taking body measurements.
- Paper Scissors: Keep separate scissors for cutting paper. Paper dulls fabric scissors quickly.
- Push Pins or Weights: To hold your paper still while you draw.
- Tracing Wheel: Useful for transferring lines or marking fold lines.
- Awl (Optional): A sharp point for marking drill holes (like dart points).
- Notebook and Pen: To record measurements and notes about your pattern.
h4: Choosing Your Workspace
You need a large, flat surface. A big table or even a clean spot on the floor works. Make sure you have good lighting. You will be drawing long lines and need space to move around the paper.
Grasping Key Concepts: Measurements and Ease
Drafting starts with measurements. You need to know the body’s size and shape. Then, you add extra space so the person can move and breathe.
h4: Taking Accurate Body Measurements
Have someone help you take measurements for the most accuracy. Wear clothing that is close-fitting, like a leotard or underwear. Stand naturally. Do not pull the tape measure too tight or leave it too loose.
Here are some basic measurements needed for many patterns:
| Measurement | How to Take It | What it’s For |
|---|---|---|
| Bust/Chest | Around the fullest part of the bust, under the arms | Bodices, dresses, shirts |
| Waist | Around the natural waistline (usually narrowest part) | Bodices, skirts, pants |
| Hip | Around the fullest part of the hips/seat | Skirts, pants, dresses |
| High Bust | Around the chest, just above the bust | Helps fit the upper chest/shoulders |
| Shoulder Width | Across the back from shoulder bone to shoulder bone | Bodices, sleeves |
| Back Width | Across the back, midway between armhole and neck | Bodices |
| Front Width | Across the chest, midway between armhole and neck | Bodices |
| Neck Circumference | Around the base of the neck | Necklines |
| Back Waist Length | From prominent bone at back of neck to natural waist | Bodices |
| Front Waist Length | From shoulder at neck to natural waist (over bust) | Bodices |
| Arm Length | From shoulder bone down arm to wrist (slightly bent) | Sleeves |
| Bicep | Around fullest part of upper arm | Sleeves |
| Wrist | Around wrist bone | Sleeve openings |
| Crotch Depth | Sit on a flat chair, measure from waist to chair seat | Pants, shorts |
| Inseam | From crotch point down inner leg to floor (no shoes) | Pants, shorts |
| Outseam | From waist down side of leg to floor (no shoes) | Pants, skirts |
Write down all measurements neatly in your notebook. Note if they are full measurements (all the way around) or half measurements (across the front or back).
h4: What is Ease?
Ease is the extra space you add to your pattern beyond the body measurements. It is needed for movement, comfort, and style.
- Wearing Ease: This is the minimum amount of ease needed to sit, stand, and move comfortably. It is usually 2-4 inches (5-10 cm) around the bust, waist, and hips for typical clothing. Close-fitting clothes have less, loose clothes have more.
- Design Ease: This is extra ease added for the look or style of the garment. A flowy dress or an oversized coat will have a lot of design ease. This is where you make fashion design patterns look different.
You need to decide how much ease to add based on the type of garment you are making. For a basic close-fitting top (a sloper), you add wearing ease only. For a loose blouse, you add wearing ease plus design ease.
The Core of Drafting: Block Pattern Drafting (Slopers)
Most garment drafting methods start with a basic block pattern. A block, also called a sloper, is a custom-fit pattern for a basic garment like a bodice, skirt, or pant, with minimal ease. It fits like a second skin, allowing only for basic movement. It has no style features like collars, pockets, or gathers.
h4: What is a Sloper Pattern Making?
Sloper pattern making is the process of drafting these basic blocks based on specific body measurements plus wearing ease. They are the foundation. Think of slopers as your personalized dress form made of paper. You will use these blocks to create all other patterns.
Why start with a sloper?
- It ensures a perfect fit on your body before you add style.
- You can trace the sloper and then change it to create endless designs. This is the main way to create sewing pattern design variations.
- It helps you learn how fabrics behave around curves like the bust and shoulders through darts or seams.
Common slopers include:
- Bodice front and back
- Sleeve
- Skirt front and back
- Pant front and back
h4: Drafting a Basic Bodice Block
Let’s walk through a very simplified example of drafting a basic bodice block. This involves taking measurements and using geometric shapes and curves to build the pattern. This is a fundamental pattern making technique.
Please note: Full pattern drafting instructions for an entire bodice block are complex and involve many specific measurements and calculations. This example gives a general idea of the steps involved in block pattern drafting.
Steps:
- Draw Your Base Lines: On your large paper, draw a vertical line (center front or center back) and a horizontal line at the top (neckline guide). Make sure they are perfectly straight and at a right angle using your L-square ruler.
- Mark Key Lengths: Using your vertical line, measure down from the neckline guide to mark:
- High bust line
- Bust line
- Waist line (using your front or back waist length measurement)
- Mark Key Widths:
- From your vertical line, measure out horizontally at the bust line. You will use your bust measurement divided by 4 (since you are drafting one quarter of the body) plus wearing ease divided by 4. Mark this point. Draw a vertical line down from here. This is a guide for your side seam.
- Mark shoulder width, chest width (front width), and back width measurements at their appropriate levels. Remember these are usually half measures taken across the body, so use that measurement from the center line.
- Draw Neckline: Use your neck circumference measurement (divided by 4, plus a tiny bit for ease) and your shoulder slope measurement (from a pattern making chart or another block). Draw a curved line for the neckline. This often uses a French curve.
- Draw Shoulder Line: From the neck point, draw a sloping line to the shoulder width point you marked. The angle of this line is the shoulder slope.
- Draw Armhole: This is a key curve. It connects the shoulder line, the chest/back width points, and the side seam line at the bust level. Use your curved rulers to create a smooth shape. This requires skill and practice.
- Draw Side Seam: Connect the bust line point (the side seam guide) down to the waist line. You will likely need to add a dart here if your waist is smaller than your bust.
- Add Darts: Darts are essential in bodice and skirt blocks. They shape the flat fabric to fit body curves (bust, waist, shoulder blade). For a bodice front, you will have a bust dart and likely a waist dart. The placement and size of these darts are crucial for fit and are calculated from measurements and differences between them (like bust vs. waist, front length vs. back length). This is a core pattern making technique.
- Repeat for Back: Draft the back bodice block similarly, using back measurements (back waist length, back width, etc.). The back typically has shoulder darts or waist darts.
This process of using body measurements and drafting tools to create the basic shapes is the foundation of garment drafting methods. It requires careful measuring and drawing.
h4: Drafting Other Blocks (Skirt, Pants)
The process for other blocks follows the same principles:
- Skirt Block: Start with waist and hip measurements. Draft a rectangle based on these, then add darts at the waist to shape it to the hip curve. Determine the length. Use a hip curve ruler for the side seams.
- Pant Block: This is more complex. It involves waist, hip, crotch depth, inseam, outseam, and thigh measurements. You draft the front and back pieces, which are different shapes to fit the body’s curves. Special curves are needed for the crotch area.
Drafting blocks accurately is the most challenging part of DIY sewing patterns from scratch. It requires precision and understanding how measurements translate to flat shapes.
Sewing Pattern Design: Turning Blocks into Styles
Once you have your basic blocks (slopers) that fit you perfectly, you can start creating actual clothing patterns. This is where sewing pattern design comes in. You will modify your blocks to add design features. This process is often called “pattern manipulation.”
h4: Methods for Pattern Manipulation
You use various pattern making techniques to change your slopers:
- Dart Manipulation: Darts shape the fabric. You can move darts from their original position (usually the shoulder or side seam for a bodice, or waist for a skirt) to a new position (like the neckline, armhole, or even turn them into gathers or pleats). The “fullness” of the dart is moved, not removed.
- Example: To create gathers at the shoulder, you can close the waist dart on your bodice block and slash from the bust point to the shoulder line. This opens up space at the shoulder to create gathers.
- Adding Fullness: This is how you create gathers, pleats, flares, or ruffles. You slash the pattern piece and spread it apart at specific points. The amount you spread determines the amount of fullness.
- Example: To make a flared skirt from a straight skirt block, slash the skirt block from the hem up to the waist dart points. Then spread the slashed sections apart at the hem. This adds width to the hem, creating flare.
- Changing Necklines and Armholes: Trace your block and draw the new desired neckline or armhole shape. Make sure the new lines blend smoothly with the shoulder and side seams.
- Designing Sleeves: The basic sleeve block fits the armhole of the bodice block. You can change a basic sleeve into a puff sleeve, bell sleeve, fitted sleeve with darts, or a gathered sleeve by slashing and spreading or adding darts.
- Adding Style Lines and Seams: You can add princess seams, yoke seams, or other style lines. You draw the line on your block, then cut the pattern piece along that line. Remember to add seam allowance to the new edges.
- Drafting Details: This includes collars, cuffs, pockets, waistbands, and plackets. These are often drafted separately and then added to the main pattern pieces or attached during sewing.
Creating fashion design patterns from blocks is a creative process. You sketch your design idea, then figure out which pattern manipulation techniques you need to use on your slopers to achieve that design.
h4: Using Your Slopers for Design
Keep your original slopers safe! Do not cut them up for designing. Instead:
- Trace Your Sloper: Lay your sloper on fresh pattern paper and trace it accurately, including dart points and key lines.
- Draw Your Design Lines: On the traced copy, draw the style lines for your new design (new neckline, where fullness will be added, where seams will go).
- Manipulate the Pattern: Perform dart manipulation, slash and spread, or cut along new style lines as needed to create the shapes for your design.
- Walk the Pattern Pieces: This is a crucial step! Check that seam lines that will be sewn together are the same length (e.g., the shoulder seam on the front bodice matches the shoulder seam on the back bodice). Check curves like armholes and necklines.
This process is how basic shapes are transformed into complex garment drafting methods used in the fashion world.
Making Your Pattern Fit: Adjustments and Muslins
Even with custom-drafted patterns, you often need to test the fit. Bodies are 3D, and flat patterns are 2D. A test garment helps you see how the fabric behaves and where adjustments are needed.
h4: What is a Muslin?
A muslin (or toile in French) is a test garment made from inexpensive fabric, often unbleached cotton muslin or similar plain fabric. You sew the pattern together quickly with long stitches (basting).
- Why Use a Muslin?
- To check the fit before cutting into expensive fabric.
- To see how the design lines look on the body.
- To make notes and mark changes directly on the fabric.
- To practice tricky sewing steps or construction methods.
h4: Fitting the Muslin and Making Adjustments
Put on the muslin garment and look in a mirror. Have someone help you. Check:
- Does it pull anywhere?
- Are there wrinkles or drag lines? These point to fit issues.
- Does it feel comfortable?
- Is the ease correct?
- Are necklines and armholes sitting correctly?
Pinch out excess fabric and pin it. Or, slash areas that are too tight and pin in extra fabric. Mark all changes directly on the muslin with a pen. Common adjustments include:
- Adjusting shoulder slope
- Changing dart size or position
- Adjusting waist or hip circumference
- Changing armhole shape
- Adding or removing length
Take off the muslin carefully. Lay it flat on your pattern paper. Transfer the changes from the muslin back to your paper pattern. Redraw lines smoothly. This adjusted paper pattern is your new, improved custom fit sewing pattern. You might need more than one muslin to get the fit perfect.
Scaling Patterns: Deciphering Pattern Grading
What if you want to make your custom pattern in a different size? This is where pattern grading comes in.
h4: What is Pattern Grading?
Pattern grading is the process of scaling a sewing pattern up or down to create a range of sizes. You start with a base size (often your perfectly fitting sloper or designed pattern) and create smaller and larger sizes from it.
- Important: Grading is NOT simply resizing or scaling the pattern like you would an image on a computer. That would distort the proportions.
- Grading adds or removes specific amounts at key points around the pattern edges and internal lines (like dart points) based on standard size charts or specific grading rules. The shape and proportions of the garment are maintained across the size range, just scaled to fit larger or smaller bodies.
h4: How Pattern Grading Works (Simplified)
Grading is typically done using specific measurements called “grade rules.” These rules tell you how much to move out (for a larger size) or in (for a smaller size) at different points on the pattern piece.
- Example: To grade a bodice pattern up one size, you might move the side seam out by a specific amount at the bust, waist, and hip. You move the shoulder point out and up slightly, adjust the armhole curve, and potentially adjust the dart size or position. These movements are measured in fractions of an inch or centimeters.
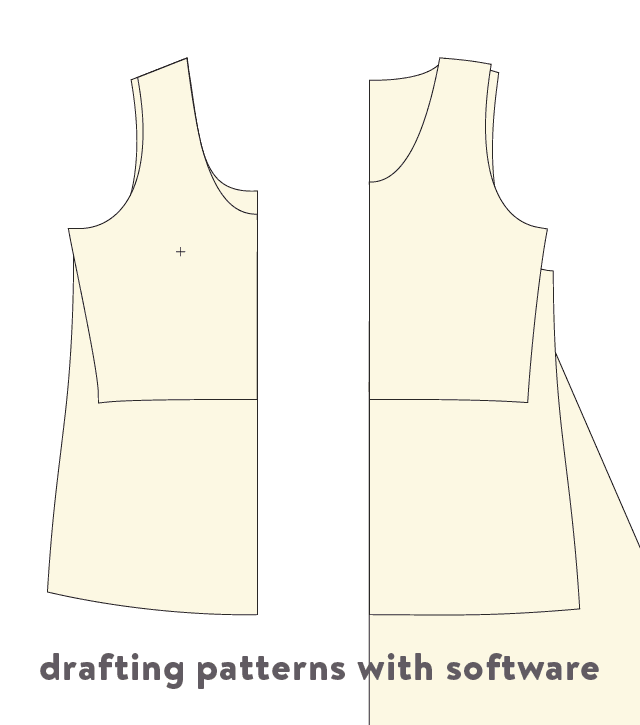
Pattern grading requires knowledge of standard body proportions and grading increments. While complex pattern grading is often done with specialized software in the industry, understanding the concept is useful for a DIY pattern maker. You might grade your own pattern slightly for someone close to your size, or understand how bought patterns are sized.
Finishing Your Pattern: Adding Markings and Details
Once your pattern pieces fit and reflect your design, you need to add information to them. These markings are essential guides for cutting and sewing.
h4: Essential Pattern Markings
Your finished DIY sewing patterns need to tell you (or anyone using them) how to cut and sew the fabric.
- Pattern Piece Name: Label each piece clearly (e.g., “Bodice Front,” “Skirt Back,” “Sleeve”).
- Size: Write the size the pattern is drafted for (e.g., “Custom Fit: [Your Name],” or “Size M”).
- Grainline: This is a long arrow indicating how the pattern piece should be placed on the fabric parallel to the selvage (the finished edge of the fabric). It is crucial for how the fabric hangs.
- Fold Line: If a pattern piece is cut on the fold of the fabric (like a bodice front or skirt front cut as one piece instead of two), mark the edge that goes on the fold.
- Cut Quantity: Note how many of this piece to cut (e.g., “Cut 1 on Fold,” “Cut 2”). Specify if lining or interfacing pieces are needed.
- Notches: Small marks on the edges of pattern pieces that help you match seams correctly when sewing. Mark corresponding notches on pieces that sew together.
- Dart Markings: Mark the dart legs and the dart point.
- Button and Buttonhole Placement: Mark where buttons and buttonholes go.
- Zipper Placement: Mark where a zipper will be inserted.
- Pocket Placement: Mark where pockets attach.
- Hemlines and Fold Lines: Mark where hems fold up or other parts fold.
- Seam Allowance: This is the space between the cutting line and the sewing line. Usually, you draft your pattern pieces to the sewing line (the line that fits the body) and then add the seam allowance around all edges. Standard seam allowances are 1/2 inch (1.3 cm) or 5/8 inch (1.5 cm), but they can vary. Be consistent and note the amount used. Adding seam allowance accurately is a key pattern making technique.
h4: Adding Seam Allowance
Drafting the pattern to the finished seam line first makes it easier to measure and manipulate. Once the shape is perfect, go around all edges and add your desired seam allowance. Use a ruler to measure the distance evenly around all curves and straight lines. Then draw the cutting line outside the seam line.
Testing Your Pattern: The Muslin Stage Revisited
We talked about muslins for fitting the initial block or design. It is worth emphasizing their importance again. For any new sewing pattern design you create from your blocks, making a muslin is highly recommended before cutting your good fabric.
It saves time, fabric, and frustration. A muslin helps you catch mistakes in your drafting or pattern manipulation before they ruin your final garment. It is a vital part of the garment drafting methods process.
Tips for Success and Practice
Learning to draft patterns is a journey. Be patient with yourself.
- Start Simple: Begin with basic blocks like a skirt or a simple bodice without complex sleeves. Master those before moving to pants or more intricate designs.
- Practice Measuring: Accurate measurements are the foundation. Practice taking your own and having others measure you.
- Draft Carefully: Draw clean, precise lines. Use your rulers correctly, especially the L-square for right angles and French curves for smooth shapes.
- Label Everything: Write notes on your pattern pieces: what it is, what design changes you made, what measurements you used, and what size it is.
- Keep Your Slopers Safe: Treat your base blocks as precious tools. Make copies to work from.
- Use Your Muslins: Do not skip the muslin step, especially when you are learning or trying a new design.
- Study Existing Patterns: Look at how commercial patterns are shaped, how darts are placed, and where notches and markings are. This gives you ideas for your own pattern making techniques.
- Learn About Fabric: Different fabrics drape and behave differently. A pattern drafted for a woven fabric might need changes for a knit fabric (often less ease).
- Troubleshoot: If your muslin does not fit, try to figure out why. Are there wrinkles pulling towards a certain point? Does it feel tight across the back? Use resources (books, online guides) to understand common fit issues and how to fix them on the pattern.
- Be Creative: Once you have mastered the basics of block pattern drafting and sloper pattern making, enjoy the freedom of creating your own fashion design patterns!
Interpreting Pattern Making: The Process in Summary
Drafting a sewing pattern is a systematic way to create a flat template for a 3D garment. It involves:
- Taking accurate measurements.
- Drafting basic blocks (slopers) that fit the body with minimal ease. This is block pattern drafting or sloper pattern making, using foundational garment drafting methods.
- Modifying these blocks using pattern making techniques like dart manipulation and adding fullness to create specific sewing pattern design ideas and fashion design patterns.
- Adding necessary markings and seam allowances to the finished pattern pieces.
- Testing the fit using a muslin garment.
- Adjusting the paper pattern based on the muslin fitting to achieve custom fit sewing patterns.
- (Optional) Scaling the pattern up or down using pattern grading for different sizes.
This is a skill that builds with practice. Each pattern you draft teaches you more about fit, shape, and design.
Frequently Asked Questions About Pattern Drafting
h5: Is pattern drafting hard?
It can be challenging at first because it involves precise measurements and spatial thinking. However, like any skill, it becomes easier with practice. Starting with simple garments helps a lot.
h5: How long does it take to draft a pattern?
Drafting a basic sloper can take several hours, including taking measurements and drawing carefully. Designing a complex pattern from a sloper takes additional time depending on the design’s complexity. Making and fitting a muslin also adds time. Be prepared to invest time, especially when learning.
h5: Can I draft patterns without a specific body?
Yes, you can draft using standard size charts, but the fit will not be as precise as using personal measurements. You can also draft for a dress form if it is adjustable to your size or very close to your size.
h5: Do I need to be good at math?
Basic math skills (addition, subtraction, division, working with fractions or decimals) are needed for calculations based on measurements. You do not need advanced math. Using a calculator is fine!
h5: What’s the difference between flat pattern drafting and draping?
Flat pattern drafting (what we discussed) involves drawing patterns on paper using measurements. Draping involves shaping fabric directly on a dress form to create the pattern. Both are valid pattern making techniques, and often designers use both.
h5: How accurate do my measurements need to be?
Very accurate! Even half an inch (1 cm) off on a key measurement can affect the fit. Take your time and double-check.
h5: Can I use pattern drafting to alter bought patterns?
Absolutely! Learning pattern drafting gives you a much better grasping of how patterns work. This makes it easier to see where and how to adjust a commercial pattern to fit you better. You understand the basic garment drafting methods behind the pattern.
Starting to draft your own patterns is a rewarding step for any sewing enthusiast. It gives you control over fit and design, leading to garments that truly are your own. Grab your rulers and paper and begin your journey into bespoke pattern making!