
Image Source: blogger.googleusercontent.com
Pro Tips: How To Cut A Sewing Pattern Out Flawlessly.
Cutting your fabric accurately is a big step in sewing. It sets up how well your project will fit and look. Bad cutting can lead to parts not fitting together right, making sewing much harder later on. What tools do you need? You’ll need a good pair of Fabric cutting scissors or a Rotary cutter for fabric, along with pins or Using pattern weights, a measuring tape, and marking tools. We will show you the simple steps to cut your sewing pattern pieces just right every time.
The First Step: Get Everything Ready
Before you even touch your scissors, you need to get ready. This means getting your fabric, pattern, and tools ready. This stage is super important for getting a great cut.
Getting Your Fabric Ready
This is where you Prepare fabric for cutting. Don’t skip this part! Fabric often shrinks or changes shape when you wash it the first time. If you don’t wash it before cutting, your finished project might not fit after you wash it later.
- Wash your fabric: Pretend you’re going to wash the finished garment. Use the same water temperature and drying method. This makes sure the fabric shrinks before you cut.
- Iron your fabric: Get rid of any wrinkles or creases. A smooth piece of fabric is much easier to cut accurately. Use the right iron temperature for your fabric type. If the fabric is not flat, your pattern pieces won’t lie flat on it, and your cuts will be off.
Choose a Good Spot to Cut
You need a large, flat space. A big table is best. The floor can work if you have a hard floor, but it’s harder on your back! Make sure you have enough room to spread out your fabric completely flat.
Get Your Tools Together
Gather all the things you will need. Stopping to look for something mid-cut can mess you up.
- Pattern Pieces: Make sure you have all the pieces for your size and view of the pattern.
- Scissors or Rotary Cutter: Have sharp Fabric cutting scissors or a sharp blade in your Rotary cutter for fabric. Dull blades make jagged edges and are frustrating.
- Pins or Weights: You need something to hold the pattern down. You can use Pinning pattern to fabric or Using pattern weights.
- Marking Tools: Chalk, fabric pens, or tailor’s tacks. You need these for Marking sewing pattern lines like darts or pocket placement.
- Measuring Tape or Ruler: For checking things like the grainline.
- Cutting Mat: If you are using a Rotary cutter for fabric, you must have a cutting mat underneath to protect your surface and blade.
- Paper Scissors: Keep a separate pair of scissors just for cutting paper pattern pieces. Cutting paper dulls fabric scissors quickly.
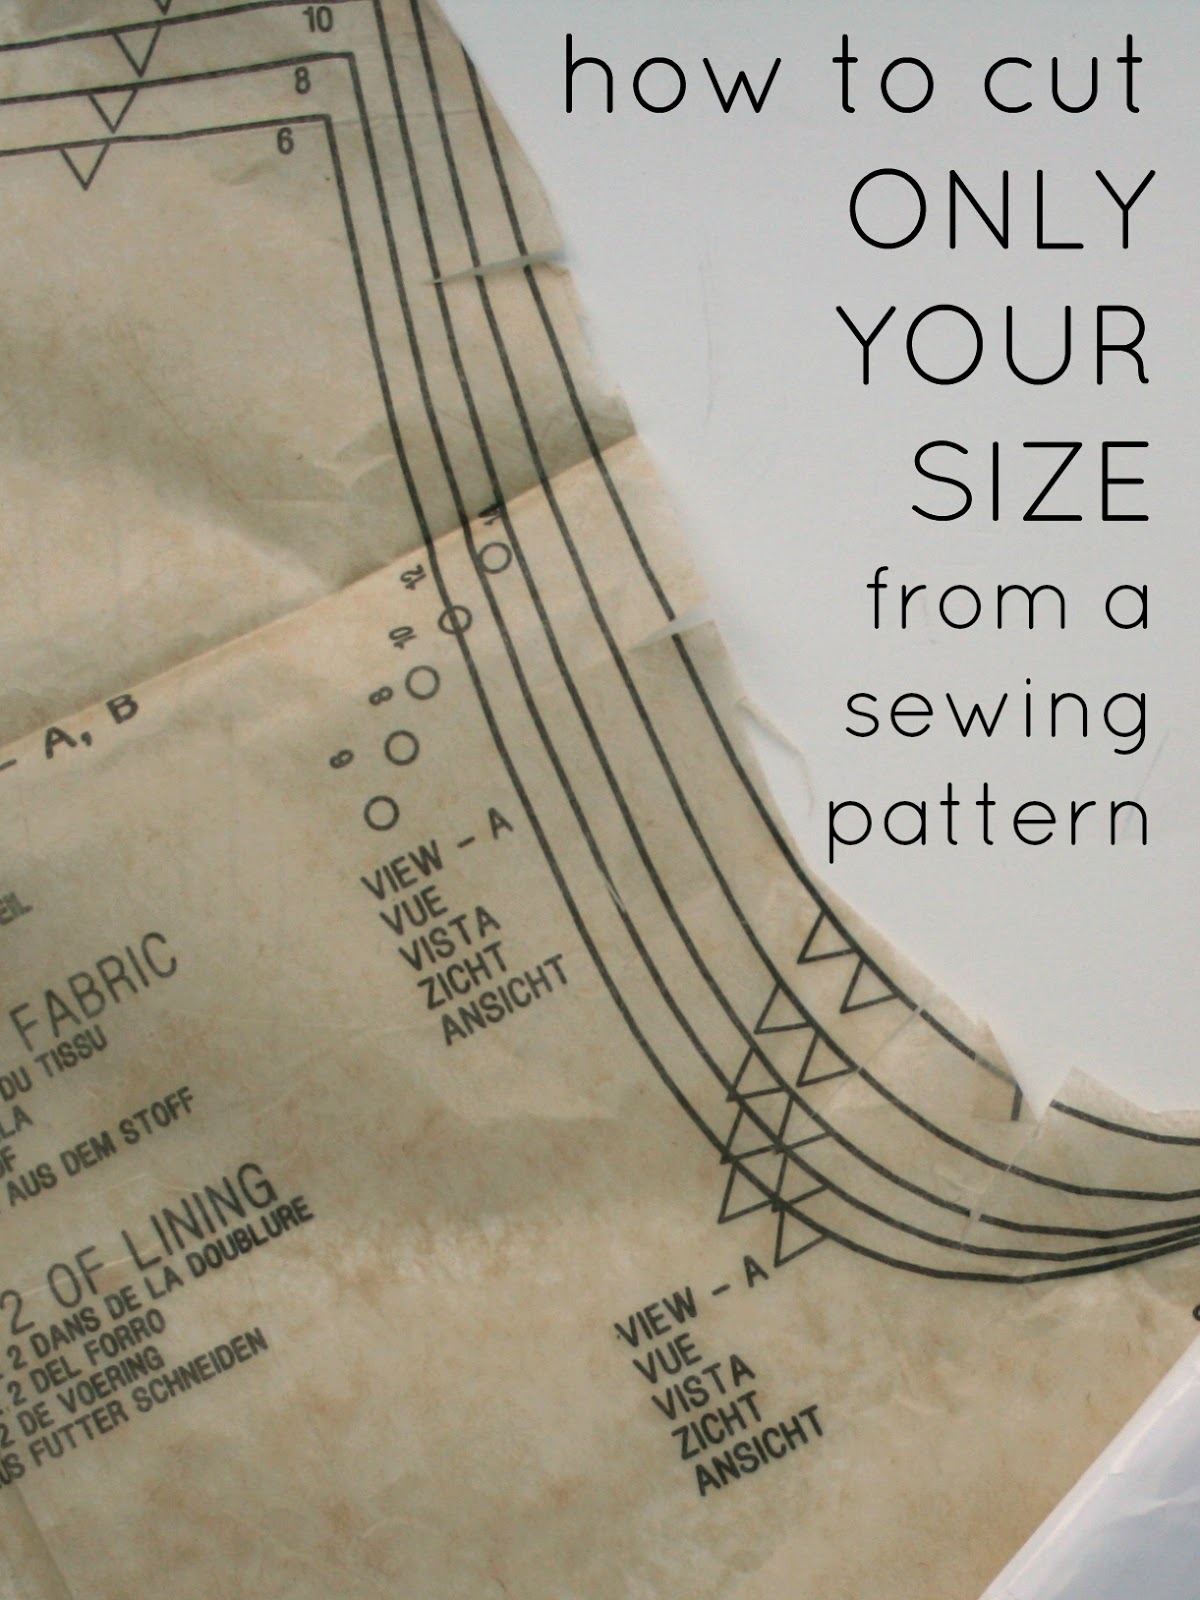
Deciphering Your Pattern Pieces
Before you lay anything out, look closely at your pattern pieces. Each one has important marks and words on it.
Reading the Pattern Guide
Your pattern envelope or instructions will show you how to lay out the pieces on your fabric. This layout is important because it saves fabric and shows you how to put pieces on the fabric grainline.
Recognizing Pattern Symbols
Look for symbols on each piece:
- Grainline Arrow: This is a long arrow with points at both ends. It must be lined up perfectly with the fabric’s grainline. This is key for Cutting fabric on grainline.
- Placement Instructions: Words like “Cut 1,” “Cut 2,” “Cut on Fold.” “Cut 1” means you need one piece. “Cut 2” means you need two (often mirror images). “Cut on Fold” means you place that edge of the pattern piece along the folded edge of your fabric.
- Notches: These are little diamonds, triangles, or lines on the edges. They help you match up pattern pieces later. You’ll learn about Cutting notches soon.
- Other Markings: Dots, squares, or triangles inside the pattern piece. These are for Marking sewing pattern details like dart points, pleats, or pocket positions.
Cutting the Paper Pattern
Carefully cut out each paper pattern piece you need. Cut just outside the lines first. You’ll be more precise when you place them on the fabric. Use your paper scissors for this!
Laying Out Your Pattern Pieces
This is a crucial step, also known as Laying out pattern pieces. How you put the paper pieces on the fabric directly affects your final garment.
Preparing the Fabric for Layout
Most patterns show the fabric folded in half.
- Fold: Fold your fabric lengthwise, bringing the two selvedges (the finished edges) together. Press the fold lightly if needed to make it crisp, but sometimes just smoothing it flat is better.
- Selvedges: Line up the selvedges neatly. The fabric should lie flat and smooth with no bumps or twists.
- Check for Square: Make sure the fabric is folded straight. The fold should be parallel to the selvedges.
Sometimes the pattern layout might tell you to fold the fabric differently, like crosswise (bringing cut edges together) or even use a single layer. Always follow your pattern’s guide!
Placing Pieces on the Fabric
Look at the pattern layout guide again. Place your largest pieces first.
- Grainline is King: For each piece, the most important thing is lining up the grainline arrow perfectly with the fabric’s grain. The grainline runs parallel to the selvedge. Use a ruler to measure from the grainline arrow to the selvedge (or the fold). Make sure the distance is the same at both ends of the arrow. This ensures your garment hangs correctly. This is the heart of Cutting fabric on grainline.
- “Cut on Fold” Pieces: Place the edge marked “Cut on Fold” exactly on the folded edge of the fabric. Do not place it near the fold; place it on it.
- Positioning Other Pieces: Arrange the other pieces according to the layout guide, paying attention to the grainline for each one. Try to fit them close together to save fabric, but leave enough space around each piece to cut easily.
Holding the Pattern Down
You have two main ways to keep your pattern pieces from moving while you cut: Pinning pattern to fabric or Using pattern weights.
Pinning Pattern to Fabric
Pinning is a classic method.
- How to Pin: Use fine, sharp pins. Place pins mostly inside the cutting line, not directly on it.
- Pin Direction: Pin mostly sideways (at a 90-degree angle) to the cutting line, not straight along it. This makes it easier to cut around the pins.
- Spacing: Use enough pins to keep the paper flat and smooth against the fabric, especially on curves and points. Don’t use too few pins, or the paper will shift. Don’t use so many that it’s hard to cut.
Using Pattern Weights
Many people prefer weights, especially with slippery or delicate fabrics.
- What to Use: You can buy special pattern weights, or use heavy objects like large washers, cans of food, or even smooth stones.
- How to Place: Place weights along the edges of the pattern pieces, inside the cutting lines. Put extra weights on curves and points to hold them steady.
- Benefits: Weights don’t distort the fabric like pins sometimes can. They are faster to put down and move. They are great when Preparing fabric for cutting if the fabric is hard to pin.
Choosing Pins or Weights
- Use Pins When:
- Working with slippery fabrics that weights might not hold firmly enough.
- Cutting single layers where weights might shift.
- Cutting very small pieces.
- Use Weights When:
- Working with delicate fabrics that pins could damage.
- Cutting thick fabrics that are hard to pin.
- You want a faster setup time.
- You are using a Rotary cutter for fabric (weights work very well with a rotary cutter).
Some sewers even use a mix of both! Weights on straight edges and pins on curves.
Cutting the Fabric
Now for the main event! This is where you use your Fabric cutting scissors or Rotary cutter for fabric to do the Best way to cut fabric for your project.
Using Fabric Cutting Scissors
Good Fabric cutting scissors are key. They should be sharp and used only for fabric.
- Hold the Fabric: Use your free hand to gently hold the fabric flat near where you are cutting. Don’t lift the fabric!
- Long, Smooth Strokes: Cut with long, smooth strokes. This helps create a nice, even edge. Don’t make lots of tiny snips; this makes a jagged edge.
- Stay on the Line: Try to cut directly on the cutting line. If you are left-handed, make sure you can see the line clearly as you cut. Some left-handed scissors are made for this.
- Cutting Around Pins: Cut carefully around your pins. Don’t cut through pins; this will damage your scissors.
- Cutting Notches: We will talk about this more below, but you’ll cut notches outward or inward depending on the pattern’s style.
Using a Rotary Cutter for Fabric
A Rotary cutter for fabric is a wheel-like blade that cuts fabric very quickly and smoothly, especially along straight lines or gentle curves. You must use a cutting mat underneath.
- Safety First: Rotary cutters are extremely sharp. Always close the blade guard when not in use. Keep your fingers away from the blade path.
- Cutting Mat: Place your fabric and pattern on a self-healing cutting mat.
- Ruler or Guide: Use a clear acrylic ruler or the pattern piece itself as a guide.
- Firm Pressure: Apply steady, firm pressure as you roll the cutter along the line.
- Standing Up: It’s often easier to get good pressure by standing up to cut with a rotary cutter.
- Best for Straight Lines: Rotary cutters are amazing for straight lines. They can also cut curves, but it takes practice to get smooth curves.
- Cutting Notches: You can use a small rotary cutter or special snips made for Cutting notches when using a rotary cutter.
The Best Way to Cut Fabric
The Best way to cut fabric involves a few simple rules:
- Take Your Time: Rushing leads to mistakes. Slow down and focus.
- Keep Fabric Flat: Make sure the fabric isn’t bunched up or twisted under the pattern piece.
- Cut On the Line: Aim to cut exactly on the line. Cutting just outside gives you extra seam allowance you might not need, and cutting just inside reduces your seam allowance. Consistency is key.
- Cut in the Right Order: Some people like to cut the largest pieces first, then the smaller ones. This helps you fit everything on the fabric.
- Stay Relaxed: Don’t hold your scissors or cutter too tightly. A relaxed grip gives you more control.
Cutting Notches and Making Marks
You’re not done cutting until you deal with notches and other marks!
Cutting Notches
Notches are those little marks on the edge of your pattern pieces. They show you which edges go together. Cutting notches is vital for matching seams correctly later.
- Types of Notches: Patterns use single, double, or triple notches. A single notch often means the front or one side, while double or triple notches often mean the back or the matching side.
- How to Cut Notches:
- Triangle Method: Cut a little triangle outward from the fabric edge at the notch marking. This is easy to see and doesn’t reduce your seam allowance.
- Snip Method: Make a small snip inward into the seam allowance at the notch mark. Make the snip short (less than 1/4 inch or 6mm) so it doesn’t go past the seam line. This is fast but can weaken the seam allowance if the snip is too long.
Most sewers find the triangle method (cutting outward) is the safest and easiest way to do Cutting notches.
Marking Sewing Pattern Details
Besides cutting out the main shape and notches, you need to transfer other important marks from the paper pattern piece onto your fabric. This is Marking sewing pattern information.
- What to Mark:
- Darts (the diamond shape that gets sewn into a point)
- Pleats (lines showing where to fold fabric)
- Buttonholes (lines or boxes showing where they go)
- Pocket placements
- Gathering lines
- Zipper placement
-
Marking Tools:
- Tailor’s Chalk: Comes in different colors. Can be brushed or ironed away. Good for most fabrics.
- Fabric Pens: Water-soluble (washes out with water) or air-erasable (disappears after a few hours/days). Test on a scrap first!
- Tailor’s Tacks: Made with thread and needle. Good for delicate fabrics or marking points on both layers at once. Take more time.
- Tracing Wheel and Paper: Use special carbon paper between the pattern and fabric, roll the tracing wheel over the marks. Can be messy and hard to remove on some fabrics.
-
How to Mark: Transfer marks carefully before you remove the pattern piece from the fabric. For darts or pleats, you might just mark the key points (like the tips of the diamond or the end of the line). You can connect the dots later. For buttonholes or pocket placements, mark the full shape if needed.
Make sure your marks will disappear later or will be hidden inside seams or facings.
After Cutting
You’ve cut out all your pieces! Now what?
Keep Pieces Organized
It’s a good idea to group the pieces for each section of the garment together. You can pin a note to each stack saying what it is (e.g., “Front Bodice,” “Sleeve”).
Store Carefully
If you aren’t sewing right away, store your cut pieces flat or gently folded to avoid new creases. A large zip-top bag or a box works well. Keep the pattern instructions with the pieces.
Common Cutting Missteps and How to Handle Them
Even experienced sewers make small mistakes. Here’s what to watch out for and what to do.
Cutting Off-Grain
- Problem: Your piece isn’t lined up correctly with the fabric grainline.
- Result: The finished part might twist, stretch out of shape, or not hang right.
- Fix: For small pieces, you might get away with it. For large pieces like skirt panels or bodice fronts, you might need to recut if you have enough fabric. Always double-check the grainline measurement before you start cutting! Cutting fabric on grainline is super important.
Jagged Edges
- Problem: Using dull scissors or tiny snips instead of long strokes.
- Result: Makes sewing harder because it’s tough to sew a straight line on a bumpy edge. Can also cause fabric to fray more.
- Fix: Use sharp Fabric cutting scissors or a sharp Rotary cutter for fabric. Practice cutting smoothly on scrap fabric.
Cutting Inside or Outside the Line
- Problem: Not cutting precisely on the cutting line.
- Result: Changes your seam allowance. If you cut too far inside, your piece is too small. Too far outside, and it’s too big. This affects how pieces fit together.
- Fix: Go slowly! Focus on keeping your blade or scissors directly on the line. Remember, the Best way to cut fabric is accurately.
Missing Notches or Marks
- Problem: Forgetting to cut notches or transfer internal markings.
- Result: You won’t know how pieces match up (notches) or where to put important details like darts or pockets (marks). This makes assembly confusing.
- Fix: Double-check your pattern pieces before removing them from the fabric to make sure you’ve marked or cut everything. You can often add missing marks later by laying the pattern piece back on the fabric, but it’s harder once the fabric is moved. Marking sewing pattern details at the right time is key.
Fabric Slipping
- Problem: Fabric is shifting while you’re cutting.
- Result: Inaccurate cuts, pieces might not match.
- Fix: Make sure your fabric is laid out smoothly. Use more pins or weights (Pinning pattern to fabric / Using pattern weights). For very slippery fabrics, you can put tissue paper or another non-slip material underneath.
By being careful and following these steps, you can avoid most cutting problems and set yourself up for successful sewing.
Frequently Asked Questions About Cutting Patterns
Here are some common questions people ask about cutting sewing patterns.
Is it better to use scissors or a rotary cutter?
Neither is strictly “better”; it depends on the fabric, the shape you’re cutting, and your personal preference.
* Scissors: Good for curves, notches (cutting outward), getting into tight spots, and fabrics that fray a lot (scissors can sometimes give a cleaner edge that frays less than a rotary cutter). They don’t require a special mat.
* Rotary Cutter: Faster for straight lines, great for cutting multiple layers at once (if your pattern allows and your blade is sharp), often gives a smoother edge than scissors on straight cuts. Needs a cutting mat and ruler. Requires careful safety practices.
Many sewers use both! Fabric cutting scissors for curves and small pieces, Rotary cutter for fabric for straight edges.
How do I cut slippery fabrics like silk or satin?
Slippery fabrics are tricky.
* Stabilize: Lay the fabric flat on a non-slip surface or place tissue paper, craft paper, or an old sheet underneath and/or on top.
* Weights: Use plenty of Using pattern weights instead of pins, as pins can snag or distort delicate fabrics.
* Sharp Tools: Use extremely sharp Fabric cutting scissors or a brand new blade in your Rotary cutter for fabric. Dull tools will just push the fabric around.
* Single Layer: Consider cutting on a single layer of fabric instead of folding it, even if the pattern says to cut on a double layer. Just make sure to flip the pattern piece over to get mirror images if needed.
* Go Slow: Take your time and don’t rush.
What if my fabric isn’t wide enough for the pattern layout?
- Check Pattern Guide: Look at the pattern guide carefully. Are there alternative layouts for narrower fabrics?
- Cut on Single Layer: You might need to cut pieces on a single layer of fabric instead of folded. This takes more layout planning to make sure you have mirror images where needed.
- Split Pieces: Sometimes you can split a large piece into two and add a seam. For example, a skirt panel could be cut in half down the middle (parallel to the grainline), adding seam allowance to the new cut edges. Be careful with this; it changes the design slightly.
- Buy More Fabric: If you can’t fit it on the width you have, you might simply need more fabric length to use a different layout.
Do I have to cut out all pattern pieces at once?
No! It’s perfectly fine to cut out pieces as you need them for each step of sewing. For example, you might cut out the bodice pieces and sleeves, sew them together, and then cut out the skirt or pants pieces. Just make sure you still have enough fabric and the pattern piece for when you need it. However, many people prefer to Prepare fabric for cutting and cut all pieces at once so they are ready to sew.
My pattern piece says “Cut 2” but the layout shows it on a fold. What does that mean?
This usually means you should cut the piece on the fold once. Because the fabric is folded, when you open it up, you will have one large piece that is double the width of the pattern piece. This large piece counts as “2” of something, like a skirt back cut on the fold resulting in one large back piece. Always check the diagram on the pattern layout.
How do I get the grainline exactly right when Laying out pattern pieces?
- Measure: Measure from the grainline arrow on the pattern piece to the nearest selvedge (or the fold). Make sure the distance is the same at the beginning and end of the arrow.
- Straight Edge: Use a long ruler or even the straight edge of your cutting mat to help align the grainline arrow parallel to the fabric edge.
- Smooth Fabric: Ensure your fabric is perfectly flat and on grain itself before you even lay the pattern down. You can check this by gently tugging on the fabric diagonally; if it’s on grain, it will feel stiff. If it’s off grain, it will stretch.
What if I don’t cut the notches?
You will have a harder time matching up your pattern pieces when sewing. Notches are guides! They tell you which seam allowances connect and where ease (extra fabric) might need to be distributed. Don’t skip Cutting notches or Marking sewing pattern notches, even if you just make a small snip inward.
How do I use a tracing wheel and paper for Marking sewing pattern?
Place the fabric wrong side up. Put the special carbon tracing paper colored-side down on the fabric where you need to mark. Place the pattern piece on top. Roll the tracing wheel firmly over the lines or dots you want to transfer. The wheel presses the color from the paper onto the fabric. Test this on a scrap first as the marks can be permanent on some fabrics.
Cutting your fabric carefully is a skill that gets better with practice. By taking your time, Preparing fabric for cutting well, paying close attention to Laying out pattern pieces and the Cutting fabric on grainline, using the right tools whether Fabric cutting scissors or a Rotary cutter for fabric, and making sure to do your Marking sewing pattern details and Cutting notches, you will be well on your way to perfectly cut pattern pieces and much easier sewing! You’ve learned the Best way to cut fabric – now go make something great!