
Image Source: i.ytimg.com
Step-by-Step: How To Make Patches With Embroidery Machine
Yes, you can make patches with an embroidery machine. It is a fun way to create custom items or gifts. This guide shows you how to make them step by step. You will learn the easy process.
Getting Started: What You Need
Making embroidery patches needs some things. You will need your embroidery machine. You also need special materials. Gathering everything first makes the work easy.
Your Machine and Tools
- Embroidery Machine: This is key. Any embroidery machine can work.
- Embroidery Hoop: Get the right size for your patch.
- Sharp Scissors: Good for cutting fabric cleanly.
- Tweezers: Help with small threads.
Embroidery Patch Materials You Need
You need specific things for patches. These are different from normal fabric.
- Fabric for the Patch: This is the base. Twill fabric is common. Felt or polyester also work well. Pick a strong fabric.
- Embroidery Thread: Use good quality thread. Rayon or polyester threads are best. Pick colors for your design.
- Bobbin Thread: Use matching bobbin thread. Or use white/black basic bobbin thread.
-
Embroidery Stabilizer for Patch Making: This is very important. It holds the stitches flat. It stops the fabric from moving. You will need a firm stabilizer.
- Cut-Away Stabilizer: A strong type. You cut the extra away. Good for complex designs.
- Tear-Away Stabilizer: Easy to pull away. Use for simpler designs.
- Wash-Away Stabilizer: Washes away with water. Use for toppings sometimes. Use a firm one for the main back.
-
Patch Backing Material: This makes the patch stiff. It gives it body. It also allows adding a way to attach it.
- Heat Seal Patch Application Backing: This is an iron on patch backing for embroidery. It has glue on one side. You iron the patch onto clothes. It is very popular.
- Sew-On Backing: Just the patch fabric. You sew it on.
- Velcro Backing: Add a hook-and-loop piece. Then you can stick the patch on and off.
Creating Your Design
Every patch starts with an idea. You need to turn your idea into stitches. This is called digitizing.
Deciphering Design Basics
Think about your patch size. Think about the shape. Simple shapes are easier. Complex shapes need more skill.
Digitizing Embroidery Patches
Digitizing is drawing with stitches. Special software is used. It turns your picture into a stitch file. Your embroidery machine reads this file.
- Using Software: You load your image. You tell the software where to stitch. You choose stitch types. Satin stitches make borders. Fill stitches color areas.
- Key Steps in Digitizing:
- Set Patch Size: Make the digital size match the real size.
- Add Design Elements: Place text or pictures.
- Add Stitching Layers: Plan the order of stitches. Stitch background first. Stitch details next.
- Plan the Border: The border is stitched last. It goes around the edge. This holds the patch layers together.
- Getting Designs:
- Digitize Yourself: If you have software and skill.
- Buy Designs: Many sites sell patch designs.
- Hire a Digitizer: A pro can make custom embroidery patches for you. This costs money but gives good results.
Planning the Applique
Some patches use applique. Applique means putting one fabric shape on another. An applique patches embroidery machine process involves these steps:
- Stitch an outline line on the base fabric.
- Place the applique fabric piece over the outline.
- Stitch another line to hold the applique fabric down.
- Trim the extra applique fabric close to the stitch line.
- Stitch a satin border over the cut edge. This hides the edge.
This adds texture and saves stitches. It is good for large color areas.
Preparing to Stitch
Setting up is key for a good patch. This means getting the fabric ready. It means hooping correctly.
Preparing Your Fabric
- Cut Fabric: Cut a piece of your base fabric. Make it bigger than your hoop.
- Cut Stabilizer: Cut a piece of stabilizer. Make it the same size as the fabric.
- Layering: Put the stabilizer under the fabric. The stabilizer goes on the back.
Hooping the Material
Hooping holds the fabric and stabilizer tight. It must be very tight. No wrinkles should be there.
- Use the Right Hoop: Pick a hoop that fits your design.
- Place Fabric and Stabilizer: Put the layered fabric and stabilizer in the hoop.
- Tighten: Pull the fabric and stabilizer taut. Tighten the hoop screw well. It should be drum tight. This stops the fabric from shifting while stitching. Shifting ruins patches.
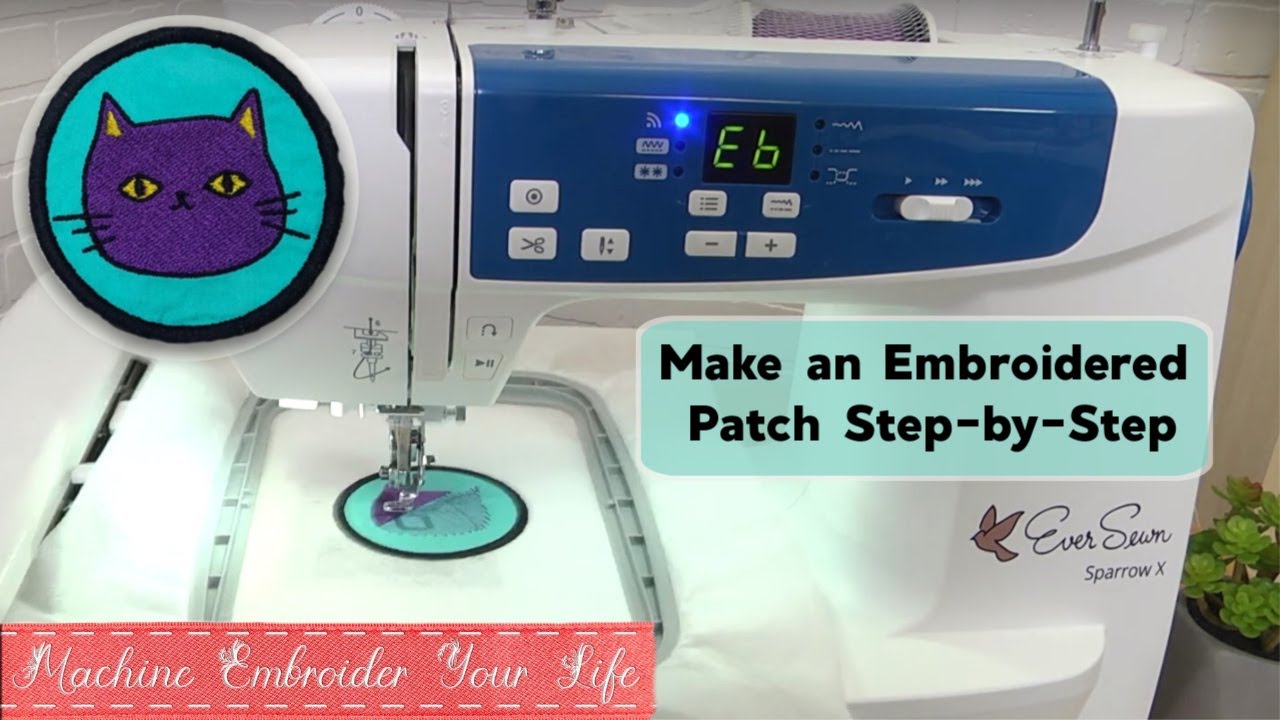
Loading the Design
Put your digitizing file into the machine. Use a USB stick or cable. Select the correct design on your machine screen. Make sure the design fits inside the hoop area.
Stitching the Patch
Now the fun part starts. The machine stitches the design. You need to watch it.
The Stitching Process
The machine follows the design file. It stitches layer by layer.
- First Stitches (Optional Outline): Some designs start with a guide stitch. This shows where the patch will be. You can place your patch fabric using this.
- Design Fill Stitches: The machine stitches colors inside the patch area. It fills shapes and letters.
- Applique Steps (If Using): If your design uses applique, the machine will stop. It will tell you to add the applique fabric. Follow the steps described earlier (place fabric, stitch, trim, satin border).
- Border Placement Stitch: The machine stitches an outline of the final patch shape. This stitch is on the patch fabric. This shows where to cut later.
- Final Border Stitch: This is the last step on the machine. The machine stitches the border. A satin stitch is common. This dense stitch goes over the border placement line. It holds the patch fabric and stabilizer together. It makes a nice edge.
Watching and Helping
- Watch for Thread Breaks: The machine will stop if thread breaks. Re-thread and start again.
- Change Colors: The machine stops for color changes. Put in the new thread color.
- Keep Area Clear: Make sure the hoop moves freely. Nothing should block it.
Finishing Your Patch
After stitching, the patch is still in the hoop. Now you need to make it look like a patch. This involves removing it, cutting it out, and adding a backing.
Removing and Trimming Stabilizer
Take the hoop off the machine. Remove the fabric piece from the hoop. Turn the piece over.
- Cut-Away Stabilizer: Use scissors. Cut the stabilizer away from the back. Leave a small edge of stabilizer around the stitched design. This keeps the patch stable.
- Tear-Away Stabilizer: Gently tear the stabilizer away from the stitches. Be careful not to pull stitches out.
Cutting Embroidered Patches
This is a key step. You need to cut the patch out neatly. The final border stitch acts as your cutting line.
- Using Scissors: Sharp scissors are good for cutting embroidered patches. Cut just outside the final border stitch. Cut smoothly. Do not cut into the stitches.
- Using a Heat Knife: A heat knife melts and cuts synthetic fabric edges. It can make a clean edge. It can help prevent fraying. Be careful; it is hot. Practice on scrap fabric first.
- Using a Laser Cutter: If you have access to one, a laser cutter gives a perfect edge. It seals the fabric edges. This is the method many pros use.
Aim for a clean, even edge all around the patch border.
Adding a Border (If Needed)
Your machine already stitched a border. This is usually a satin stitch.
- Merrow Border Patch Machine: Professional patch makers use a special machine for a merrow border. This border wraps around the edge of the patch material itself. It makes a very thick, rolled edge. Your standard embroidery machine cannot do a true merrow border. The satin stitch border made by your machine is the most common finish for home-made patches. It looks very good.
Applying Backing Material
This is where you add the way to attach the patch. You chose this earlier.
- Iron On Patch Backing for Embroidery (Heat Seal): This is the most common for easy use.
- Cut a piece of heat seal backing slightly smaller than your patch.
- Place the shiny/glue side of the backing on the back of the embroidered patch.
- Use a heat press or iron. Follow the backing material instructions for heat and time. Heat melts the glue. It bonds the backing to the patch fabric.
- Sew-On: No extra backing needed for this. The patch is ready to sew on.
- Velcro: Cut a piece of the loop (soft) side of velcro. Sew or use fabric glue to attach it to the back of the patch. You will then sew the hook (rough) side onto the item where the patch will go.
Tips for Better Patches
- Test Stitch: Stitch a small part of your design first. Do this on scrap fabric with the same stabilizer. This helps you see if stitches look right.
- Needle Size: Use a sharp needle. Use a needle size that works with your thread and fabric. A size 75/11 or 90/14 embroidery needle is often good.
- Thread Tension: Correct thread tension is key. Stitches should look the same on top and bottom. Adjust tension if needed.
- Clean Machine: Keep your machine clean. Remove lint often. This helps it run smoothly.
Troubleshooting Common Issues
- Fabric Puckering: The fabric wrinkles.
- Fix: Hoop tighter. Use stronger stabilizer. Check thread tension.
- Stitches Not Meeting: Gaps in fill stitches or borders.
- Fix: Digitizing issue. Check stitch density in software. Make sure fabric is hooped tight.
- Border Not Lined Up: The final border stitch is not centered on the patch outline.
- Fix: Hooping issue (fabric shifted). Check digitizing file border placement.
- Rough Edges After Cutting: Fabric frays at the cut edge.
- Fix: Use sharper scissors. Try a heat knife for synthetic fabrics. Ensure your final border is dense enough.
Making Custom Embroidery Patches for Many Uses
You can make patches for anything.
- Clubs and Teams: Show group pride.
- Businesses: For uniforms or promotions.
- Crafts and Gifts: Add a personal touch.
- Repairing Clothes: Cover holes or stains stylishly.
Making custom embroidery patches lets you be creative. You can make one patch or many.
Considering Different Materials
The materials you pick matter.
- Fabric:
- Twill: Strong, classic patch material. Holds stitches well.
- Felt: Soft, easy to stitch. Good for simple shapes. Edges don’t fray much.
- Polyester/Blends: Durable, wide color choice.
- Stabilizer:
- Firm Cut-Away: Best support for complex designs and thinner fabrics.
- Heavy Tear-Away: Good for stable fabrics like twill. Easier cleanup.
- Backing:
- Heat Seal: Easy for users to apply with an iron. Most popular.
- Sew-On: Very secure. Best for items that get washed a lot or heavy use.
- Velcro: Good for tactical gear or items where patches change often.
Choosing the right embroidery patch materials helps get the best result.
The Process Step-by-Step Summary
Let’s look back at the main steps for your embroidery patch tutorial.
- Step 1: Design Creation. Get or create your patch design. Digitize it for your machine. Decide if you use applique.
- Step 2: Gather Supplies. Get fabric, threads, stabilizer, and backing.
- Step 3: Prepare Fabric. Layer fabric and stabilizer. Hoop them very tightly.
- Step 4: Stitch the Patch. Load the design. Run the machine. Follow color changes and stops. Do applique steps if needed. Stitch the final border.
- Step 5: Finish the Patch. Take it from the hoop. Remove extra stabilizer. Carefully cut out the patch near the border. Add the chosen backing (iron-on, sew-on, velcro).
This is the core process. Each step needs care. Taking your time leads to a good patch.
Expanding Your Skills
Once you are good at making basic patches, try more.
- Complex Designs: Use more colors and stitches.
- Different Shapes: Try circles, squares, or custom shapes.
- Mixed Media: Add other things like vinyl or rhinestones (after stitching).
- Larger Patches: Use bigger hoops and designs.
Embroidery patch making is a skill that grows. Practice helps a lot.
How to Get the Best Cutting Results
Cutting is where many patches get messed up. A good cut makes the patch look store-bought.
- Follow the Border: Always use the final machine-stitched border as your guide. Cut just outside it.
- Angle Your Scissors: Angle the scissor blades slightly away from the patch. This helps the edge look clean from the front.
- Take Your Time: Do not rush. Cut slowly and steadily.
- Test Sharpness: Make sure your scissors are very sharp. Dull scissors will chew the fabric.
- Consider Tools: If you make many patches, look into a heat knife (for synthetics) or even a small laser cutter. These give professional edges.
Cutting embroidered patches takes practice. Your first few might not be perfect. Keep trying.
Using Heat Seal Patch Application
Iron on patch backing for embroidery is popular because it is easy. But you need to do it right.
- Check Instructions: Different heat seal backings need different heat. Read the package.
- Use a Heat Press: A heat press gives even heat and pressure. This is best for strong bonding.
- Using an Iron: You can use a home iron.
- Use a hard surface, not an ironing board.
- Place the patch with the heat seal side down on the item.
- Cover with a thin cloth.
- Press down hard with the hot iron. Do not move the iron around. Press for the time listed in the backing instructions.
- Lift the iron. Move to the next spot. Repeat until the whole patch is heated.
- Let it cool completely before checking the bond.
- Testing: After it cools, try to lift the edges. If they lift, press again.
- Wash Care: Patches with iron-on backing may lift in washing machines. Turning clothes inside out helps. Gentle wash cycles are best. For things that get washed often (like kids’ clothes), also add a few stitches around the edge. This makes it extra secure.
Heat seal patch application is good for jackets, bags, and items not washed roughly.
Final Thoughts on Your Patch Journey
Making patches with an embroidery machine is a rewarding skill. It lets you add your own art to things. You learned about:
- Gathering materials.
- Digitizing and design choices.
- Setting up your machine.
- Stitching the patch layers.
- Finishing steps like cutting and adding backing.
With practice, you can make beautiful custom embroidery patches. Have fun creating!
Frequently Asked Questions (FAQ)
What is the best stabilizer for patches?
A firm cut-away stabilizer is often best. It gives strong support while stitching. You cut it away later. This helps the patch keep its shape well.
Can I make patches without special patch fabric?
Yes, you can use other fabrics. Twill, felt, and sturdy cottons work well. The fabric must be stable. It should not stretch easily. Using strong stabilizer is very important with other fabrics.
How do I make a merrow border with a home machine?
You cannot make a true merrow border with a standard embroidery machine. A merrow border requires a special merrow machine. Home embroidery machines make a dense satin stitch border. This border goes around the edge of the patch fabric. It looks nice and finishes the edge cleanly.
How do I make patches stick?
The most common way is using iron on patch backing for embroidery (heat seal). You iron the patch onto the item. You can also use sew-on backing (just sewing the patch on) or add velcro to the back.
Is digitizing hard?
Digitizing embroidery patches takes time to learn. It is like learning a new software program. You can start with simple designs. Or you can buy pre-made designs. Hiring a digitizer is also an option for complex custom embroidery patches.
My patch edges fray after cutting. Why?
This happens if the fabric frays easily. It can also happen if the final border stitch is not dense enough or you cut too close to it. Use a fabric that frays less. Make sure your border covers the cut edge well. A heat knife can help seal synthetic edges.