
How to cut out a sewing pattern? Cutting out your sewing pattern is a super important step. If you don’t cut right, your finished project might not fit or hang correctly. Getting it wrong here can mess up your whole sewing project before you even start stitching! This guide will show you the best way to cut your pattern pieces accurately.
Getting Ready to Cut
Before you pick up your scissors, there are a few things you need to do. Proper prep work makes cutting much easier and more accurate. Don’s skip these steps.
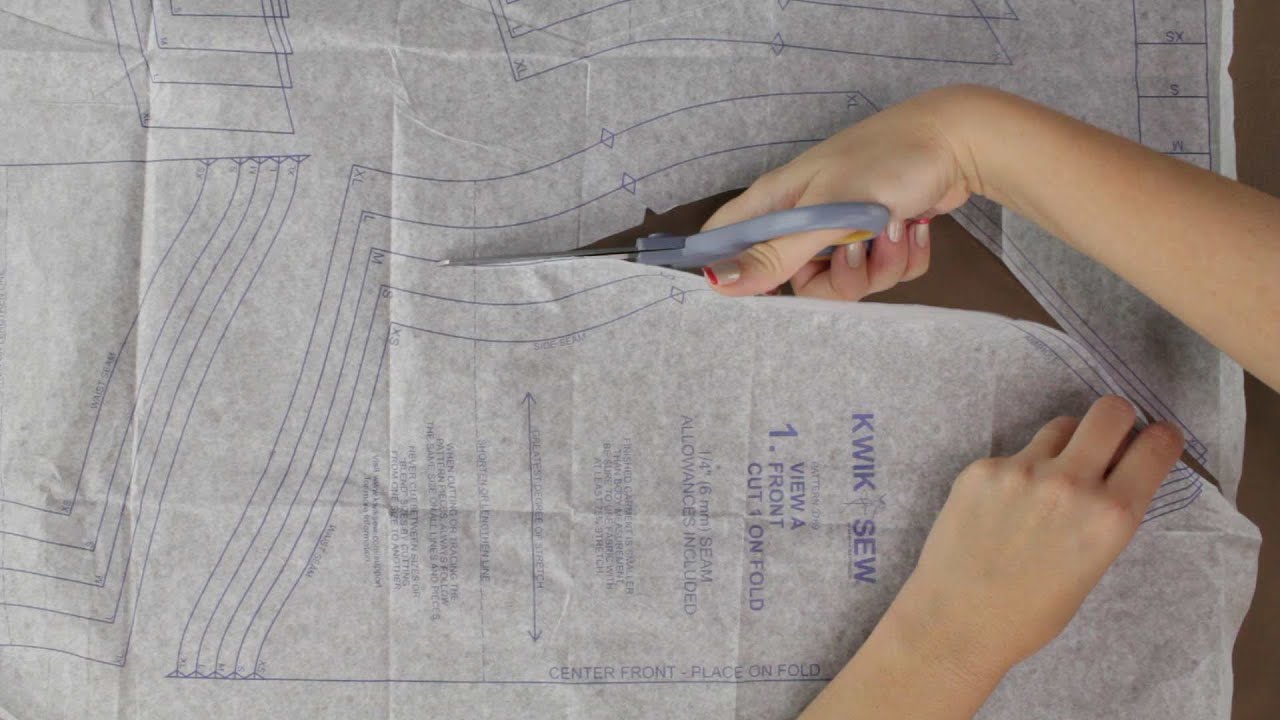
Image Source: i.ytimg.com
Gather Your Gear
You need the right tools to cut patterns well. Having the best tools for cutting sewing patterns helps a lot.
H4: Must-Have Tools
- Sharp Fabric Shears: These are special scissors just for fabric. Don’t use them on paper! Paper makes them dull quickly.
- Paper Scissors: You’ll need separate scissors to cut out the paper pattern pieces.
- Pattern Weights or Pins: These hold your pattern down on the fabric. We’ll talk more about using pattern weights instead of pins later.
- Measuring Tape: Good for checking fabric grain and other measurements.
- Marking Tools: Chalk, fabric pens, or tailor’s tacks. You need these to transfer pattern markings to your fabric.
- Flat Surface: A large table or even a clean floor works best. You need space to spread out your fabric and pattern.
H4: Optional Tools
- Rotary Cutter: This is a very sharp circular blade. It’s great for cutting straight lines and curves on some fabrics. Cutting fabric using a rotary cutter requires a special mat underneath.
- Cutting Mat: If you use a rotary cutter, you need a self-healing mat to protect your surface.
- Tracing Wheel and Paper: Another way to transfer markings.
- Notchers: Small tools that make little cuts to mark notches.
Get Your Pattern Ready
Your paper pattern might be folded up. It might have wrinkles.
H5: Smooth the Pattern Pieces
Carefully unfold your pattern. Iron the paper pieces flat. Use a dry iron on a low setting. Don’t use steam! Steam can warp the paper. Flat pattern pieces lie better on the fabric. This helps you cut accurately.
H5: Find Your Size
Look at the pattern envelope. It tells you what size to use based on your body measurements. Circle your size on the pattern pieces. If the pattern has overlapping lines for different sizes, you might want to trace your size onto separate paper. This keeps the original pattern safe. It also makes cutting easier because there is only one line to follow.
Prepare Your Fabric
Getting the fabric ready is just as important as preparing the pattern.
H4: Pre-Wash Your Fabric
Always pre-wash your fabric the way you plan to wash the finished garment. Fabric can shrink. It’s better that it shrinks now, before you cut and sew. Drying is also important. Dry it how you will dry the finished item.
H4: Iron the Fabric
After washing and drying, iron your fabric smooth. Any wrinkles or creases can throw off your cutting. Make sure the fabric is completely flat.
H4: Find the Fabric Grain
This is a super important step for interpreting fabric grain for cutting. Fabric is made of threads woven together.
* Threads that run parallel to the selvage (the finished edge of the fabric) are called the warp threads. These are usually strong and don’t stretch much.
* Threads that run across the fabric, from selvage to selvage, are called the weft threads.
* The bias is the diagonal direction across the fabric. It has the most stretch.
Most pattern pieces have a line with arrows. This is the ‘grainline’. It tells you how to place the pattern piece on the fabric. The grainline on the pattern must run exactly parallel to the selvage edge of your fabric. If you don’t line this up right, your garment can twist or hang oddly.
To find the grainline:
1. Find the selvage edge of your fabric.
2. Measure from the grainline arrow on your pattern piece to the selvage.
3. Keep the pattern piece straight.
4. Measure the distance at both ends of the grainline arrow.
5. Adjust the pattern piece until the measurement is the same at both ends.
This makes sure the pattern piece is perfectly straight on the fabric grain. This is a key step for accurately cutting pattern pieces.
Laying Out the Pattern Pieces
Now your pattern and fabric are ready. It’s time for how to lay out pattern on fabric. This step needs care and space.
Spread Out Your Fabric
Lay your fabric on your large, flat surface. Most pattern layouts show fabric folded in half lengthwise. The fold is often on your left. The selvage edges are on the right. Check your pattern guide. It will show you the correct fabric layout for each piece. Some pieces might be cut on the fold. This means you place the pattern edge marked “Place on Fold” right along the fabric fold.
Place Pattern Pieces Carefully
Look at the pattern guide sheet. It shows you how to arrange the pieces. This helps you save fabric. It also makes sure you cut all the pieces you need.
H4: Follow the Layout Diagram
The diagram in your pattern envelope is your map. It shows you how to fit all the pieces onto your fabric width. Place the large pieces first. Then fit the smaller pieces around them.
H4: Check the Grainline Again
For every single pattern piece, check the grainline. Use your measuring tape. Make sure the grainline arrow is parallel to the selvage edge. Do this even for small pieces. It makes a big difference in how your final garment hangs.
Securing the Pattern
Once your pattern pieces are correctly placed on the fabric, you need to hold them still. You have a few choices here.
Using Pins
Pins are a common way to hold patterns.
H4: How to Pin Patterns
- Use sharp, fine pins. Dull pins can snag delicate fabric.
- Place pins within the pattern piece, not outside the cutting line.
- Point the pins towards the edge of the pattern piece. This makes them easier to remove as you cut.
- Use enough pins to keep the paper flat against the fabric. Put pins along long edges and curves. Place them closer together on curves to stop the paper from shifting.
- Make sure not to push pins through both layers of folded fabric at an angle that distorts the fabric underneath. Push straight down and up.
Using Pattern Weights
Using pattern weights instead of pins is a great option. Weights hold the pattern flat without poking holes in your fabric. This is especially good for delicate fabrics like silk or knits. It also works well with rotary cutters because there are no pins in the way.
H4: What to Use as Weights
You can buy special pattern weights. Or you can use things you have around the house.
* Large washers or nuts from a hardware store.
* Smooth stones.
* Food cans.
* Small bean bags.
Anything with a bit of weight that won’t roll away works.
H4: How to Use Weights
- Place weights around the edge of the pattern pieces. Put them close enough together to keep the paper flat.
- Put extra weights on points, curves, and corners. These areas tend to shift more.
- Make sure the weights don’t make the fabric bunch up under the pattern. The fabric must stay smooth and flat.
Cutting the Fabric
Now for the cutting! This is where sewing pattern cutting techniques come into play. Slow and steady wins the race here.
Using Scissors
Fabric shears are designed to cut fabric smoothly.
H4: Tips for Cutting with Shears
- Use your fabric shears only on fabric. Keep your paper scissors separate.
- Cut with long, smooth strokes. Don’t make choppy little cuts. Long strokes give you a smoother edge.
- Keep the lower blade of your scissors on the table or cutting surface. This helps lift the fabric less, giving a more accurate cut.
- Follow the cutting line exactly. This line is usually the outer line on your pattern piece.
- Cut through both layers of fabric if your fabric is folded. Make sure the layers stay lined up.
Using a Rotary Cutter
Cutting fabric using a rotary cutter can be faster for some people. It’s great for straight lines. It also works well on curves if you are careful. Remember, you need a cutting mat underneath.
H4: Tips for Cutting with a Rotary Cutter
- Always use a cutting mat. The blade is razor sharp and will cut your table.
- Always use a ruler for straight lines. Place the ruler right on the cutting line. Hold it firmly. Run the rotary cutter along the edge of the ruler.
- Use weights to hold the pattern piece flat, especially if you are not using a ruler for curves. Pins can get in the way of a rotary cutter.
- Cut away from your body. Always keep your fingers away from the blade. Rotary cutters are very dangerous if not used carefully.
- Close the blade guard immediately after cutting.
- Change your blade when it gets dull. A dull blade can chew the fabric instead of cutting it cleanly.
Accurately Cutting Pattern Pieces
No matter what tool you use, aiming for accurately cutting pattern pieces is key.
Follow the Line Closely
Your pattern piece has lines. The line you cut on is usually the outmost line. This is the cutting line. Cut right on this line. Do not cut inside it. Do not cut outside it. Cutting accurately means your pieces will fit together correctly later.
Cut Straight and Smooth
Try to make your cuts smooth. Avoid jagged edges. Jagged edges can make sewing harder. They can also fray more easily.
Keep Fabric Layers Together
If your fabric is folded, make sure the top and bottom layers stay lined up as you cut. If they shift, your two pieces (like two sleeves or two pant legs) might not be the same shape.
Cutting Notches and Pattern Markings
Pattern pieces have more than just cutting lines. They have notches and other markings. These markings tell you how to put the pieces together. You need to transfer these markings to your fabric.
What Are Notches?
Notches are small marks on the edge of the pattern pieces. They look like triangles or small lines. They are used to match up pattern pieces when sewing. For example, notches on a sleeve cap match notches on the armhole of the garment body.
H4: Cutting Notches
You have a few ways to mark notches:
* Cut them outwards: Cut small triangles pointing away from the pattern edge. This is common.
* Cut them inwards: Make a tiny snip (about 1/4 inch or 6mm) into the seam allowance. Be careful not to snip beyond the seam line.
* Mark with chalk or pen: Simply draw the notch shape onto the fabric using tailor’s chalk or a fabric pen.
Choose one method and be consistent. Cutting notches and pattern markings correctly saves time later.
Other Pattern Markings
Patterns have other symbols too. Dots, squares, or triangles in the middle of pattern pieces often show placement for things like pockets, darts, or zippers. Lines might show where to fold or gather fabric.
H4: Transferring Other Markings
Do not cut these internal markings out of your fabric! You need to transfer them onto your fabric pieces.
* Tailor’s Chalk or Pens: Draw on the fabric through the pattern paper.
* Tailor’s Tacks: Use thread to make small loop stitches through the pattern and fabric layers. When you remove the pattern, the loops stay in the fabric as markers. This works well for delicate or transparent fabrics.
* Tracing Wheel and Paper: Place special carbon paper under the fabric, the pattern on top, and trace over the markings with the wheel.
Transfer all necessary markings before you remove the pattern pieces from the fabric. These markings are like instructions for sewing.
Tips for Cutting Different Fabric Types
Different fabrics behave differently. Tips for cutting different fabric types can make your job easier and more accurate.
Stable Fabrics (Cotton, Linen, Broadcloth)
These fabrics don’t shift much. They are the easiest to cut.
* You can usually pin them without distortion.
* Both scissors and rotary cutters work well.
* Make sure layers stay aligned if cutting on the fold.
Slippery Fabrics (Silk, Rayon, Polyester Satins)
These fabrics move around a lot. They are harder to cut accurately.
* Using pattern weights instead of pins often works better. Pins can cause snags or shifts.
* Lay the fabric on a non-slip surface. A sheet of tissue paper underneath can help stop it from sliding.
* Use very sharp scissors or a new rotary blade. Dull tools will snag or push the fabric.
* Cut in a single layer if possible, especially for very slippery fabrics. This means folding your fabric out flat and cutting mirrored pieces separately or flipping the pattern piece.
Knit Fabrics
Knit fabrics stretch. This stretch can make them distort when you cut.
* Do NOT stretch the fabric while cutting. Keep it flat and relaxed.
* Using pattern weights is often better than pins, as pins can create puckers.
* A rotary cutter with a cutting mat is often preferred for knits. It cuts cleanly without lifting the fabric, which can cause stretching.
* Make sure the fabric grain (which is usually parallel to the ribs or loops in the knit) is perfectly aligned with the pattern grainline.
Sheer Fabrics (Chiffon, Organza)
These fabrics are delicate and can be slippery.
* Lay the fabric flat in a single layer if you can. Cut mirrored pieces separately.
* Place tissue paper or a layer of old sheet fabric underneath the sheer fabric. Pin the pattern to the tissue/sheet and the sheer fabric all together. Cut through all layers. The tissue/sheet adds stability.
* Use very sharp, fine scissors.
Thick or Bulky Fabrics (Denim, Fleece, Corduroy)
These fabrics can be hard to cut through multiple layers.
* Use strong, sharp fabric shears. You might need to stand to get enough leverage.
* A rotary cutter might struggle with very thick fabrics unless it has a special blade, but can work well on medium weight ones.
* Check your pattern layout carefully. Bulky fabrics often take up more space.
Summary of Accurate Cutting Steps
Let’s quickly go over the steps for how to cut out a sewing pattern accurately.
- Prep: Get sharp tools (best tools for cutting sewing patterns). Iron your pattern and fabric. Wash and iron fabric first.
- Grainline: Find the fabric grain. This is vital for interpreting fabric grain for cutting.
- Layout: Place pattern pieces on the fabric following the pattern guide (how to lay out pattern on fabric). Make sure the pattern grainline is parallel to the fabric selvage.
- Secure: Hold the pattern pieces down with pins or by using pattern weights instead of pins. Weights are great for tricky fabrics.
- Cut: Use sharp fabric shears or a rotary cutter on a mat (cutting fabric using a rotary cutter). Cut exactly on the cutting line. Use sewing pattern cutting techniques like long, smooth strokes. Aim for accurately cutting pattern pieces.
- Mark: Transfer all notches and other pattern markings (cutting notches and pattern markings). Use chalk, pens, or tailor’s tacks.
- Consider Fabric: Adjust your technique based on the fabric type (tips for cutting different fabric types).
Following these steps will give you cleanly cut pattern pieces. This makes sewing much easier and helps ensure your finished garment looks great and fits right.
Table: Cutting Tools Quick Guide
| Tool | Best Use Cases | Pros | Cons | Special Needs |
|---|---|---|---|---|
| Fabric Shears | Most fabrics, intricate curves, detail work | Control, no extra tools needed (usually) | Can be slower, can lift fabric, require sharpening | Fabric only! |
| Rotary Cutter | Straight lines (with ruler), knits, long cuts | Fast, clean edge, good for multiple layers | Requires cutting mat & ruler, dangerous blade | Cutting mat, ruler |
| Paper Scissors | Cutting paper patterns ONLY! | Keeps fabric shears sharp | Don’t use on fabric | — |
| Pattern Weights | Slippery fabrics, knits, using rotary cutter | No holes in fabric, holds flat | Can shift if bumped, not good for hanging fabric | — |
| Pins | Most stable fabrics | Holds multiple layers well, easy to use | Can snag fabric, leave holes, get in the way of rotary cutter | Sharp, fine pins |
Frequently Asked Questions
H3: FAQ
H4: Can I cut multiple layers of fabric at once?
Yes, you can often cut two layers (fabric folded in half) at once. Most pattern layouts are for fabric folded in half. For thin, stable fabrics, you might be able to cut more layers. Be very careful. Make sure all layers are perfectly smooth and lined up. For slippery or bulky fabrics, cutting one layer at a time is often more accurate.
H4: What if my fabric is not wide enough for the pattern layout?
Sometimes your fabric width is smaller than what the pattern suggests. You might need to cut some pieces in a single layer instead of on the fold. For pieces meant to be cut on the fold, you’ll need to add a seam allowance to that edge before cutting. Then you cut two separate pieces and sew them together later. Always check the pattern instructions for guidance on cutting layouts for different fabric widths.
H4: How do I know which line to cut on if there are many sizes?
Look for the lines that match the size you chose in step one. If the lines for different sizes are very close or overlap a lot, it helps to trace your size onto separate paper before cutting. This way, you only have one line to follow on your paper pattern piece.
H4: My pattern paper keeps moving. How do I stop it?
Make sure you are using enough pins or pattern weights. Place them closer together, especially on curves and points. Ensure your fabric is also smooth underneath and not shifting. Using pattern weights instead of pins often helps a lot with this problem, especially on slippery fabrics.
H4: Is it better to use scissors or a rotary cutter?
It depends on the fabric and your preference. Scissors give you more control for curves and small pieces. Rotary cutters are faster for straight lines and work well on knits and some slippery fabrics when used with a mat and ruler. Try both on scrap fabric to see what you like best for your project. Using the best tools for cutting sewing patterns means using the tool that gives you the most accurate result for the specific fabric you are working with.
H4: What is the seam allowance?
The seam allowance is the area between the cutting line and the stitching line on your pattern piece. Most patterns include the seam allowance in the cutting line. This means you cut on the outer line, and you will sew along a line typically 5/8 inch (1.5 cm) or 1/2 inch (1.3 cm) inside that edge. The pattern instructions will tell you what the seam allowance is. Do not cut inside the cutting line to try and create a seam allowance; it’s already included! Cut right on the line.
Getting pattern cutting right is a foundational sewing skill. Take your time with each step. Soon, you’ll be cutting out patterns accurately and confidently!