
Can you machine quilt on a regular sewing machine? Yes, absolutely! You can machine quilt beautifully on a standard domestic sewing machine quilting setup. You do not need a large, expensive long-arm quilting machine to add stitches to your quilts. Many quilters, including skilled professionals, quilt amazing projects using the machine they already have at home. This guide will show you how to do it.
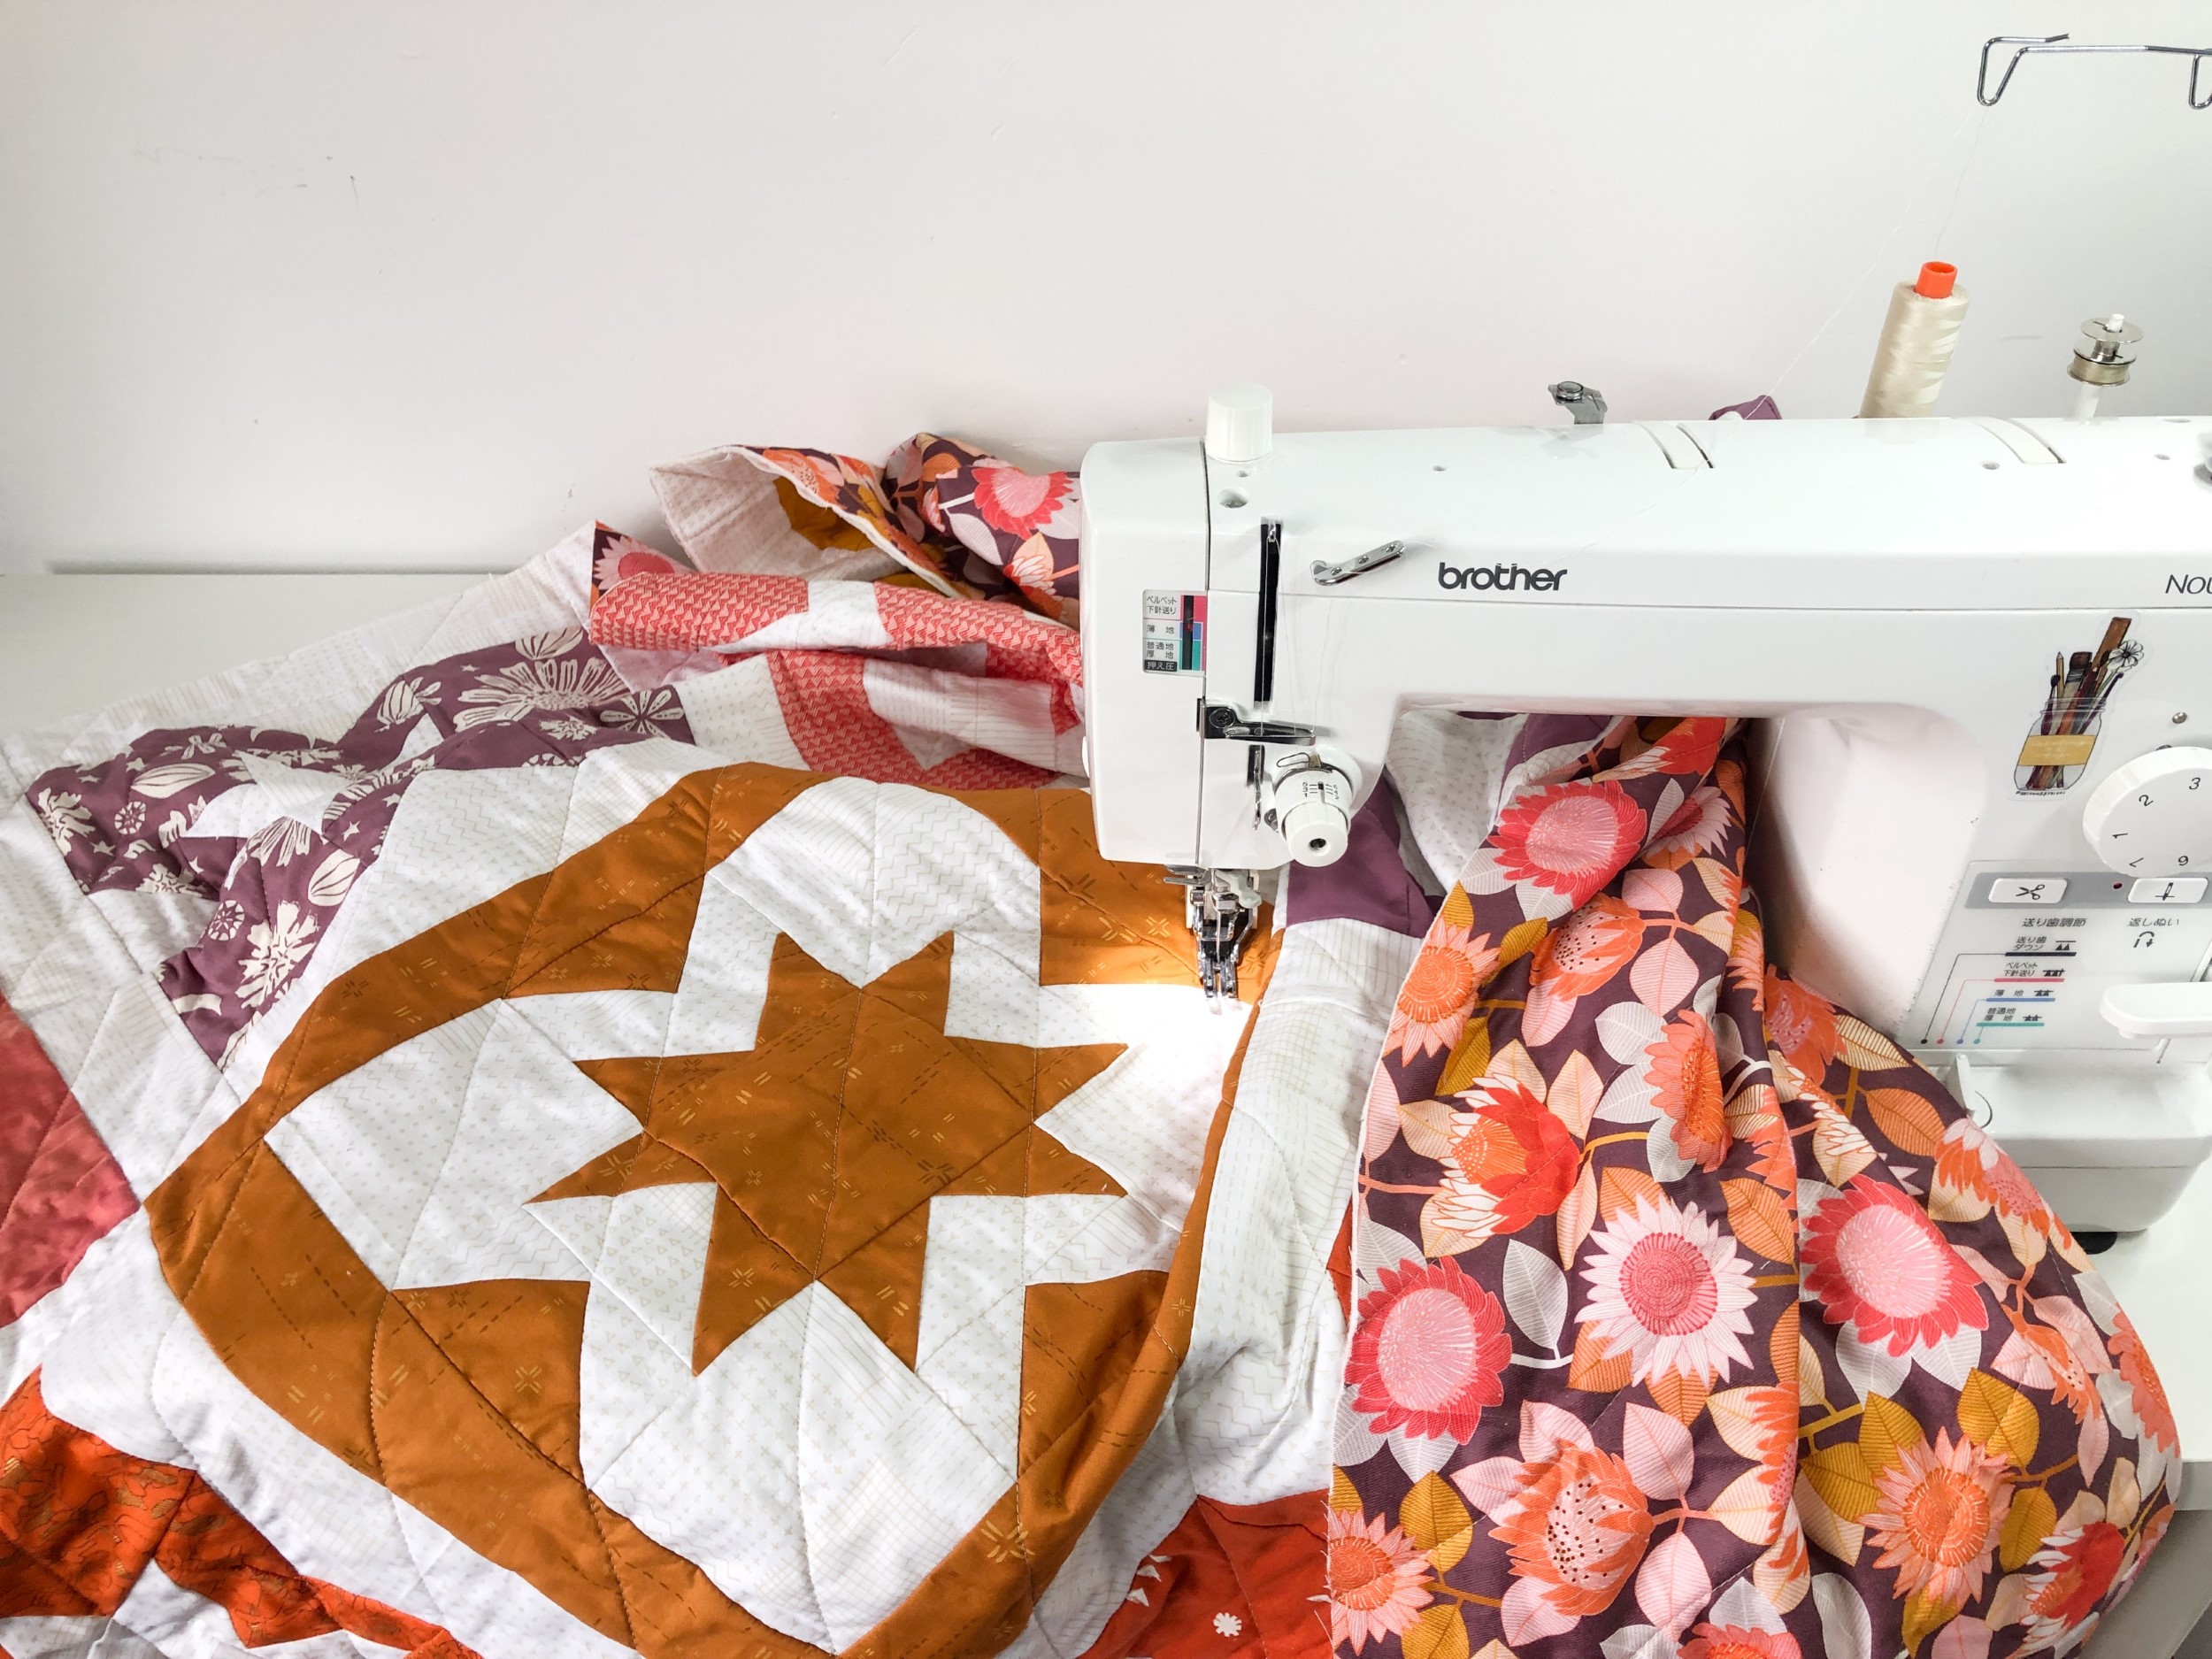
Image Source: www.blossomheartquilts.com
Why Quilt on Your Home Machine?
Using your regular sewing machine for quilting is practical and cost-effective. It lets you finish your projects yourself, right in your sewing space. You have full control over the design and the stitches. Plus, it’s a great way to learn new skills and make your quilts truly your own.
Getting Ready: What You Need
To start machine quilting on your home machine, you’ll need a few things. You might have some already. Others you might need to get.
Essential Equipment
- Your Regular Sewing Machine: Make sure it’s in good working order. Clean it and oil it before you start.
- Quilting Feet: These are special feet that help you quilt. The two most common are:
- Walking Foot: This foot helps feed all three layers of your quilt (top, batting, backing) through the machine evenly. It’s a must-have for walking foot quilting, especially for straight lines or gentle curves.
- Free Motion Quilting Foot (or Darning Foot): This foot lets you move the fabric freely under the needle in any direction. It doesn’t press down on the fabric. This allows for swirling designs or stippling. It’s needed for free motion quilting home machine work.
- Quilting Needles: Use needles designed for quilting. They have a special point that goes through the layers cleanly. Size 90/14 or 80/12 is common.
- Thread: Use good quality cotton or polyester thread made for quilting. Matching thread weight to needle size is helpful.
- Bobbins: Have extra bobbins filled with your chosen thread.
- Quilting Gloves: These are often rubber-tipped gloves. They help you grip the fabric better as you move it. Quilting gloves give you more control.
- Fabric: Your quilt top, batting, and backing fabric.
- Safety Pins or Basting Spray: To hold the quilt layers together.
- Large Surface Area: You need space around your machine to support the quilt’s weight. This could be a sewing table extension or an ironing board set up next to your machine.
Setting Up Your Space
Clear a large area around your sewing machine. The quilt can get bulky and heavy. It needs support so it doesn’t pull on the needle as you stitch. Make sure you have good light. A comfortable chair helps too.
Preparing Your Quilt for Stitching
Before you can quilt, you must make a “quilt sandwich.” This means layering the three parts of your quilt together. Getting this step right is very important for smooth, even quilting. This is the preparing quilt sandwich step.
The Three Layers
- Backing Fabric: This is the bottom layer. It should be a few inches larger than your quilt top on all sides.
- Batting: This is the middle layer. It gives the quilt warmth and puffiness. It also needs to be a few inches larger than your quilt top. Batting comes in different types (cotton, polyester, bamboo, wool) and thicknesses. Choose one that suits your project.
- Quilt Top: This is the pieced or whole-cloth top layer. It goes on top.
Making the Sandwich
Lay the backing fabric flat on a large surface (like a table or the floor), right side down. Tape the edges down with painter’s tape to keep it smooth and flat. Make sure there are no wrinkles.
Smooth the batting over the backing fabric. Again, make sure it is perfectly flat with no bumps or wrinkles.
Center the quilt top over the batting, right side up. Smooth it out starting from the middle and working your way to the edges.
Now, you need to hold these three layers together so they don’t shift while you quilt. This is called basting.
Basting Methods
There are two main ways to baste your quilt sandwich:
- Safety Pins: Use curved safety pins designed for quilting. Start in the center and place pins outward, about 4-6 inches apart. Make sure to pin through all three layers. Pin density is key; more pins help prevent shifting.
- Basting Spray: Use a temporary fabric adhesive spray. Follow the product instructions carefully. It’s best to do this in a well-aired space. Spray small sections at a time, smoothing the layers as you go. This method is faster but requires careful application to avoid sticky spots or unevenness.
Whichever method you choose, the goal is a smooth, flat quilt sandwich with all layers held firmly together.
Setting Up Your Machine for Quilting
Proper machine setup is vital for good results. This includes choosing the right foot and setting the machine quilting tension.
Choosing the Right Foot
- Walking Foot: Use this for any quilting where you want straight lines or simple, evenly spaced stitches. The foot’s ‘feed dogs’ on top work with your machine’s feed dogs to move the fabric layers together at the same speed. This stops the top or bottom layers from shifting or getting stretched. It’s excellent for Stitch-in-the-Ditch, straight lines across the quilt, or gentle wavy lines.
- Free Motion Foot: Use this when you want to draw designs with your needle. This foot does not press down on the fabric. This lets you move the quilt in any direction – forward, backward, side to side, or in circles. When using this foot, you must lower or cover your machine’s feed dogs. Check your machine’s manual to see how to do this.
Adjusting Machine Settings
- Stitch Length:
- For walking foot quilting, you’ll use a regular stitch length. Start with something around 2.5mm and test it. Shorter stitches might make the machine work too hard; longer stitches might look messy.
- For free motion quilting home machine, you will usually set your stitch length to zero or very short. The stitch length is controlled by how fast you move the fabric and how fast the needle is going. If you move the fabric fast with the needle going slow, stitches will be long. If you move the fabric slow with the needle going fast, stitches will be short. You want a consistent speed between your hands and the needle.
- Needle Position: Center needle position is standard for most quilting.
- Machine Quilting Tension: This is super important. Tension controls how the top thread and bobbin thread interlock in the fabric layers. You want them to meet exactly in the middle of the quilt sandwich.
- If the bobbin thread shows on top: Top tension is too tight, or bobbin tension is too loose. Usually, adjust the top tension first. Loosen it slightly.
- If the top thread shows on the bottom: Top tension is too loose, or bobbin tension is too tight. Tighten the top tension slightly.
- Always test your tension on a practice quilt sandwich made of the same fabrics and batting as your real quilt. Stitch a few lines. Check the back and front. Adjust the top tension dial slowly until the stitches look good on both sides. Bobbin tension usually doesn’t need adjusting unless your machine manual says so or you have ongoing issues.
Lowering Feed Dogs (for Free Motion)
For free motion quilting home machine, you must lower your machine’s feed dogs. These are the little metal teeth under the needle plate that move the fabric during regular sewing. When lowered, they don’t grip the fabric, allowing you to move the quilt freely. Most machines have a lever or switch for this. If your machine doesn’t have this feature, some come with a plate cover you can put over the feed dogs. Check your machine’s manual for how to lower or cover the feed dogs.
Learning Quilting Techniques
There are two main ways to machine quilt on a regular machine: walking foot quilting and free motion quilting home machine. Both are great for beginner machine quilting.
1. Walking Foot Quilting
This technique uses the walking foot and your machine’s feed dogs (which are up) to create straight or gently curved lines. It’s controlled and great for geometric designs.
Types of Walking Foot Quilting
- Stitch-in-the-Ditch: Quilting exactly in the seam lines where fabric pieces join. This makes your piecing stand out and holds the layers together without adding a separate design.
- Straight Line Quilting: Sewing parallel lines across the quilt. You can space them evenly. Using masking tape, a fabric marker, or a guide bar that attaches to your walking foot helps keep lines straight and evenly spaced.
- Crosshatching: Sewing sets of parallel lines that cross each other, often at a 45-degree angle. This creates a grid of squares or diamonds.
- Wavy Lines: Sewing lines that gently curve back and forth across the quilt. Still controlled by the machine moving the fabric forward.
- Matchstick Quilting: Very dense straight line quilting with lines spaced very close together (like matchsticks). This gives a modern, dense texture.
Steps for Walking Foot Quilting
- Attach your walking foot.
- Set your stitch length (around 2.5mm is a good start).
- Keep your feed dogs up.
- Adjust tension on a test piece.
- Plan your quilting path. Decide where you will start and how you will progress across the quilt. Working from the center outward is often best to push fullness to the edges.
- Start sewing. Guide the quilt gently. Do not push or pull the fabric. The walking foot and feed dogs are moving it. Your job is to guide it straight and keep the weight of the quilt supported.
- Use guide bars or tape for straight lines.
- Bury your thread tails for a neat finish or leave them long to tie off later.
Walking foot quilting is excellent for controlling the fabric layers and creating neat, even lines. It’s often recommended for large quilts where controlling the bulk is harder with free motion.
2. Free Motion Quilting
This technique uses a free motion or darning foot. The feed dogs are down or covered. You move the fabric freely under the needle to draw designs.
How Free Motion Works
Your hands control the movement of the fabric. Your machine controls the speed of the needle. Your stitch length is determined by how well you match these two speeds. Move the fabric smoothly and evenly. Keep the needle speed constant (or use your machine’s speed control setting).
Getting Started with Free Motion
- Attach the free motion foot.
- Lower or cover your feed dogs.
- Set stitch length to zero or very short (or for free motion mode if your machine has it).
- Adjust tension on a test piece. Free motion tension can be a bit different than regular sewing.
- Wear quilting gloves for better grip.
- Practice! This is the most important step. Practice on scrap quilt sandwiches. Draw simple shapes like loops, swirls, or meanders. Work on getting an even stitch length.
Common Free Motion Designs
- Stippling: Random, non-overlapping shapes that fill the space. Looks a bit like puzzle pieces. This is a very common filler design.
- Loops: Simple circles or loops that connect to each other.
- Meandering: A flowing, curvy line that covers the area without crossing itself.
- Pebbles: Small circles quilted close together.
- Feathers: A classic quilting design that looks like plumes.
Tips for Free Motion Quilting Home Machine
- Start small. Don’t try to free motion quilt a king-size quilt as your first project. Start with placemats, table runners, or baby quilts.
- Sit comfortably and position your body so you can see well and move the quilt easily.
- Support the weight of the quilt around the machine. Use a large table or supports.
- Focus on the area just ahead of the needle.
- Practice moving the quilt smoothly before you even turn on the machine.
- Practice different speeds of hand movement and machine speed to find what gives you even stitches.
Free motion quilting allows for much more creative expression and custom designs. It takes practice to control the fabric and get even stitches, but it’s very rewarding.
Grasping Quilting Stitches
What kind of quilting stitches should you use? On a regular machine, you primarily use a straight stitch.
The Straight Stitch
This is the basic stitch on your machine.
* Walking Foot: Use a consistent straight stitch length (e.g., 2.5mm). All stitches should be the same size because the machine is controlling the movement.
* Free Motion: You are still making a straight stitch, but the length changes based on your movement speed relative to the needle speed. The goal is to make stitches that are as consistently spaced as possible, even though you are controlling the movement. This means the stitches look like small, even straight stitches following your design.
Other Machine Stitches
While most machine quilting uses a straight stitch, some people use decorative stitches built into their machine.
* Using decorative stitches with a walking foot can add nice texture, especially on borders or plain areas. The machine controls the stitch length and pattern.
* Using decorative stitches with free motion is very difficult because you lose control over the stitch pattern when you move the fabric freely. Stick to the straight stitch for free motion.
For beginner machine quilting, focus on mastering the straight stitch with both walking foot and free motion techniques.
Beginner Machine Quilting Tips
Starting machine quilting can feel big, but here are some tips to help you learn and enjoy the process:
- Start with small projects: A large quilt is heavy and hard to handle. Begin with a mug rug, placemat, or baby quilt.
- Practice your sandwich: Make several small test sandwiches using scrap fabrics and batting. Use these for practicing basting, tension, and stitching.
- Test Tension: Always test your machine quilting tension on a practice sandwich before starting your real project. This is one of the most common problems for beginners.
- Learn one technique at a time: Start with walking foot quilting. It’s more controlled and less daunting for many. Once you’re comfortable, move to free motion.
- Don’t strive for perfection: Your first machine-quilted projects will not be perfect. Stitches might be uneven, or lines might wobble. This is normal! It shows it’s handmade. Focus on finishing and learning.
- Watch videos: Seeing someone else machine quilt on a regular machine can be very helpful. Look for videos showing walking foot or free motion quilting on a domestic machine.
- Get the right tools: Having the correct quilting feet (walking foot, free motion foot) and quilting gloves makes a big difference.
- Take breaks: Machine quilting can be tiring, especially on your shoulders and arms from managing the quilt’s weight. Take breaks often to stretch and rest.
- Support the quilt: Make sure the weight of the quilt is supported around your machine. Don’t let it hang and pull on the needle.
- Enjoy the process: Machine quilting is a creative step. Have fun choosing designs and watching your quilt come to life!
Handling Quilt Bulk
One of the biggest challenges of domestic sewing machine quilting is managing the size and weight of the quilt.
- Roll or Fold: For larger quilts, roll or gently fold the parts of the quilt you are not currently quilting. Use quilt clips or hair ties to hold the rolls. This keeps the bulk manageable around the machine arm.
- Support Tables: Use extra tables or ironing boards to extend your sewing surface and support the quilt’s weight.
- Quilt Behind the Needle: For walking foot straight lines, you can roll the finished part of the quilt behind the needle.
- Quilt from the Center Out: This helps push any extra fabric or fullness towards the edges where it can be trimmed later.
Common Issues and Simple Fixes
Even with good preparation, you might run into problems. Here’s how to deal with some common ones:
- Uneven Stitches:
- Walking Foot: Check stitch length setting. Ensure the foot is attached correctly. Make sure you are not pulling or pushing the fabric. Let the machine feed it.
- Free Motion: This is usually due to inconsistent speed between your hands (moving the fabric) and the needle. Practice varying speeds. Try slowing down needle speed using your machine’s controls. Or practice moving your hands more smoothly and evenly. Quilting gloves can help with smooth movement.
- Thread Breaking:
- Check your needle. Is it new and sharp? Is it the right type (quilting needle)? Is it inserted correctly?
- Is your thread good quality?
- Is your machine quilting tension too tight?
- Are you pulling or pushing the fabric too hard?
- Skipped Stitches:
- Check your needle again. Is it bent or dull? Is it inserted all the way up?
- Is the feed dog setting correct for your technique (up for walking foot, down for free motion)?
- Could be a timing issue with the machine (might need a service).
- Fabric Wrinkling or Puckering:
- Did you baste well? Are your pins close enough together? Is the basting spray holding?
- Are you pushing or pulling the fabric while quilting? The machine should move it (walking foot) or you should move it smoothly without forcing (free motion).
- Is your machine quilting tension off? Incorrect tension can cause puckering.
- Bobbin Thread Showing on Top / Top Thread Showing on Bottom: This is a tension issue. Adjust your top tension dial based on your test swatch.
The Art of Machine Quilting Designs
Once you are comfortable with the basic techniques, you can explore different designs.
Design Choices Based on Technique
- Walking Foot: Best for geometric designs that rely on straight or gently curved lines. Examples: straight lines, grids, diagonals, concentric squares/diamonds, simple waves following block patterns. These designs can be marked on the quilt first or quilted freehand using guides.
- Free Motion: Allows for organic shapes, curves, and complex fills. Examples: stippling, loops, swirls, feathers, pebbles, continuous line designs following printed panels or appliqué shapes. Free motion is like drawing with thread.
Planning Your Design
Consider the quilt top’s pattern.
* Simple quilt tops (like large blocks or panels) can handle dense or complex quilting designs.
* Busy quilt tops (with lots of small pieces) might look best with simple quilting, like stitch-in-the-ditch or simple all-over patterns like stippling or loops.
Think about how much quilting you want.
* Dense quilting (lines or designs close together) creates a flatter, stiffer quilt with lots of texture.
* Less dense quilting (lines or designs further apart) creates a softer, more pliable quilt with more puffiness from the batting. The batting package often gives a maximum distance for quilting lines to keep the batting stable.
Sketching your ideas on paper or a printed picture of your quilt top can help you visualize the design before you start stitching.
Table: Walking Foot vs. Free Motion
Here is a simple comparison of the two main methods for domestic sewing machine quilting:
| Feature | Walking Foot Quilting | Free Motion Quilting |
|---|---|---|
| Foot Used | Walking Foot | Free Motion Foot (Darning Foot) |
| Feed Dogs | Up | Down or Covered |
| Stitch Length | Set on machine (fixed, e.g., 2.5mm) | Controlled by hand/machine speed (variable) |
| Movement Control | Machine moves fabric forward | You move fabric in any direction |
| Best For | Straight lines, gentle curves, grids, stitch-in-the-ditch | Loops, swirls, stippling, feathers, custom designs |
| Beginner Level | Often easier to start with | Takes more practice for smooth stitches |
| Handling Bulk | Can be easier as movement is controlled | Can be harder as you manipulate quilt directionally |
| Design Style | Geometric, structured | Organic, fluid, artistic |
Taking Care of Your Machine
Quilting puts extra stress on your sewing machine compared to simple garment construction. The layers are thicker, and you are often moving the fabric in ways different from straight-line sewing.
- Regular Cleaning: Clean the lint out of your bobbin area often, especially when quilting. Batting creates a lot of lint.
- Oiling: Follow your machine’s manual for where and how often to oil it.
- Needle Changes: Change your needle often. A good rule is after every bobbin or every 8 hours of sewing, and always at the start of a new project.
- Service: Get your machine serviced regularly by a professional. This keeps it running smoothly and catches potential problems early.
Treating your machine well will help it handle the work of quilting and last longer.
Finishing Your Quilt
Once the quilting is done:
- Trim the excess batting and backing fabric around the quilt top.
- Remove all basting pins or check that basting spray isn’t sticky on the edges.
- Square up your quilt if needed.
- Add the binding around the edges. This can be done by machine or hand.
Your beautifully quilted project is now ready to be enjoyed!
FAQ: Questions Beginners Often Ask
h5 How much space do I need around my machine?
You need enough space to support the weight of the quilt so it doesn’t pull on the needle. A large table or even using an ironing board or chair to the side can help. More support makes it much easier, especially with bigger quilts.
h5 My stitches are different lengths in free motion. What am I doing wrong?
This is the most common issue in free motion quilting home machine. Your hands (moving the fabric) and the machine (needle speed) are not working at the same speed. Practice moving your hands more evenly. Try setting your machine to a medium-fast speed and moving your hands smoothly to match. Quilting gloves can help you get a better grip for smoother movement. It just takes practice!
h5 Do I really need a walking foot?
For walking foot quilting techniques (straight lines, stitch-in-the-ditch), yes. It helps feed the three layers evenly, preventing puckers and shifts. You could try without it, but results will likely be much worse. It’s one of the most valuable quilting feet to own.
h5 Do I have to wear quilting gloves?
No, but quilting gloves make a big difference for free motion quilting home machine. They give you a much better grip on the fabric, making it easier to move the quilt smoothly and control the design. Many quilters find they can quilt for longer without their hands getting tired with gloves.
h5 What kind of batting is best for beginners?
Cotton or an 80/20 cotton/polyester blend are good choices. They are stable and easy to work with. Choose a low-loft (thin) batting for easier handling on a domestic machine. Check the batting package for the recommended maximum distance between quilting lines.
h5 How do I know what design to quilt?
Look at the quilt top’s pattern. Is it simple or busy? Think about the final use of the quilt – will it be washed a lot? (More dense quilting holds up well). Start simple with stitch-in-the-ditch or an all-over pattern like a meander or loops. As you get more comfortable, try more complex designs or custom work in different areas of the quilt. Don’t overthink your first few projects; just aim to get the layers stitched together!
h5 Is machine quilting hard?
Like any new skill, it takes practice. Beginner machine quilting can be challenging at first, especially controlling the fabric and getting even stitches. But with patience and practice, you can get good results and finish beautiful quilts on your home machine. Start simple, practice on scraps, and celebrate your progress.
h5 Can I quilt large quilts on a small machine?
Yes, but it takes more effort to manage the bulk. Using support tables, rolling or folding the quilt section by section, and quilting from the center outward are key strategies. It’s harder than on a large long-arm machine, but it is definitely possible with patience and good technique.
Conclusion
Machine quilting on your regular home sewing machine is a rewarding skill. It allows you to complete your quilt projects from start to finish. With the right tools, proper setup, and practice, you can create beautiful quilting stitches using both walking foot quilting for structured designs and free motion quilting home machine for creative patterns. Don’t be afraid to start small, test your machine quilting tension, and use quilting gloves to help with control. Every stitch you make adds to the beauty and durability of your quilt. Happy quilting!