
Do your car’s headlights look hazy and yellow, like they’ve seen better days? It’s not just about looks; those cloudy lenses actually make driving at night much harder and even more dangerous. You might be worried about spending too much money on professional restoration or trying a complicated DIY fix that doesn’t work. Choosing the right headlight cleaning method can feel overwhelming, with so many products promising miracles.
But fixing foggy headlights doesn’t have to be a headache! In this guide, we break down exactly why your headlights dim and show you the easiest, most effective ways to make them crystal clear again. You will learn simple, budget-friendly tricks and discover the best products for lasting results. Get ready to see the road clearly and boost your car’s appearance safely. Let’s dive into how you can restore your headlights today!
Top Headlight Cleaning Recommendations

- KIT CONTENTS - Each headlight restoration kit includes (8) Step 1 Oxidation Removing Wipes, (1) Step 2 Sanding Kit, and (2) Step 3 Ceramic Coating Wipes.
- LASTS AS LONG AS YOU OWN YOUR VEHICLE! - This is a CERAMIC coating for cars that chemically bonds to your headlights and provides UV protection for as long as you'll own your vehicle.
- NO POWER TOOLS REQUIRED - Everything is included in the kit for your car. There are no tools required that could potentially damage your headlights or paint.
- RESTORES AND PROTECTS FROM UV! - Our CERAMIC coating wipes provide a layer of UV protection that will last as long as you own your vehicle. We believe in providing our customers the best products on earth, the first time.
- 3 EASY STEPS! - Cerakote's Headlight Restoration Kit is a simple, 30 minute process. Step 1: Our Oxidation Remover wipes remove stubborn oxidation. Step 2: Using our supplied sanding materials, remove any remaining deep oxidation. Step 3: Cerakote's industry leading ceramic restores the headlight to like-new!

- KIT INCLUDES: 1 - Disc Pad Holder, 3.25 in (8,2 cm) 6 - 3M Gold Sanding Discs 500 Grit, 3 in (7,6 cm) each 4 - 3M White Finishing Discs 800 Grit, 3 in (7,6 cm) each 1 - 3M Trizact Refining Disc 3000 Grit, 3 in (7,6 cm) 2 - 3M Quick Headlight Clear Co
- KITS CONTAIN masking tape, light sanding discs, wax protectant and more
- FOR USE ON plastic lenses headlights, taillights, fog lights, directional lights and more
- 3M abrasive technology removes yellowing and buildup without damaging plastic lens surface
- Easy to use choose a kit with no tools required, or for use with a common household drill
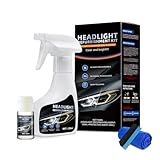
- Make Your Vision Brighter:This New Automotive Headlight Restoration Kits effectively clears up yellowing and cloudiness, shine your car headlamp in just minutes, instantly improving brightness and visibility
- Fast-Acting: This instant headlight oxidation removal spray works in minutes. This headlight cleaning kit quickly and easily resolves cloudy or yellowed headlights, saving you time
- Easy to Use: Simply shake 120ml of headlight restoration fluid, spray on your headlights, and wipe with a microfiber towel. No special tools or complicated steps are required, making this headlight repair kit easy for everyone
- Wide Compatibility: This headlight cleaning kit is suitable for both plastic and glass lenses on a variety of vehicle models, ensuring versatility for daily maintenance. This universal headlight restoration kit, suitable for all vehicle models, is a great addition to any car maintenance routine
- Lnstructions For Use: Step 1-Cleaning: Evenly spray the cleaner onto the headlight surface. Let it sit for 30 seconds, then wipe with a clean towel. Step 2-Rinsing: Thoroughly rinsse the headlight surface with clean water to remove all cleaner, then use a dry cloth to wipe away any water spots. Step3-Restoration: Squeeze an appropriate amount of crystal coating liquid onto the sponge applicator, wipe the headlight surface carefully in one direction to complete restoration.( Tip: when applying the coating liquid, do not scrub back and forth. Complete the wiping in a single pass in the same direction to protect the coating layer.)

- KIT INCLUDES: 1 - 3M Trizact Refining Disc 1000 grit, 3 in/7.6 cm 1 - 3M Trizact Refining Disc 3000 grit, 3 in/7.6 cm 2 - 3M Quick Headlight Clear Coat Wipes 1 - Foam Pad with 3M Hookit Attachment, 3 in/7.6 cm 1- Disposable Glove
- FOR USE ON plastic lenses – headlights, taillights, fog lights, directional lights and more
- 3M abrasive technology removes yellowing and buildup without damaging plastic lens surface
- Easy to use – choose a kit with no tools required, or for use with a common household drill
- Save hundreds vs. replacing headlight lenses
- No Grinding, No Thinning – Just Lasting Clarity: Tired of complicated kits that force you to sand down your valuable headlight lens? Our revolutionary solution requires NO grinding, NO sanding, and NO damaging removal of your headlight's protective layer. Simply clean with our solution, rinse thoroughly, and apply the coating. You get a perfectly restored, like-new finish without compromising your headlight's structural integrity or future durability. It's safe, fast, and permanently effective
- NOT a Temporary Dressing, a True Ceramic Coating: Tired of headlight dressing that wash off? Our formula permanently bonds to damage headlight, curing into a hard, crystal armor. This integrated layer doesn't just restore; it helps prevent the appearance of scratches, scuffs, and daily abrasions from road debris and brushes, keeping your headlight looking pristine far longer than any dressing ever could
- Gives Car Like-New Sleek Look & Boosts Visibility: This headlight restoration kit restores dull headlights, turning them clear and bright — giving your car a like-new, sleek look and enhancing night driving visibility
- For All Headlight Issues – Saves Time & Effort, Gets Clear Lights: This headlight restoration kit works on blurring, yellowing, oxidation, so you can fix all headlight problems with one solution — saving time/effort, restoring clear bright lights, and giving your car a sleek look
- Effortless Spray & Wipe Restoration Without Power Tools: This headlight cleaner and restorer kit requires no sanding tools. Just spray and wipe, allowing you to restore headlights easily — no complex equipment needed, making the process quick, simple, and labor-saving

- HEADLIGHT RESTORATION AND PROTECTION (GAP11516) – All-in-one formula cleans, restores, and protects plastic headlights, removing yellowing, oxidation, and haze for improved clarity and visibility
- RESTORES LIKE-NEW CLARITY – This headlight restorer quickly removes surface oxidation, light scratches, and embedded dirt, reviving headlight lenses to enhance nighttime driving safety and appearance
- LONG-LASTING PROTECTION – Leaves behind a durable headlight coating that acts as a protective barrier to help prevent future fading, discoloration, and oxidation from environmental exposure
- SAFE FOR MULTIPLE SURFACES – This car light cleaner works on plastic clear headlights, taillights, fog lights, and turn signals; safe for OEM and aftermarket lenses
- EASY APPLICATION – Apply the car headlight cleaner by hand or machine with a foam or microfiber applicator; buff to reveal a crystal-clear, restored finish in minutes

- ① RESTORE FOGGY, YELLOW & OXIDIZED HEADLIGHTS - This headlight restoration kit is designed to clean and restore foggy headlights, yellow headlights, cloudy headlights, and oxidized headlight lenses. It helps improve headlight clarity and refresh dull plastic lenses for a cleaner, brighter look.
- ② HEADLIGHT CLEANER AND RESTORER KIT FOR CARS- Our headlight cleaner and restorer kit combines a powerful headlight cleaner with a protective ceramic coating to help restore headlights in one simple process. Ideal for car headlight restoration, headlight lens restoration, and plastic lens restorer needs.
- ③ DEEP CLEANING HEADLIGHT LENS - This headlight refinishing kit with Special formula that works on plastic headlight lenses to remove built-up haze, grime and surface oxidation without damaging the lens.
- ④ CERAMIC COATING FOR LONG-LASTING PROTECTION - This headlight lens repair kit includes a ceramic coating treatment that helps enhance shine and clarity after cleaning. Great for restoring cloudy plastic headlights, improving lens appearance, and supporting long-lasting headlight restoration results.
- ⑤ EASY DIY HEADLIGHT RESTORATION - User Guide: Step 1-Cleaning: Evenly spray the cleaner onto the headlight surface. Let it sit for 30 seconds, then wipe with a clean towel. Step 2-Rinsing: Thoroughly rinsse the headlight surface with clean water to remove all cleaner, then use a dry cloth to wipe away any water spots. Step3-Restoration: Squeeze an appropriate amount of crystal coating liquid onto the sponge applicator, wipe the headlight surface carefully in one direction to complete restoration.( Tip: when applying the coating liquid, do not scrub back and forth. Complete the wiping in a single pass in the same direction to protect the coating layer.)

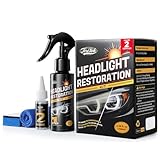
- Easy Headlight Restoration Kit: The Sylvania Headlight Restoration Kit is easy to use and includes everything needed to repair two headlight lenses and restore light output with no tools needed
- Restores Headlight Clarity: Designed to eliminate haze and yellowing, this foggy headlights restoration kit provides a like-new appearance to your headlights
- Improves Night Driving Visibility: The headlight refurbishment kit restores the clarity and shine you need to see down the road at night safely
- Exclusive Headlight UV Coating: This all-in-one headlight repair system contains surface activator, premium sandpaper, a clarifying compound, an exclusive UV block clear coat, and more
Your Brightest Drive: The Headlight Cleaning Buying Guide
Cloudy, yellow headlights make your car look old. They also make driving at night dangerous because the light doesn’t shine as far. Cleaning them keeps you safe and makes your ride look great. This guide helps you pick the best cleaning kit.
Key Features to Look For
When shopping, look closely at what the kit offers. A good kit does more than just clean the surface.
- Restoration Power: Does it just clean surface dirt, or does it remove the yellowing and oxidation (the cloudy look)? Look for kits that promise to restore clarity.
- UV Protection: Headlights turn yellow because of the sun’s UV rays. The best kits include a sealant or coating that blocks these rays after cleaning. This makes the fix last longer.
- All-in-One Solution: Some kits only come with a cleaner. Better kits include sandpaper, polishing compounds, applicators, and the final UV sealant.
- Ease of Use: Check if the instructions are simple. You want a quick fix, not a complicated project.
Important Materials in Your Kit
The materials used determine how well the product works and how long the results last.
Abrasives (Sandpaper)
If your lights are very cloudy, you will need to sand them down first. Good kits provide varying grits of sandpaper. Finer grits (higher numbers, like 2000 or 3000) leave a smoother finish. Cheap kits might skip these or provide low-quality paper that tears easily.
Polishing Compound
This is the ‘magic paste’ that buffs away the remaining haze after sanding. Look for a dedicated plastic polish. Toothpaste is sometimes suggested, but professional compounds work much better and faster.
UV Clear Coat Sealant
This is the most important part for long-term results. This liquid dries into a hard, clear layer. It must be a dedicated automotive UV sealant, not just regular wax.
Factors That Improve or Reduce Quality
The quality of the final result depends on two things: the product itself and how you use it.
Factors That Improve Quality
- Proper Preparation: Always clean the headlight thoroughly before starting. Taping off the painted car body around the light protects your paint from scratches or polish residue.
- Patience in Sanding: If you skip sanding the heavy oxidation, the polish cannot reach the clear plastic underneath. Take your time sanding evenly.
- Thick Sealant Application: Apply the UV sealant in thin, even coats, as directed. More coats usually mean longer protection.
Factors That Reduce Quality
- Skipping the Sealant: If you only clean and polish without sealing, the headlights will turn cloudy again within a few weeks or months.
- Using Household Cleaners: Harsh cleaners or abrasive household items damage the plastic surface further.
- Working in Direct Sun: Polishing compounds dry too fast in hot sunlight, making them hard to buff off cleanly. Work in the shade or on a cool day.
User Experience and Use Cases
Most headlight cleaning kits are designed for the average car owner. You do not need special mechanic skills.
Use Case 1: Light Haze. If your lights look slightly dull, you might only need a simple liquid cleaner and polish. This usually takes about 15 minutes for both lights.
Use Case 2: Heavy Yellowing. If the lights look deeply orange or foggy, you must use the sanding steps. This process takes longer, maybe 45 minutes to an hour, but the results look like brand new lights.
User Tip: Test the product first. Before committing to sanding the whole light, try just the polishing compound on a small spot. If the haze disappears, you save time!
10 Frequently Asked Questions (FAQ) About Headlight Cleaning
Q: How long does a headlight cleaning job usually last?
A: If you use a good UV sealant, the results can last from six months up to two years. It depends on how much sun your car sits in.
Q: Can I use toothpaste instead of special polish?
A: Toothpaste has mild abrasives. It might work for very slight hazing, but a proper polishing compound removes oxidation better and faster.
Q: Do I need to remove the headlights from the car?
A: No. Almost all kits are designed to be used while the headlights are still attached to the vehicle.
Q: What is oxidation?
A: Oxidation is when the plastic cover reacts with sun and heat, breaking down the clear layer. This causes the foggy, yellow look.
Q: Is sanding the headlight safe for the plastic?
A: Yes, it is safe when done correctly. You are removing the damaged, oxidized outer layer to reveal the clear plastic underneath. Always use water or a lubricant if the instructions suggest it.
Q: When should I reapply the UV sealant?
A: Reapply the sealant every year, or as soon as you notice the lights starting to look slightly dull again.
Q: Can this method fix cracked or broken headlights?
A: No. This method only fixes surface cloudiness. It cannot repair deep cracks, chips, or moisture leaks inside the housing.
Q: What is the best time of day to clean my headlights?
A: Choose a cool, cloudy day, or work in a shaded garage. Direct, hot sun makes the chemicals dry too quickly.
Q: Do I need to use painter’s tape?
A: Yes, use painter’s tape to cover the car paint right next to the headlight. This prevents the abrasive compounds from scratching your car’s finish.
Q: Are there kits for just cleaning without sanding?
A: Yes. If your lights are only slightly hazy, some kits skip the sandpaper and use a stronger cleaner and polish combination.