
Beginner’s How Can I Embroider With A Sewing Machine
So, you want to know, how can I embroider with a sewing machine? It’s totally possible! You can use your sewing machine to add beautiful pictures, letters, and designs to fabric. This can be done in two main ways: using special automatic machines that sew the design for you, or using a regular sewing machine and moving the fabric yourself. This guide will show you the simple steps and tools you need to start making lovely embroidery on your projects.
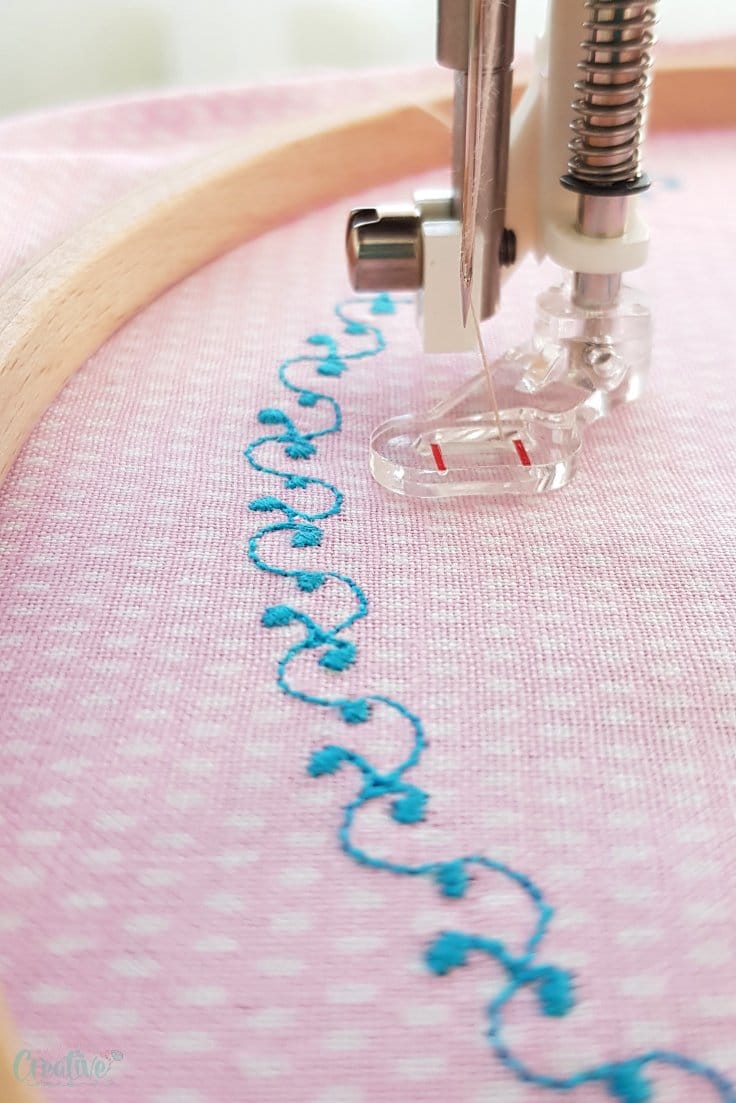
Image Source: theseamanmom.com
Getting Started with Machine Embroidery Basics
Let’s talk about what machine embroidery is. It’s a way of using stitches from a sewing machine to make pictures or patterns on fabric. Think of it like drawing with thread. It’s different from hand embroidery because the machine does the stitching really fast.
There are two main kinds of machine embroidery you can do:
- Free Motion Embroidery: Here, you guide the fabric yourself while the machine stitches. Your hands control where the needle goes.
- Computerized Embroidery: These are special machines. You load a design file, and the machine sews the design all by itself.
Both types let you create amazing things. They just use different methods. To start, you will need a few key things. You need your sewing machine, a way to hold the fabric tight (called an embroidery hoop for sewing machine), something to support the fabric (stabilizer for machine embroidery), special thread (embroidery thread for sewing machine), and a design you want to stitch (embroidery designs for sewing machine). Let’s look closer at each part.
Picking the Right Sewing Machine
Can your sewing machine do embroidery? This is one of the first things to figure out. Different machines have different powers.
Finding Your Machine’s Embroidery Power
Some sewing machines are made just for embroidery. These are often called embroidery machines or combination sewing and embroidery machines. They have a special arm and a computer screen. You load a design file, hoop your fabric, attach the hoop to the arm, and the machine sews the design automatically. This is the world of computerized sewing machine embroidery. These machines are great because they make perfect stitches based on the design you choose.
Other sewing machines are just for sewing seams. But many of these can still do free motion embroidery. To do this, your machine needs a way to drop its feed dogs. Feed dogs are the little teeth under the needle plate that pull the fabric along. When you do free motion embroidery sewing machine work, you need to move the fabric yourself. So, you need to drop the feed dogs or cover them up. This lets you move the fabric in any direction you want while the needle stitches.
Some sewing machines also have built-in decorative stitches. You can use these stitches to make simple embroidery-like patterns, but it’s not quite the same as full free motion or computerized embroidery.
Checking Your Machine’s Book
The best way to know what your machine can do is to read its instruction book. It will tell you if it can drop the feed dogs or if it has embroidery features. If you have a newer electronic machine, it might even have some simple embroidery designs built-in.
If your goal is detailed pictures and complex patterns done easily, a computerized embroidery machine is best. If you like drawing with thread and having full control, a regular sewing machine with drop feed dogs is perfect for free motion work.
Gathering Your Essential Supplies
No matter which type of machine embroidery you do, you need a few key items besides your machine. These tools help make your embroidery look good and stay that way.
Getting an Embroidery Hoop for Sewing Machine
You cannot do machine embroidery without a hoop. The embroidery hoop for sewing machine holds your fabric very tight and flat. This stops the fabric from moving or getting wrinkled while the needle is stitching really fast. If the fabric is not held tight, your design will look messy or pulled out of shape.
Hoops come in different sizes and shapes (round, square, rectangle). For computerized machines, you need a hoop that fits your machine’s special arm. The size of the hoop also limits the size of your design. You pick a hoop big enough for your design.
For free motion embroidery, you use a hoop too. It works the same way – holding the fabric tight. Regular hand embroidery hoops can work, but special machine embroidery hoops often have a better grip. You just need a hoop that lets you easily move the fabric inside it while keeping it flat.
Using the hoop is simple. You place your fabric and stabilizer over the inner ring, then press the outer ring down over it. Make sure the fabric is like a drum head – very tight.
Using Stabilizer for Machine Embroidery
Stabilizer for machine embroidery is a must-have. It’s like a hidden helper for your fabric. Embroidery stitches are very dense (close together). This can make your fabric pucker or pull out of shape, especially if your fabric is thin or stretchy. Stabilizer gives the fabric extra body and support. It helps the stitches lie flat and keeps the design from looking warped.
Stabilizers come in different types:
- Cut-Away Stabilizer: This type stays with the fabric forever. You trim the extra stabilizer away from the design edges after you finish stitching. It’s good for knits or unstable fabrics that stretch a lot. It gives permanent support.
- Tear-Away Stabilizer: This type is easy to remove. After stitching, you can gently tear it away from the back of your design. It’s good for stable woven fabrics. It provides support while stitching but doesn’t stay there.
- Wash-Away Stabilizer: This type dissolves in water. It’s great for delicate fabrics, towels (used on top to keep stitches from sinking into loops), or freestanding lace designs. It leaves no trace after washing.
You also need to think about the weight of the stabilizer. Thicker fabrics need lighter stabilizers, and lighter fabrics need heavier stabilizers. You might even use more than one layer for very detailed designs or tricky fabrics. Choosing the right stabilizer is key to getting neat results.
Choosing Embroidery Thread for Sewing Machine
You can’t just use any thread for machine embroidery. Embroidery thread for sewing machine is different from regular sewing thread. It’s usually thinner and has a lovely shine. This makes the embroidery stitches look smooth and pretty.
The most common types are rayon and polyester.
- Rayon Thread: This thread is very shiny and soft. It gives a classic embroidery look. However, it’s not as strong as polyester and might fade over time if washed a lot or exposed to sunlight.
- Polyester Thread: This thread is stronger and keeps its color better. It’s also usually a bit cheaper than rayon. It has a nice shine, though maybe not as bright as rayon. It’s a good choice for things that will be washed often.
Embroidery thread also comes in different weights. A common weight is 40 wt. Lower numbers mean thicker thread. Thicker thread fills areas faster but might make small details look messy. Thinner thread (like 60 wt) is good for tiny details or lettering.
Using the right needle with your embroidery thread is also important. A sharp embroidery needle (often size 75/11 or 90/14) helps the thread pass through the fabric smoothly without skipping stitches or breaking the thread.
Table: Common Stabilizer Types
| Stabilizer Type | What it does | Best for… | How to remove |
|---|---|---|---|
| Cut-Away | Stays to give lasting support | Stretchy fabrics, knits, unstable materials | Trim away |
| Tear-Away | Gives support while stitching | Stable fabrics, wovens | Tear away |
| Wash-Away | Dissolves in water | Delicate fabrics, towels, freestanding lace | Wash away |
Table: Common Embroidery Thread Types
| Thread Type | Look | Strength | Price | Best for… |
|---|---|---|---|---|
| Rayon | Very shiny, soft | Medium | Higher | Classic look, detailed designs |
| Polyester | Shiny, strong | High | Lower | Items washed often, durability, quilts |
Getting Your Design Ready
Before you can stitch, you need a design! This is the fun part – picking what you want to create. You need embroidery designs for sewing machine projects.
Finding Designs
Where do you get these designs?
- Built-in Designs: If you have a computerized embroidery machine, it likely comes with designs already saved in its memory. These are a great way to start.
- Purchased Designs: You can buy designs online from many different websites. They come in special file formats that your machine can read (like .DST, .PES, .JEF, etc.). There are thousands of designs available, from simple flowers to complex pictures.
- Free Designs: Many websites offer free designs you can download to practice with.
- Creating Your Own: You can also create your own designs! This involves a process called digitizing for machine embroidery.
Interpreting Digitizing for Machine Embroidery
Digitizing is like translating a picture into a language your embroidery machine understands. You use special computer software to do this. You take a picture (like a drawing, logo, or image) and use the software to tell the machine where to put the stitches. You choose the stitch type (like a fill stitch for large areas or a satin stitch for outlines), the stitch direction, and the colors.
Digitizing is a skill that takes time to learn. It’s more advanced than just starting embroidery. Most beginners buy ready-made designs or use the ones that came with their machine. But knowing about digitizing helps you understand where designs come from. It’s how logos on shirts or complex pictures become stitchable files.
Using Designs on Your Machine
For computerized machines, you typically load the design file using a USB stick or by connecting your computer directly to the machine. Your machine’s screen will show you the design, its size, the colors needed, and how many stitches it has.
For free motion embroidery, you don’t need a digital design file in the same way. You might draw your design directly on the fabric with a washable marker. Or you might follow a printed pattern placed under sheer fabric. Or you might just “draw” freehand with the needle as you move the fabric.
Sewing Machine Embroidery Techniques
Now, let’s talk about how the stitching actually happens. The technique you use depends on your machine type. These are the core sewing machine embroidery techniques.
Doing Computerized Machine Embroidery
This method is largely automatic.
- Prepare Fabric: Hoop your fabric with the right stabilizer. Make sure it’s tight.
- Set up Machine: Put the hooped fabric onto the machine’s embroidery arm. Load your design file.
- Choose Colors: The machine screen will show you the design and tell you which color thread to put in first. Thread your machine.
- Start Stitching: Press the start button. The machine will sew the first part of the design.
- Change Colors: The machine will stop when it’s time to change to the next color. You change the thread and press start again.
- Finish: The machine finishes the design and stops. You take off the hoop, remove the fabric, and trim the extra thread tails and stabilizer.
This method is very precise. It’s great for detailed designs, logos, and things like monogramming with sewing machine built-in fonts.
Doing Free Motion Embroidery
This method is more like drawing.
- Prepare Machine: You need to lower or cover your machine’s feed dogs. You might also need a darning foot or free-motion foot. This is a special presser foot that lets you move the fabric freely.
- Prepare Fabric: Hoop your fabric with stabilizer. You can draw your design on the fabric or just have an idea in mind.
- Set Stitch: Set your machine to a straight stitch. The stitch length doesn’t matter much because you control the stitch length by how fast you move the fabric and how fast the needle bobs up and down.
- Start Stitching: Place the hooped fabric under the needle. Lower your presser foot (even though it hovers above the fabric). Begin sewing.
- Move Fabric: As the machine stitches, you move the hoop. You move it slowly to make shorter, closer stitches, or faster to make longer stitches. You guide the fabric to follow your design lines or just draw freely.
- Control Speed: You control the speed of the machine with your foot pedal. Practice moving the fabric at a steady speed while keeping the machine speed steady. This helps make even stitches.
- Finish: When done, raise the feed dogs (or remove the cover), change back to a regular presser foot, and sew a few stitches normally to lock the threads. Then remove the fabric and trim threads.
Free motion embroidery is very flexible and artistic. You can literally draw anything you can imagine with thread. It’s great for quilting, sketching with thread, or adding unique touches to projects.
Making Letters: Monogramming with Sewing Machine
A popular use for sewing machines in embroidery is adding letters. This is called monogramming with sewing machine.
If you have a computerized embroidery machine, it likely has built-in fonts (letter styles). You can type in initials or names on the machine’s screen, choose the size and font, and the machine will stitch them perfectly. This is the easiest way to get nice, clean letters. You just prepare your fabric with stabilizer and hoop it, tell the machine where to put the letters, and press start.
If you are doing free motion embroidery, you can also do lettering. You would draw the letters on the fabric and then trace them with your needle. This gives a more handmade look to the letters. It takes practice to make them look neat and even. You move the fabric carefully to follow the shape of each letter.
You can add monograms to towels, shirts, bags, gifts, and more. It makes items feel personal and special.
Step-by-Step Guide: Putting It All Together (Computerized)
Here is a simple guide for using a computerized embroidery machine.
Step 1: Get Things Ready
- Pick your fabric.
- Choose your embroidery design for sewing machine.
- Select the right embroidery thread for sewing machine colors.
- Pick the correct stabilizer for machine embroidery based on your fabric.
- Make sure you have the right embroidery hoop for sewing machine size for your design.
Step 2: Prepare Your Fabric
- Place your stabilizer on the back of your fabric.
- Sometimes you need a water-soluble topping stabilizer too, especially for towels or fuzzy fabrics. Put this on the top of your fabric.
- Lay the inner hoop ring flat.
- Place the fabric (with stabilizer underneath and topping on top if using) over the inner ring.
- Press the outer hoop ring down firmly over the fabric and inner ring.
- Pull the fabric edges around the hoop gently to make sure the fabric inside the hoop is very tight and smooth, like a drum. Tighten the screw on the outer hoop if needed.
Step 3: Set Up the Machine
- Turn on your computerized sewing machine embroidery machine.
- Load your chosen design file. You might use a USB stick or cable.
- Follow the machine’s screen instructions to pick the design, size, and placement.
- The screen will tell you which thread color to start with. Thread your machine with that color.
- Put the hooped fabric onto the embroidery arm. Make sure it clicks into place correctly.
Step 4: Start Stitching
- Lower the presser foot.
- Make sure there is nothing blocking the hoop’s movement path.
- Press the ‘Start’ button on your machine.
- The machine will begin stitching the first part of the design. It will move the hoop automatically to create the pattern.
- Watch to make sure the thread doesn’t break.
Step 5: Change Colors
- The machine will stop when it finishes stitching all the areas for the first color.
- The screen will tell you the next color needed.
- Carefully snip the thread near the needle and near the spool. Remove the old thread.
- Thread your machine with the next color.
- Press ‘Start’ again. The machine will continue stitching.
- Repeat this step every time the machine stops for a color change until the design is finished.
Step 6: Finishing Up
- Once the machine finishes the very last stitch, it will stop.
- Raise the presser foot.
- Remove the hooped fabric from the embroidery arm.
- Take the fabric out of the hoop.
- Carefully snip any small threads connecting parts of the design.
- Remove the stabilizer from the back. If it’s tear-away, gently tear it away from the stitches. If it’s cut-away, use scissors to trim around the design, leaving about a half-inch edge. If it’s wash-away, follow the package directions (usually soak in water).
- Remove any wash-away topping from the front by gently wiping or washing.
You now have a finished machine embroidery design!
Step-by-Step Guide: Putting It All Together (Free Motion)
Here is a simple guide for using a regular sewing machine for free motion embroidery.
Step 1: Get Things Ready
- Pick your fabric.
- Have your design ready (drawn on fabric, under fabric, or just in your head).
- Select your embroidery thread for sewing machine. You can use regular thread too, but embroidery thread looks nicer.
- Pick the right stabilizer for machine embroidery based on your fabric.
- Get an embroidery hoop for sewing machine (a regular hoop is fine, just make sure it holds fabric tight).
- Get a darning or free-motion foot for your machine.
Step 2: Prepare Your Fabric
- Place your stabilizer on the back of your fabric.
- Put your fabric and stabilizer in the hoop. Make it very, very tight, like a drum.
Step 3: Set Up the Machine
- Attach the darning or free-motion foot to your machine.
- Important: Lower your machine’s feed dogs. If you can’t lower them, use a plate cover that came with your machine to cover them up.
- Thread your machine with your chosen embroidery thread.
- Set your machine to a straight stitch. Set the stitch length to zero or very close to zero. This lets you control the stitch length with your movement.
- Place the hooped fabric under the needle. Lower the presser foot lever. The foot will hover just above the fabric.
Step 4: Start Stitching
- Hold both the top and bobbin thread tails for the first few stitches.
- Start sewing slowly. As the needle goes down, gently move the hoop.
- Try to keep your fabric moving at a smooth, steady speed while keeping the machine speed steady. This makes your stitches look even.
- You are drawing with the needle! Move the hoop to follow your design or just doodle on the fabric.
- Move the fabric slower for shorter, denser stitches. Move it faster for longer stitches.
- Take breaks often. Free motion takes focus.
Step 5: Drawing Your Design
- If you drew your design on the fabric, follow your lines carefully.
- If you have a pattern under sheer fabric, follow the lines you see.
- If you are stitching freely, just enjoy drawing with thread! You can fill shapes or just stitch lines and swirls.
Step 6: Finishing Up
- When you are done stitching, stop the machine with the needle down in the fabric.
- Raise the presser foot.
- Move the hoop slightly to the side.
- Raise the needle to its highest point.
- Raise the feed dogs back up (or remove the cover).
- Put your regular presser foot back on.
- Lower the needle just next to your finished stitching. Sew 2-3 regular stitches in place to lock the thread.
- Raise the needle and presser foot, and remove your hooped fabric.
- Take the fabric out of the hoop.
- Trim all your thread tails neatly.
- Remove the stabilizer from the back (tear or cut away as needed).
Free motion is all about practice. Don’t worry if your first tries are not perfect. Keep practicing on scrap fabric!
Reading the Basics: Machine Embroidery Basics
Let’s look at the basic ideas behind machine embroidery again. The goal is to create stitches that form a picture or pattern.
- Stitch Types: Machines use different stitch types. A ‘fill stitch’ covers a large area with stitches going back and forth. A ‘satin stitch’ is a dense stitch used for outlines or narrow shapes, like columns of thread. There are also walking stitches (just simple lines) and decorative stitches.
- Density: This is how close together the stitches are. High density means stitches are packed tightly. This uses more thread and makes the design solid. Low density means stitches are spaced further apart.
- Underlay: For many designs, especially computerized ones, the machine stitches a layer of stitches under the main design. This is called underlay. It helps flatten the fabric, holds the stabilizer and fabric together, and gives the main stitches something to grab onto. It helps the final design look smooth and keeps it from sinking into the fabric.
- Push and Pull: When stitches are added, they slightly pull or push the fabric. This is why stabilizer is so important. Good digitizing or careful free motion movement helps handle this to keep the design shape true.
Grasping these machine embroidery basics helps you understand why things like stabilizer and hooping are so important and why designs look the way they do.
Tips for Getting Started
Starting something new can feel tricky. Here are some tips for your first steps into sewing machine embroidery techniques:
- Start Simple: Don’t pick a very complex design or a difficult fabric for your first try. Choose a simple design on stable cotton fabric.
- Practice Hooping: Getting the fabric hooped correctly – tight and smooth – is half the battle. Practice this step.
- Test Stitch: Always do a test stitch of your design (or your free motion pattern) on a scrap of the exact same fabric and stabilizer you plan to use for your final project. This lets you check thread colors, tension, and how the fabric handles the stitches before you sew on your good item.
- Thread Tension: Machine embroidery uses a lot of thread. Make sure your top thread and bobbin thread tension are balanced. The back of your stitching should look neat, with only a tiny bit of the top thread showing. The instruction book for your machine will have steps for checking and adjusting tension.
- Needle Size: Use the right needle for your thread and fabric. A sharp embroidery needle (75/11 or 90/14) is usually best. Change your needle often, maybe after every few designs. A dull needle can cause thread breaks or skipped stitches.
- Clean Your Machine: Lint from thread can build up quickly when doing dense embroidery. Clean your machine regularly, especially around the bobbin area.
- Watch and Learn: Look for videos online showing free motion or computerized embroidery. Seeing someone do it can help you understand the steps.
- Be Patient: Your first few tries might not be perfect. That is okay! Embroidery takes practice. Keep trying and learning from each project.
Remember the LSI keywords we talked about? You’ve seen them used as we covered sewing machine embroidery techniques, embroidery hoop for sewing machine, stabilizer for machine embroidery, free motion embroidery sewing machine, computerized sewing machine embroidery, embroidery thread for sewing machine, embroidery designs for sewing machine, digitizing for machine embroidery, machine embroidery basics, and monogramming with sewing machine. These are all key parts of the world of machine embroidery.
Frequently Asked Questions (FAQ)
Q: Can a basic sewing machine do computerized embroidery?
A: No, a basic sewing machine can usually only do free motion embroidery if it has drop feed dogs. Computerized embroidery needs a special machine made for that purpose.
Q: Why do I need stabilizer? Can’t I just use the hoop?
A: The hoop holds the fabric tight, but stabilizer supports the fabric against the dense stitches. Without it, the fabric will likely pucker, pull, and lose its shape when stitched.
Q: What’s the difference between rayon and polyester embroidery thread?
A: Rayon is shinier and softer but less strong. Polyester is stronger, keeps color better, and is good for items washed often.
Q: Do I need special needles for machine embroidery?
A: Yes, embroidery needles are recommended. They are sharp and designed to work well with embroidery thread at high speeds.
Q: Is free motion embroidery hard?
A: It takes practice! You control the fabric movement and speed. Your first tries might be wobbly, but with practice, you can make amazing designs.
Q: Can I make my own embroidery designs?
A: Yes, but you need special digitizing software and skills to create the design files for computerized machines. For free motion, you can just draw directly on the fabric or stitch freely.
Wrapping Up
Using a sewing machine for embroidery is a wonderful way to add personal touches to your projects. Whether you have a special computerized machine or a regular one that can do free motion, you can create beautiful thread art. Get your hoop, stabilizer, and thread ready. Choose a simple design and give it a try. Like any new skill, practice is key. Have fun exploring the world of machine embroidery!