
Image Source: i.ytimg.com
Your Guide: How Do I Thread A Singer Sewing Machine Correctly?
Threading a Singer sewing machine correctly is fundamental to successful sewing. Can I thread my Singer without a manual? Yes, although a Singer sewing machine manual is your best friend for precise instructions, this guide will walk you through the general process for most Singer models, covering both the upper and lower threads, and familiarizing you with essential Singer sewing machine parts.
The Essential First Steps: Getting Ready to Thread
Before you even think about threading the needle, a few crucial steps ensure a smooth and frustration-free experience. This part of the Singer sewing machine setup Singer is often overlooked but makes a world of difference.
Preparing Your Machine
- Turn Off the Machine: Always ensure your Singer sewing machine is powered off and unplugged before you begin threading. Safety first!
- Raise the Presser Foot: Lift the presser foot lever. This opens up the tension discs, allowing the thread to pass through them smoothly. If the presser foot is down, the thread will get stuck.
- Remove Old Thread: If there’s any old thread still on the machine, carefully remove it from the spool pin, take-up lever, and all the guides. This prevents tangles and ensures the new thread follows the correct path.
- Select Quality Thread: Use good quality thread that is appropriate for your fabric. Cheap or old thread can break easily, leading to skipped stitches or jams.
Identifying Key Singer Sewing Machine Parts
To effectively thread your Singer, you need to know the main components involved:
- Spool Pin: Where you place your spool of thread.
- Thread Guides: Small loops or slots that direct the thread.
- Tension Discs: Two circular metal discs that control how tightly the thread is pulled.
- Take-Up Lever: A moving arm that lifts and lowers, guiding the thread through the machine.
- Needle Clamp Screw: Holds the needle in place.
- Presser Foot: Holds the fabric down.
- Bobbin Winder: Used to wind thread onto the bobbin.
- Bobbin Case: Holds the bobbin and its thread.
- Needle Plate (Throat Plate): The metal plate around the needle.
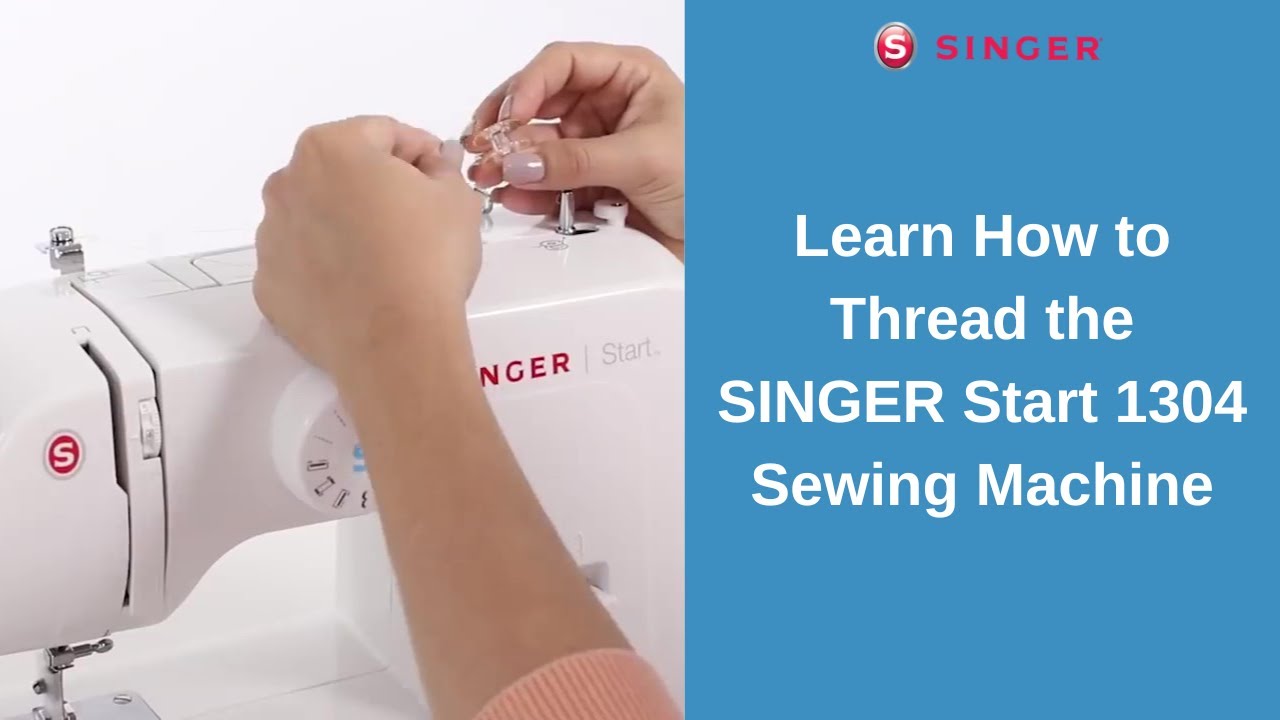
Mastering the Upper Thread: A Step-by-Step Approach
Threading a Singer machine for the upper thread is a precise process. This is where the majority of your sewing thread will travel.
Step 1: Placing the Spool
- Insert your spool of thread onto the spool pin. Most Singer machines have a vertical spool pin, but some may have a horizontal one. Ensure the spool is seated firmly.
- If your spool has a label on one side, place it so the label faces outwards. This helps prevent the thread from unwinding too quickly.
Step 2: Following the Thread Path
This is the most critical part of Singer sewing machine threading. Your machine will have a series of guides and levers the thread must pass through. Consult your sewing machine manual Singer for the exact numbering or illustration of the thread path for your specific model, as they can vary slightly.
Here’s a general sequence:
- First Thread Guide: Take the end of your thread and guide it through the very first thread guide closest to the spool pin.
- Around the Tension Discs: Now, bring the thread down and around the tension discs. The thread should go between the two discs. You’ll feel a slight resistance as you pull the thread. Important: Make sure the thread is properly seated between the tension discs. This is crucial for correct tension.
- Up to the Take-Up Lever: Guide the thread upwards, moving it towards the take-up lever.
- Through the Take-Up Lever: This is a vital step. The thread must go through the eye of the take-up lever from right to left (or vice versa, depending on the machine, but usually right to left).
- Back Down: After passing through the take-up lever, bring the thread back down.
- More Thread Guides: Continue to follow the numbered path or illustration in your manual, passing the thread through subsequent thread guides. These guides are strategically placed to ensure the thread is straight and under control. Pay close attention to any small metal or plastic clips that the thread needs to pass through.
- The Needle Clamp Guide: Near the needle, there will be another guide, often a small metal finger or loop, attached to the needle bar. Ensure the thread goes through this guide.
Step 3: Threading the Needle
This is where precision is paramount. Threading the needle Singer can be challenging, especially with fine threads or older eyes.
- Cut the Thread End: Use sharp scissors to cut the end of the thread at a clean, diagonal angle. This makes it easier to push through the needle’s eye.
- Hold the Needle: If your machine has a needle threader, use it! If not, hold the needle steady with one hand.
- Insert Thread: With your other hand, carefully guide the cut end of the thread through the eye of the needle. For most machines, you’ll be threading from front to back.
- Pull Through: Once the thread is through the eye, pull about 4-6 inches of thread through.
Preparing the Lower Thread: The Bobbin Work
The lower thread comes from the bobbin. Getting the Singer sewing machine bobbin ready is just as important as the upper thread.
Winding the Bobbin
- Place the Bobbin on the Winder: Remove the bobbin winder spindle (usually a small, metal or plastic post that pops out). Place your bobbin onto this spindle.
- Secure the Thread: Take the end of your thread from the spool (which should still be on the spool pin) and guide it under and through the bobbin’s hole.
- Snip a Small Piece of Thread: Leave a small tail of thread sticking out of the bobbin hole. You can snip off the excess thread a little later.
- Engage the Bobbin Winder: Most Singer machines have a mechanism to disengage the needle bar from the handwheel. This allows the bobbin winder to spin without moving the needle. Consult your manual for how to do this (often by pushing the handwheel in or out).
- Start Winding: Hold the thread tail firmly and start the machine slowly. The bobbin winder will begin to spin, winding the thread onto the bobbin. Let the first few wraps go to secure the thread tail, then carefully snip the tail close to the bobbin.
- Wind Evenly: Try to wind the bobbin evenly. Don’t wind it too full, as this can cause issues. Most machines have a guide or stopper to prevent over-winding.
- Disengage and Remove: Once the bobbin is wound, disengage the bobbin winder spindle and remove the full bobbin. Cut the thread from the spool.
Inserting the Bobbin
The way the bobbin is inserted depends on whether your Singer machine has a front-loading bobbin case or a drop-in bobbin system.
For Front-Loading Bobbin Cases:
- Remove the Bobbin Case: Locate the bobbin case compartment, usually under the needle plate. There will be a latch or a small lever to release the bobbin case. Remove it.
- Place Bobbin in Case: Insert the wound bobbin into the bobbin case. The thread should unwind from the bobbin in a specific direction. For most Singer machines, the thread should unwind counter-clockwise. Check your manual or the bobbin case itself for markings.
- Thread Through the Slit: Pull about 4-6 inches of thread from the bobbin and guide it through the slit in the bobbin case. This slit helps create the correct tension.
- Insert Bobbin Case: Carefully place the loaded bobbin case back into its compartment. Make sure it clicks or locks into place. There’s usually a small hook or arm on the bobbin case that needs to engage with a slot in the machine.
For Drop-In Bobbin Systems:
- Remove Needle Plate Cover: If your machine has a removable needle plate cover or a throat plate that lifts, remove it.
- Place Bobbin in Holder: Insert the wound bobbin directly into the bobbin holder. Again, the thread should unwind in the correct direction, usually counter-clockwise, with the thread coming off the top of the bobbin.
- Guide Thread: Pull about 4-6 inches of thread from the bobbin and guide it under the tension spring and through the small notch or guide provided.
- Replace Cover: Replace the needle plate cover or ensure the throat plate is properly seated.
Bringing It All Together: Combining Upper and Lower Threads
With both threads in place, it’s time to connect them. This is often the most confusing part for beginners, but it’s simple once you know how.
Retrieving the Bobbin Thread
- Hold the Upper Thread: With your left hand (or right, whichever is your dominant hand), hold the end of the upper thread Singer machine that you threaded through the needle. Keep a slight tension on it.
- Turn the Handwheel: With your other hand, slowly turn the handwheel towards you (counter-clockwise). This brings the needle down and then back up, pulling the upper thread through the machine.
- Catch the Bobbin Thread: As the needle and take-up lever rise, the upper thread will loop downwards. Use the tip of your scissors or a seam ripper to gently catch this loop of upper thread.
- Pull Through: Pull this loop of upper thread through the needle plate opening until you have a complete loop of the upper thread. Now, pull the bobbin thread through this loop.
- Position Threads: You should now have both the upper thread and the bobbin thread coming up through the needle plate. Pull about 4-6 inches of both threads towards the back of the machine, under the presser foot.
Final Checks and Troubleshooting
You’ve threaded your Singer sewing machine! But before you start stitching, a few final checks are in order.
Pre-Sewing Checks
- Presser Foot Down: Ensure the presser foot is lowered onto the fabric. This is essential for the machine to sew correctly.
- Check Thread Path: Quickly re-trace the thread path with your eyes to ensure no step was missed.
- Test Stitch: Place a scrap piece of your intended fabric under the presser foot. Hold the thread tails gently behind the presser foot and sew a few stitches. This allows you to check tension and ensure everything is working smoothly.
Common Threading Issues and Solutions
| Problem | Cause | Solution |
|---|---|---|
| Upper thread breaks frequently | Thread not properly seated in tension discs. | Re-thread the upper thread, ensuring it goes between the tension discs. |
| Needle is bent, dull, or incorrect for fabric. | Replace the needle. Ensure it’s the right type and size for your fabric and that it’s inserted correctly (flat side at the back). | |
| Thread snagging on spool or guides. | Check spool winding, ensure thread path is clear of snags. | |
| Bobbin thread breaks | Bobbin thread not seated correctly in bobbin case/holder. | Re-thread the bobbin thread through the case slit or holder guide. |
| Bobbin case tension is too tight. | Adjust bobbin case tension (refer to manual for specific instructions). | |
| Stitches are uneven or loopy | Incorrect tension settings (upper or lower). | Adjust upper and lower thread tension. Start with small adjustments. |
| Upper thread not fully engaged with take-up lever. | Re-thread the upper thread, ensuring it passes through the take-up lever eye. | |
| Bobbin not wound evenly or is over-wound. | Rewind the bobbin neatly. | |
| Machine not properly threaded (missed a guide). | Completely re-thread the machine, paying close attention to every step. | |
| Needle goes up/down but no stitch | Bobbin thread not caught by upper thread. | Retrieve the bobbin thread using the upper thread and scissors. |
| Presser foot is up. | Lower the presser foot. | |
| Needle is inserted backwards or upside down. | Re-insert the needle correctly (flat side of shank at the back). |
Maintaining Your Singer Sewing Machine
Regular maintenance ensures your Singer sewing machine continues to thread and sew smoothly. This includes cleaning lint from around the bobbin area and needle plate, and occasional oiling as per your sewing machine manual Singer. Proper sewing machine setup Singer also involves ensuring your workspace is organized and well-lit.
Conclusion
Mastering Singer sewing machine threading is a skill that improves with practice. By following these detailed steps, paying close attention to the specific guides on your machine, and consulting your sewing machine manual Singer when needed, you’ll be well on your way to confident and successful sewing. Remember, patience and precision are key to a well-threaded machine and beautiful stitches.
Frequently Asked Questions (FAQ)
Q1: What is the most common mistake when threading a Singer sewing machine?
A1: The most common mistake is not properly seating the thread between the tension discs or failing to thread the take-up lever. These two steps are critical for correct tension.
Q2: Can I use any type of thread with my Singer sewing machine?
A2: While you can use most general-purpose sewing threads, it’s best to use good quality polyester or cotton thread recommended for your specific project and fabric type. Avoid very thick or very thin threads unless your machine is specifically set up for them.
Q3: My machine is making a weird noise when I try to sew after threading.
A3: A strange noise often indicates a threading issue, a needle problem, or something caught in the bobbin area. Ensure the machine is threaded correctly, the needle is straight and secure, and the bobbin area is free of lint and thread.
Q4: How do I know if my Singer sewing machine bobbin is wound correctly?
A4: A correctly wound bobbin will have thread evenly distributed across its surface, without any loose loops or overlapping threads. It should not be wound so full that the thread catches on anything.
Q5: Why does the thread keep breaking at the needle?
A5: This usually points to a problem with the needle itself (bent, dull, or wrong type), the needle being inserted incorrectly, or the upper thread not being properly guided through all the guides, especially the one near the needle clamp.
Q6: What if I have a vintage Singer sewing machine?
A6: Vintage Singer machines can be slightly different, but the core principles of threading remain the same. Your best resource will be a specific manual for your vintage model, as the placement of guides or the bobbin mechanism might vary. However, this general guide should still be very helpful.