
Threading a Singer sewing machine involves two key parts: the upper thread path and the bobbin. You guide the upper thread from the spool through various points down to the needle. The bobbin, holding the lower thread, sits below the needle plate. Both threads must meet and intertwine to form a stitch. This guide will walk you through each step. It will make sure your machine is ready to sew smoothly.
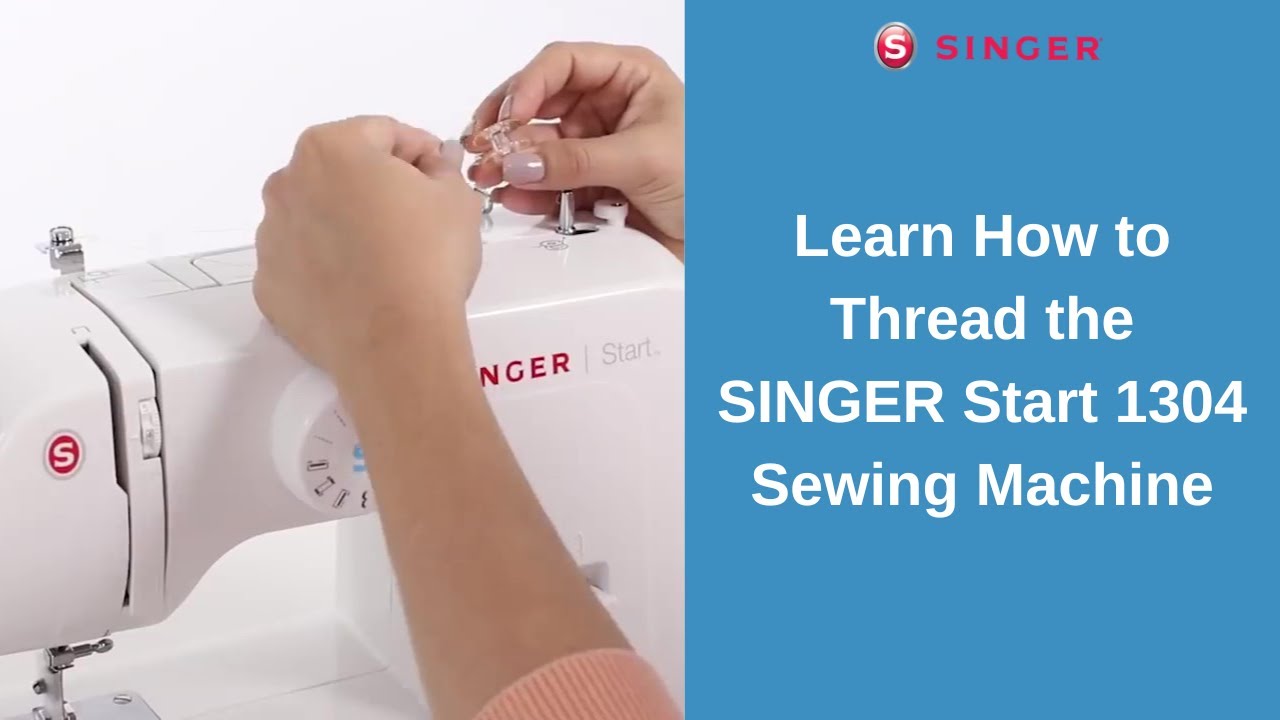
Image Source: i.ytimg.com
Getting Ready to Thread Your Machine
Before you start threading, take a few moments to prepare. Proper setup saves time. It helps prevent problems later.
Safety First
Safety is always most important.
* Unplug your machine. This stops it from turning on by accident. It keeps your fingers safe.
* Raise the needle. Turn the handwheel towards you. Make the needle go all the way up.
* Lift the presser foot. Use the lever at the back of the needle bar. Lifting the foot opens the tension disks. This is very important for correct threading.
Gathering Your Tools
You do not need many tools for threading.
* Good quality thread: Choose strong, smooth thread. Bad thread can break or make bad stitches.
* Scissors: You will need them to cut the thread.
* Your machine manual: Keep it close. It has pictures for your exact model. Every Singer machine is a little bit different.
* A small brush: This helps clean lint. Lint can cause problems.
* A small screwdriver: You might need it for some bobbin cases.
This is part of your Singer machine setup for sewing. Taking these steps helps avoid problems. It makes sewing more fun.
Mastering the Bobbin System
The bobbin holds the bottom thread. It is a vital part of your sewing. You need to fill the bobbin first. Then you put it in the machine correctly.
Singer Bobbin Winding: A Key Skill
Winding the bobbin is often the first step. You fill an empty bobbin with thread from your main spool. A properly wound bobbin helps make good stitches.
Here are the steps for Singer bobbin winding:
- Place the main thread spool. Put your thread spool on the spool pin. This is usually at the top of your machine. Make sure the thread comes off the spool smoothly. It should unwind without getting stuck.
- Guide the thread. Look for a small metal disc or hook. It is usually near the spool pin. Pass the thread under or through this guide. This creates a little tension. This tension helps the bobbin wind evenly.
- Place the bobbin. Put an empty bobbin onto the bobbin winder spindle. This is a small peg. It is often on the top right of your machine. There might be a small slot or hole in the bobbin. Put the thread end through this hole. Wind the thread around the bobbin a few times by hand. Do it clockwise.
- Engage the winder. Push the bobbin winder spindle to the right. It should click into place. This makes it ready to wind. Some machines have a little lever to push down.
- Start winding. Gently press the foot pedal. The bobbin will spin fast. It will fill with thread. The machine’s needle should not move. If it does, push the handwheel inwards. Or there might be a clutch knob to loosen.
- Stop when full. Watch the bobbin. Stop when it is full. It should not be overfilled. A small pin or lever often stops the winding automatically.
- Cut the thread. Cut the thread connecting the bobbin to the spool. Remove the full bobbin from the spindle.
Here is a table to help you with bobbin winding:
| Step Number | Action | Important Detail |
|---|---|---|
| 1 | Put thread on spool pin. | Thread unwinds smoothly. |
| 2 | Guide thread through small tension disc. | Creates even winding. |
| 3 | Place empty bobbin on spindle. | Thread goes through bobbin hole a few times. |
| 4 | Push spindle to engage winding. | Spindle clicks into place. |
| 5 | Press pedal to start winding. | Bobbin fills evenly. |
| 6 | Stop when bobbin is full. | Do not overfill. |
| 7 | Cut thread, remove bobbin. | Ready for use. |
How to Insert Bobbin Singer: Top-Loading vs. Front-Loading
Once your bobbin is wound, you must put it into the machine. Singer machines use two main types of bobbin systems. Knowing yours helps with how to insert bobbin Singer.
1. Top-Loading Bobbin (Drop-in Bobbin):
Many newer Singer machines have a top-loading bobbin. It is easy to use.
- Open the cover. Slide open the clear plastic cover over the bobbin area. This is usually on the flat bed of your machine. It is right below the needle.
- Insert the bobbin. Place the bobbin into the bobbin case. Make sure the thread spins the right way. For most Singers, the thread should unwind counter-clockwise. It should look like the letter ‘P’ when you look at it.
- Guide the thread. Find the slot or groove in the bobbin case. Pull the bobbin thread through this groove. It will often go under a small metal spring or plate. Then pull it out to the side. Leave about 4-6 inches of thread hanging out.
- Close the cover. Put the plastic cover back on.
2. Front-Loading Bobbin (Bobbin Case):
Older Singer machines, and some heavy-duty ones, use a bobbin case. This case holds the bobbin.
- Remove the bobbin case. Open the door on the front of your machine. It is usually below the needle plate. Reach in and pull out the metal bobbin case. There is often a small latch or lever to help you grab it.
- Insert the bobbin into the case. Place the wound bobbin into the metal bobbin case. The thread must unwind in the correct direction. For front-loading Singers, the thread often unwinds clockwise. It should look like the letter ‘Q’ as you hold the bobbin in the case.
- Guide the thread in the case. Pull the bobbin thread into the slot on the side of the bobbin case. It will go under a small tension spring. This spring helps control the thread. Let about 4-6 inches of thread hang out.
- Insert the case into the machine. Hold the bobbin case by its latch. Push it back into the machine’s bobbin holder. It will click into place. Make sure it is secure. Close the front door.
Always check your machine’s manual. It will show the exact direction for your bobbin. This small detail is very important. It helps prevent tangles and bad stitches.
The Singer Upper Thread Path: Step by Step
Now, let’s thread the top part of your machine. This is where the thread from the spool travels down to the needle. This is the Singer upper thread path.
Placing the Thread Spool
First, put your thread spool on the spool pin. This pin is usually at the top of your machine.
* Place the spool so the thread comes off the top or front. It should unroll smoothly.
* If your machine has a horizontal spool pin, use the cap. This cap keeps the spool from falling off.
Using Singer Thread Guides: The Start of the Journey
Your Singer machine has many guides. These guides direct the thread. They also help control its tension. Proper use of these guides is key. This is about using Singer thread guides.
- First thread guide: From the spool, pull the thread. It goes through the first guide. This might be a metal loop, hook, or a plastic clip. It is usually near the spool pin.
- Down to the tension unit: Guide the thread down. It goes into the main tension unit. This is often a slit or channel. Make sure the thread goes all the way into the channel. It should pass between two metal disks. This is where the machine controls how tight the thread is. Remember, your presser foot should be up. This opens the tension disks. If the foot is down, the disks are closed. The thread will not sit correctly.
Navigating the Take-Up Lever
The take-up lever is a very important part. It helps pull thread from the spool. It also releases thread for each stitch.
- Raise the take-up lever. Turn the handwheel towards you. Make the take-up lever go to its highest point. This is crucial for correct threading. If it is not at the top, the thread can skip out.
- Guide the thread up. From the tension unit, pull the thread up. It goes through the eye of the take-up lever. For most Singers, you pull the thread up from right to left. Or it might be from front to back. Check your manual for your specific model.
- This is your Singer take-up lever guide. It makes sure the thread moves with the needle.
Guiding Down to the Needle
From the take-up lever, the thread goes down. It follows more guides.
- Lower thread guides: There might be one or two more hooks or clips. These are on the side of the needle bar. Guide the thread through each of these. They keep the thread straight. They help stop tangles.
Threading Needle Singer: The Final Act
This is the last step for the upper thread. You thread the needle.
- Position the needle. Make sure the needle is at its highest point again. This makes the eye easy to reach.
- Thread the needle. Pull the thread through the eye of the needle.
- Which way? For most Singer machines, you thread the needle from front to back. Some older models thread from side to side. Check your manual.
- Having trouble? The eye of the needle is small. If you have trouble, use a needle threader. Many modern Singer machines have a built-in needle threader. If yours does, learn how to use it. It is a big help.
- Pull enough thread. Pull about 4-6 inches of thread through the needle’s eye. Let it hang freely.
This completes the threading needle Singer step. Your Singer upper thread path is now ready.
Bringing Threads Together: Ready to Sew
Both your upper thread and your bobbin thread are now in place. You need to bring them up together.
- Lower the presser foot. Put the presser foot down. This closes the tension disks.
- Hold the upper thread. Hold the tail of the upper thread. Hold it gently to the side or front of the machine.
- Turn the handwheel slowly. Turn the handwheel towards you. Turn it one full rotation.
- The needle will go down. It will pick up the bobbin thread loop.
- The needle will then come back up. It will bring a small loop of the bobbin thread with it.
- Pull up the bobbin thread. Use a small tool like tweezers. Or use your fingers. Pull the bobbin thread loop up through the needle plate hole.
- Pull both threads back. Pull both the upper thread and the bobbin thread. Pull them under the presser foot. Then pull them towards the back of the machine. Make sure they are both long enough. About 4-6 inches is good.
Your Singer machine is now fully threaded. It is ready for sewing.
Perfecting Your Stitches: Adjustments
Sometimes, stitches do not look right. They might be too loose or too tight. This is often a tension issue. You can fix this with a Singer sewing machine tension adjustment.
Singer Sewing Machine Tension Adjustment
Tension controls how tight your stitches are. It balances the upper and lower threads.
* What tension does: If the upper tension is too high, the bobbin thread pulls to the top. If the upper tension is too low, the upper thread pulls to the bottom.
* Look at your stitches:
* Top stitch looks good, bottom stitch looks like straight line: Upper tension is too tight. Turn the tension dial to a lower number.
* Bottom stitch looks good, top stitch looks like straight line: Upper tension is too loose. Turn the tension dial to a higher number.
* Perfect stitch: Both threads meet in the middle of the fabric. They form a neat, balanced stitch.
* Adjusting the dial: Your Singer machine has a tension dial. It has numbers on it. A higher number means more tension (tighter). A lower number means less tension (looser).
* Test on scrap fabric: Always test tension on a scrap piece of your fabric. Use the same number of layers. Use the same thread you will use for your project. Make small changes. Test after each change.
Here is a guide for Singer sewing machine tension adjustment:
| Stitch Appearance (Top Side) | Stitch Appearance (Bottom Side) | Issue | Adjustment Needed (Upper Tension Dial) |
|---|---|---|---|
| Loops or messy | Straight line | Upper thread too loose | Increase number (e.g., from 4 to 5) |
| Straight line | Loops or messy | Upper thread too tight | Decrease number (e.g., from 4 to 3) |
| Balanced, neat | Balanced, neat | Perfect tension | No change |
| Random loops, irregular | Random loops, irregular | Check threading, bobbin, or needle | (Not always tension, see troubleshooting) |
Remember, a perfect stitch looks like two interlocking lines. They should meet neatly in the middle of your fabric layers.
Troubleshooting Common Thread Issues
Even with perfect threading, problems can happen. Knowing how to fix them saves time and frustration.
Troubleshooting Singer Thread Breaking
Thread breaking is a common problem. It stops your sewing. Here are reasons why your thread might break: This is for troubleshooting Singer thread breaking.
- Bad quality thread: Old, weak, or cheap thread breaks easily. Use good quality thread.
- Incorrect threading: A missed guide or a thread not fully seated in the tension disks can cause breaks. Re-thread your machine from the start.
- Needle problems:
- Wrong needle size: A needle that is too small for the thread size can cause friction.
- Bent or dull needle: A damaged needle can snag the thread. Change your needle often.
- Needle inserted wrong: If the needle is not fully in, or turned the wrong way, it can hit parts of the machine.
- Tension too tight: If the upper tension is too high, it puts too much stress on the thread. This makes it snap. Loosen the tension slightly.
- Lint buildup: Lint and dust can gather in the thread path or tension disks. This can block the thread. Clean your machine regularly. Use a small brush.
- Bobbin problems:
- Bobbin wound unevenly.
- Bobbin inserted wrong.
- Too much lint in the bobbin area.
- Machine needs oiling: Some older machines need oil. Check your manual.
Singer Sewing Machine Skipped Stitches Fix
Skipped stitches mean the machine is not forming a stitch every time. This leaves gaps in your sewing. This is for Singer sewing machine skipped stitches fix.
- Needle inserted wrong: The needle has a flat side. This flat side almost always faces the back of the machine. Make sure it is fully pushed up into its clamp.
- Bent or dull needle: A damaged needle cannot pick up the bobbin thread correctly. Change your needle.
- Wrong needle type for fabric: Use the right needle for your fabric. A ballpoint needle for knits. A sharp needle for wovens. A universal needle for most fabrics.
- Incorrect threading: Again, a missed thread guide or bad threading can cause skips. Re-thread the entire machine.
- Tension problems: Incorrect tension can lead to skipped stitches. Adjust your tension.
- Lint buildup: Dirt and lint can get in the hook area or bobbin case. This stops the hook from grabbing the thread. Clean this area well.
- Using the wrong bobbin: Use only bobbins made for your Singer machine model. Other bobbins might not fit or spin right.
- Presser foot pressure: If your machine has adjustable presser foot pressure, it might be too light. Increase it if fabric is not moving evenly.
Always re-thread your machine first if you have problems. Most sewing problems come from threading mistakes.
Final Checks Before You Sew
You have threaded your machine. You have fixed any issues. Now, do a quick final check.
- Both threads are under the foot: Make sure the upper thread and bobbin thread are pulled back. They should be under the presser foot.
- Correct needle for fabric: Double-check your needle. Is it the right type and size for your fabric?
- Power on: Plug in your machine. Turn on the power switch. The light should come on.
- Test on scrap fabric: Never start on your project right away. Take a scrap piece of your fabric. Sew a few lines. Check the stitches on both sides. Make sure they are perfect.
FAQ Section
Here are common questions about Singer sewing machine threading and care.
How often should I clean my Singer machine?
You should clean your Singer machine regularly. This means after every few projects. Or after 8-10 hours of sewing. Lint builds up fast. Use a small brush to remove lint from the bobbin area. Also, clean around the feed dogs (the teeth that move the fabric). Never use canned air. It can push lint deeper into the machine.
Can I use any thread in my Singer machine?
It is best to use good quality all-purpose sewing thread. Polyester thread is a good choice for most projects. Avoid very cheap or old thread. These can break easily. They can also leave a lot of lint. Some machines are picky about certain types of thread. For example, very thick or very thin threads might need special needles or tension changes.
What if my bobbin thread looks bad, but the upper thread is perfect?
If your bobbin thread looks bad (loops, too loose, too tight), first check the bobbin itself.
* Is it wound evenly?
* Is it inserted correctly in the bobbin case or drop-in area?
* Is the thread in the bobbin case tension slot?
* Is there lint in the bobbin area?
If the bobbin is perfect, then the problem is usually with the upper tension. Adjust the upper tension dial. It might be too tight or too loose.
Why does my upper thread keep coming out of the needle?
This often happens if you did not pull enough thread through the needle. It can also happen if the take-up lever was not at its highest point when you started.
* Pull at least 4-6 inches of thread through the needle.
* Make sure the take-up lever is at the top when you thread the machine.
* Hold the thread ends when you start sewing. Do this for the first few stitches. This helps the machine grab the thread.
Threading your Singer sewing machine may seem tricky at first. But with practice, it becomes easy. Follow these steps carefully. You will be sewing smoothly in no time. Happy sewing!