
Can you use a Singer sewing machine without a manual? Yes, you can start learning how to use a Singer sewing machine with this guide, but always refer to your specific Singer sewing machine manual for detailed instructions and safety warnings. This guide will help you get started with the basics of operating your Singer sewing machine.
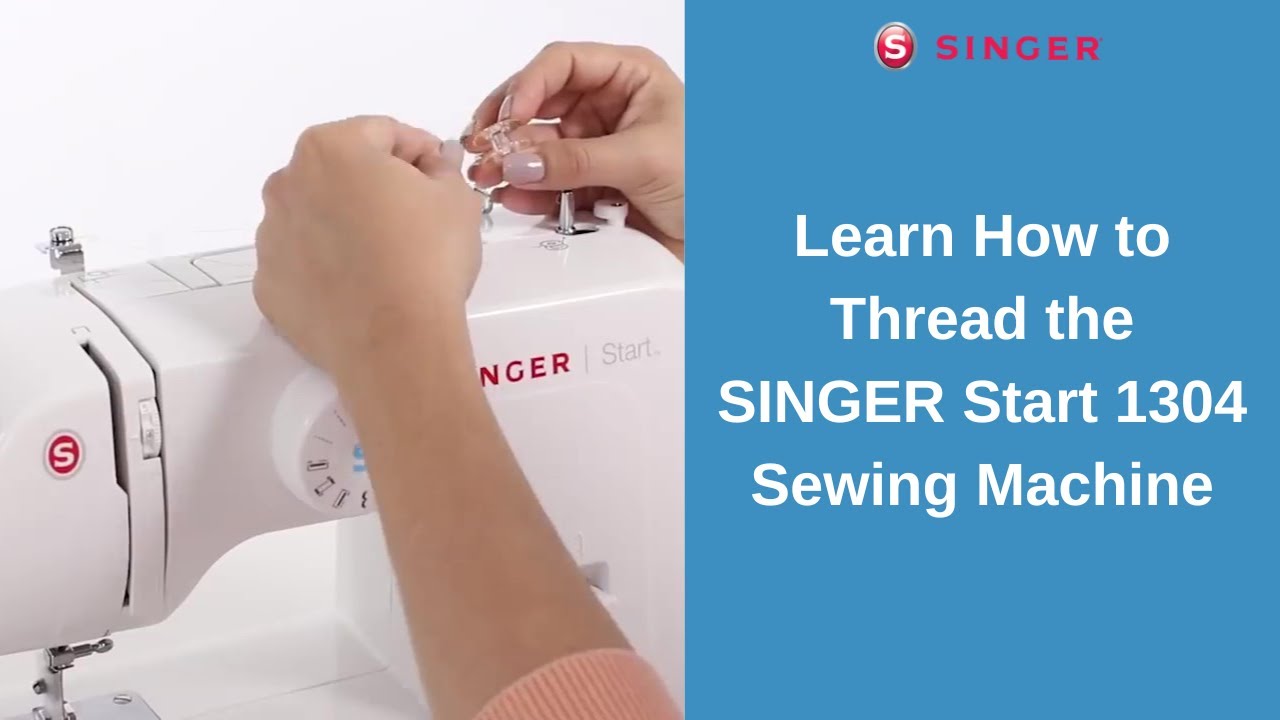
Image Source: i.ytimg.com
Getting Started with Your Singer Sewing Machine
Singer sewing machines are renowned for their reliability and ease of use, making them a fantastic choice for beginners and experienced sewers alike. Whether you’ve just unboxed your brand-new machine or are dusting off a vintage treasure, this guide will walk you through the essential steps to get sewing.
Essential Singer Sewing Machine Parts
Before you begin, it’s helpful to know the main parts of your Singer sewing machine.
- Needle: The sharp point that pierces the fabric and carries the upper thread.
- Presser Foot: Holds the fabric down against the feed dogs.
- Feed Dogs: Small metal teeth that move the fabric forward as you sew.
- Bobbin: A small spool that holds the lower thread.
- Bobbin Case: Holds the bobbin and regulates the tension of the lower thread.
- Handwheel: Controls the movement of the needle; always turn it towards you.
- Stitch Selector Dial: Allows you to choose different stitches.
- Tension Dials: Adjust the tightness of the upper and lower threads.
- Foot Pedal: Controls the speed of the sewing machine.
- Power Switch: Turns the machine on and off.
- Thread Spool Pin: Holds the spool of upper thread.
- Thread Guides: Help direct the thread properly through the machine.
- Needle Clamp Screw: Holds the Singer sewing machine needle in place.
Setting Up Your Singer Sewing Machine
1. Powering On
First, plug your Singer sewing machine into a power outlet. Locate the power switch, usually on the side or back of the machine, and turn it on.
2. Preparing the Bobbin
A properly wound Singer sewing machine bobbin is crucial for good stitching.
- Wind the Bobbin:
- Place a spool of Singer sewing machine thread onto the spool pin.
- Find the bobbin winder spindle. Slide an empty Singer sewing machine bobbin onto it.
- Guide the thread from the spool through the bobbin winder thread guide.
- Hold the end of the thread, and gently press the foot pedal to start winding. Stop after a few wraps, and catch the thread end by inserting it into a small notch on the bobbin.
- Continue winding until the bobbin is full. Most machines have an automatic stop or a way to disengage the needle so it doesn’t move while winding.
- Cut the thread and remove the bobbin.
3. Inserting the Bobbin
How you insert the Singer sewing machine bobbin depends on your machine type (front-load or top-load bobbin).
- Front-Load Bobbin:
- Remove the bobbin cover plate.
- Place the wound bobbin into the bobbin case with the thread unwinding counter-clockwise.
- Pull about 4-6 inches of thread through the slit in the bobbin case.
- Replace the bobbin cover.
- Top-Load (Drop-In) Bobbin:
- Remove the needle plate.
- Place the wound bobbin into the bobbin case, ensuring the thread unwinds counter-clockwise.
- Pull the thread through the designated slot until about 4-6 inches are free.
- Replace the needle plate.
4. Threading the Upper Thread
Proper threading of the Singer sewing machine thread is key to preventing skipped stitches and bird’s nests.
- Spool Placement: Place your spool of Singer sewing machine thread onto the spool pin.
- Thread Path: Follow the numbered guides on your machine. This typically involves guiding the thread up, through the tension discs, around the take-up lever, and down through the remaining thread guides.
- Needle Insertion: Thread the Singer sewing machine needle from front to back. Pull about 4-6 inches of thread through the eye.
- Bringing Up the Bobbin Thread: Hold the free end of the upper thread. Turn the handwheel towards you to lower the needle, catching the bobbin thread. Then, pull the upper thread to bring the loop of bobbin thread up through the needle plate. Pull both threads to the back and under the presser foot.
Sewing Basics with Your Singer Sewing Machine
Now that your machine is set up, let’s explore how to actually sew.
Choosing Your Singer Sewing Machine Stitches
Most Singer sewing machines offer a variety of stitches. For general sewing, the straight stitch and zigzag stitch are most common.
- Straight Stitch: Used for seams, hemming, and topstitching. Adjust the stitch length for different fabrics.
- Zigzag Stitch: Useful for finishing raw edges, sewing knits, and decorative purposes.
- Other Stitches: Many machines have buttonhole stitches, decorative stitches, and overcasting stitches. Consult your Singer sewing machine manual to identify and use these.
Selecting and Adjusting Stitches
- Select a Stitch: Use the stitch selector dial or buttons on your machine to choose the desired stitch. The selected stitch will usually be displayed on a screen or indicated by a marker.
- Adjust Stitch Length: For straight stitches, a length of 2-3mm is standard for most fabrics. Adjust for lighter or heavier materials.
- Adjust Stitch Width: This is primarily for zigzag stitches. A wider stitch is good for stretch fabrics, while a narrower one is for finishing edges.
Adjusting Singer Sewing Machine Tension
Singer sewing machine tension is critical for creating balanced stitches. If the tension is off, you’ll see loops on either side of the fabric.
- Upper Thread Tension: This is usually adjusted with the top dial. A standard setting is often around 3-5.
- Too Tight: The bobbin thread will show on the top of the fabric. Increase the upper tension (turn dial to a higher number).
- Too Loose: The upper thread will show on the bottom of the fabric. Decrease the upper tension (turn dial to a lower number).
- Lower Thread Tension (Bobbin Tension): This is adjusted by a small screw on the bobbin case. It’s best to leave this as is unless you’re experiencing consistent tension issues. If adjustment is needed, a slight turn of the screw (clockwise to tighten, counter-clockwise to loosen) is usually sufficient.
Table: Troubleshooting Common Tension Issues
| Problem | Cause | Solution |
|---|---|---|
| Loops on top of fabric | Upper thread tension too loose | Increase upper thread tension (higher number). |
| Loops on bottom of fabric | Upper thread tension too tight | Decrease upper thread tension (lower number). |
| Puckering fabric | Tension too tight overall, or needle dull | Loosen upper thread tension, check needle, ensure proper threading. |
| Skipped stitches | Wrong Singer sewing machine needle, dull needle, improper threading | Use the correct needle type and size for your fabric. Re-thread the machine. Ensure needle is inserted correctly. |
Using the Presser Foot Pedal
The Singer sewing machine foot pedal controls the speed of the machine.
- Place Fabric: With the needle up, place your fabric under the presser foot. Lower the presser foot onto the fabric.
- Start Sewing: Gently press the foot pedal. The more you press, the faster the machine sews.
- Stop Sewing: Release the foot pedal to stop. Always raise the needle to its highest position before removing fabric.
Sewing Your First Seam
- Set Up: Thread your machine and place your fabric under the presser foot.
- Start: Hold both the upper and bobbin threads at the back for the first few stitches.
- Sew: Gently press the foot pedal to start. Guide the fabric with your hands, but don’t push or pull. The feed dogs will move the fabric.
- Backstitching: To secure your seam, sew a few stitches forward, then use the reverse lever (usually near the needle) to sew a few stitches backward. Then continue sewing forward.
- Finish: Sew to the end of your seam, backstitch again, and lift the presser foot. Cut the threads.
Fabric and Needle Considerations
Choosing the right Singer sewing machine needle and Singer sewing machine thread for your fabric makes a big difference.
Selecting the Right Singer Sewing Machine Needle
Needles come in various sizes and types for different fabrics.
- Universal Needles: Good for most common fabrics like cotton, linen, and polyester blends. Available in sizes 70/10 (fine) to 90/14 (medium) to 110/18 (heavy).
- Ballpoint/Jersey Needles: Have a rounded tip that pushes between fabric fibers, preventing runs in knits and stretch fabrics.
- Sharps/Microtex Needles: Have a very sharp point for piercing tightly woven fabrics like silk and microfiber without snagging.
- Denim/Jeans Needles: Stronger and sharper for piercing denim and other heavy fabrics.
- Leather Needles: Have a wedge-shaped point for piercing leather.
Table: Singer Sewing Machine Needle Guide
| Fabric Type | Recommended Needle Type | Recommended Needle Size |
|---|---|---|
| Cotton, Linen | Universal | 70/10 – 90/14 |
| Silk, Rayon | Sharp/Microtex | 60/8 – 70/10 |
| Knits, Jersey | Ballpoint/Jersey | 70/10 – 90/14 |
| Denim, Canvas | Denim/Jeans | 90/14 – 110/18 |
| Polyester Blends | Universal | 70/10 – 90/14 |
| Leather | Leather | 90/14 – 110/18 |
Choosing Your Singer Sewing Machine Thread
- All-Purpose Polyester Thread: The most versatile and a good choice for most projects.
- Cotton Thread: Best for quilting and 100% cotton fabrics.
- Specialty Threads: Silk, nylon, or metallic threads are for specific decorative or functional purposes.
Always ensure your Singer sewing machine thread is in good condition, not frayed or old.
Advanced Sewing Techniques on Your Singer
Once you’re comfortable with basic sewing, you can explore more advanced features.
Buttonholes
Most Singer sewing machines have a built-in buttonhole function.
- Attach Buttonhole Foot: Replace the standard presser foot with the buttonhole foot.
- Mark Buttonhole: Place your fabric under the foot, marking the buttonhole start and end points.
- Select Buttonhole Stitch: Choose the appropriate buttonhole stitch on your machine.
- Sew: Lower the presser foot and press the foot pedal. The machine will automatically sew the buttonhole.
- Finish: Lift the presser foot and cut the buttonhole open with a seam ripper or a buttonhole cutter.
Other Singer Sewing Machine Stitches
Experiment with decorative stitches to add flair to your projects. Refer to your Singer sewing machine manual for specific instructions on using stitches like satin stitch, heirloom stitches, or quilting stitches.
Singer Sewing Machine Maintenance
Regular Singer sewing machine maintenance keeps your machine running smoothly and prolongs its life.
Cleaning Your Machine
Dust and lint build up inside your machine and can affect performance.
- Frequency: Clean after every few projects, or more often if you sew frequently or with linty fabrics.
- What to do:
- Unplug the machine.
- Remove the needle and presser foot.
- Open the bobbin area and remove the bobbin.
- Use a small brush (often provided with the machine) to sweep away lint from the feed dogs, bobbin area, and presser foot holder.
- You can use a lint-free cloth to wipe down external surfaces.
Oiling Your Machine
Some Singer sewing machines require occasional oiling. Check your Singer sewing machine manual to see if your model needs oiling and where to apply the oil. Use only Singer-approved sewing machine oil.
Replacing the Singer Sewing Machine Needle
A dull or bent needle can cause skipped stitches, fabric damage, and thread breakage.
- When to replace:
- After every 8-10 hours of sewing.
- When you change fabric types.
- If you experience sewing problems.
- How to replace:
- Ensure the machine is unplugged.
- Turn the handwheel to raise the needle to its highest position.
- Loosen the needle clamp screw.
- Remove the old Singer sewing machine needle.
- Insert the new needle, ensuring the flat side of the shank faces the back.
- Push the needle up as far as it will go, and tighten the needle clamp screw.
Checking Singer Sewing Machine Parts
Periodically check all Singer sewing machine parts for wear or damage. Ensure screws are tight and that no parts are loose or broken.
Singer Sewing Machine Troubleshooting
Even with good maintenance, you might encounter issues. Here are common problems and their solutions.
Common Singer Sewing Machine Problems
- Skipped Stitches:
- Cause: Wrong needle, dull needle, bent needle, improper threading, incorrect needle insertion.
- Solution: Check needle type and size, replace needle, re-thread the machine, ensure the needle is inserted correctly.
- Thread Breaking:
- Cause: Tension too tight, needle burr, wrong needle size, rough thread path, forcing fabric.
- Solution: Adjust tension, check/replace needle, ensure correct threading, use a smoother thread.
- Fabric Bunching/Puckering:
- Cause: Tension too tight, dull needle, incorrect stitch length, fabric feed issues.
- Solution: Loosen tension, check/replace needle, adjust stitch length, ensure feed dogs are up and clean.
- Machine Not Sewing:
- Cause: Not plugged in, power switch off, foot pedal not pressed, needle set too high, thread jammed.
- Solution: Check power connections, ensure foot pedal is used, check needle position, re-thread and clear any jams.
- Bird’s Nesting (Thread Loops Under Fabric):
- Cause: Improper threading of upper thread, bobbin not inserted correctly, lint in bobbin case, tension too loose.
- Solution: Re-thread the entire machine, ensure bobbin is seated correctly, clean the bobbin area, adjust upper tension.
When to Seek Professional Help
If you’ve tried troubleshooting and are still experiencing issues, or if you suspect a mechanical problem with your Singer sewing machine parts, it’s best to contact a qualified sewing machine repair technician.
Frequently Asked Questions (FAQ)
How often should I change my Singer sewing machine needle?
It’s recommended to change your Singer sewing machine needle after about 8-10 hours of sewing time, or whenever you notice signs of dullness or damage.
What is the best Singer sewing machine thread to use?
For most general sewing projects, an all-purpose polyester thread is a good choice. The specific type of fabric you are sewing will influence the best thread choice.
How do I adjust the Singer sewing machine tension?
You typically adjust the upper thread tension using a dial on the machine. The lower thread tension is adjusted on the bobbin case with a small screw. Always refer to your specific Singer sewing machine manual for detailed instructions.
My Singer sewing machine is making a strange noise. What could be the problem?
Strange noises can indicate various issues, from lint buildup to a mechanical problem. First, try cleaning and lubricating your machine according to the Singer sewing machine manual. If the noise persists, it might be a more serious issue requiring professional attention.
Can I use different brands of Singer sewing machine parts?
While some generic Singer sewing machine parts might fit, it’s always best to use genuine Singer parts for optimal performance and to avoid damaging your machine. This includes needles and bobbins.
By following these steps and consulting your Singer sewing machine manual, you’ll be well on your way to mastering your Singer sewing machine and creating beautiful projects!