
Do you want to know how to lock stitches sewing machine? Backstitching is the simplest way to do this. It is the main method for sewing machine stitch locking. It makes your seams strong and stops them from coming apart. You use a sewing machine reverse stitch to do it. This guide will show you how to do it step by step. It works for most sewing machines.
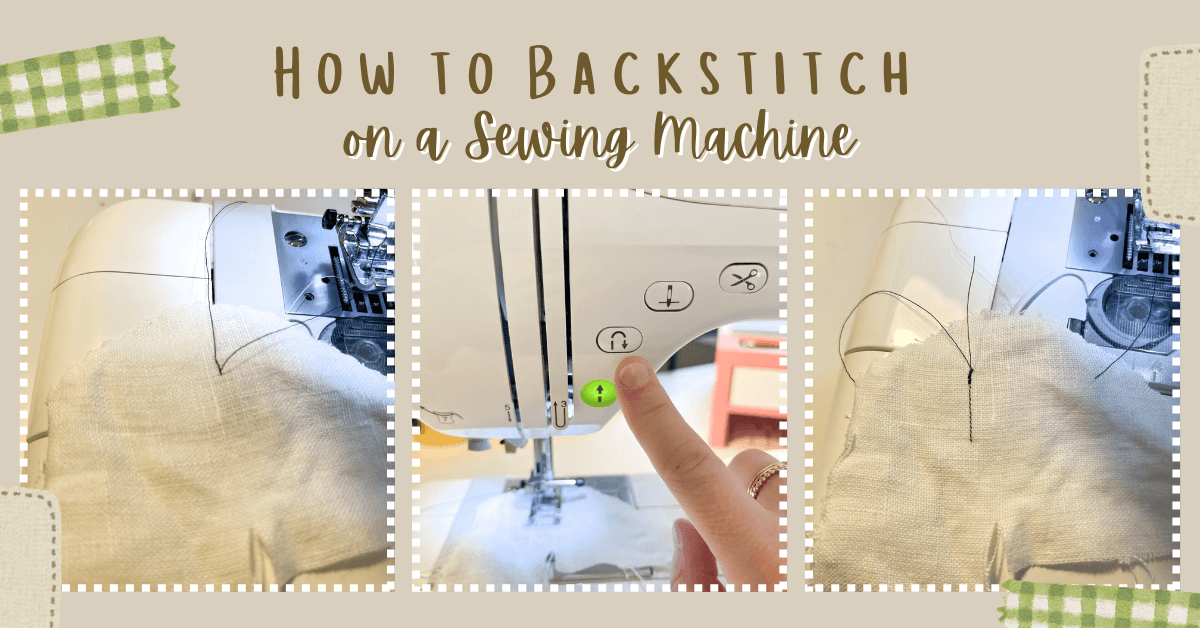
Image Source: dropinblog.net
Why Backstitch? It Makes Your Seams Strong
Sewing is fun. You make clothes, bags, or fix things. But stitches can come undone. This happens if you don’t make the start and end strong. Backstitching fixes this. It is like tying a knot with your machine.
Think about your seams. They hold fabric pieces together. If the first or last few stitches are loose, the whole seam can unravel. This is bad. Your project falls apart.
Backstitching lays stitches on top of each other. You sew forward a little. Then you sew backward over those stitches. Then you sew forward again. This builds up thread in one spot. It makes that part of the seam very strong. It creates a secure seam ends sewing machine needs. It is the key to preventing stitches unraveling machine stitches on your project.
Grasping The Reverse Lever
Most sewing machines have a way to sew backward. This is often a lever or a button. It might be on the front or the side of your machine. Finding this is the first step.
H4. What the Reverse Lever Does
When you push or hold this lever or button, your machine changes direction. It normally sews away from you. When you use the reverse lever sewing machine, it sews towards you. The needle still goes up and down. The feed dogs still move the fabric. But they move it the other way.
H4. Finding Your Reverse Lever or Button
Look at your machine. Is there a lever? It might be big or small. Is there a button? It might have an arrow pointing backward. Check your machine’s book if you can’t find it. The book will show you where it is. It will also tell you how to use it. Some machines have a lever you hold down. Others have a button you push once to start reverse and push again to stop.
Steps To Backstitch At The Start
This is how you start sewing a seam the right way. You need to make the beginning strong.
H4. Get Ready To Sew
Put your fabric under the presser foot. Line up the edge of the fabric with a line on the sewing machine plate. This helps you sew straight. Lower the presser foot down onto the fabric.
H4. Start Sewing Forward
Push the foot pedal gently. Sew just a few stitches forward. Three or four stitches are usually enough. Don’t sew too many. These stitches are your base.
H4. Use The Reverse Function
Now, use the reverse lever or button. Push it or hold it down. Keep the foot pedal going. Sew backward over the stitches you just made. Sew back the same amount. Sew over those three or four stitches. You are now sewing machine reverse stitch stitches right on top of your starting stitches.
H4. Sew Forward Again
Stop using the reverse function. If it’s a lever you held, let go. If it’s a button, push it again. Your machine will now sew forward again. Sew forward over the backstitches you just made.
H4. Continue Your Seam
Now you have sewn forward, backward, and forward again right at the start. This makes the start very strong. You can now sew your seam all the way to the end. This is sewing machine stitch reinforcement for the start of your seam.
Steps To Backstitch At The End
Making the end of your seam strong is just as important as the start.
H4. Reach The End Of Your Seam
Sew your seam until you get to the end of the fabric edge or where your seam should stop. Sew right off the edge if needed, or stop right at the corner or mark.
H4. Use The Reverse Function
Stop sewing forward. Use the reverse lever or button. Push it or hold it down. Sew backward for about three or four stitches. Sew backward over the end of your seam.
H4. Sew Forward Again
Stop using the reverse function. Let go of the lever or push the button again. Sew forward over the backstitches you just made. Sew forward for three or four stitches again. You might sew just off the edge of the fabric.
H4. Finish The Seam
You have now sewn forward, backward, and forward again at the end. This makes the end very strong. Lift the needle up. Lift the presser foot up. Pull your fabric away from the machine. Cut the threads.
Why Backstitching Works
Backstitching is a simple trick. It makes your stitches stay put.
H4. It Piles Up Stitches
When you backstitch, you put stitches on top of each other. Imagine laying ropes side by side. If you lay ropes forward, then back on top, then forward again, they get tangled up. The thread on your machine does this. It wraps around itself many times in the same place.
H4. It Prevents Unraveling
When thread is wrapped around itself, it’s hard for it to pull free. If you just stop sewing at the end of a seam, the thread can just pull out. Backstitching stops this pull. It locks the stitches in place. This is secure seam ends sewing machine always needs.
H4. It Makes Seams Last
Clothes and other sewn items get used. They get pulled. They get washed. If the seams are not strong, they break open. Backstitching makes sure your seams can handle wear and tear. It gives you sewing machine stitch reinforcement where it’s needed most.
When To Use Backstitching
You don’t need to backstitch everywhere. But there are key times to do it.
H4. At The Start of Every Seam
Always backstitch when you begin a seam. This is the most common place. It locks the first stitches. This is part of starting ending seam sewing machine practice.
H4. At The End of Every Seam
Always backstitch when you finish a seam. This is just as important as the start. It locks the last stitches. This is also part of starting ending seam sewing machine practice.
H4. When Sewing Pockets
Pocket edges need to be strong. They get used a lot. Backstitching at the start and end of pocket seams makes them last.
H4. When Sewing Zippers
Zipper seams hold the zipper in place. These seams get pulled open and closed often. Backstitching makes sure they don’t come undone.
H4. When Sewing Straps or Handles
Things with straps or handles get a lot of pull. Backstitching these points is very important. It makes sure the strap stays attached. Reinforce stitches sewing machine makes here are vital.
H4. In Areas With High Stress
Anywhere your sewing project will get pulled, stretched, or used roughly needs backstitching. This helps in preventing stitches unraveling machine work in these areas.
When Not To Backstitch
Sometimes, backstitching is not the best choice.
H4. When You Will Sew Over The Seam Later
If you are sewing two pieces together, and you know another seam will cross over the start or end later, you might not need to backstitch there. The new seam will hold the first one down.
H4. On Very Light or Thin Fabrics
On some delicate fabrics, backstitching can create a thick bump. This can look bad or damage the fabric. In these cases, you might use a tiny stitch length at the start and end instead. Or tie off the threads by hand.
H4. For Gathering Stitches
Gathering stitches are meant to be pulled and adjusted. You don’t want to lock them.
H4. For Basting Stitches
Basting stitches are temporary. You sew them to hold fabric together for a short time. Then you take them out. You don’t want to lock them.
Other Ways To Secure Stitches
Backstitching is the most common way. But there are other methods for sewing machine stitch locking.
H4. Reduce Stitch Length
At the start and end of a seam, you can set your machine to sew very short stitches. Sew three or four short stitches. Then change back to your normal stitch length. Sew the seam. At the end, change back to short stitches. Sew three or four. Very short stitches are harder to unravel. This helps secure seam ends sewing machine makes.
H4. Tie Off Threads By Hand
After you finish a seam without backstitching, pull the thread tails to the back of the fabric. Tie them in a knot by hand. This works well on delicate fabrics where backstitching is too bulky. This is a manual way of preventing stitches unraveling machine work.
H4. Lock Stitch Button
Some modern machines have a special “lock stitch” button. This is different from reverse. When you push this button, the machine sews a few tiny stitches in place. It doesn’t sew backward. It just stitches up and down in the same spot. This creates a small knot of thread. It’s a neat way of sewing machine stitch locking without the bulk of backstitching. This is a feature on automatic backstitch sewing machine models.
Automatic Backstitch Machines
Some newer sewing machines make backstitching even easier.
H4. How They Work
These machines have settings for starting ending seam sewing machine work. You can tell the machine to backstitch for you at the start and end. You pick the number of stitches. The machine does it automatically. It might sew forward, backward, forward, then stop. Or it might just sew a few extra-short stitches. This depends on the machine. This is the automatic backstitch sewing machine function.
H4. Benefits of Automatic Backstitching
- Easy: You don’t have to remember to push a lever.
- Neat: The backstitching is often very even.
- Fast: It happens quickly.
H4. Check Your Machine
See if your machine has this feature. Look for buttons with symbols for starting and ending seams. Read your machine’s book to learn how to use it.
Practicing Your Backstitch
Like anything new, backstitching takes a little practice.
H4. Get Scraps
Use some extra pieces of fabric. It does not matter what kind.
H4. Draw Lines
Draw some lines on the fabric with a pen or chalk. These lines will be your pretend seams.
H4. Sew and Backstitch
Practice sewing along the lines.
– Put fabric under foot.
– Lower foot.
– Sew forward 3 stitches.
– Push reverse.
– Sew backward 3 stitches.
– Let go of reverse.
– Sew forward along the line.
– Get to the end of the line.
– Stop.
– Push reverse.
– Sew backward 3 stitches.
– Let go of reverse.
– Sew forward 3 stitches.
– Stop.
– Lift foot.
– Cut threads.
H4. Look At Your Stitches
See how your backstitching looks.
– Are the stitches right on top of each other?
– Is it too bulky? (Maybe you sewed too many stitches).
– Is it strong? Try pulling the threads.
Keep practicing until you feel good about it. This helps you master the sewing machine reverse stitch.
Troubleshooting Backstitching Problems
Sometimes things don’t go right.
H4. Stitches Are Not Lining Up
Maybe your backward stitches are next to your forward ones, not on top.
– Why it happens: You might be moving the fabric yourself. Or the machine’s feed dogs are not moving it straight in reverse.
– How to fix: Keep your hands steady on the fabric. Let the machine feed it. Some machines just don’t sew reverse perfectly straight. Just get them as close as you can. Three stitches forward, three back is often enough even if not perfectly stacked. This is still enough sewing machine stitch reinforcement.
H4. Backstitch Is Too Bulky
Too much thread builds up.
– Why it happens: You sewed too many stitches forward and back. Or your thread is very thick.
– How to fix: Only sew 2-4 stitches forward and back. Use normal sewing thread. On very fine fabrics, use fewer stitches or try the hand-tying method.
H4. Machine Won’t Sew Backward
The reverse lever or button does nothing.
– Why it happens: The machine might be broken. Or you are trying to sew a stitch type that cannot go backward (like zig-zag on some machines).
– How to fix: Check your machine book. Some stitches are forward only. If it’s a straight stitch and it won’t go back, the machine might need service.
H4. Fabric Jams Up
The fabric gets stuck when backstitching.
– Why it happens: You might be trying to backstitch over a very thick seam. Or the fabric is too thin and getting pushed down into the needle hole.
– How to fix: Go slowly. Use a thinner needle for fine fabrics. Put a piece of tear-away stabilizer under thin fabric. Don’t backstitch over giant bumps. Sew up to the bump, stop, lift the foot, move past the bump, lower foot, start again. Then reinforce stitches sewing machine makes near the bump another way if needed.
Types of Machines and Backstitching
Most home sewing machines can backstitch.
H4. Mechanical Machines
These have levers and dials. You usually hold a lever down to backstitch.
H4. Electronic Machines
These often have buttons. You might push a button to switch between forward and reverse. Some have the automatic backstitch setting.
H4. Computerized Machines
These have screens. They almost always have automatic backstitch options. They offer very precise sewing machine stitch locking.
No matter the type, the basic idea is the same: sew back over your stitches to make them strong. It’s the standard way of preventing stitches unraveling machine sewn seams.
The Importance of Secure Seam Ends
Let’s talk more about why this matters. Your sewing project needs to hold up.
H4. Clothing Needs Strength
Clothes get pulled on when putting them on and taking them off. Seams can rip. Backstitching helps stop this. It makes sure your seams are solid.
H4. Bags and Totes Carry Weight
Bag seams hold weight. If the seams at the handles or corners are weak, the bag will break. Backstitching is critical for bags. It is key to secure seam ends sewing machine makes on heavy-duty projects.
H4. Items For Kids Get Pulled
Kids are tough on things. Toys, clothes, blankets get a lot of rough use. Backstitching makes sure they last longer. It reinforces stitches sewing machine makes for kids’ items.
H4. Preventing Frustration
Imagine finishing a big project, only to have a seam open up the first time you use it. This is frustrating! Simple backstitching prevents this heartache. It’s a small step for major payoff in preventing stitches unraveling machine work.
Sewing Machine Stitch Reinforcement Details
Backstitching is a simple way to reinforce stitches sewing machine makes. But what does reinforcement really mean in sewing?
H4. Adding Strength
It means making a seam stronger than a single line of stitches. Backstitching adds strength by piling up thread.
H4. Spreading Stress
When a seam is pulled, the force goes along the stitch line. If the end is weak, all that force hits the first stitch, and it can break. When you backstitch, the force is spread over many stitches at the start and end. This helps prevent the stitches from breaking free. This is effective sewing machine stitch reinforcement.
H4. Locking The Thread
The thread is locked in place. It cannot easily pull out of the fabric holes. This is the core of sewing machine stitch locking.
Steps For A Mid-Seam Backstitch
Sometimes, you might need to reinforce stitches sewing machine makes in the middle of a seam. Maybe you had to stop and restart. Or you know a spot will take extra stress.
H4. Sew Up To The Spot
Sew your seam like normal until you reach the point you want to make strong.
H4. Stop and Backstitch
Stop sewing forward. Push the reverse lever. Sew backward 2-3 stitches.
H4. Sew Forward Again
Stop using reverse. Sew forward over those stitches. Continue sewing forward along your seam line. Sew forward about 2-3 stitches past where you started the backstitch.
H4. Continue Your Seam
You have now made that spot in the middle much stronger. You can continue sewing your seam to the end.
This mid-seam backstitch is less common than starting and ending backstitches. But it is useful for fixing mistakes or adding extra strength to specific points. It’s another way of using the sewing machine reverse stitch for reinforcement.
Making Your Backstitching Look Neat
Sometimes, backstitching can look messy. Here are tips for neatness.
H4. Sew Slowly
Don’t speed through the backstitch. Go slow and steady. This helps you keep the stitches right on top of each other.
H4. Keep Fabric Flat
Make sure the fabric is flat under the foot. Don’t let it bunch up.
H4. Use Matching Thread
Use thread that matches your fabric. This makes the backstitching less noticeable.
H4. Don’t Overdo It
Sewing just 2-4 stitches forward and back is enough. Too many stitches create a thick lump that looks bad. Keep your sewing machine stitch locking simple and neat.
H4. Trim Threads Close
After you cut your project free, trim the little thread tails close to the fabric. Be careful not to cut the seam itself.
Comparing Backstitch Methods
Let’s look at the different ways to lock stitches.
| Method | How It Works | Pros | Cons | Best Use |
|---|---|---|---|---|
| Standard Backstitch | Sew forward, back over, forward again. | Very strong, works on most machines. | Can be bulky, can look messy if not careful. | Most seams on medium-heavy fabrics. |
| Short Stitch Length | Sew tiny stitches at start/end. | Flatter finish, less bulky. | Less strong than backstitch on its own. | Delicate fabrics, when minimal bulk is key. |
| Hand Tying | Pull threads to back, tie a knot. | Invisible on the front. | Takes more time, can be fiddly. | Very fine fabrics, visible stitching areas. |
| Lock Stitch Button | Machine sews tiny stitches in place. | Very neat, very strong, automatic. | Only on some machines, creates small knot. | Modern machines, clean finish needed. |
Backstitching with the sewing machine reverse stitch is the standard skill. It’s the one everyone should know. It gives good sewing machine stitch locking.
Summing Up Backstitching
Backstitching is a key skill in sewing. It is easy to learn. It makes a big difference in how strong your projects are.
H4. Basic Steps Reviewed
- Put fabric under the foot.
- Sew forward a few stitches (3-4).
- Use the reverse lever/button.
- Sew backward over those stitches.
- Release the lever/button.
- Sew forward over those stitches again.
- Sew your seam to the end.
- At the end, stop.
- Use the reverse lever/button.
- Sew backward a few stitches (3-4) over the end of the seam.
- Release the lever/button.
- Sew forward a few stitches (3-4) over those stitches again.
- Finish and cut threads.
This simple action of using the reverse lever sewing machine is your main tool for sewing machine stitch locking. It provides essential sewing machine stitch reinforcement at the vital points: starting ending seam sewing machine work on. It is the most reliable way of preventing stitches unraveling machine makes.
By adding backstitching to your sewing, you make sure your hard work lasts. Your seams will be strong. Your projects will hold up to use. It’s an easy step with great results. Secure seam ends sewing machine makes are happy ends!
Frequently Asked Questions About Backstitching
H5. What is the main reason to backstitch?
The main reason is to make your seams strong at the start and end. It stops the stitches from coming undone. It’s about sewing machine stitch locking and preventing stitches unraveling machine seams.
H5. How many stitches should I backstitch?
Usually, three or four stitches are enough. Too many can make a bulky spot.
H5. Do all sewing machines have a reverse function?
Most modern home sewing machines do. Look for a lever or button. Older or very simple machines might not. Check your machine’s book.
H5. Can I backstitch in the middle of a seam?
Yes, you can. This adds extra strength to a specific spot. Just sew forward a few stitches, then back a few, then forward again, and continue your seam. This is another form of sewing machine stitch reinforcement.
H5. Is automatic backstitch better than manual?
Automatic backstitch is often neater and easier to use once set up. Manual backstitch gives you more control over exactly where and how many stitches you make. Both provide good sewing machine stitch locking.
H5. What happens if I don’t backstitch?
The stitches at the start or end of your seam can easily pull out. This can cause the whole seam to unravel, and your project might fall apart.
H5. Is backstitching the same as a lock stitch?
No, not exactly. Standard backstitching uses the sewing machine reverse stitch. A ‘lock stitch’ button on some machines makes stitches in place without sewing backward. Both secure the seam, but they do it differently. Both aim for sewing machine stitch locking.
H5. Can I backstitch on knit fabric?
Yes, you can backstitch on knit fabrics. Use a ballpoint or stretch needle. Be careful not to stretch the fabric while backstitching. Too many stitches can make knit fabric bulky.
H5. My backstitch looks messy. How can I fix it?
Go slower when backstitching. Keep the fabric flat. Make sure you are only sewing 2-4 stitches forward and back. Practice on scrap fabric.
H5. Is backstitching needed for every project?
It’s needed for most projects where seams need to be strong and not unravel. You might skip it on temporary stitches (basting) or some very delicate fabrics where it adds too much bulk. But for most clothes, bags, and home decor, secure seam ends sewing machine creates with backstitching are a must.