
You can display embroidery by putting it in a hoop or a frame. There are many ways to show your finished stitches. This article will show you how to get your stitched pieces ready and put them on show. We will look at hoops, frames, and other fun ways to display your beautiful textile art. Learning how to display embroidery well makes your hard work look even better.
Image Source: images.squarespace-cdn.com
Why Showing Your Embroidery Matters
You worked hard on your embroidery. You spent hours picking colors and making stitches. Displaying it lets others see your skill. It turns your stitched cloth into art for your home. Proper display also keeps your art safe. It helps protect your stitches and fabric over time.
Displaying Hoop Art
Embroidery hoops are common tools. But they also make great frames. Displaying hoop art is very popular now. It gives a simple, clean look.
Preparing Your Hoop for Display
Finishing embroidery for display in a hoop is important. You cannot just cut the fabric and hang it. You need to make the back neat. This protects the stitches. It also makes the piece look professional.
Steps for Finishing a Hoop Back
- Trim the Fabric: Leave about 1 to 2 inches of extra fabric around the hoop edge. Cut away the rest.
- Gather the Edge: Use strong thread (like embroidery floss or perle cotton). Sew a running stitch around the trimmed fabric edge. Keep the stitch about half an inch from the hoop edge.
- Pull the Thread: Gently pull the thread tight. This gathers the fabric edges towards the center of the hoop back.
- Tie Off the Thread: Tie the thread end securely. This holds the fabric in place.
- Add a Backing Piece (Optional but Good):
- Cut a circle of felt, cardboard, or thick fabric. Make it slightly smaller than the hoop.
- You can glue this circle over the gathered fabric. Use fabric glue or craft glue.
- Or, you can stitch the circle onto the gathered fabric edge. This gives a very secure finish.
- A backing piece covers the messy back stitches. It also adds another layer of protection.
Securing the Fabric Inside the Hoop
Before finishing the back, make sure your fabric is tight in the hoop. Pull the fabric gently while tightening the hoop screw. The fabric should be drum-tight. This keeps your design from getting wavy later. Make sure the design is centered just how you like it. Then tighten the screw very well.
Hanging Your Hoop Art
Hanging embroidery hoops is easy. Here are simple ways:
Hanging a Single Hoop
- Use the Hoop Screw: The metal screw part at the top is perfect for hanging. Hang it directly on a small nail or a picture hook.
- Add Ribbon or String: Tie a ribbon, twine, or string around the hoop screw. Make a loop. Hang the loop on a hook or nail. This adds a decorative touch. Match the ribbon color to your embroidery.
- Command Hooks: Small clear Command hooks work well. They stick to the wall. No holes needed. The hoop can hang directly on the hook.
- Small Nails: A simple small nail angled slightly up can hold a hoop by its screw.
Creating Hoop Gallery Walls
Embroidery wall art ideas often include groups of hoops. A gallery wall looks great. Mix different sizes of hoops. Use different hanging heights.
- Plan Your Layout: Lay your hoops on the floor first. Move them around until you like the look. Take a picture.
- Trace and Tape: Cut out paper circles the size of your hoops. Tape these paper circles on the wall using your plan. Use a level to make sure they are straight if you want.
- Place Hooks: Put your nail or hook through the paper circle where the hoop should hang.
- Hang the Hoops: Remove the paper. Hang your hoops.
- Mix Shapes: You can mix circles with oval hoops. You can also add small framed pictures or other light art pieces. This adds interest to your textile art display.
Table: Pros and Cons of Using Hoops for Display
| Pro | Con |
|---|---|
| Simple and cheap | Fabric can loosen over time |
| Easy to hang | Design must fit the circle/oval shape |
| Modern, popular look | Offers less protection from dust/sun |
| Lightweight | Backing needs finishing |
| Comes with the embroidery | Not acid-free (can yellow fabric) |
Creative Ways to Display Hoops
Creative ways to display embroidery go beyond just walls.
- Sit on Shelves: Small hoops can lean against a wall on a shelf. They add color and texture.
- Use Plate Stands: Small decorative plate stands can hold hoops upright on tables, shelves, or mantels.
- Hang from Branches: Tie hoops with string and hang them from a decorative branch mounted on the wall or in a vase. This creates a natural, airy look.
- Attach to Fabric: Sew or tie hoops onto larger fabric pieces. These can be wall hangings or quilts. This integrates the hoop art into bigger textile art display.
- Clipboards: Clip a small hoop onto a decorative clipboard. Lean it on a shelf or hang the clipboard.
- Pegboards: Use pegboards with hooks. Hang multiple hoops easily. This is great for craft rooms or studios.
Displaying Framed Pieces
Framing embroidery gives it a classic, finished look. It also offers better protection. Framing embroidery is a good choice for special pieces or designs you want to last a very long time.
Why Frame Embroidery?
Framing embroidery does more than make it look nice.
- Protection: A frame and glass protect the fabric and stitches from dust, dirt, and curious fingers.
- Support: Mounting embroidery onto a board inside the frame keeps the fabric flat and smooth. It prevents sagging.
- Preservation: Using acid-free materials helps stop the fabric from yellowing or getting damaged over time. This is key for protecting embroidery art.
- Formal Look: Framing can make your embroidery feel more like traditional fine art.
Choosing the Right Frame
The frame you choose changes how your embroidery looks. Think about your piece and where you will hang it.
Types of Frames
- Ready-Made Frames: You can buy frames in standard sizes (like 5×7, 8×10, etc.) at craft stores or online. These are affordable. You need to make sure your embroidery piece can be cut or shaped to fit the frame’s opening.
- Custom Frames: A frame shop can build a frame just for your piece. This costs more. But you get the perfect size, style, and color frame. They can also help with mounting and choosing the right glass. This is best for valuable or oddly-sized pieces.
- Depth: Embroidery has stitches that stick up. Choose a frame deep enough to hold the embroidery without squishing the stitches against the glass. A frame with a bit of depth is often best.
Using Mats
A mat is a thick, flat border put between the embroidery and the frame. It’s cut to show the picture in the middle.
- Benefits of a Mat:
- Creates Space: A mat keeps the embroidery from touching the glass. This is very important. If the stitches touch the glass, they can get flattened or damaged. Moisture can also build up.
- Focuses the Eye: A mat draws your eye to the embroidery.
- Adds Size: A mat makes a small embroidery piece look bigger.
- Acid-Free: Good mats are acid-free. This protects your fabric from harm over time. Always ask for acid-free mats for textile art display.
- Choosing a Mat:
- Color: Pick a color that matches your embroidery or your room decor. White or off-white are classic choices.
- Width: The mat can be narrow or wide. A wider mat often gives a more elegant look.
Mounting Embroidery for Framing
Mounting embroidery correctly is vital. It keeps your fabric flat inside the frame. This step is part of finishing embroidery for display in a frame.
Methods for Mounting
The goal is to attach your embroidery smoothly to a backing board. This board goes inside the frame.
-
Lacing (Best Method for Preservation):
- This method does not use glue or tape on the fabric itself.
- You will need an acid-free foam core board or mat board the size of your frame opening or mat opening.
- Place your centered embroidery piece right-side up on the board. Leave plenty of extra fabric around the edges.
- Turn the board and fabric over carefully. The fabric’s wrong side is now up. The board is on top of the wrong side.
- Wrap the extra fabric edges around to the back of the board.
- Use strong thread (like linen thread or strong cotton) and a curved needle if you have one.
- Lace the fabric edges together across the back of the board. Imagine lacing a shoe.
- Start in the middle of one side. Go across to the other side. Take a small stitch in the wrapped fabric edge. Go straight across the board to the opposite edge. Take a small stitch there. Pull gently to make the fabric taut on the front. Go back and forth down the board.
- Do this for all four sides. Then lace the corners.
- This pulls the fabric tight over the front of the board. It keeps it smooth. If you ever need to remove the embroidery, you can just cut the lacing threads. This is the safest way for protecting embroidery art long-term.
-
Using Acid-Free Tape (Okay for Less Valuable Pieces):
- You need acid-free double-sided tape or special linen tape. Do not use regular tape.
- Place your embroidery centered on an acid-free board, right side up.
- Wrap the extra fabric edges around to the back of the board.
- Apply the acid-free tape to the back of the board, along the edges. Press the wrapped fabric onto the tape.
- Smooth the fabric on the front as you go.
- This is faster than lacing. But removing the tape later can be hard or might damage the fabric fibers. Only use tape meant for textile or photo mounting.
-
Stapling/Pinning (Use with Care):
- You can use stainless steel staples or pins (like dressmaker pins) to attach the fabric edges to the back of the board.
- This should only be done on the very outer edge of the fabric that will not show or on a sturdy linen/canvas.
- Again, place fabric on the board, wrap edges to the back. Staple or pin the edges smoothly on the back.
- Use rust-proof staples or pins to avoid staining the fabric over time.
- Like tape, this can be harder to undo later without risk.
Choosing the Backing Board
Always use acid-free board for mounting. This is often called conservation board or museum board. Regular cardboard or mat board can have acids. These acids can yellow or rot fabric over many years. Protecting embroidery art involves using the right materials inside the frame.
The Framing Process
Once mounted, the piece is put in the frame.
- Clean Everything: Make sure the glass (or acrylic), mat (if using), and the mounted embroidery are free of dust and lint. Use a microfiber cloth.
- Stack the Layers: Place the glass in the frame first. Then put the mat on top of the glass (if using). Then carefully place your mounted embroidery piece into the frame on top of the mat.
- Add Backing: Place a piece of acid-free foam core or cardboard behind the mounted piece. This fills the frame and holds everything in place.
- Secure: Bend down the metal tabs in the frame to hold the stack tight. Or use a staple gun designed for framing (framer’s points).
- Seal the Back: Cover the back of the frame with brown paper tape (framer’s tape). This keeps dust and insects out.
- Add Hardware: Attach picture hanging wire or a hook to the back of the frame. Make sure it is strong enough to hold the weight.
Professional Framing
For very special or valuable pieces, consider a professional framer. They know how to frame embroidery correctly. They use museum-quality, acid-free materials. They can advise on the best mounting method, mat, and glass type (like UV-protective glass). This ensures your textile art display lasts as long as possible and is fully protected.
Table: Comparing Hoop Display and Framed Display
| Feature | Hoop Display | Framed Display |
|---|---|---|
| Look | Modern, casual, craft-like | Classic, formal, art-like |
| Cost | Very low | Low (ready-made) to High (custom) |
| Protection | Little (dust, light exposure) | Good (dust, touch, some light with special glass) |
| Mounting | Pulled tight in hoop, back finished | Mounted flat on board (lacing is best) |
| Flexibility | Easy to change, lightweight | Heavier, harder to change |
| Preservation | Limited (fabric can loosen, hoop not acid-free) | Good (acid-free materials possible) |
Alternative Display Ideas
Besides hoops and frames, there are other creative ways to display embroidery and other textile art display pieces.
Shadow Boxes
Shadow boxes are deep frames. They are perfect for embroidery with beads, buttons, or 3D elements. The depth keeps the design from being flattened. Mount the embroidery onto a board inside the shadow box.
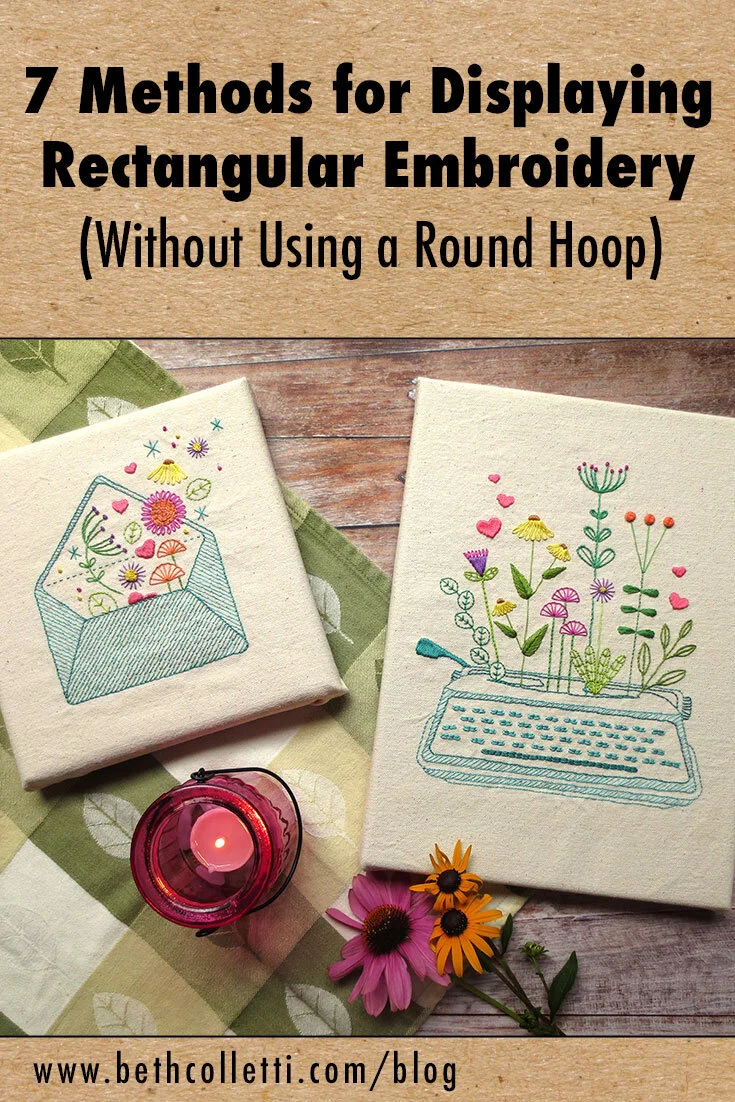
Stretched Canvas
You can mount embroidery onto a stretched canvas just like painting canvas.
1. Get a blank stretched canvas.
2. Center your embroidery on the front.
3. Wrap the edges of your embroidery fabric around the sides and back of the canvas frame.
4. Staple the fabric securely to the back of the canvas frame. Pull tight as you go.
5. You can leave the canvas edges showing or cover them with the fabric.
This gives a clean, modern look. It’s like gallery-wrapped canvas art.
Incorporating into Textile Projects
Your embroidery doesn’t just have to hang on a wall alone.
- Quilts: Stitch embroidered blocks and join them with fabric to make a quilt.
- Pillows: Make embroidered panels and turn them into decorative pillows.
- Bags/Clothing: Stitch designs onto tote bags, jackets, or other clothing items. These are displays you can carry or wear!
- Functional Items: Embroider tea towels, napkins, or table runners. Display them in your kitchen or dining room.
- Soft Sculpture: Use embroidery as a surface design on stuffed objects or soft sculptures.
Knowing How to Care for Displayed Embroidery
Protecting embroidery art is important once it’s on display. Here are care tips.
Sunlight is the Enemy
Sunlight makes fabric colors fade. It can also make the fabric weak.
* Do not hang embroidery in direct sunlight.
* Hang it on walls that do not get strong sun.
* For framed pieces, use UV-protective glass. This blocks harmful sun rays. It is more expensive but worth it for special pieces.
Keep it Clean
Dust can settle on embroidery.
* For hoop art or unstretched pieces, gently brush with a very soft brush (like a clean makeup brush). Or use a small vacuum cleaner with a low setting and a screen over the nozzle.
* For framed pieces behind glass, clean the glass regularly. Make sure no cleaner touches the fabric.
Humidity and Temperature
Extreme heat, cold, or humidity can harm textiles.
* Do not hang embroidery near heaters, fireplaces, or in damp basements.
* Keep the environment stable where your art hangs.
Handling with Care
- Always wash your hands before touching embroidery. Oils and dirt from hands can stain fabric.
- Lift and carry framed pieces carefully. Do not press on the front.
Planning Your Embroidery Wall Art Ideas
Now that you know how to prepare pieces, think about where to put them. Embroidery wall art ideas can be simple or grand.
Single Statement Pieces
A large, detailed framed piece or a striking large hoop can be hung alone. Put it over a fireplace, sofa, or on a main wall. It becomes a focal point.
Arranging Groups
Creating a gallery wall with multiple pieces looks great.
* Mix sizes and shapes (hoops, frames, maybe a stretched canvas piece).
* Arrange them close together for a unified look. Leave only a few inches between them.
* You can arrange them in a grid for a formal look. Or arrange them more freely for a casual feel.
* Think about the colors in the pieces. Group pieces with similar colors. Or mix colors for a vibrant display.
* Add other items: small mirrors, photos, or other lightweight art can make the textile art display more interesting.
Using Shelves and Furniture
Do not forget about using flat surfaces.
* Lean framed pieces or hoops against the back of a shelf.
* Place smaller pieces on easels or plate stands on tables, dressers, or mantels.
* Hang small hoops from hooks added under shelves.
Mixing Display Types
Combine hoops, frames, and other textile art display methods.
* A gallery wall can have both hoops and framed pieces.
* A shelf can hold a leaning frame and a hoop on a stand.
This adds depth and variety to your display. Creative ways to display embroidery mean using all the tools and spaces you have.
Putting it All Together
You have learned about finishing embroidery for display in hoops and frames. You know about mounting embroidery and hanging embroidery. You have many embroidery wall art ideas. You also know about protecting embroidery art.
Start with one piece. Decide if you want to display it in a hoop or a frame. Prepare it carefully. Then find the perfect spot to hang or place it. As you create more pieces, you can start planning bigger displays. Enjoy showing off your stitching talents!
Frequently Asked Questions (FAQ)
Can I wash my embroidery before displaying it?
Yes, it is often a good idea to wash finished embroidery. This removes marks from the hoop or your hands. Use cool water and a mild soap. Gently swish the piece. Rinse well. Press out water with a towel. Lay flat to dry. Make sure it is totally dry before putting it in a hoop or frame. Always check thread colorfastness first!
How do I clean dusty embroidery that is already displayed?
For pieces not behind glass, use a soft brush or a vacuum on a very low setting with a protective screen. Do not rub hard. For framed pieces, clean the glass. Do not use liquid cleaner directly on the glass while it is in the frame; spray the cloth instead.
Is it okay if the embroidery touches the glass in a frame?
No, try to avoid this. The stitching can be flattened. Moisture can build up and cause damage or mildew. Use a mat or a deep frame to create space between the embroidery and the glass.
What kind of glass should I use for framing?
Regular picture frame glass is okay. But for better protection, use conservation clear glass or museum glass. These block UV rays from the sun that cause fading. Museum glass also has less reflection.
Can I frame embroidery hoops?
You can put a finished embroidery hoop inside a deeper frame, like a shadow box. You would secure the hoop inside the box. The hoop itself serves as the ‘frame’ for the fabric within it. More commonly, when people ask how to frame embroidery hoops, they mean how to finish the hoop so the fabric stays put and looks neat for hanging as is (which we covered in the “Preparing Your Hoop” section).
How do I remove embroidery from a hoop or frame later?
For hoops, just loosen the screw and take it out. If the back is glued, you might need to gently loosen the glue or cut a stitched backing piece. If it is laced into a frame, you can cut the lacing threads on the back. If it was taped or stapled, carefully remove the tape or staples. Be very careful not to pull or snag the fabric or threads.
What is textile art display?
Textile art display means showing any kind of art made with fabric, thread, or fiber. This includes embroidery, quilting, weaving, knitting, and more. Displaying it properly means showing it well and keeping it safe.