
Are you wondering what hand embroidery lettering is? Simply put, it is using a needle and thread to draw letters on fabric. It is a fun way to add words, names, or phrases to clothes, bags, wall art, and more. Can you learn to do it even if you have never stitched before? Yes! This guide will show you how. We will cover everything a new stitcher needs to know to make beautiful letters with thread.
Embroidery letters might look hard, but they are not. They just take a little patience and practice. Think of your needle like a pen and your thread like ink. You are drawing with stitches! Learning the right steps and picking easy embroidery stitches for letters will help you start. This hand embroidery lettering tutorial is made for you.
Let’s get ready to stitch some letters!
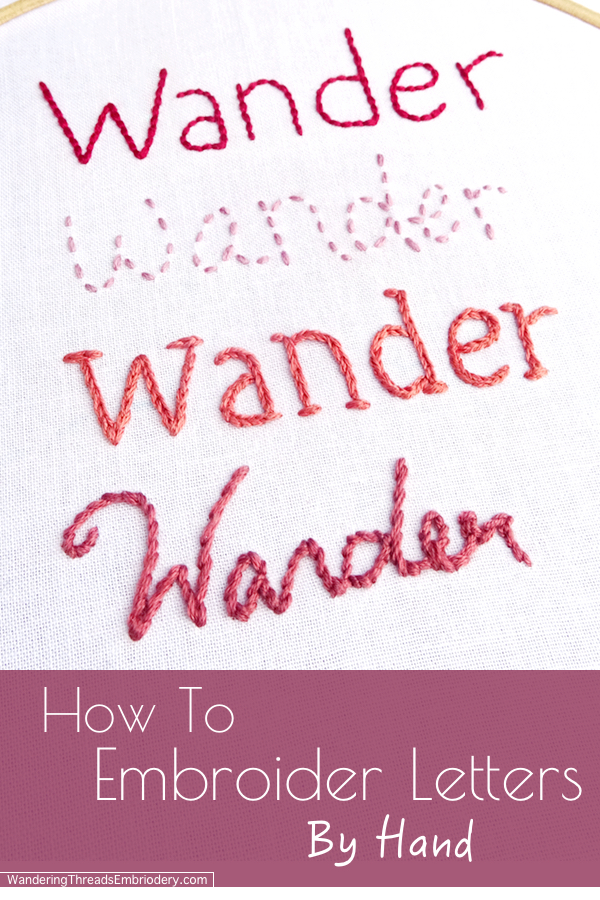
Image Source: www.wanderingthreadsembroidery.com
Getting Your Tools Ready
Before you start stitching, you need a few things. Having the right tools makes learning easier and more fun. You do not need many fancy things to start.
Here is a list of the basics:
- Fabric
- Embroidery needles
- Embroidery hoop
- Embroidery thread
- Small scissors
- A way to put your design on the fabric (like a pen or paper)
Let’s look at each item.
Picking Your Fabric
Almost any fabric works for embroidery. For a beginner embroidery letters project, choose a fabric that is not too stretchy or too thin. Cotton or linen is good. It is easy to see your stitches and the fabric holds its shape well. A light color fabric is best when you are starting. This helps you see your design lines easily.
Finding the Right Needles
Embroidery needles are different from sewing needles. They have a larger eye (the hole for the thread). This is because embroidery thread is thicker than sewing thread. They also have a sharp point. Sizes of needles go by number. A higher number means a smaller needle. For most embroidery thread, a size 7 or 9 needle is a good start. Get a pack with different sizes to see which you like best.
What About the Hoop?
An embroidery hoop keeps your fabric tight. It is like a frame. It holds the fabric so you can stitch without pulling it too much or having it get bumpy. Hoops come in wood or plastic. Both work fine. Choose a size that fits your hand well and is a little bigger than your design. A 5 or 6 inch hoop is good for beginners. The hoop has two parts. A ring on the bottom and a ring on top with a screw. You put the fabric over the small ring, put the big ring on top, and tighten the screw. This makes the fabric tight like a drum.
Choosing Your Thread
Embroidery thread comes in many colors! The most common type is called stranded cotton. It is made of six thin strands twisted together. You can use all six strands or pull some away. Using fewer strands makes thinner lines. Using more makes thicker lines. For letters, beginners often use two or three strands. It gives nice cover but is not too thick to work with easily. DMC and Anchor are popular brands. They have tons of colors!
Scissors Are Important
You need small, sharp scissors just for cutting thread. Using them only for thread keeps them sharp. Sharp scissors make clean cuts close to the fabric. This helps make your work look neat. Small scissors with pointy tips are great for snipping threads in tight spots.
How to Put Your Design On
You need to get the letter shapes onto your fabric. There are several ways to do this. We will talk more about this later. You might need a pencil, a special fabric pen, tracing paper, or special sticky paper.
Picking Your Letter Style
Before you stitch, you need to decide what letters you want to make and what they will look like. This is where you choose your embroidery fonts.
Simple Shapes Are Best First
For your first try, pick simple letter shapes. Block letters are great. They have straight lines and clear corners. Script letters can be beautiful, but script embroidery font can be tricky at first. They have curves and loops that are harder to follow. Start simple to build your skill. You can try fancy fonts later.
Finding Designs
Where can you find letters to trace?
* Type them on a computer and print them. You can make them any size.
* Find letters in books or online.
* Draw your own!
* Look for free embroidery patterns online. Many sites offer simple letter designs.
Think about the size of the letters. Big letters are easier to stitch than tiny ones. Start with letters that are at least 1 inch tall.
Putting Your Letters Onto Fabric
Now you have your fabric and your letter design. You need to get the design onto the fabric so you know where to stitch. This is called transferring embroidery patterns. There are different ways to do this. Some ways are better for beginners.
Here are a few easy ways:
-
Tracing with Light:
- Tape your fabric smoothly onto a window or light box.
- Tape your paper design behind the fabric so you can see the lines.
- Use a fabric pen or a sharp pencil to carefully trace the lines onto the fabric.
- Tip: Use a pen that disappears with water or heat. Test it on a scrap of fabric first! Pencil lines can be hard to remove.
-
Using Tracing Paper (Parchment Method):
- Place a thin tracing paper or parchment paper over your design. Trace the letters onto the paper with a pen.
- Pin or tape this paper onto your fabric where you want the letters to go.
- Stitch right through the paper and the fabric following your lines.
- When you are done stitching, carefully tear the paper away from your stitches. This takes time but leaves no marks on the fabric.
-
Sticky Fabric Paper (Solvy or Stick ‘n Stitch):
- This is a special paper. You can print your design right onto it using a home printer.
- Peel the back off the paper. It is sticky! Stick it right onto your fabric.
- Stitch through the paper and fabric. The lines are right there.
- When you finish stitching, soak the fabric in water. The paper dissolves away! This is very easy and leaves perfect lines. It is great for beginner embroidery letters.
Choose the method that seems easiest for you. Using sticky paper is often the simplest for tracing detailed shapes like letters.
Setting Up Your Hoop
Before you start stitching, put your fabric in the embroidery hoop. This step is important for making neat stitches.
- Loosen the screw at the top of the outer hoop ring.
- Take the inner hoop ring out.
- Lay your fabric over the inner hoop ring. Make sure your design is in the middle of the hoop.
- Place the outer hoop ring over the fabric and inner ring. Push the outer ring down. You might need to loosen the screw more to get it on.
- Center your design in the hoop.
- Pull the edges of the fabric around the hoop gently. Pull it evenly all around.
- Tighten the screw on the outer hoop.
- Tap the fabric in the hoop. It should sound like a drum when you tap it. If it is loose, pull the fabric edges again and tighten the screw more.
- Your fabric should be tight and smooth inside the hoop. This keeps your stitches even.
Picking Your Stitches for Letters
There are many embroidery stitches for letters. Some stitches fill in the letters, while others make an outline. For beginners, two stitches are best to start with: the Backstitch and the Satin stitch.
The Backstitch
The backstitch embroidery letters method is one of the easiest ways to make clear letter outlines. It makes a strong line that looks like it was drawn with thread. It is perfect for simple block letters or the lines of a script embroidery font.
How to do the Backstitch:
- Bring your needle and thread up from the back of the fabric at point A (the start of your line). Pull the thread through.
- Put your needle down at point B, a small step away from A. Pull the thread through to the back.
- Bring your needle up from the back at point C, which is a small step past point B.
- Now, put your needle down backwards into the same hole as point B. This is why it is called backstitch!
- Bring your needle up again, a step forward from C. Put the needle back into the hole you just came up from (the one before the new point).
- Keep repeating: move forward under the fabric, then stitch back into the end of the last stitch on top of the fabric.
- This makes a solid line of stitches that touch each other. Keep your stitches small and even. This makes smooth curves and lines on your letters.
The Satin Stitch
The satin stitch embroidery letters method is used to fill in shapes. It makes a smooth, solid block of color. It is great for filling in thick block letters or parts of letters. It looks shiny like satin fabric if you do it right.
How to do the Satin Stitch:
- This stitch works best for shapes you want to color in completely. Draw the outline of the area you want to fill.
- Bring your needle and thread up on one edge of the shape.
- Pull the thread across the shape and put your needle down on the opposite edge, directly across from where you came up.
- Bring your needle up again, very close to where your first stitch started, but right next to it.
- Pull the thread across the shape again and put your needle down on the opposite edge, right next to where your first stitch ended.
- Keep making straight stitches very close together. They should go all the way across the shape.
- Make sure your stitches lie flat next to each other. Do not twist the thread.
- Try to make all the stitches go in the same direction. This makes the filled area look smooth and uniform.
- This stitch uses more thread than backstitch. Practice on a small shape first.
Other Stitches for Letters
You can use other stitches too.
* Split Stitch: Similar to backstitch but you come up through the previous stitch. It makes a slightly textured line and is good for outlines.
* Stem Stitch: Good for curves, makes a rope-like line. Works well for script embroidery font.
* Chain Stitch: Makes a line of connected loops, good for bolder outlines.
For starting out, stick with Backstitch for outlines and Satin Stitch for filling. These two stitches let you make many different letter styles. They are key embroidery stitches for letters.
Picking Your Thread Colors
Choosing thread colors is fun! Think about where your embroidered letters will go. What colors will look good on that item or in that room?
- Contrast: Choose a thread color that stands out from the fabric color. This makes your letters easy to see.
- Match: You can also match the thread closely to the fabric for a subtle look.
- Number of Strands: Remember, you can use 1 to 6 strands of the embroidery thread. Fewer strands make thin, delicate lines. More strands make thick, bold lines. For most letters, 2 or 3 strands are a good place to start. This gives nice color coverage but is not too bulky.
To separate the strands, pull the thread from the skein. Cut a length about 18 inches long (not too long or it will get tangled). Hold the cut end. Take the number of strands you want (say, 3). Gently pull them away from the other strands. The remaining strands might bunch up. Just let them. They will straighten out. Then thread your needle with the strands you pulled off.
Ready to Stitch!
You have your fabric in the hoop, your design traced, your needle threaded, and you know which stitches to use. You are ready to start your beginner embroidery letters project!
Here are some tips for stitching:
- Start at the Back: Always start your thread from the back of the fabric. Do not tie a knot at the beginning! Leave a small tail of thread (about an inch) on the back. You will stitch over this tail to hold it in place.
- Pull Gently: Pull your thread through the fabric smoothly. Do not pull too hard, or your fabric will pucker (get bumpy). Do not leave the thread too loose, or your stitches will loop on top. Find a gentle tension.
- Follow Your Lines: Stitch right on the lines you traced.
- Keep Stitches Even: Try to make your stitches the same length. This makes your letters look neat and tidy.
- Take Your Time: Do not rush! Embroidery is calming. Enjoy the process.
- Ending a Thread: When your thread is running short, or you finish a section, you need to secure it. On the back of your fabric, run the needle under a few nearby stitches. Pull the thread through the loops made by those stitches. Do this twice. Then snip the thread close to the fabric. This holds the end firmly without a knot.
Stitching the Letters
Let’s walk through stitching an outline letter using the Backstitch:
- Start at the beginning of a straight line or curve.
- Bring thread up.
- Go down a short way along the line.
- Come up ahead of that stitch.
- Go back down into the end of the first stitch.
- Repeat along the whole letter outline.
- When you get to a corner, make the last stitch end right at the corner point. Then start the next line of the letter from that same corner point.
- For curves, make your backstitches shorter. Short stitches bend more smoothly around curves. This is important for script embroidery font.
Now, let’s think about filling a letter shape with Satin Stitch:
- Start on one edge of the shape you want to fill.
- Bring thread up.
- Go straight across the shape to the other edge and go down.
- Come up right next to where you started (very close!).
- Go straight across again, down next to where your last stitch ended.
- Repeat. Lay the stitches very close. Do not leave gaps.
- Keep all the stitches going in the same direction (e.g., all vertical, all horizontal, or all at an angle). This makes the fill look smooth.
Handling Mistakes
Everyone makes mistakes! It is okay. If you make a stitch in the wrong place, you can use your needle or small tweezers to gently pull the stitches out. Be careful not to snip the fabric. Take your time pulling stitches. It is easier to fix mistakes right away rather than later.
Finishing Your Embroidery
You have finished stitching all your letters! Now you need to finish your work neatly.
- Remove the Hoop: Take the fabric out of the hoop.
- Remove Transfer Marks: If you used a fabric pen that washes away, gently wash the fabric in cool water. If you used a heat-away pen, use a warm iron (test a scrap first!). If you used sticky paper, soak it away as directed. Make sure all marks are gone.
- Press: Let the fabric dry. Then gently press your embroidery from the back side. Use a clean cloth between the iron and the fabric to protect your stitches. This helps smooth out the fabric and makes the stitches look neat.
- Trim Excess Fabric (Optional): If you are framing the embroidery in the hoop or another frame, you might trim the extra fabric around your design. Leave enough to work with for framing.
Using Your Embroidered Letters
What can you do with your finished letters? Lots of things!
* Frame them in the hoop you used or a picture frame.
* Sew the embroidered piece onto a tote bag, jacket, or pillow.
* Make a patch.
* Create small gifts for friends.
Embroidery letters can personalize almost anything fabric!
Taking Care of Your Embroidery
If you put your embroidered letters on something you will wash, be gentle.
* Hand wash in cool water with mild soap is best.
* Do not rub the embroidery hard.
* Lay flat to dry.
* Iron from the back on a low setting if needed.
More Ideas for Embroidery Letters
Once you feel good doing basic letters, you can try new things:
- Different Stitches: Learn Stem Stitch, Chain Stitch, or French Knots to add dots or textures.
- Mixing Stitches: Use backstitch for the outline and satin stitch for part of the letter. Or use different colors for the fill and the outline.
- New Fonts: Try a simple script embroidery font. Use the backstitch or stem stitch for the flowing lines.
- Combining: Add small pictures or designs next to your letters.
- Different Threads: Try using sparkly thread or thicker threads for a different look.
Learning embroidery stitches for letters opens up a world of ideas. Keep practicing, and you will get better with every stitch.
Reflecting on Your First Steps
You have learned about the tools, how to get your design ready, how to put fabric in the embroidery hoop, how to pick and use embroidery thread, and the basic embroidery stitches for letters like backstitch embroidery letters and satin stitch embroidery letters. You know how to transfer designs using different methods like sticky paper for transferring embroidery patterns. You even thought about picking embroidery fonts and starting with simple ones for your beginner embroidery letters project before trying a script embroidery font. This hand embroidery lettering tutorial has given you the building blocks.
Remember that your first try might not be perfect. That is okay! Embroidery takes practice. Each stitch you make helps you learn. Pay attention to how you hold the needle, how much you pull the thread, and how you form the stitches. These small things make a big difference over time.
Keep your stitches small and even, especially when learning backstitch embroidery letters. When trying satin stitch embroidery letters, focus on laying the stitches right next to each other to fill the space completely.
Embroidery is a craft that has been enjoyed for a very long time. It is a relaxing hobby. It lets you create unique, handmade items. Adding custom letters makes your projects extra special. You can make gifts with names or favorite quotes. You can decorate your own things to show your style.
Do not be afraid to experiment after you feel comfortable with the basics. Try different thread colors together. Try different numbers of thread strands in the same project. Stitch the same letter shape using different stitches to see how it changes the look. There is no one “right” way to do it. The best way is the way you enjoy most!
Find simple embroidery fonts online or in craft books to keep practicing. Trace the same letter many times using different stitches to see how it looks. Maybe try stitching one letter of your name over and over until you feel confident. Then move on to the next letter.
Remember the key steps for beginner embroidery letters:
1. Gather your simple tools.
2. Pick a simple letter style (font).
3. Get the letter design onto your fabric carefully using an easy method for transferring embroidery patterns.
4. Put your fabric nice and tight in the embroidery hoop.
5. Thread your needle with the right number of embroidery thread strands.
6. Choose an easy stitch like backstitch or satin stitch from the embroidery stitches for letters.
7. Start stitching slowly, following your lines.
8. Finish your thread ends neatly on the back.
9. Take your fabric out of the hoop and clean it up.
These steps cover everything from getting started to finishing your first embroidered letter project.
Embroidery can connect you with others too. Look for local groups or online communities. You can share your work, ask questions, and get tips from other stitchers. Seeing what others create can also give you new ideas.
Learning a new craft like embroidery lettering should be fun. Do not get too worried about making things perfect at first. The goal is to learn and enjoy the process. Your stitches will get more even with practice. Your lines will get smoother. Your filled areas will become more solid.
So, grab your needle and thread. Pick a simple letter. Put it on your fabric. Place it in the hoop. And start stitching! You are ready to make your first embroidered letters. This hand embroidery lettering tutorial is your guide. Have fun creating!
Questions People Often Ask
Here are answers to some common questions beginners have about embroidery letters.
h4 What is the easiest way to transfer letters to fabric?
Using sticky, water-soluble paper (like Stick ‘n Stitch) is very easy for beginners. You print or draw your design onto the paper, stick it on your fabric, stitch over it, and then the paper washes away with water.
h4 How many strands of embroidery thread should I use for letters?
For most letters, especially for outlines or medium-thick lines, using 2 or 3 strands of standard stranded cotton embroidery thread is a good choice. For filling thick block letters, you might use 3 to 6 strands depending on how full you want the letter to look.
h4 Which stitch is best for outlining letters?
The Backstitch is one of the best embroidery stitches for letters when you want a clear, solid outline. The Split Stitch and Stem Stitch are also good choices, especially for curved script embroidery font.
h4 Which stitch is best for filling in letters?
The Satin Stitch is the main stitch used to fill in areas, making them look smooth and solid.
h4 My fabric is puckering in the hoop. What am I doing wrong?
Puckering often happens if the fabric is not tight enough in the embroidery hoop or if you are pulling your stitches too tight. Make sure your fabric is drum-tight in the hoop before you start. When stitching, pull your thread gently so it lies flat on the fabric without pulling the fabric itself.
h4 Can I use any fabric for embroidery letters?
While you can stitch on many fabrics, beginners should start with stable, non-stretchy fabrics like cotton or linen. Very thin, thick, or stretchy fabrics can be harder to work with.
h4 How do I make sure my stitches are the same length?
Try to be consistent. Before you put your needle down for a stitch, look at the stitches you just made and try to make the new one a similar length. For curves, make stitches shorter. Practice helps a lot! Using a clear guide line on your fabric is also important.
h4 What if my thread gets tangled?
If your embroidery thread gets twisted or knotted while you are stitching, let the needle hang down from the fabric for a moment. This often lets the thread untwist itself. If a knot forms, gently try to tease it out with your needle tip. It is easier to prevent tangles by not using too long a piece of thread (18 inches is a good length). Also, when you pull your thread through, pull it through smoothly and slowly.
h4 How can I make my satin stitch look smooth?
Make sure your stitches are all going in the exact same direction and are laid very close together without overlapping too much. Do not twist the thread before laying the stitch. Pull the thread just enough so it lies flat.
h4 Is it okay to knot my thread on the back of the fabric?
It is better practice not to use knots, especially at the start. Knots can make bumps under your stitches. Securing your thread by running it under existing stitches on the back makes the finish flatter and neater.
Learning how to do embroidery letters is a rewarding skill. Keep this guide handy as you start your stitching journey. You will be making beautiful personalized projects in no time!