
Have you seen beautiful fabric shapes stitched onto clothes, bags, or home decor? That is embroidery applique! It is a fun way to add pictures and pops of color to your sewing projects. This guide will teach you how to do machine embroidery applique from the very beginning. We will cover everything you need to know to start making your own designs today.
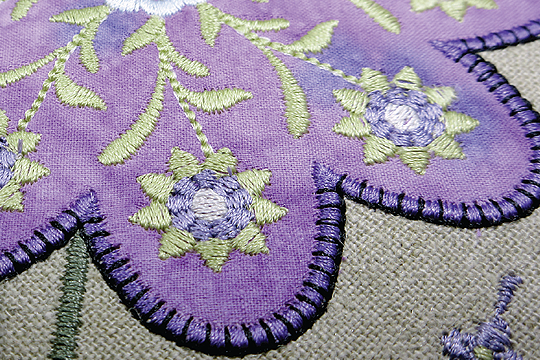
Image Source: www.bernina.com
Deciphering Embroidery Applique
Embroidery applique mixes machine embroidery and fabric shapes. You use your embroidery machine to sew down pieces of fabric onto a base fabric. This creates a design that looks like a picture or a pattern made from different fabrics.
It is not hard to learn. Many beginners start with it. It adds texture and interest. You can make simple shapes or complex pictures. It works on many things like shirts, blankets, and quilts.
Why Use Applique?
- It saves on thread. Instead of filling a big shape with stitches, you fill it with fabric.
- It adds texture. Different fabrics feel different.
- It uses up fabric scraps. Great for leftover pieces.
- It makes bold designs. Fabric stands out more than just thread.
Getting Ready: What You Need
Before you start your first project, gather your tools and supplies. Having everything ready makes the process smooth.
Your Embroidery Machine
You need a machine that can do machine embroidery. It should connect to a computer or use a USB stick for design files.
Embroidery Hoop
Your machine came with hoops. Use one that fits your design and your project fabric.
Applique Design Files
You need special digital files for your machine. These are called applique design files. They tell your machine where to stitch guide lines, where to place the fabric, and what final stitches to use. You can buy these files online. Some machines come with built-in designs.
Fabric for the Base
This is the main fabric. Your applique will go on top of it. Choose a fabric that works for your project. Think about how it washes and how it feels. Cotton is a good choice for many projects.
Fabric for the Applique
These are the fabrics you will cut into shapes. Pick fabrics that look good together. Think about color, pattern, and texture. Small prints or solids often work well.
Stabilizer
This is very important for machine embroidery. It gives the fabric support. It stops the stitches from sinking in or making the fabric wrinkle. We will talk more about applique stabilizer types soon.
Thread
You need embroidery thread. Rayon or polyester thread works well. You will need thread for the stitches that hold the applique down. You might also need bobbin thread. Most people use white bobbin thread, but you can match it if your design shows the back.
Needles
Use an embroidery needle in your machine. Needles have different sizes. A size 75/11 is good for most fabrics.
Scissors
You need sharp scissors for cutting fabric. Small, sharp scissors are best for cutting around the applique shapes right in the hoop. Curved tip scissors help a lot. You also need scissors for cutting stabilizer and thread.
Other Helpful Items
- Temporary spray adhesive: Helps hold the applique fabric in place.
- Fabric marker or pen: For marking placements if needed.
- Iron and ironing board: For pressing fabrics and stabilizer. Ironing applique pieces is key for a good result.
- Tweezers: To help pick away stabilizer.
Picking Your Design and Fabric
The design file you pick will tell you what shapes you need. It might be a simple shape like a circle or heart. It could be parts of an animal or a flower.
Finding Applique Design Files
Lots of websites sell or give away these files. Look for designs made for applique. They usually have specific steps in the stitch-out process.
Look at the design picture. It should show you what fabric shapes you need and where they go. Some files might come with a guide showing fabric colors to use.
Choosing Fabrics That Work
Pick fabrics that are not too thick. Thick fabrics are hard to cut and stitch through. Quilting cotton is often a great choice.
Think about the colors. Do they go together? Do they stand out from the base fabric? A busy print for a small shape might not show up well. A solid color might be better for a detailed shape.
Pre-wash your fabrics. This stops them from shrinking later. It also removes any stuff on the fabric that can mess up your stitches.
Preparing Your Fabric Pieces
This is where you get your applique fabrics ready.
Cutting Applique Fabric
There are a few ways to do this. The most common way with machine embroidery applique is to cut after the machine stitches a guide line.
Your applique design file will have a stitch step that outlines where the fabric piece goes. You will put a piece of fabric over this outline. The machine will stitch the outline again, right onto your applique fabric and base fabric. This second stitch line is your cutting line.
You will take the hoop off the machine (but do not unhoop the fabric!). Use your sharp scissors to carefully cut away the extra applique fabric outside the stitched line. Cut close to the line, but not on it.
Some designers provide templates you can print and cut before you start. You trace the template onto your applique fabric and cut it out before you even start stitching. This is another way of cutting applique fabric.
Using a cutting machine like a Cricut or Silhouette is also an option if your design file format supports it. You can send the shape to the cutter for a perfect cut.
The Fusible Method
Many people use a fusible applique method. This means using a product called fusible web. It has glue on both sides. You iron it onto the back of your applique fabric.
How to use fusible web:
1. Iron the rough side of the fusible web onto the back of your applique fabric. Use medium heat. Do not use steam.
2. Let it cool.
3. Draw or trace your shape onto the paper side of the fusible web.
4. Cut out the shape.
5. Peel off the paper backing.
6. Now your fabric shape has glue on the back. You can place it on your base fabric.
When using the fusible method with machine embroidery:
* The machine stitches the placement line on your base fabric.
* You place your fusible applique piece inside this placement line. The glue holds it there.
* You iron it to make it stick well.
* Then the machine stitches the final edge stitches.
The fusible method holds the fabric piece firmly. This helps prevent it from moving while the machine stitches. It also helps preventing puckering applique.
Picking the Right Stabilizer
Stabilizer gives your fabric body and keeps it flat while stitching. Using the wrong type or amount of stabilizer is a main reason for poor results. There are several applique stabilizer types.
Types of Applique Stabilizer
| Stabilizer Type | When to Use It | How to Remove It | Good For | Notes |
|---|---|---|---|---|
| Tearaway | Stable fabrics like cotton. Designs with lighter stitches. | Tears away easily after stitching. | Towels, bags, shirts (not stretchy). | Can leave small bits behind. Can distort stitches if not torn clean. |
| Cutaway | Stretchy fabrics like knits. Designs with dense stitches. | Must be cut away from the design edge. | T-shirts, sweatshirts, items that stretch. | Provides permanent support. Important for preventing fabric stretching. |
| Water-Soluble | Delicate fabrics. Topping for high-pile fabrics (like terrycloth). | Dissolves in water. | Lace, sheer fabrics, velvet, corduroy. | Use as a topping to keep stitches from sinking. Can also be a backing. |
| Heat-Away | Fabrics that cannot get wet. | Melts away with heat. | Some specific project types. | Less common for beginners. Follow heat instructions carefully. |
For most applique on non-stretchy fabric like quilting cotton, tearaway stabilizer works well. If your base fabric is a t-shirt (knit) or stretches easily, use cutaway. Sometimes, using two layers of stabilizer is best for very dense designs or thin fabrics.
Always put the stabilizer under the base fabric in the hoop. If using water-soluble as a topping, put it on top of the base fabric and applique piece before the final stitches.
Hooping Your Project
Proper hooping for applique is vital. Bad hooping leads to wrinkles and puckering.
How to Hoop Correctly
- Place the outer hoop flat on a table.
- Lay your stabilizer over the outer hoop. Make sure it is smooth.
- Place your base fabric over the stabilizer. Center the area where your design will go.
- Press the inner hoop down inside the outer hoop. Push down firmly all around the hoop edges.
- Tighten the screw on the hoop until the fabric feels like a drum. It should be taut and smooth, with no wrinkles.
- Check the back. The stabilizer should also be smooth.
Tips for preventing puckering applique:
* Use the right stabilizer for your fabric.
* Hoop the fabric and stabilizer together, making them drum tight.
* Do not stretch the fabric while hooping, especially knits. Just make it smooth and taut.
* Use temporary spray adhesive between layers (stabilizer to fabric, or applique piece to base) carefully if needed, but hooping correctly is the first step.
* Check your machine’s thread tension. Too-tight top tension can pull the fabric.
Some people use a method called “floating” where you hoop only the stabilizer and then stick the base fabric onto the stabilizer using spray adhesive. This works well for items that are hard to hoop, like thick towels or shirt sleeves. However, for beginners, hooping both fabric and stabilizer is usually easier and more effective for preventing puckering applique.
The Applique Stitch-Out Steps
Embroidery machines follow instructions from the design file. An applique design file has specific steps. Here is a typical machine embroidery applique tutorial process:
- Placement Line: The machine stitches a line on your base fabric. This shows you where to place your applique fabric piece.
- Tack-Down Stitch: You place your applique fabric over the placement line (making sure it covers the whole area). The machine stitches again, this time holding the applique fabric down. This stitch is often longer and looser than the final stitch.
- Trimming Step: The machine stops. This is your signal to trim the extra applique fabric. Take the hoop off the machine (do not unhoop!). Use sharp scissors to carefully cut away the fabric outside the tack-down stitch line. Cut close to the stitches without cutting the stitches themselves or the base fabric. If you used the fusible applique method, your piece might already be cut and ironed on after step 1 or 2, skipping the trimming step here.
- Final Stitch: Put the hoop back on the machine. The machine now stitches the final border around the applique shape. This stitch covers the raw edge of the applique fabric. Common final stitches are satin stitch, zigzag, or blanket stitch. We will talk about these applique stitch techniques next.
- Repeat for More Pieces: If your design has many applique shapes, the machine will repeat steps 1-4 for each shape.
Follow the design file’s color chart or instructions. They will tell you which steps are which.
Applique Stitch Techniques
The final stitch holds the applique piece down and covers its raw edge. Different stitches give different looks. Here are common applique stitch techniques:
Satin Stitch
This is a dense zigzag stitch. The stitches are very close together. They cover the edge completely. It gives a smooth, raised border. It is a very common applique stitch.
Zigzag Stitch
Like a satin stitch, but less dense. You can see the fabric slightly between the stitches. It gives a lighter look than satin stitch. You can change the width and density of the zigzag.
Blanket Stitch
This stitch looks like hand-stitched applique. It has stitches along the edge with little “legs” going into the fabric shape. It gives a charming, crafty look. The design file sets the size and spacing.
Straight Stitch or Other Outline Stitches
Sometimes, the final stitch is just a simple straight line or a decorative outline stitch near the edge. This is often used in raw edge applique machine embroidery.
Raw Edge Applique Machine Embroidery
In this method, you do not cover the raw edge of the applique fabric completely. The final stitch is usually a straight stitch, a zigzag, or a triple stitch close to the edge. The edge is meant to fray a little bit after washing. It gives a different look, often used for a more casual or distressed style. This method means cutting applique fabric precisely before placing it, often using the fusible method. You usually skip the trimming step in the hoop.
Finishing Your Project
Once all the stitching is done, take the hoop off the machine.
- Remove Stabilizer: Carefully remove the stabilizer from the back of your project.
- For tearaway, hold the stitches down and gently tear the stabilizer away.
- For cutaway, use sharp scissors to carefully cut the stabilizer away from the edge of the stitching. Leave about 1/4 to 1/2 inch of stabilizer around the design. Do not cut too close!
- For water-soluble, soak the area in water following the stabilizer instructions.
- If you used a topping, remove it from the top as instructed (tear, cut, or wash away).
- Remove Jump Stitches: Use small scissors to snip any threads that connect parts of the design (jump stitches). Cut them close to the fabric but be careful not to cut your actual stitches.
- Ironing Applique Pieces: Press your project. Place it face down on a soft towel or pressing mat. Use a pressing cloth on the back if needed. Gently press with an iron. This helps flatten the stitches and the fabric. If you used fusible web, ironing applique pieces from the back with some steam can help the fusible fully stick and lie flat. Be careful not to stretch knits while ironing.
Your applique is now finished! You can now use the fabric piece to finish building your project, whether it is a shirt, bag, or quilt block.
Help! Problems and Fixes
Sometimes things do not go perfectly. Here are some common issues and how to fix them.
Puckering or Wrinkling
This is the most common problem.
* Fix: Check your hooping. Was it tight enough? Did you hoop the stabilizer with the fabric? Was the stabilizer right for your fabric? Use cutaway for knits. Use more stabilizer layers if needed. Check your thread tension.
Stitches Not Covering the Edge
- Fix: Check your design file. Is it for applique? If it is, maybe your fabric shifted a little. Make sure you trim the fabric close to the tack-down line, but not so close that the final stitch has nothing to grab onto. Using the fusible applique method helps fabric stay put. Check if you are using the right stitch technique (satin stitch is best for full coverage).
Applique Fabric Pulling Up
- Fix: Did you use the tack-down stitch? Did you use fusible web? A good tack-down stitch and optional fusible web keep the fabric flat while the final stitches are made.
Thread Breaks
- Fix: Is your needle new and sharp? Is it the right type for embroidery? Is your machine threaded correctly? Is your bobbin okay? Slow down the machine speed.
Tips for Great Applique
- Always do a test stitch on scrap fabric with the same stabilizer. This helps you see if your tension and settings are right.
- Match your thread color to your applique fabric for the final stitch, or use a contrast color for a bold look.
- When cutting applique fabric in the hoop, take your time and use sharp, small scissors. This is a key step for a neat edge.
- Do not over-handle your hooped fabric. This can loosen it and cause puckering.
- Keep your machine clean and oiled. This helps it run smoothly.
Summarizing the Steps
Embroidery applique lets you add fun fabric shapes to your projects. Here is a quick review of the main steps:
- Choose your design and fabrics. Get your applique design files ready.
- Pick the right applique stabilizer types for your project.
- Prepare your base fabric and stabilizer by hooping for applique, making sure it is taut to avoid preventing puckering applique.
- Load the design into your machine.
- Stitch the placement line.
- Place your applique fabric over the line. Use the fusible applique method or spray adhesive if you like.
- Stitch the tack-down line.
- Take the hoop off and trim the extra applique fabric. This is key for cutting applique fabric correctly.
- Put the hoop back on and stitch the final border using your chosen applique stitch techniques (like satin, zigzag, or for raw edge applique machine embroidery, a straight stitch).
- Repeat steps 5-9 for all applique pieces in the design.
- Finish by removing stabilizer and jump stitches. Do some ironing applique pieces to flatten everything nicely.
FAQ
Q: Can I do applique without an embroidery machine?
A: Yes, you can do applique by hand or with a regular sewing machine. Machine embroidery applique uses digital files and specific stitch-out steps on an embroidery machine.
Q: Do I have to use fusible web?
A: No, but it helps hold the fabric in place and can make trimming easier. You can use temporary spray adhesive instead, or just rely on the tack-down stitch.
Q: What is the best stabilizer for applique?
A: It depends on your base fabric. Tearaway is good for stable wovens (like quilting cotton). Cutaway is best for stretchy knits (like t-shirts) to prevent stretching and puckering.
Q: My final stitch is not covering the fabric edge. What went wrong?
A: Make sure you trimmed the applique fabric close enough to the tack-down stitch. The final stitch needs to grab the edge of the fabric. Also, check the stitch type – a satin stitch covers best.
Q: Can I use any fabric for applique?
A: Stick to fabrics that are not too thick or bulky. Quilting cotton, felt, and light denims work well. Avoid very loose weaves or fabrics that fray excessively unless you are doing raw edge applique machine embroidery.
Getting started with machine embroidery applique opens up a world of creative possibilities. It is a simple process once you understand the steps. With practice, you will be able to add beautiful, unique designs to almost anything! Grab your machine, pick a fun design, and start stitching today.