
Learning how to follow a pattern for sewing can open up a world of creative projects, from simple skirts to detailed dresses. This guide will show you the path step by step. You will learn to read the signs on the pattern, prepare your fabric, cut pieces correctly, and put them together to make something you can wear or use. It makes sewing easier and helps you make clothes that fit well.
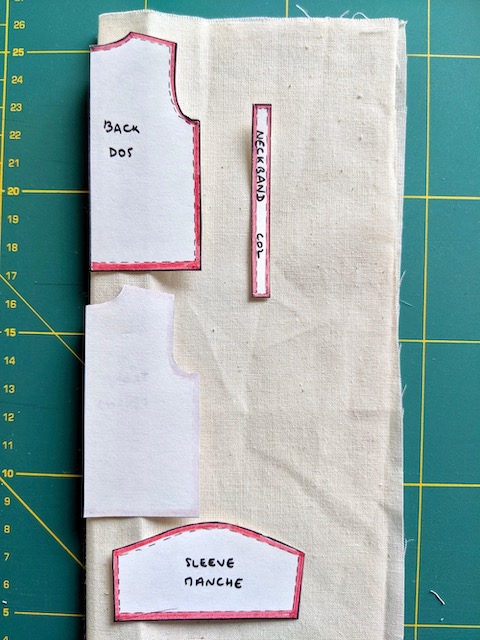
Image Source: camimade.com
Why Sew With Patterns?
Using a pattern is like having a map for your sewing project. It shows you the shapes you need to cut from fabric. It tells you how to put the pieces together. Patterns help you make clothes that fit your body. They guide you through steps like adding zippers or sleeves. Patterns take the guesswork out of sizing and shape. They are a great tool for both new and experienced sewers.
Getting Ready: Your Sewing Kit
Before you start, gather your tools. You will need the pattern itself. You also need fabric. The pattern will tell you what kind of fabric to use. It will also say how much fabric you need.
You will need:
* The paper sewing pattern
* Fabric (pre-washed and pressed)
* Sharp fabric scissors or a rotary cutter
* Pins
* A measuring tape
* Tailor’s chalk or fabric marker
* An iron and ironing board
* A sewing machine
* Matching thread
Choosing fabric for sewing pattern is a key first step. The pattern envelope often suggests types of fabric that work best. Think about how the fabric drapes and feels. Does it match the style of the garment? Using the right fabric helps your finished project look its best. A stretchy knit fabric works well for different styles than a stiff woven fabric. Always check the pattern suggestions.
Interpreting the Map
A sewing pattern comes in an envelope. The envelope shows a picture of the finished item. It lists suggested fabrics, sizes, and how much fabric you need. Inside the envelope, you will find large sheets of paper with many lines and symbols. These are your pattern pieces. You will also find a guide sheet. This sheet has all the sewing pattern instructions.
Identifying Sewing Pattern Symbols
The pattern pieces have marks on them. These sewing pattern markings explained are like a secret code. They tell you important things about cutting and sewing. Learning what they mean is very helpful.
Here are common sewing pattern symbols:
- Grainline Arrow: This is a long line with an arrow at one or both ends. This line must be placed exactly parallel to the selvage edge of your fabric. It shows you which way to lay the pattern piece on the fabric. This is super important for how your garment hangs. We will talk more about checking fabric grainline for sewing soon.
- Fold Line: This symbol is an arrow or brace that points to the edge of a pattern piece. This edge must be placed along a folded edge of the fabric. It means you cut two of this piece at once, joined at the fold.
- Notches: These are small diamonds, triangles, or lines on the edge of pattern pieces. They are like matching points. You use them to line up pieces when you sew them together. Matching notches ensures pieces fit together correctly.
- Dots or Squares: These are circles or squares marked on the pattern piece. They are also used for matching points, placing pockets, darts, or other details.
- Darts: These are triangular or diamond shapes marked with dots and lines. Darts help shape the fabric to fit curves, like the bust or waist. You sew along the lines to create the dart.
- Buttonholes and Buttons: Symbols show where to place buttonholes and buttons.
- Lengthen/Shorten Line: These are double lines across the pattern piece. They show where you can add or remove length from the pattern.
It is wise to go over the pattern pieces and find these symbols. Use a marker to make them stand out if needed. This helps you see them clearly when you are cutting and sewing.
Here is a quick look at some symbols:
| Symbol Name | Look | What It Means |
|---|---|---|
| Grainline | Arrow line | Place parallel to fabric selvage/fold. |
| Place on Fold | Arrow/brace to edge | Place this edge on a folded edge of fabric. |
| Notches (Single) | Single line or triangle | Match with another single notch. |
| Notches (Double/Triple) | Two/three lines/triangles | Match with other double/triple notches. |
| Dots/Squares | Circle or Square mark | Match points, place details, mark dart ends. |
| Dart Lines | Lines forming triangle | Fold fabric and sew along lines for shaping. |
| Lengthen/Shorten Line | Two parallel lines | Line to use when changing piece length. |
Fathoming the Rules
The guide sheet holds the sewing pattern instructions. Do not skip reading this sheet! It tells you which pattern pieces to use for your size and view (the specific style you are making). It shows you the sewing pattern layout on fabric. This layout guide helps you place your pattern pieces efficiently.
The instructions also give step-by-step directions for sewing the garment. They tell you when to sew seams, add zippers, make buttonholes, and finish edges. Pictures or diagrams often go with the text. These pictures show you what each step should look like. Read all the instructions before you start sewing. This helps you understand the whole process. If a step seems confusing, look closely at the diagram.
Grasping the Edge
Most patterns include a sewing pattern seam allowance explained. This is an extra strip of fabric around the edge of each pattern piece. It is typically 5/8 inch (1.5 cm) wide, but check your pattern. The instructions will tell you the seam allowance. When you sew, you stitch along a line that is this far from the cut edge of the fabric.
The pattern lines you see on the paper are the stitching lines. The cut lines are usually the solid lines on the outside of the piece. The seam allowance is the space between the stitching line and the cutting line. Do not cut on the stitching line! Cut on the outer line. The seam allowance gives you room to sew and make adjustments. It is important to sew with the correct seam allowance. This makes sure your pieces fit together as the pattern planned.
Prepping Your Canvas
Once you have chosen your fabric, prepare it. Most fabrics should be washed and dried just like you plan to wash the finished garment. This pre-shrinks the fabric. It is important because fabrics can shrink the first time they are washed. If you cut and sew before washing, your finished item might become too small after the first wash.
After washing, press the fabric smoothly. Any wrinkles can cause cutting errors. Pressing makes the fabric flat and ready to cut.
Checking Fabric Grainline for Sewing
This step is very important for how your finished garment looks and hangs. Fabric is made of threads woven together.
* Threads that run parallel to the selvage (the finished edge of the fabric) are called the warp threads. This is the straight grain.
* Threads that run across the fabric from selvage to selvage are called the weft threads. This is the cross grain.
* The bias is the diagonal direction, 45 degrees from the straight or cross grain. Fabric cut on the bias has a lot of stretch and drape.
The grainline arrow on your pattern piece must run parallel to the straight grain of your fabric. This means it should be parallel to the selvage edge. To check this, measure the distance from each end of the grainline arrow to the selvage. The distance must be the same at both ends. This makes sure the pattern piece is straight on the fabric.
Why is this important? Cutting on the correct grain ensures the fabric hangs and stretches the way the pattern intends. Cutting off-grain can cause clothes to twist, hang unevenly, or not drape properly. Take time to line up your grainlines correctly.
Mapping the Cut
Now it is time to place your pattern pieces on the fabric. The guide sheet includes a sewing pattern layout on fabric diagram. This diagram shows you the best way to arrange all the pattern pieces on your fabric. It helps you save fabric and make sure everything fits.
The layout shows:
* How to fold your fabric (often in half lengthwise or crosswise).
* Where to place pieces that go on the fabric fold.
* Where to place pieces that need to be on the straight grain (using the grainline arrow).
* How many of each piece to cut.
Unfold your fabric and lay it flat. Fold it as shown in the layout diagram. Smooth out any wrinkles.
Sewing Pattern Layout on Fabric Tips
- Find the layout that matches your pattern view, size, and fabric width. Fabric comes in different widths (like 45 inches or 60 inches).
- Place the largest pattern pieces first.
- Make sure all ‘place on fold’ edges are exactly on the fabric fold.
- Align the grainline arrows on each piece with the straight grain of the fabric. Use a measuring tape to check the distance from the grainline arrow to the selvage or fold.
- Try out different placements before you start pinning or cutting. You might find a way to fit everything better.
- Pay attention to any pieces that need to be cut on a single layer of fabric, not folded. The layout will show this.
Pinning Pattern Pieces to Fabric
Once you have arranged the pattern pieces according to the layout, it is time to pin them down. Pinning keeps the pattern pieces from shifting while you cut.
- Use sharp pins. Dull pins can snag or damage fabric.
- Place pins within the pattern piece, not in the seam allowance if possible, especially if using shears (scissors). If using a rotary cutter, pins should be outside the cutting line.
- Pin along the edges of the pattern pieces.
- Place pins closer together on curves to keep the pattern smooth.
- Place pins parallel or slightly angled to the cutting line. This makes it easier to cut around them.
- Make sure the fabric stays smooth and flat under the pattern piece as you pin. No bumps or puckers.
Pin all your pieces carefully. Double-check grainlines and fold placements before you start cutting.
Making the First Cut
Cutting the fabric accurately is as important as sewing. Use sharp scissors meant only for fabric. Paper will dull fabric scissors quickly.
How to Cut Fabric from Pattern
- Hold the fabric and pattern flat on a table. Do not let the fabric hang off the edge.
- Cut smoothly along the cutting line (the outermost solid line) of each pattern piece.
- Use long, smooth strokes with scissors. This helps avoid jagged edges.
- When cutting curves, use shorter strokes.
- Cut out the notches. Some people cut notches outwards as little triangles, others snip tiny slits inwards (stay within the seam allowance!). Be consistent.
- Cut out any internal markings like dots or squares. You can make a small snip within the marking or use tailor’s chalk to mark the spot on the fabric.
Take your time cutting. Accuracy here saves problems later when you sew. Once all pieces are cut, remove the pins and gently separate the fabric pieces from the paper pattern. Keep the pattern pieces handy. You might need to refer to them again.
Putting It Together: Sewing Time
With your pieces cut and marked, you are ready to sew. The sewing pattern instructions will guide you through the steps.
- Start with the first step on the instruction sheet.
- Identify the pattern pieces needed for that step.
- Match up edges using the notches and dots you marked.
- Pin the pieces together along the edges you will sew.
- Go to your sewing machine.
- Set your machine for a straight stitch.
- Check your pattern for the correct sewing pattern seam allowance explained. This is usually 5/8 inch (1.5 cm), but always check.
- Place the fabric under the presser foot so the needle is the correct distance from the edge.
- Sew along the edge, keeping the fabric edge aligned with the seam allowance guide on your machine or throat plate.
- Backstitch at the beginning and end of each seam to secure the stitches.
- Press each seam as you sew it. Pressing is crucial for a professional look. Press seams flat first, then press them open or to one side as directed by the pattern.
Work through the instructions one step at a time. Do not jump ahead. The steps are usually in a logical order to make construction easiest.
Making It Yours
Sewing patterns are designed for a standard body size. Not everyone fits this standard perfectly. Making pattern adjustments for fit is a common part of sewing. It helps you create clothes that fit your body shape.
Common adjustments include:
* Making a piece wider or narrower (e.g., at the waist, hips, or bust).
* Adding or removing length (e.g., in pants legs, sleeves, or bodice).
* Adjusting for different heights (petite or tall).
* Full bust adjustments (FBAs) or small bust adjustments (SBAs).
The pattern guide sheet might include basic adjustment lines or tips. For more detailed adjustments, you might need sewing books or online resources that explain specific techniques.
How to make an adjustment:
* Compare your body measurements to the pattern’s body measurements. Choose the size closest to your measurements.
* Pin the pattern pieces together at the seam lines (not the cutting lines). Hold the pattern pieces up to your body or compare them to a favorite garment that fits well. See where you need more or less room or length.
* Use the lengthen/shorten lines on the pattern pieces if you need to change length. Cut the pattern piece on the line, spread it apart (for adding length) or overlap it (for removing length), keeping the edges straight, and tape it back together.
* To change width, you might need to use the seam allowance. Or, you might need to slash the pattern piece and spread or overlap it, adding paper to fill the gap. This is more advanced but gives a better fit.
* Always make the same adjustment to matching pattern pieces (e.g., if you widen the front bodice, widen the back bodice the same amount).
Start with small adjustments on your first projects. It gets easier with practice. Making a test garment (a “muslin”) from inexpensive fabric is a great way to check the fit before cutting your good fabric.
Beyond the Basic: Tips for Success
- Read Everything First: Read the pattern envelope and guide sheet fully before you do anything else.
- Prep Fabric: Always wash and press your fabric.
- Check Grainline: Double-check the grainline alignment. Measure from the grainline arrow to the selvage at both ends.
- Cut Carefully: Use sharp scissors and cut smoothly on the cutting line.
- Markings Matter: Transfer all necessary sewing pattern markings explained from the pattern to your fabric (notches, dots, darts).
- Press As You Sew: Pressing makes a big difference in the final look.
- Stay Organized: Keep your pattern pieces organized. Use the layout guide.
- Be Patient: Sewing takes time. Do not rush.
- Learn From Mistakes: Everyone makes mistakes. Figure out what went wrong and learn from it.
Troubleshooting Common Issues
- Fabric Slipping While Cutting: Place weights on the pattern pieces. Use sharp pins. Try cutting on a non-slip surface or with a rotary cutter and mat.
- Pieces Not Fitting Together: Check if you matched the correct notches and dots. Did you use the correct seam allowance? Did you cut accurately?
- Garment Does Not Fit: Review your measurements and the pattern size. Did you make any adjustments? Maybe the pattern style is not right for your body shape, or you need to try making pattern adjustments for fit.
Frequently Asked Questions (FAQ)
Q: What is the selvage edge?
A: The selvage is the finished edge of the fabric that runs along the length of the bolt. It does not fray. The grainline is parallel to the selvage.
Q: Do I have to cut out all the pattern sizes?
A: No. Pattern sheets have multiple sizes printed on top of each other. You can trace your size onto separate paper or carefully cut out only your size. Tracing lets you save the original pattern if you need a different size later.
Q: What if my fabric does not have a visible grainline?
A: Most woven fabrics have a clear grain. If using knit or other fabrics where it is hard to see, find the direction with the least stretch. This is often the straight grain. For very slippery fabrics, the pattern guide might offer tips.
Q: Can I use a pattern for a different fabric type?
A: You can, but be careful. The pattern suggests fabric types for a reason. Using a fabric with different drape or stretch will change how the finished garment looks and fits. A pattern designed for woven fabric will not work well with stretchy knit fabric without changes.
Q: How do I know if I need to make pattern adjustments?
A: Compare your body measurements to the pattern’s measurement chart. If your measurements are between sizes, you might need to blend sizes. If you have significant differences (e.g., a much larger or smaller bust compared to your waist and hip size), you will likely need to make pattern adjustments for fit. Making a muslin is the best way to test fit.
Q: What is interfacing?
A: Interfacing is a material added to certain parts of a garment (like collars, cuffs, and waistbands) to give them structure and stability. The pattern instructions will tell you if you need interfacing and where to put it.
Q: How do I finish raw edges so they do not fray?
A: There are many ways. You can use a zigzag stitch on your sewing machine, an overlocker (serger), or finish the edges before sewing seams using methods like French seams or flat-felled seams. The pattern instructions might suggest a method.
Conclusion
Following a sewing pattern might seem like a challenge at first. But by learning to identify sewing pattern symbols, reading the sewing pattern instructions, and taking each step carefully, you can sew amazing things. From understanding sewing pattern markings explained to choosing fabric for sewing pattern, cutting with care, and making pattern adjustments for fit, each step builds your skill. Practice makes perfect. Start with a simple pattern. Be patient with yourself. Soon you will be unlocking your creative potential and making clothes that are truly yours. Happy sewing!