
Yes, you can easily install a bobbin on your Brother sewing machine, and this guide will show you how step by step. Putting the bobbin in correctly is key to getting good stitches when you sew. There are two main types of bobbin systems on Brother machines: the top-load (or drop-in) style and the front-load style that uses a separate bobbin case. We will explain how to handle both types. Knowing how to do this right will help you avoid problems like tangled thread or skipped stitches while sewing.
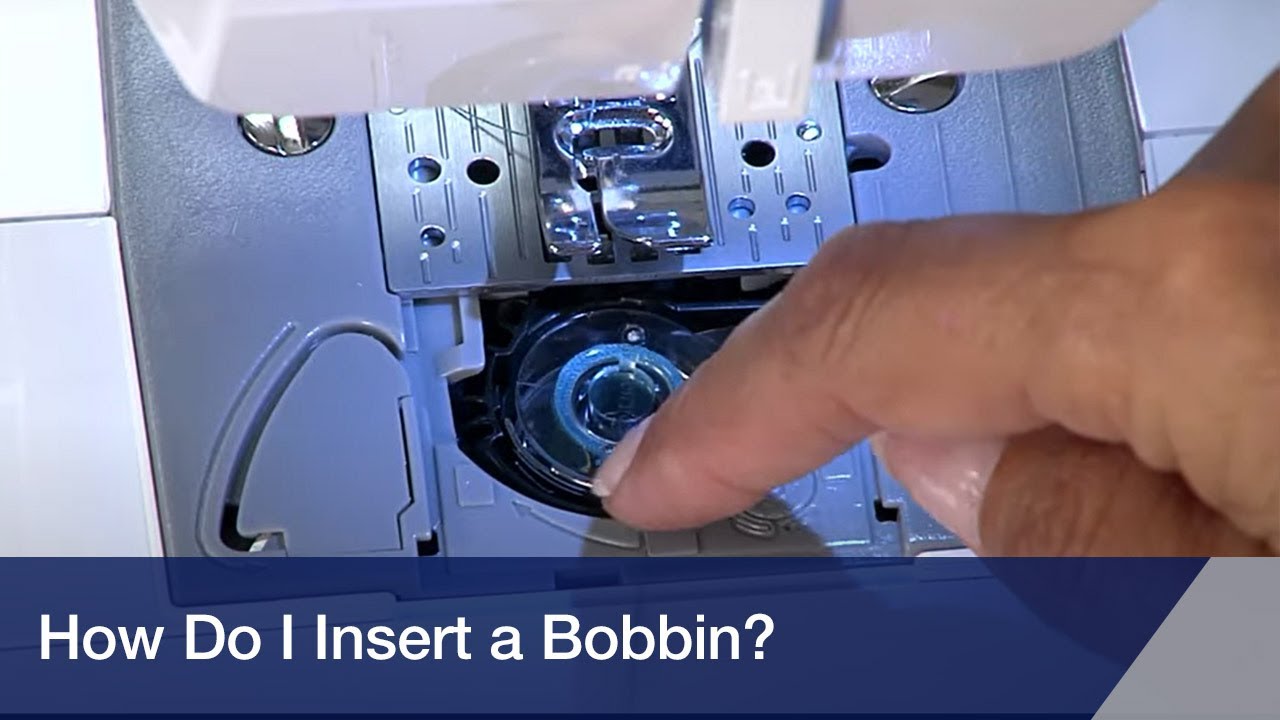
Image Source: i.ytimg.com
Getting Ready: Winding Your Bobbin First
Before you can put a bobbin into your machine, it needs thread on it. This is called winding the bobbin. It’s a simple job and most Brother machines make it very easy.
The Bobbin Itself: What You Need
First, use the right bobbin. Brother machines usually work best with Brother bobbins or bobbins that are the exact same size and type. Using the wrong bobbin can cause many problems. Look in your machine’s manual to see what kind of bobbin your model needs. Often, they are clear plastic bobbins. Think of the “Brother sewing machine parts bobbin” as needing to be the right match for your machine.
Finding the Bobbin Winding Spindle
Most Brother machines have a special pin or post just for winding bobbins. This is called the “Bobbin winding spindle Brother”. It’s usually on the top or front of the machine. Near it, you will often find a small disc or guide that helps the thread wind smoothly onto the bobbin.
Steps for Winding the Bobbin
Getting thread onto your bobbin is the first big step. Here’s how you usually do it:
- Put the thread on the main spool pin. Place the spool of thread you want to use on the main pin, which is often on top of the machine. Make sure it sits correctly.
- Guide the thread. Follow the path shown in your machine’s manual for bobbin winding. This path usually involves guiding the thread through a small thread guide or tension disc specifically for winding bobbins. This helps the thread wind tightly and evenly.
- Put the bobbin on the spindle. Place your empty bobbin onto the “Bobbin winding spindle Brother”. The spindle might pop up slightly or just be a fixed post.
- Secure the thread. Take the end of the thread and put it through a small hole in the bobbin itself. Some people just hold the thread end while winding starts, but putting it through the hole helps it stay put and wind neatly from the very start. Wrap the thread around the bobbin a few times by hand to start it off.
- Move the spindle. On many machines, you need to push the bobbin winding spindle to the side. This disconnects the needle so it won’t move while you wind the bobbin. Safety first!
- Start winding. Gently press the foot pedal or the start/stop button on your machine. The bobbin will start spinning quickly on the spindle, pulling thread from the spool. Watch it wind.
- Fill the bobbin. Let the machine wind the bobbin until it is full. Most spindles have a small stopper that will stop the winding automatically when the bobbin is full enough. Don’t overfill it, as this can cause thread problems later.
- Stop and cut the thread. Once winding stops or the bob bobbin looks full, take your finger off the pedal or press the stop button. Slide the spindle back to its original position (away from the side). Cut the thread connecting the bobbin to the spool.
- Remove the bobbin. Take the freshly wound bobbin off the spindle.
You now have a ready bobbin. Winding bobbin Brother sewing machine correctly makes a big difference in your sewing.
Putting in a Top-Load (Drop-In) Bobbin
Many newer Brother sewing machines use a top-load bobbin system. This system is popular because it’s easy to use and you can see how much thread is left on the bobbin while you sew.
Finding the Bobbin Area
The bobbin area is usually right under the needle plate. This is the flat metal part below the needle.
Accessing the Bobbin
To get to the bobbin spot, you need to take off a cover. This is the “Bobbin cover plate removal Brother” step. This cover is often made of clear plastic.
- Find the small notch or button next to the cover plate.
- Slide or lift the cover plate off. It should come away easily. Put it somewhere safe so you don’t lose it.
Now you will see a space where the bobbin sits. This space has a round part where the bobbin drops in.
Placing the Drop-In Bobbin
This is where “Drop-in bobbin installation Brother” happens. Getting the bobbin’s thread going the right way is very important here. This is all about “Bobbin orientation Brother sewing machine”.
- Take your wound bobbin. Hold the bobbin in your hand.
- Look at the thread tail. Notice which way the thread is coming off the bobbin.
- Check the diagram. Your machine or the cover plate often has a little picture showing how the bobbin should sit. It will show if the thread should come off the left side or the right side.
- Put the bobbin in. Place the bobbin into the round holder. Make sure it sits flat.
- Get the thread tail right. This is the most crucial part of “Bobbin orientation Brother sewing machine” for drop-in types. The thread tail must be coming off the bobbin in the direction shown by the diagram. For most Brother drop-in machines, the thread needs to come off the left side of the bobbin, making it spin counter-clockwise as the machine pulls thread. If it comes off the wrong way, your thread will likely tangle right away.
- Guide the thread into the slot. Once the bobbin is sitting in its spot with the thread going the right way, pull the thread tail into the special slot or channel around the edge of the bobbin area. This slot guides the thread to the machine’s tension system. Follow the numbered path if there is one. Pull the thread firmly until it slips into the end of the slot, sometimes there’s a small cutting blade here too. Leave a tail of thread about 4-6 inches long hanging out.
This completes the main “Drop-in bobbin installation Brother” step. The “Lower thread setup Brother” is almost done.
Putting the Cover Back
Once the bobbin is in and the thread is in the slot, put the clear plastic cover plate back on. Make sure it clicks or slides into place securely. This protects the bobbin area and holds the bobbin correctly.
Final Step for Lower Thread Setup
Before you can sew, you need to bring the bobbin thread up through the needle plate hole. We will cover this step after explaining the front-load system, as it’s similar for both. This step is part of the overall “Lower thread setup Brother”.
Putting in a Front-Load Bobbin (With a Bobbin Case)
Some Brother sewing machines, especially older or mechanical models, use a front-load bobbin system. This type uses a separate metal or plastic part called a bobbin case. The bobbin goes into the case, and then the case goes into the machine.
Finding the Bobbin Area
The bobbin area for a front-load system is usually located at the front of the machine, often behind a small door or cover near the needle.
Accessing the Bobbin Area
Open the front cover or door. You will see a round metal part. This is where the “Brother sewing machine bobbin case” fits.
Working with the Bobbin Case
The “Brother sewing machine bobbin case” is a small, removable part designed to hold the bobbin and provide tension to the bobbin thread.
- Take out the old bobbin case (if one is in there). If there’s a case already in the machine, grab the little latch or handle on the case and pull it out. The old bobbin might be inside it. Remove the old bobbin.
- Hold the empty bobbin case. Look at the bobbin case. It has a slot where the thread comes out and usually a little pigtail-shaped guide or a spring.
- Get your wound bobbin. Take your newly wound bobbin.
- Insert the bobbin into the case. Place the bobbin into the “Brother sewing machine bobbin case”.
- Check Bobbin Orientation. This is another point about “Bobbin orientation Brother sewing machine”, but specific to the case. How the bobbin sits in the case matters. For most front-load systems, the thread should come off the bobbin so that when you pull it, the bobbin spins clockwise inside the case. There might be a small diagram on the case itself or in your manual. If the bobbin spins the wrong way when you pull the thread, take it out and turn it around in the case.
- Guide the thread into the case’s slot. Once the bobbin is in the case with the thread going the right way (spinning clockwise when pulled), pull the thread tail into the slot on the side of the bobbin case. Pull it along the slot and under the tension spring. You should feel a slight resistance from the spring. Leave a thread tail hanging out of the case, about 4-6 inches long.
This is how you thread the “Brother sewing machine bobbin case”. This step is part of “Threading lower bobbin Brother”.
Putting the Bobbin Case into the Machine
Now you need to put the loaded bobbin case into the machine.
- Open the front door/cover.
- Hold the bobbin case by its latch. The small latch helps you hold and position the case.
- Align the case. Look at the round opening inside the machine. It has a center pin or post. The bobbin case has a notch that fits over a specific part inside the machine (often a position finger or hook). Line up the bobbin case so its notch fits correctly.
- Push the case in. Gently push the bobbin case into the round opening until it sits firmly in place. You might hear a light click as it locks in.
- Release the latch. Let go of the bobbin case latch.
The “Threading lower bobbin Brother” is now completed within the machine. This finishes the main steps for “Lower thread setup Brother” for front-load machines.
Close the Cover
Close the front door or cover on your machine.
Bringing Up the Bobbin Thread (For Both Types)
After you’ve installed the bobbin (either drop-in or with a case), you need to bring the bobbin thread up through the hole in the needle plate so you can start sewing. This step is part of the overall “Lower thread setup Brother”.
- Make sure the upper thread is ready. Your machine must be threaded with the upper thread through the needle. Leave a tail of upper thread about 4-6 inches long hanging out from the needle.
- Hold the upper thread tail. Hold the tail of the upper thread gently in your hand, off to the side (usually towards the left).
- Turn the handwheel. Slowly turn the handwheel on the side of your machine towards you. Watch the needle go down and then come back up. As the needle goes down, the upper thread will catch the bobbin thread. As the needle comes back up, it will pull a loop of the bobbin thread upwards.
- Catch the bobbin thread loop. When the loop of bobbin thread appears above the needle plate, often looking like a small loop of thread next to the needle, stop turning the handwheel.
- Pull the bobbin thread. Use your fingers, tweezers, or a seam ripper to gently pull that loop of bobbin thread up completely.
- Pull both threads back. Once you have the bobbin thread pulled up, pull both the bobbin thread tail and the upper thread tail under the presser foot and towards the back of the machine. Leave them lying flat under the foot.
Now, both the upper and lower threads are correctly set up and ready for you to start sewing. This completes the essential “Lower thread setup Brother”.
Checking Your Work and Troubleshooting Bobbin Thread Issues
Even if you follow the steps, sometimes problems happen. Knowing how to check your work and fix common issues is important. This is part of “Troubleshooting bobbin thread”.
How to Check if Everything is Right
- Thread Tails: Make sure both the upper and lower threads are pulled back under the presser foot before you start sewing.
- Stitch Test: Always test on a scrap piece of the same fabric you plan to use. Sew a few straight stitches.
- Look at the Stitches:
- Top Side: The stitches on the top should look neat and even.
- Bottom Side: The stitches on the bottom should also look neat. If you see loops on the bottom, the problem is usually with the upper thread tension or how the upper thread is threaded.
- If you see loops or messy stitches on the top, the problem is usually with the bobbin thread. This could mean the bobbin was installed wrong, the thread is not in the bobbin case tension (for front-load), or the thread came out of the slot (for drop-in).
Common Bobbin Thread Problems and What to Do (“Troubleshooting Bobbin Thread”)
| Problem | Possible Cause | How to Fix |
|---|---|---|
| No bobbin thread comes up. | Bobbin is empty. Bobbin is not installed correctly. Thread not caught. |
Wind a new bobbin. Take bobbin out and re-install following the steps (check orientation!). Turn handwheel slowly, make sure needle goes all the way down and up, try pulling upper thread gently. |
| Thread nests or tangles (usually on the bottom of the fabric). |
Bobbin installed wrong (wrong orientation!). Lower thread not in tension guide/slot. Bobbin case not seated correctly (front-load). Upper thread threaded wrong (most common cause of bottom tangles). |
Check “Bobbin orientation Brother sewing machine”. Re-install the bobbin correctly. For drop-in, ensure thread is firmly in the slot. For front-load, ensure thread is under the bobbin case spring. Take case out and re-insert firmly. Crucially, re-thread the entire upper thread path carefully, making sure the presser foot is UP when threading the top. |
| Skipped stitches. | Needle problem (bent, dull, wrong size). Bobbin installed wrong. |
Change the needle. Make sure you are using the right needle for your fabric. Re-install the bobbin, checking “Bobbin orientation Brother sewing machine”. Ensure “Lower thread setup Brother” was done right. |
| Thread breaks often (lower thread). |
Bobbin wound too tightly or too loosely. Bobbin or bobbin case damaged. Poor quality thread. |
Re-wind the bobbin evenly. Check the bobbin and case for nicks or damage; replace if needed (“Brother sewing machine parts bobbin”). Use good quality thread. |
| Stitches are too loose (on top or bottom). |
Tension issue. Could be upper or lower. | First, re-thread the upper thread path carefully with the presser foot UP. For drop-in, check the bobbin thread is still in its slot under the cover. For front-load, check thread is under the bobbin case tension spring. Adjust tension dial slightly if needed (usually upper tension first). |
Most problems with the lower thread (“Troubleshooting bobbin thread”) come from the bobbin being put in with the wrong “Bobbin orientation Brother sewing machine” or the thread not being correctly placed in the tension path (the slot for drop-in, the spring for front-load “Brother sewing machine bobbin case”). Always check these first.
Keeping the Bobbin Area Clean
Dust and lint from thread and fabric can build up in the bobbin area. This can cause major problems with stitching and tension. It’s a good idea to clean this area regularly.
- Turn off and unplug the machine. Safety first!
- Remove the bobbin and bobbin case (if applicable). Take off the bobbin cover plate.
- Use a small brush. Your machine likely came with a small brush. Use this brush to gently sweep away dust and lint from the bobbin holder area, the feed dogs (the little teeth under the needle plate that move the fabric), and the “Brother sewing machine bobbin case” itself.
- Avoid canned air. Sometimes canned air can push lint deeper into the machine mechanisms. Brushing is usually better for this area.
- Put everything back. Once clean, put the bobbin, bobbin case (if needed), and the cover plate back on.
Regular cleaning helps your “Brother sewing machine parts bobbin” and the area they work in stay happy and work smoothly.
Different Brother Models, Similar Steps
While the exact look might differ slightly between models, the basic steps for “Drop-in bobbin installation Brother” and “Threading lower bobbin Brother” with a “Brother sewing machine bobbin case” follow the principles described here. Always check your specific model’s manual if you are unsure. The manual will show diagrams specific to your machine’s “Bobbin winding spindle Brother”, thread path, and “Bobbin orientation Brother sewing machine”.
Step-by-Step Summary
Here is a quick look at the main steps we covered for installing a bobbin:
-
Winding:
- Put thread spool on pin.
- Guide thread through winding path.
- Place empty bobbin on “Bobbin winding spindle Brother”.
- Secure thread end on bobbin.
- Slide spindle to winding position.
- Start machine to wind bobbin.
- Stop when full, slide spindle back, cut thread.
- Remove wound bobbin.
-
Drop-In Bobbin Installation:
- Perform “Bobbin cover plate removal Brother”.
- Hold wound bobbin, check thread direction.
- Place bobbin in holder, ensuring correct “Bobbin orientation Brother sewing machine” (usually thread off the left, spins counter-clockwise).
- Guide thread into the tension slot/path.
- Replace bobbin cover plate.
-
Front-Load Bobbin Installation:
- Open the front bobbin cover.
- Take out the “Brother sewing machine bobbin case” (if in machine).
- Insert bobbin into the “Brother sewing machine bobbin case”.
- Guide thread into the case’s tension slot/spring, ensuring correct “Bobbin orientation Brother sewing machine” within the case (usually thread off top/right, spins clockwise when pulled from case).
- Hold case by latch, align notch with machine’s position finger.
- Push case into machine firmly, release latch.
- Close front cover.
-
Bringing up the Lower Thread (“Lower thread setup Brother”):
- Make sure upper thread is ready through needle.
- Hold upper thread tail.
- Slowly turn handwheel towards you.
- Watch needle go down and pull up bobbin thread loop.
- Catch loop and pull bobbin thread tail up completely.
- Pull both threads under presser foot and back.
Doing these steps carefully each time will help you avoid many common sewing problems related to the lower thread. Paying attention to details like “Bobbin orientation Brother sewing machine” and making sure the thread is correctly seated in its path are very important for good stitch quality. The “Lower thread setup Brother” needs both the correct bobbin installation and bringing the thread up.
Learning how your “Brother sewing machine parts bobbin” area works makes sewing much smoother. If you run into issues, check our “Troubleshooting bobbin thread” tips and your machine’s manual.
Frequently Asked Questions (FAQ)
Let’s answer some common questions people have about bobbins on Brother sewing machines.
h4: Why does my bobbin thread keep getting tangled?
This is a very common problem! The most likely reasons are:
1. The bobbin is installed with the wrong “Bobbin orientation Brother sewing machine”. Double-check which way the thread needs to come off the bobbin for your specific machine type (clockwise or counter-clockwise) and fix it.
2. For drop-in bobbins, the thread wasn’t fully seated into the tension slot around the bobbin holder. Make sure it snaps into place.
3. For front-load bobbins and cases, the thread isn’t correctly under the tension spring on the “Brother sewing machine bobbin case”.
4. The upper thread is threaded incorrectly, causing loops on the bottom (which look like bobbin tangles). Always re-thread the upper thread path with the presser foot UP.
5. Using the wrong size or type of “Brother sewing machine parts bobbin”.
h4: How do I know if my bobbin is installed correctly?
After installing the bobbin and threading the lower thread into its path (slot or case spring), pull the bobbin thread tail gently. You should feel a smooth, light resistance. If it pulls very easily with no resistance, it’s not in the tension path. If it doesn’t pull at all or feels jerky, something is wrong with the installation or the bobbin itself. Then, bring up the thread using the handwheel. If a loop forms and you can pull the thread up easily, the main installation is likely okay.
h4: Can I use any bobbin in my Brother sewing machine?
No, it’s best to use bobbins specifically designed for your Brother machine model or universal bobbins labelled Class 15. Using the wrong size or shape bobbin (even if it fits) can cause problems with winding, tension, and stitch quality. Check your manual for the right “Brother sewing machine parts bobbin”.
h4: Why won’t the bobbin thread come up when I turn the handwheel?
First, make sure the upper thread is correctly threaded through the needle. Then, hold the upper thread tail firmly but gently. Turn the handwheel slowly and only towards you. Watch closely as the needle goes down. If the machine is correctly set up, the upper thread loop should catch the bobbin thread. If it doesn’t, the bobbin might be empty, installed incorrectly, or the machine timing might be off (less likely, but possible). Re-check the bobbin installation and try turning the handwheel slower and watching closely.
h4: My machine makes a loud noise when winding a bobbin.
Check that the “Bobbin winding spindle Brother” is pushed all the way into the winding position (disengaging the needle). Also, make sure the thread is guiding smoothly onto the bobbin and not snagging anywhere. If the noise continues and sounds bad, stop and check your manual or contact service.
h4: How do I remove the “Bobbin cover plate removal Brother” on my machine?
Look for a small indent, button, or lever near the edge of the clear plastic cover plate. Gently push or slide it as shown in your machine’s manual. The plate should then lift or slide off. Don’t force it.
h4: My “Lower thread setup Brother” seems fine, but my stitches look bad.
If both upper and lower threads seem correctly threaded and installed, the problem could be:
* Incorrect upper thread tension.
* Using the wrong needle for your fabric.
* A dull or bent needle.
* Lint build-up in the bobbin area or upper tension discs.
* Incorrect machine settings for the fabric type.
Always start by re-threading the upper thread completely with the presser foot up. Then check the bobbin installation again (“Threading lower bobbin Brother”, “Bobbin orientation Brother sewing machine”). Clean the machine.
We hope this detailed guide helps you confidently install the bobbin on your Brother sewing machine for smooth, happy sewing!