
Image Source: i.ytimg.com
Easy Steps: How To Load A Bobbin In A Sewing Machine
A bobbin is a small spool that holds the bottom thread in your sewing machine. Can you sew without a bobbin? No, you cannot. A bobbin is key for sewing. It works with the top thread to make strong stitches. Is loading a bobbin hard? Not at all! Many people find this part easy once they know how. This guide will show you simple steps to load your bobbin. We will cover sewing machine bobbin winding, inserting bobbin sewing machine, and more. You will learn to do this task with no stress.
Grasping the Role of the Bobbin
The bobbin is a small but vital part of your sewing machine. It holds the thread that forms the bottom half of each stitch. Without a properly loaded and wound bobbin, your sewing machine cannot make a stitch. The top thread and bottom thread (from the bobbin) must meet and link up. This link creates a strong seam. If the bobbin is not right, your stitches will look bad. They might loop or skip. You need to make sure your bottom thread setup is perfect.
Types of Bobbins and Their Machine Fits
Not all bobbins are the same. It is important to use the right type for your machine. Using the wrong bobbin can cause big problems. It can lead to tangled thread or even break your machine.
H4: Class and Size Matters
Bobbins come in different classes and sizes. The most common types are Class 15, Class 66, and Class L. Your sewing machine manual will tell you which bobbin class you need.
- Class 15 bobbins: These are very common. They are flat on both sides. Many newer machines use them.
- Class 66 bobbins: These bobbins are also common. They have slight domes on both sides. Older machines often use them.
- Class L bobbins: These are smaller bobbins. They are often used in embroidery machines or some older machines.
Always check your machine’s manual. Or, look at a bobbin that came with your machine. Match it exactly.
H4: Metal vs. Plastic Bobbins
Bobbins can be made of metal or plastic.
* Metal bobbins: These are durable. They can be heavier. Some older machines need them for the right tension.
* Plastic bobbins: These are lighter. Many modern machines use them. They let you see how much thread is left.
Do not mix them unless your manual says you can. Some machines are made for only one type. Using the wrong type can change your bobbin tension settings. This makes your stitches look wrong.
Readying Your Workspace: Pre-Loading Checks
Before you begin winding thread onto bobbin or loading it, do a quick check. This helps things go smoothly.
- Check your thread: Make sure you have enough thread. The thread on your bobbin should match your top thread. It should be the same type and weight.
- Clean your machine: A little lint can cause big problems. Use a small brush to clean the bobbin area. Remove any old thread bits.
- Gather your tools: You might need small scissors or a thread snip.
The Art of Sewing Machine Bobbin Winding
Winding your bobbin properly is the first key step. A poorly wound bobbin can lead to bad stitches. It can also cause thread breaks. This section guides you through sewing machine bobbin winding.
H4: General Winding Steps for Most Machines
Most sewing machines have a built-in bobbin winder. It makes the job easy.
- Place the spool of thread: Put your spool of thread on the spool pin. This is usually at the top or side of your machine. Make sure the thread unwinds correctly.
- Thread the tension disk: Guide the thread through the tension disk for winding. This disk helps the thread wind evenly. It stops the bobbin from getting too loose or too tight. Your machine often has a diagram for this.
- Place the bobbin: Put an empty bobbin onto the bobbin winder spindle. This is a small metal or plastic peg. It is often near the spool pin.
- Insert thread into bobbin: Take the end of your thread. Put it through the small hole on the bobbin. Go from the inside of the bobbin to the outside.
- Wind a few times: Hold the thread end. Wrap it around the bobbin a few times by hand. Make sure it is secure.
- Engage the winder: Push the bobbin spindle towards the stop or click it into place. This makes the winder ready to go.
- Start winding: Gently press the foot pedal or the start/stop button. The bobbin will start to spin and fill with thread.
- Watch the winding: Keep an eye on the bobbin. The thread should wind evenly. It should fill the bobbin from edge to edge. Do not overfill it. Stop when it is full.
- Disengage and cut: Once full, stop the machine. Push the bobbin winder spindle back to its resting spot. Take the bobbin off. Cut the thread, leaving a tail of a few inches.
Table 1: Common Bobbin Winding Issues and Solutions
| Issue | Possible Cause | Simple Solution |
|---|---|---|
| Thread winds unevenly | Not using the tension disk; too much speed | Guide thread through tension disk; wind slower |
| Bobbin not filling up | Winder not engaged; thread slipping | Push spindle firmly; ensure thread is in hole and wrapped |
| Bobbin too loose or too tight | Incorrect tension disk use | Reroute thread through tension disk; check machine diagram |
| Thread breaking during winding | Old or weak thread; too much tension | Use new thread; check tension disk for snags |
| Bobbin overfills / thread spills off | Not stopping in time; winder stop not working | Stop winding when full; clean winder stop; do not overfill |
Inserting Bobbin Sewing Machine: Two Main Types
Now your bobbin is wound! The next step is to get it into your machine. There are two main ways to inserting bobbin sewing machine: the top drop-in system and the front-load system. Each type has its own steps.
H4: Top Drop-In Bobbin Instructions
Many modern sewing machines have a top drop-in bobbin instructions system. This is often seen as easier. The bobbin drops in from the top of the machine, right under the needle plate.
- Lift the needle: Turn your handwheel to lift the needle and the take-up lever to their highest points.
- Remove needle plate cover: Slide open or remove the clear plastic cover over the bobbin area. This cover is often just to the left or front of your needle.
- Place the bobbin: Pick up your wound bobbin. Look at the way the thread unwinds. For most top drop-in systems, the thread should unroll counter-clockwise (like the letter ‘P’). If it unwinds clockwise, turn the bobbin over. Drop the bobbin into its spot.
- Guide the thread: Pull the thread tail from the bobbin. Guide it into the tension slot or groove. This groove often looks like a narrow channel around the bobbin case. You may hear a small click when it seats correctly.
- Pull thread under plate: Pull the thread a little more. Make sure it goes under the small metal guide on the needle plate.
- Replace cover: Put the clear needle plate cover back on.
- Bring up bottom thread: Hold the top thread tail lightly. Turn the handwheel towards you (counter-clockwise) one full turn. The needle will go down and come back up. As it comes up, it should catch the bobbin thread. You will see a loop of bobbin thread rise up.
- Pull out the loop: Use a small tool or your finger to pull the bobbin thread loop out. Pull both the top thread and the bobbin thread towards the back of the machine. Place them under the presser foot. You are now ready to sew!
Table 2: Top Drop-In Bobbin Quick Guide
| Step | Action | Key Point |
|---|---|---|
| 1. Needle Up | Turn handwheel until needle is highest. | Prevents needle hitting bobbin area. |
| 2. Open Cover | Slide or lift the clear bobbin cover. | Access the bobbin area. |
| 3. Place Bobbin | Drop bobbin in, thread unwinding counter-clockwise (‘P’). | Right direction prevents tangles. |
| 4. Guide Thread | Pull thread into the tension slot. | Ensures proper tension for stitching. |
| 5. Replace Cover | Put the clear cover back on firmly. | Keeps lint out and bobbin secure. |
| 6. Bring Up Bobbin Thread | Hold top thread, turn handwheel one full turn. | Catches the bottom thread. |
| 7. Position Threads | Pull both threads under the presser foot to the back. | Ready for sewing, prevents knotting at start. |
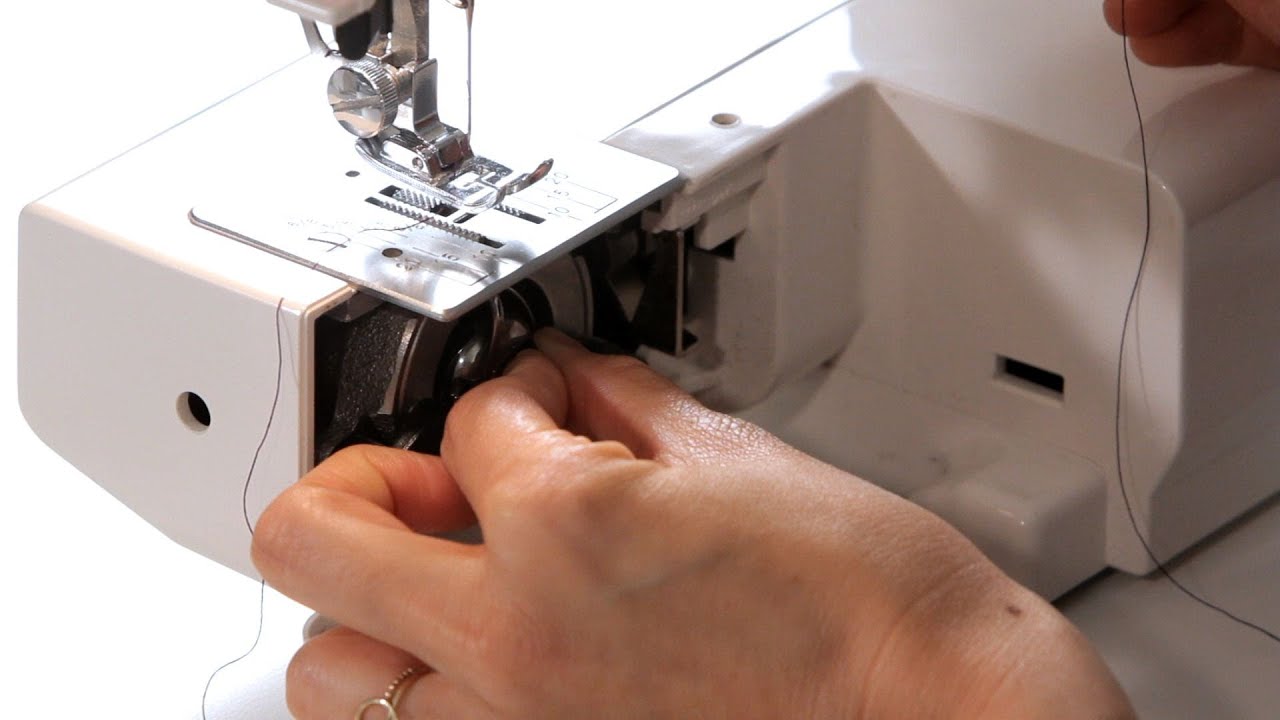
H4: Front Load Bobbin Installation and Bobbin Case Loading
Older machines, and some industrial ones, use a front load bobbin installation system. This involves a separate bobbin case loading. It might seem a bit more complex, but it’s very easy once you know it. The bobbin case sits inside a shuttle race.
- Lift the needle: Turn your handwheel to lift the needle and the take-up lever to their highest points.
- Open the front access: Open the door or cover at the front of your machine, usually near the bottom.
- Remove the bobbin case: Gently pull out the bobbin case. It looks like a small metal cup. It has a small hinged latch.
- Load the bobbin into the case: Take your wound bobbin. Place it inside the bobbin case. The thread should unwind clockwise (like the letter ‘q’). If it unwinds counter-clockwise, turn the bobbin over.
- Thread the bobbin case: Pull the thread tail from the bobbin. Guide it into the small slot on the side of the bobbin case. Pull it along until it slides under the tension spring. You may hear a soft click.
- Check tension (optional): Hold the thread tail of the bobbin case. Let the case hang. If the bobbin case slowly drops a bit, the tension is likely good. If it drops fast or not at all, the tension might be off.
- Insert bobbin case: Hold the bobbin case by its hinged latch. Push it back into the shuttle race inside the machine. Line up the small finger or notch on the bobbin case with the matching slot in the shuttle race.
- Secure the bobbin case: Push the bobbin case until it clicks firmly into place. Release the latch.
- Close the access: Close the front door or cover.
- Bring up bottom thread: Hold the top thread tail lightly. Turn the handwheel towards you (counter-clockwise) one full turn. The needle will go down and come back up. As it comes up, it should catch the bobbin thread. You will see a loop of bobbin thread rise up.
- Pull out the loop: Use a small tool or your finger to pull the bobbin thread loop out. Pull both the top thread and the bobbin thread towards the back of the machine. Place them under the presser foot. You are now ready to sew!
Table 3: Front Load Bobbin Installation Quick Guide
| Step | Action | Key Point |
|---|---|---|
| 1. Needle Up | Turn handwheel until needle is highest. | Safety for bobbin case removal. |
| 2. Open Front Access | Open the door at the bottom front of machine. | Access the bobbin area. |
| 3. Remove Bobbin Case | Pull out the metal bobbin case. | Needed for loading. |
| 4. Load Bobbin into Case | Put bobbin in case, thread unwinding clockwise (‘q’). | Right direction for tension. |
| 5. Thread Bobbin Case | Pull thread through slot and under tension spring. | Ensures proper tension for stitching. |
| 6. Insert Bobbin Case | Hold by latch, push into shuttle race until it clicks. | Must be fully seated. |
| 7. Close Access | Close the front door firmly. | Protects the bobbin area. |
| 8. Bring Up Bobbin Thread | Hold top thread, turn handwheel one full turn. | Catches the bottom thread. |
| 9. Position Threads | Pull both threads under the presser foot to the back. | Ready for sewing. |
Threading Sewing Machine Bobbin (The Bottom Thread Setup)
No matter if you have a top drop-in or front-load system, the last part of threading sewing machine bobbin is making sure the bottom thread setup is right. This means getting both threads ready to sew.
- Both threads are out: Make sure both the top thread and the bobbin thread are pulled free. They should not be caught anywhere.
- Pull under foot: Pull both threads together. Pass them under the presser foot.
- To the back: Lay both threads towards the back of the machine. They should go behind the presser foot. Leave tails about 4-6 inches long.
This setup ensures that when you start sewing, the threads can move freely. This helps prevent tangles or nests of thread.
Calibrating Bobbin Tension Settings
Bobbin tension settings are very important. They control how tight or loose your bottom thread is. If the tension is wrong, your stitches will look bad. You will see loops on the top or bottom of your fabric.
H4: What Proper Tension Looks Like
With good tension, the top and bottom threads meet in the middle of the fabric layers. Your stitches will look the same on both sides. They will be flat and even.
- If top thread loops on bottom: The top thread is too loose. Or the bobbin thread is too tight.
- If bobbin thread loops on top: The bobbin thread is too loose. Or the top thread is too tight.
H4: Adjusting Bobbin Tension (Small Changes Only)
Most times, you should adjust the top thread tension first. The bobbin tension is often set at the factory. It usually does not need much change.
- For top drop-in bobbins: You usually cannot adjust the tension on these. If you have issues, clean the bobbin area well. Make sure the thread is seated in the guide properly. If problems continue, see a repair person.
- For front-load bobbin cases: These cases have a small screw on the side. This screw lets you change the tension.
- Use a small screwdriver: Get a tiny screwdriver.
- Turn a little bit: Turn the screw a very small amount.
- Turn clockwise: This tightens the tension. Do this if your bobbin thread is looping on top.
- Turn counter-clockwise: This loosens the tension. Do this if your top thread is looping on the bottom.
- Test and repeat: Sew a test stitch on a scrap of fabric. Check the stitches. Adjust again if needed. Make only tiny turns. A quarter turn can make a big difference.
Caution: Adjusting bobbin case tension is delicate. Only do it if you are sure it is needed. Always try adjusting the top thread tension first. If you mess up the bobbin tension, it can be hard to fix.
Troubleshooting Bobbin Problems
Even with the best care, you might face troubleshooting bobbin problems. Do not worry! Many issues have simple fixes.
H4: Common Bobbin-Related Issues and Fixes
1. Thread Nesting on Bottom of Fabric:
* Problem: This looks like a big tangled mess of thread on the bottom side of your fabric.
* Cause: The most common cause is incorrect top threading or wrong top thread tension. The top thread is too loose. Sometimes, the bobbin is not seated right.
* Fix:
1. Re-thread the top of your machine completely. Make sure the presser foot is up when you thread. This lets the thread sit in the tension disks.
2. Check your top thread tension dial. Make sure it is at a good setting (often 3-5).
3. Make sure your bobbin is in correctly. For top drop-in, check the ‘P’ direction. For front-load, check the ‘q’ direction and make sure it clicked in.
4. Pull both threads under the presser foot to the back before you start.
2. Skipped Stitches:
* Problem: Your stitches are not even. Some stitches are missing.
* Cause: This can be due to a bent needle, wrong needle type, or issues with bobbin thread catching.
* Fix:
1. Change your needle. A fresh needle often fixes this. Make sure it is the right type for your fabric.
2. Re-insert your bobbin. Make sure it is seated well.
3. Clean the bobbin area. Lint can stop the bobbin from spinning smoothly.
3. Bobbin Thread Breaking:
* Problem: The bottom thread keeps snapping.
* Cause: The bobbin thread might be too tight. The bobbin could be damaged. The bobbin case might have a burr.
* Fix:
1. Check the thread on your bobbin. Is it old or weak? Re-wind a new bobbin.
2. If you have a front-load bobbin case, slightly loosen the tension screw (turn counter-clockwise a tiny bit).
3. Check the bobbin and bobbin case for nicks or rough spots. Replace if needed.
4. Clean the bobbin area very well.
4. Bobbin Not Winding:
* Problem: The bobbin winder spins, but the bobbin does not fill with thread.
* Cause: The bobbin winder is not engaged. The thread is not properly looped through the bobbin hole.
* Fix:
1. Make sure you pushed the bobbin winder spindle firmly into the winding position.
2. Ensure the thread is put through the small hole on the bobbin from the inside out, and then wrapped around a few times.
3. Check the winding tension disk. Is the thread correctly routed?
5. Bobbin Thread Too Loose or Too Tight (Stitches look uneven):
* Problem: Stitches have loops on top (bobbin thread too loose) or loops on bottom (top thread too loose, or bobbin thread too tight).
* Cause: Incorrect tension settings.
* Fix:
1. First, adjust the top thread tension. Make it tighter if loops are on top. Make it looser if loops are on bottom.
2. If the top tension changes do not work, and you have a front-load bobbin case, make tiny changes to the bobbin case tension screw.
H4: The Importance of a Clean Bobbin Area
Many bobbin problems come from lint and dirt. Small bits of fabric fuzz or broken thread can build up. This can stop the bobbin from spinning freely. It can also mess up tension.
- Regular cleaning: Use a small brush (often comes with your machine) to clean the bobbin area after every few projects.
- Air clean: A can of compressed air can blow out stubborn lint. Be careful not to blow lint further into the machine.
Key Tips for Lasting Success
- Read your manual: Your sewing machine’s manual is your best friend. It shows exact steps for your model.
- Use the right bobbin: Always use the bobbin type specified for your machine. This is crucial for proper function and tension.
- Wind bobbins ahead of time: Wind a few bobbins of your most used thread colors. This saves time during a project.
- Match threads: For best results, use the same type and weight of thread for both your top thread and bobbin thread.
- Practice makes perfect: The more you load bobbins, the faster and easier it will become.
Keeping Your Machine Happy: Bobbin Area Care
Caring for your bobbin area is part of general sewing machine care. Good care means fewer problems and longer machine life.
- Cleanliness is next to godliness: As mentioned, regularly remove lint and dust from the bobbin case area. This includes the shuttle hook area for front-load machines.
- Proper storage of bobbins: Store wound bobbins neatly. Use bobbin boxes or organizers. This stops them from unraveling or getting tangled.
- Oil if needed: Some older machines need oiling in the bobbin area. Your manual will tell you if and where to oil. Do not over-oil.
Concluding Thoughts: A Smooth Stitch Ahead
Loading a bobbin might seem like a small task. But it is a very important part of sewing. It lays the groundwork for perfect stitches. By following these easy steps for sewing machine bobbin winding, inserting bobbin sewing machine, and bobbin case loading, you will be ready to sew with confidence. Remember the tips for threading sewing machine bobbin and fine-tuning bobbin tension settings. With a little practice, your bottom thread setup will be a breeze. And you will know how to tackle any troubleshooting bobbin problems that come your way. Happy sewing!
Frequently Asked Questions (FAQ)
H5: Q1: Can I use different thread colors for my top and bobbin threads?
A1: Yes, you can! Many sewers use a matching thread color on top and a neutral color (like white or grey) in the bobbin. This is fine if your stitches look good from both sides. For visible seams, you might want to match both.
H5: Q2: How full should I wind my bobbin?
A2: Wind your bobbin until it is nearly full, but do not let it overfill. Most bobbin winders have a stop. This stop tells the machine when the bobbin is full. If you overfill it, thread can spill off. This can cause tangles.
H5: Q3: Why does my bobbin thread keep jamming?
A3: A common reason for jamming is lint build-up. Clean the bobbin case area very well. Also, check if you are using the correct bobbin type for your machine. Make sure the bobbin is wound evenly.
H5: Q4: My machine makes a loud noise when I sew. Could it be the bobbin?
A4: Yes, it could be. A noisy bobbin area often means lint or a lack of oil (if your machine needs oiling there). It could also mean the bobbin is not seated correctly. Check these things first. If the noise continues, a service person should look at it.
H5: Q5: Do all sewing machines wind bobbins the same way?
A5: Most home sewing machines have a similar built-in winder. The main steps are much alike. But small details like thread paths or tension disk spots can differ. Always check your specific machine’s manual.