
Here is a guide on loading a bobbin on a Brother sewing machine. Learning how to load the bobbin correctly is a simple skill. It helps your machine sew well. This guide will show you the easy steps for your Brother sewing machine lower thread setup.
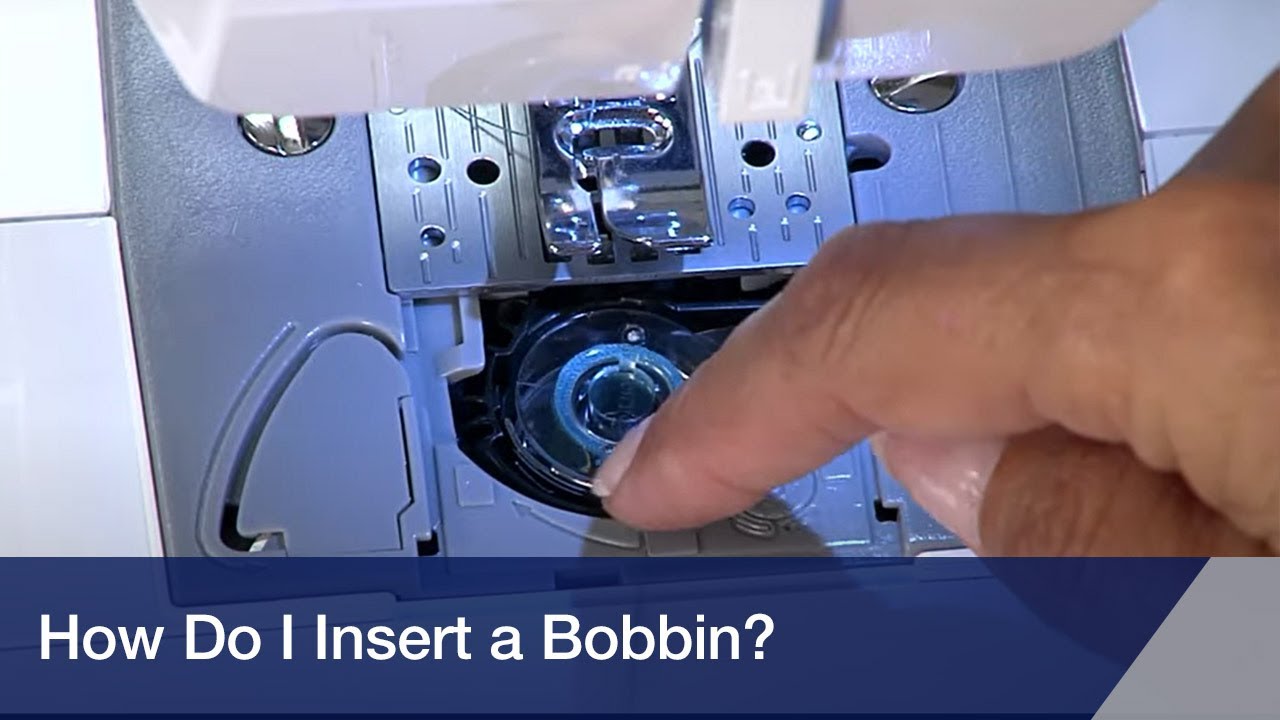
Image Source: i.ytimg.com
Why Loading the Bobbin Matters
The bobbin holds the bottom thread. Your sewing machine uses two threads. One comes from the spool on top. The other comes from the bobbin below. These two threads loop together to make a stitch.
If the bobbin is not loaded right, the stitches will look bad. They might loop or break. The machine might even stop working. Learning the correct steps makes sewing much easier.
Getting Ready to Load the Bobbin
Before you load a bobbin, you need a bobbin with thread on it. Most Brother machines have a way to wind a bobbin. This is called the bobbin winder sewing machine part. You will use this part first.
You will need:
* A spool of thread.
* An empty bobbin that fits your Brother machine. Check your machine book to be sure.
* Your Brother sewing machine.
How To Wind Thread On A Bobbin
Winding a bobbin is the first step. Your Brother sewing machine has a special spot for this. It is called the Brother bobbin winder use area.
Here are the steps to wind a bobbin:
h4 Step 1: Place the Thread Spool
Put your thread spool on the spool pin. This is usually on top of your machine. Make sure the thread comes off the spool in the right way. Look at your machine’s picture. The thread might need to come off the back or the front of the spool.
h4 Step 2: Guide the Thread
The thread needs to go through certain guides. These guides keep the thread in place. Look for numbers or pictures on your machine.
* First, take the thread from the spool.
* Guide it through the first thread guide. This might be a small clip or hook.
* Next, pull the thread over to the tension disc for bobbin winding. This is a small metal disc or a set of discs. The thread needs to go under or between these discs. This makes sure the thread winds smoothly and tightly onto the bobbin. Pull the thread firmly into this area.
h4 Step 3: Place the Bobbin on the Winder Pin
Find the bobbin winder pin. It sticks up from the machine, often near the spool pin.
* Take your empty bobbin.
* There is a small hole in the edge of the bobbin.
* Put the end of your thread through this hole. Thread it from the inside of the bobbin out to the edge.
* Place the bobbin onto the bobbin winder pin. Push it down gently. Make sure the thread end stays out of the bobbin.
h4 Step 4: Engage the Bobbin Winder
The bobbin winder pin can usually move. It moves left or right.
* Push the bobbin winder pin to the right. Pushing it right moves it into the “winding” position.
* This action often disengages the sewing needle. This means the needle will not move while you wind the bobbin. This is good! It keeps you safe and lets the machine focus on winding. Your machine might make a different sound now.
h4 Step 5: Start Winding
You are ready to wind!
* Hold the end of the thread that you put through the bobbin hole. Keep holding it for a few seconds.
* Press the foot pedal gently, or push the start/stop button.
* The bobbin will start to spin very fast.
* The thread will wind onto the bobbin.
* Let go of the thread end after a few wraps. The thread will now hold itself.
h4 Step 6: Watch the Bobbin Fill
Keep the pedal pressed (or button on) until the bobbin is full.
* The thread should wind evenly onto the bobbin. It should look smooth, not bumpy.
* Do not overfill the bobbin. Most bobbin winder pins have a small stop. When the bobbin is full, the thread will touch this stop. This makes the bobbin winder slow down or stop on its own.
* If your winder does not stop itself, watch the bobbin. Stop when it is full, but before thread spills over the edges.
h4 Step 7: Stop the Winder
When the bobbin is full:
* Take your foot off the pedal, or press the start/stop button again. The bobbin will stop spinning.
h4 Step 8: Remove the Bobbin
Now, take the full bobbin off the pin.
* Push the bobbin winder pin back to the left. This moves it out of the winding position.
* Lift the bobbin off the pin.
* Cut the thread that connects the bobbin to the spool. Use the small cutter on the machine if it has one. It’s often near the bobbin winder. If not, use scissors.
* Snip off the little thread end sticking out of the bobbin hole if you want.
You now have a full bobbin! You are ready for the next part: inserting bobbin Brother machine.
Finding the Sewing Machine Bobbin Area
Brother sewing machines often have a drop-in bobbin. This means the bobbin goes into a spot under the sewing area. You usually see the bobbin through a clear plastic cover.
The sewing machine bobbin area is usually:
* Right in front of the needle plate.
* Under a small plastic cover.
To get to this area:
* Make sure the needle is all the way up. Turn the handwheel (the big wheel on the side) towards you to lift the needle.
* Open the bobbin cover plate. It might slide off or flip open. Look for a small button or lever to release it.
Sewing Machine Bobbin Placement Guide
Now you need to put the bobbin in the machine. This is the ‘inserting bobbin Brother machine’ step. Getting the bobbin in the right way is very important. The thread needs to come off the bobbin in a certain direction.
Here’s how to put the bobbin in:
h4 Step 1: Get the Bobbin Ready
Hold the full bobbin in your hand. Look at it.
* The thread comes off the bobbin edge.
* For most Brother drop-in bobbins, the thread needs to come off the bobbin in a way that makes it look like the letter ‘P’ or the number ‘6’ when you look at the bobbin from the top as you put it in.
* This usually means the thread comes off the left side of the bobbin.
h4 Step 2: Place the Bobbin in the Case
Put the bobbin into the round bobbin case area.
* The bobbin should sit flat in the case.
* Make sure it spins freely.
* The thread should be coming off the top edge of the bobbin towards the left side.
h4 Step 3: Guide the Thread Through the Slot
This is a key part of the Brother sewing machine lower thread setup. There is a specific path for the bobbin thread.
* Find the small metal slot or groove on the edge of the bobbin case area.
* Take the end of the bobbin thread.
* Guide the thread into this slot.
* Pull the thread gently. It should slide into the tension path.
* The thread might go through one or two turns or clips here. Follow the numbers or line drawn on your machine. The path usually looks like a curved line or hooks.
h4 Step 4: Pull the Thread Tail
Once the thread is in the slot and guided through the path:
* Pull about 4 to 6 inches (10 to 15 cm) of thread tail out. This is the loose end you will need soon.
* The thread should now be held lightly by the machine’s lower tension system. This is crucial for correctly loading sewing machine bobbin.
h4 Step 5: Close the Cover Plate
Put the clear plastic cover plate back on.
* Make sure it clicks or slides firmly into place.
* The bobbin area is now closed.
You have now completed inserting bobbin Brother machine! The bobbin is in its spot. The thread is in the lower tension system.
Bringing Up the Bobbin Thread
You have the bobbin thread loaded. Now you need to bring it up above the needle plate. This gets the machine ready to sew. This is part of the overall Brother sewing machine threading steps.
Here are the steps:
h4 Step 1: Prepare the Top Thread
Make sure your machine is threaded with the top thread correctly. The top thread comes from the spool on top of the machine, through all the guides, and through the needle.
* Leave the presser foot up for this step.
* Hold the end of the top thread gently with your left hand. Keep it a bit loose.
h4 Step 2: Turn the Handwheel
The handwheel is the large wheel on the side of the machine.
* Turn the handwheel slowly towards you (counter-clockwise). Do not turn it away from you.
* As you turn, the needle will go down into the needle plate hole. It goes all the way down.
* Keep turning the handwheel. The needle will then come back up.
* As the needle comes back up, the top thread will catch the bobbin thread. It will form a small loop of the bobbin thread on the needle plate surface.
h4 Step 3: Catch the Bobbin Loop
- Stop turning the handwheel when the needle is at its highest point.
- Look on the needle plate, just below the needle. You should see a small loop of the bobbin thread. It might be the same color as your bobbin thread.
- Use scissors, tweezers, or your finger to catch this loop.
h4 Step 4: Pull the Bobbin Thread Up
- Gently pull the loop of bobbin thread. As you pull the loop, the end of the bobbin thread will come up through the needle plate hole.
- Pull the bobbin thread tail out a few inches (10-15 cm).
h4 Step 5: Position the Threads
Now you have two threads: the top thread and the bobbin thread. Both are coming up through the needle plate hole.
* Place both thread tails under the presser foot.
* Pull them towards the back of the machine.
You are now ready to sew! The Brother sewing machine lower thread setup is complete, and the threads are positioned correctly.
Checking Your Bobbin Setup
Before you start sewing your project, it is a good idea to do a test stitch.
* Use a scrap piece of fabric.
* Lower the presser foot.
* Sew a few stitches.
* Stop and look at the stitches.
* Check the stitches on the top side of the fabric.
* Check the stitches on the bottom side of the fabric.
The stitches should look the same on both sides. They should be locked neatly in the middle of the fabric layers. If they look looping or uneven, your bobbin setup or top threading might need checking.
Common Bobbin Issues and Fixes
Even with an easy guide, sometimes things go wrong. Here are a few common problems with the bobbin setup and how to fix them simply.
h4 Stitches Loop on Top Fabric Side
- Problem: The bottom thread (bobbin thread) looks loose and makes loops on the top side of your fabric.
- Simple Cause: The top thread tension is too tight, OR the bobbin thread tension is too loose.
- Easy Fix:
- Check your bobbin loading again. Is the thread correctly pulled into the tension slot in the bobbin area? This is the most common reason.
- Re-thread the top thread completely. Make sure the presser foot is UP when you thread the top part.
- If your machine has a bobbin case (less common in drop-in types), check its tension. But first, always re-load the bobbin and re-thread the top.
h4 Stitches Loop on Bottom Fabric Side
- Problem: The top thread looks loose and makes loops on the bottom side of your fabric.
- Simple Cause: The top thread tension is too loose, OR the bobbin thread tension is too tight.
- Easy Fix:
- Check the top threading path carefully. Make sure the thread is seated correctly in all guides and the tension discs on top. Re-thread the top completely with the presser foot UP.
- Check your bobbin. Is it wound smoothly? A poorly wound bobbin can cause issues. Re-wind the bobbin if it looks lumpy.
- For drop-in bobbins, the bobbin itself doesn’t have adjustable tension. The tension is controlled by the path you pull the thread through in the machine’s bobbin area. Double-check you followed the sewing machine bobbin placement guide exactly. Make sure the thread snaps into the tension guide.
h4 Thread Jams or Breaks
- Problem: The machine stops, makes noise, or thread breaks often.
- Simple Cause: Thread is tangled, or the bobbin is loaded wrong.
- Easy Fix:
- Stop sewing right away.
- Lift the presser foot.
- Gently pull the fabric out. You might need to cut the threads.
- Remove the bobbin cover plate.
- Look in the sewing machine bobbin area. Is there tangled thread (a “thread nest”)?
- Clean out any tangled threads completely. Use tweezers if needed.
- Take the bobbin out.
- Re-insert the bobbin Brother machine following the steps precisely. Make sure the thread is in the tension path.
- Bring the bobbin thread up again.
- Re-thread the top part of the machine.
- Try sewing on scrap fabric again.
h4 Bobbin Winder Not Working
- Problem: The bobbin winder spins, but no thread winds on the bobbin.
- Simple Cause: Thread not held at the start, or not through the bobbin hole.
- Easy Fix:
- Make sure you threaded the end of the thread through the small hole in the bobbin before you started winding.
- Make sure you held the thread tail for the first few turns.
- Check that the thread is going through the tension disc for bobbin winding.
h4 Bobbin Winder Not Engaging
- Problem: You push the bobbin winder pin right, but it does not seem to start or click into place.
- Simple Cause: Machine might be threaded for sewing, or needle is down.
- Easy Fix:
- Make sure the top thread is NOT threaded through the needle when you are winding a bobbin.
- Make sure the presser foot is up.
- Turn the handwheel towards you to make sure the needle is all the way up before pushing the winder pin.
This simple troubleshooting table can help:
h5 Basic Bobbin Fixes Table
| Problem | Look Here First | Try This Simple Step |
|---|---|---|
| Loops on top of fabric | Bobbin Area | Re-load bobbin, check tension path slot |
| Loops on bottom of fabric | Top Threading / Bobbin Area | Re-thread top, check bobbin direction and tension path |
| Machine Jams/Thread Breaks | Sewing Machine Bobbin Area / Below | Clean out tangled thread, re-load bobbin, re-thread top |
| Bobbin not winding | Bobbin Winder Setup | Check thread path, hold thread start, check bobbin hole |
| Bobbin winder not engaging | Winder Pin Position / Machine Setup | Push pin fully right, check needle position, foot up |
Remember, correctly loading sewing machine bobbin is key to smooth sewing.
Tips for Best Bobbin Results
Follow these simple tips for easy bobbin loading and better sewing.
- Use the right bobbin: Brother machines work best with Brother bobbins made for that model. Using the wrong size or type can cause problems in the sewing machine bobbin area. Plastic bobbins are common. Don’t use metal bobbins in a machine meant for plastic ones, or vice versa.
- Wind bobbins evenly: When using the bobbin winding sewing machine feature, watch that the thread winds smoothly. If it looks lumpy, the tension might be wrong, or the thread might be old. Lumpy bobbins cause bad stitches.
- Don’t overfill: A bobbin packed too full will not fit or spin right in the bobbin area. The thread can spill off the sides and cause jams.
- Leave a tail: When inserting bobbin Brother machine, make sure you leave enough thread pulled out before closing the cover (4-6 inches). This makes it easier to bring the thread up.
- Check the direction: This is super important! The sewing machine bobbin placement guide on your machine (a picture or numbers) shows the direction. The thread must come off the bobbin in the correct way (usually making a “P” or “6” shape when viewed from the top).
- Always close the cover: Make sure the bobbin cover plate is closed firmly before sewing.
- Clean the bobbin area: Lint and small thread bits can build up in the sewing machine bobbin area. This can mess up the bobbin tension. Use a small brush to clean it often. Your machine book will show you how.
- Use good quality thread: Cheap or old thread can break easily or not wind well. This makes the bobbin winding sewing machine process frustrating. Good thread makes a big difference.
- Practice: Loading the bobbin threading bobbin case Brother steps might feel strange at first. Do it a few times, and it will become very easy.
By following these tips and the Brother sewing machine threading steps, your lower thread setup will be ready for smooth sewing.
Deciphering Your Machine’s Markings
Brother sewing machines have helper marks. Look for these when loading your bobbin.
* Numbers: There might be numbers (1, 2, 3, etc.) showing the path for winding or threading.
* Lines: Dashed or solid lines often show the path for the thread.
* Pictures: Small drawings show how to place the bobbin or guide the thread.
Look closely at the machine’s surface near the bobbin area and the bobbin winder use spot. Your machine manual is also a great help. It will have clear pictures for inserting bobbin Brother machine and using the bobbin winding sewing machine feature.
Ensuring Correctly Loading Sewing Machine Bobbin
We’ve talked about winding and inserting. The goal is ‘correctly loading sewing machine bobbin’. This means:
1. The bobbin is wound smoothly, not too full.
2. The bobbin is placed in the sewing machine bobbin area with the thread coming off in the right direction (the key part of the sewing machine bobbin placement guide).
3. The thread is pulled through the tension path or slot correctly (threading bobbin case Brother or drop-in area).
4. Enough thread tail is left out.
5. The cover is closed.
6. The bobbin thread is brought up above the needle plate.
If all these steps are done right, your Brother sewing machine lower thread setup is correct. This leads to nice, even stitches.
A Bit More on Thread
The type of thread you use can affect how the bobbin works.
* Weight: Thicker threads might need different tension. Most general sewing uses 40-weight thread.
* Fiber: Cotton, polyester, rayon threads all work fine. Avoid very fuzzy or sticky threads that can gum up the bobbin area.
* Spool size: Make sure the spool fits on your machine’s spool pin and spins freely.
Using the right thread helps the bobbin winding sewing machine part work well and keeps the sewing machine bobbin area clean.
Maintenance for the Bobbin Area
Keeping the bobbin area clean prevents many problems. Lint and thread bits can build up from sewing.
* Open the cover: Remove the bobbin cover plate.
* Remove the bobbin: Take the bobbin out.
* Remove the bobbin case (if it has one): Some machines have a metal bobbin case you can take out. If yours does, take it out.
* Brush away lint: Use the small brush that came with your machine. Brush away all the fuzz from the bobbin case, the area it sits in, and the feed dogs (the teeth under the needle plate).
* Oil (if your manual says so): Some older or mechanical machines need a drop of oil in the bobbin area. Check your manual! Most modern Brother machines do not need oiling here.
* Put it back: Place the bobbin case back (if removed), put the bobbin back in (checking the direction!), and close the cover.
Regular cleaning keeps the Brother sewing machine lower thread setup working smoothly and prevents thread jams.
Final Checks Before Sewing
You have wound the bobbin using the Brother bobbin winder use method. You have followed the sewing machine bobbin placement guide for inserting bobbin Brother machine. The bobbin thread is up. Before you put fabric under the foot:
* Make sure the presser foot is up when threading the top AND when bringing up the bobbin thread. Lower it only when you are ready to sew.
* Make sure both thread tails are pulled under the presser foot and towards the back. This helps the machine start sewing without tangling.
These little checks are part of the complete Brother sewing machine threading steps and help ensure a good start.
Frequently Asked Questions (FAQ)
h5 Q: Why does my bobbin thread keep breaking?
A: This is often because the thread is not guided through the tension path in the bobbin area correctly. Take the bobbin out and put it back in, making sure the thread snaps into the small metal slot or guide. It could also be old or poor quality thread, or the bobbin area needs cleaning.
h5 Q: How often should I clean the bobbin area?
A: Clean it after every project, or after about 8-10 hours of sewing time. If you are using fuzzy threads (like cotton), clean it more often.
h5 Q: My bobbin winder is not spinning the bobbin. What’s wrong?
A: Check that you pushed the bobbin winder pin all the way to the right. Also, make sure the machine is not threaded through the needle; the machine often stops the needle bar from moving when winding a bobbin. The presser foot should be up.
h5 Q: Does the direction of the bobbin matter?
A: YES! This is very important for Brother drop-in bobbins. The thread must come off the bobbin edge in the direction shown on your machine (usually counter-clockwise, making a “P” or “6”). If it’s backwards, the stitches will be terrible. Look at the pictures on your machine or in your manual for the sewing machine bobbin placement guide.
h5 Q: Can I use metal bobbins in my Brother machine?
A: Check your manual. Most modern Brother machines with drop-in bobbins use plastic bobbins only. Using metal bobbins in a plastic-only machine can damage it.
h5 Q: Why are my stitches looping on the bottom?
A: This usually means the top thread tension is too loose. The most common reason for this is not threading the top part correctly, especially with the presser foot down. Always re-thread the top path with the presser foot UP. Also, check that the bobbin thread is not too tight (make sure it is pulled into its tension guide correctly).
Loading a bobbin on your Brother sewing machine is a fundamental step in sewing. By following these easy instructions for the bobbin winding sewing machine feature, the Brother bobbin winder use, and the inserting bobbin Brother machine process, you can ensure your machine is set up for success. Pay close attention to the Brother sewing machine lower thread setup, using the sewing machine bobbin placement guide. With correctly loading sewing machine bobbin into the sewing machine bobbin area and following the Brother sewing machine threading steps, you’ll have smooth sailing for your sewing projects.