
Making a body form for sewing, often called a dress form, dress mannequin, sewing dummy, body mannequin, or tailor’s dummy, is a fantastic way for home sewists to achieve professional-level garment construction. Can you make a functional dress form yourself? Absolutely! Who is making a body form for sewing for? Anyone who wants to create well-fitting garments, improve their pattern making skills, and practice fitting techniques without constantly needing a live model. This DIY guide will walk you through the process, offering a cost-effective and customizable alternative to store-bought fitting forms.
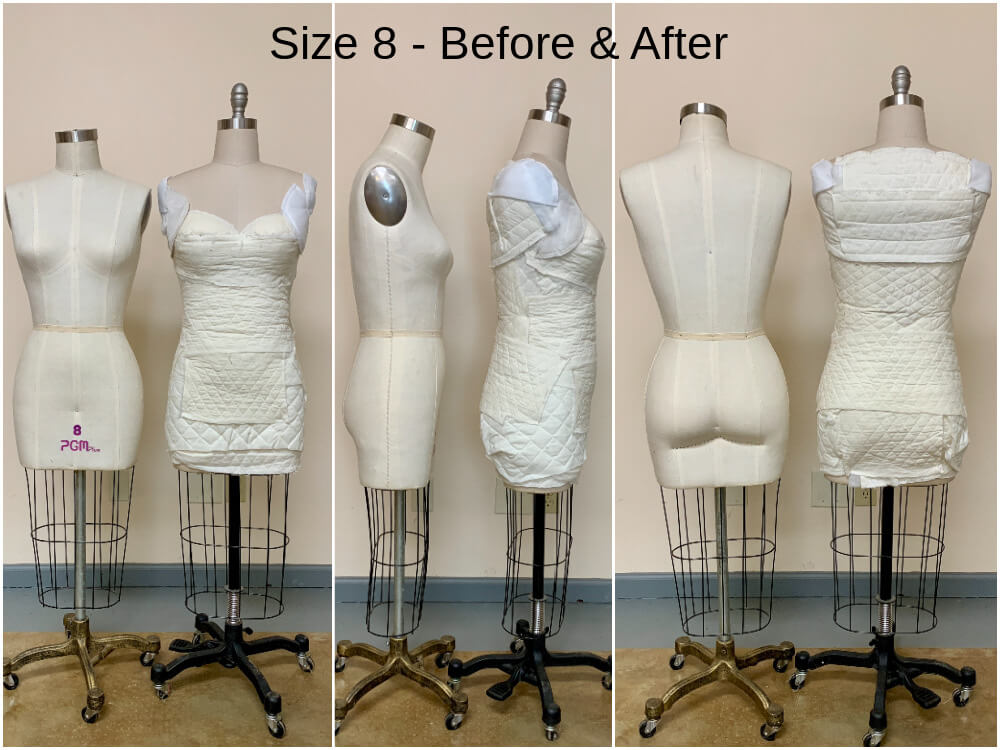
Image Source: brooksann.com
Crafting Your Custom Body Form: A Step-by-Step Journey
Creating your own body form is a rewarding project that puts you in control of your sewing projects. Whether you’re a beginner looking to improve your garment construction or an experienced seamstress needing a precise fitting form, this guide will equip you with the knowledge to build a personalized sewing dummy.
Why Build Your Own Body Mannequin?
Before diving into the “how,” let’s explore the “why.” A custom-made body form offers several distinct advantages:
- Perfect Fit: Store-bought dress forms are standard sizes. Your body is unique. A DIY form ensures your patterns and garments will fit your specific measurements flawlessly.
- Cost-Effectiveness: Professional dress forms can be quite expensive. Making your own significantly reduces the cost.
- Customization: You can tailor the form to your exact needs, adding features like a padded surface for pinning or a sturdy base for stability.
- Pattern Making Precision: For intricate pattern making, having a form that replicates your body’s shape allows for more accurate draping and adjustments.
- Learning & Practice: The process of making the form itself is a learning experience, and using it for sewing practice provides invaluable insights into garment behavior on a body.
Method 1: The Plaster Wrap Technique – Capturing Your Form
This is a popular and relatively straightforward method to create a realistic replica of your body.
Materials You’ll Need:
- Plaster of Paris or Plaster Bandages: Available at craft stores or medical supply stores. Plaster bandages are generally easier to work with.
- Old Clothes: Wear clothes you don’t mind getting messy or potentially ruining. A close-fitting t-shirt and leggings or tight pants work best.
- Plastic Wrap or Old Sheets: To protect your body and the floor.
- Duct Tape: For reinforcing and creating the base.
- Scissors: For cutting tape and plaster.
- A Helper: This is crucial for safely applying the plaster.
- A Sturdy Stand: A broom handle inserted into a bucket of sand or concrete, or a sturdy coat rack, can serve as a temporary stand.
- Sandpaper: For smoothing.
- Paint or Fabric: For finishing.
Step-by-Step Instructions:
-
Preparation is Key:
- Wear your old clothes.
- Cover your arms and neck area with plastic wrap or old sheets. This prevents the plaster from sticking directly to your skin and makes removal easier.
- Ensure your helper is ready and understands the process.
- Set up your stand in a comfortable, well-ventilated area.
-
Measuring and Marking:
- With your helper’s assistance, take your body measurements. Record these carefully: bust, waist, hips, and any other key areas you want the form to represent accurately.
- Mark these measurements lightly on your clothes with a fabric marker. This will help ensure accuracy when you start wrapping.
-
Applying the Plaster:
- If using plaster bandages, cut them into manageable strips (about 6-10 inches long).
- Dip the plaster strips into lukewarm water, one at a time, and gently squeeze out excess water.
- Starting from your waist or hips, begin applying the wet plaster strips to your body, overlapping them by about half an inch. Smooth out any air bubbles as you go.
- Work in sections, covering your torso from just below the bust down to your hips or thighs, depending on how much of a form you want.
- Crucially, leave an opening at the neck and underarms to allow for removal. Also, avoid the very bottom edge of your torso.
- Ensure even coverage and smooth surfaces. Your helper should be carefully applying the strips, smoothing as they go.
-
Building Strength and Shape:
- After the first layer is applied, let it set for a few minutes.
- Apply a second layer of plaster strips, ensuring good adhesion and strength. You might want to apply a third layer in areas that need more rigidity, like the bust or hips.
- Pay attention to your marked measurements. Use extra strips to build out areas that are larger than the base measurement (e.g., bust fullness).
-
Creating the Base and Removal:
- Once the plaster has hardened sufficiently (it will feel firm and cool), your helper can carefully begin to peel the plaster shell away from your body. Start by gently prying at the openings you left.
- As you remove it, it will likely come off in one piece, a hollow shell.
- Immediately place this hollow shell onto your prepared stand.
- Use duct tape to reinforce the edges, especially where you left openings. You can also tape across the bottom to create a solid base if needed.
-
Finishing Touches:
- Let the plaster form dry completely. This can take 24-48 hours.
- Once dry, use sandpaper to smooth any rough edges or bumps.
- You can then paint the form or cover it with fabric (like a sturdy cotton or linen) using spray adhesive or fabric glue for a more professional finish. This also provides a surface for pinning.
Method 2: The Duct Tape Form – A Quick and Easy Alternative
This method is faster but may not be as precise as the plaster wrap. It’s great for basic garment construction and fitting practice.
Materials You’ll Need:
- Plenty of Duct Tape: You’ll use a lot!
- Old Clothes: A very tight-fitting t-shirt and leggings are essential.
- Scissors: For cutting tape.
- A Helper: Again, this is crucial for applying the tape smoothly.
- A Sturdy Stand: As described in Method 1.
- A Marker: For marking measurements.
Step-by-Step Instructions:
-
Wear Your Base Layer: Put on your tight-fitting t-shirt and leggings. Make sure they are smooth against your skin.
-
Measure and Mark:
- With your helper, take your measurements.
- Mark these key measurements directly onto your clothes with a marker.
-
Applying the Duct Tape:
- Start by wrapping strips of duct tape horizontally around your torso, starting from your waist and working upwards towards your shoulders. Overlap each strip by about half an inch.
- Ensure the tape is applied smoothly and without wrinkles. Your helper should be helping you to keep the fabric underneath taut.
- When you reach areas with curves, like the bust or hips, cut small slits in the tape so it can lie flat and conform to the shape of your body.
- Continue building layers of tape, ensuring good coverage and rigidity. Aim for at least 3-4 layers for a sturdy form.
- Crucially, leave an opening at the neck or a seam you can cut later for removal. Also, avoid taping the very bottom edge where you’ll eventually cut it free.
-
Creating the Body Form Shell:
- Once you have sufficient layers of tape, carefully cut a vertical line from your neck opening down to your waist, or from the bottom of your taped area up towards your waist. This will allow you to peel the taped structure off your body.
- Have your helper assist you in carefully sliding out of the taped shell.
- Once removed, use duct tape to reinforce the cut seam and create a stable, continuous shell. You can also tape across the bottom to close it off and provide a base.
-
Securing to a Stand:
- Place the duct tape shell onto your stand.
- Use additional duct tape to secure the form to the stand, ensuring it’s stable and won’t wobble.
-
Refining the Shape:
- You can use more tape to smooth out any bumps or build up areas that might be too flat.
- You can also cover the entire form with a layer of fabric for a smoother pinning surface.
Adapting and Enhancing Your Body Mannequin
Once you have your basic body form, you can customize it further to better suit your sewing needs.
Adding Padding for Pinning:
- Materials: Cotton batting, spray adhesive or fabric glue.
- Process: Cut cotton batting to the shape of your form. Adhere it to the surface using spray adhesive or fabric glue, starting from the bottom and working your way up. This creates a soft surface that’s easy to pin into.
Covering with Fabric:
- Materials: Sturdy cotton fabric, spray adhesive, sewing machine (optional).
- Process: Cut fabric panels to fit your form. You can either glue them directly onto the form using spray adhesive for a smooth finish, or sew them into a cover that slips over the form. This provides a clean surface for marking and pinning.
Creating a Stable Base:
- For Plaster Forms: If your plaster form is hollow at the bottom, you can fill the base with concrete or sand for added weight and stability. Ensure the stand is securely embedded.
- For Duct Tape Forms: Use a generous amount of duct tape to create a strong, flat base. You might also consider attaching it to a wooden base or a repurposed mannequin stand.
Measuring and Marking Tools:
- Measuring Tape: Essential for checking your form against your actual body measurements.
- Fabric Marker: For marking seam lines or pattern adjustments directly on the form.
Using Your DIY Dress Form for Sewing Practice and Pattern Making
Your custom body form is now ready for action! Here’s how to leverage it for better sewing:
Fitting Form Utility:
- Muslin Fittings: Create a muslin (test garment) using your pattern. Put it on your DIY body form and make adjustments as you would on a live person. This is invaluable for seeing how the fabric hangs and where alterations are needed.
- Draping Fabric: Use your form to drape fabric for design experimentation. See how different fabrics behave and fall on a three-dimensional surface that mimics your body.
Pattern Making Enhancement:
- Adjusting Patterns: Place your paper patterns directly onto the form and pin them. You can easily see how seams will lie, where to add or subtract ease, and how to adapt commercial patterns to your unique shape.
- Creating Darts and Seams: Mark dart intakes and seam placements directly on the form. This visual aid is incredibly helpful for accurate garment construction.
Sewing Practice Benefits:
- Sleeve Setting: Setting in sleeves can be tricky. Practicing on your form allows you to get a feel for easing the fabric and achieving a smooth armhole.
- Collar Attachment: Attaching collars and neckbands requires precision. Your form provides a stable surface to practice these techniques.
- Zipper Insertion: Practice inserting zippers smoothly and accurately, especially in curved areas.
Important Considerations and Tips
- Safety First: Always have a helper for both the plaster and duct tape methods. Never attempt to apply plaster or tape yourself without assistance.
- Ventilation: Work in a well-ventilated area, especially when using plaster or spray adhesives.
- Cleanliness: Protect your workspace and wear old clothes. Plaster and duct tape can be messy.
- Accuracy: Take your time with measurements. The accuracy of your form depends on the accuracy of your initial measurements.
- Patience: The drying time for plaster can be significant. Be patient and allow it to dry completely before handling or finishing.
- Durability: While DIY forms are functional, they might not be as durable as professional ones. Handle them with care.
Frequently Asked Questions About DIY Body Forms
Q1: How accurate will my DIY body form be?
A1: The accuracy depends on how carefully you take your measurements and apply the materials. The plaster wrap method generally yields a more precise replica of your body’s contours than the duct tape method.
Q2: Can I use my DIY dress form for heavy fabrics like denim or wool?
A2: For heavier fabrics, you might need to reinforce your form with additional layers of plaster or duct tape. Padding with a denser material can also help. A sturdy stand is also essential.
Q3: How long will a DIY body form last?
A3: The lifespan of a DIY form can vary. A well-made plaster form, properly sealed and cared for, can last for many years. A duct tape form might become less rigid over time and may need reinforcement.
Q4: What if I gain or lose weight? Can I adjust my DIY form?
A4: Adjusting a DIY form can be tricky. For minor changes, you might be able to add or remove padding. For significant changes, it’s often easier to make a new form to ensure accuracy.
Q5: Can I make a body form for someone else?
A5: Yes, but you will need their measurements and their cooperation for the wrapping or taping process. Safety is paramount when working with another person.
Creating your own body form is a game-changer for any serious sewist. It’s a project that enhances your skills in pattern making, garment construction, and fitting, leading to garments that fit beautifully and make you feel fantastic. Happy sewing!