
Making your own sewing patterns lets you create clothes that fit just right. It’s like drawing the map for your fabric before you cut. How do you make a sewing pattern? You start by taking careful body measurements. Then, you draw simple body shapes on paper, known as blocks or slopers. From these basic shapes, you draft a sewing pattern for your design. You will learn how to measure for pattern making, create a garment block, and turn it into a pattern you can sew. This simple guide walks you through each step.
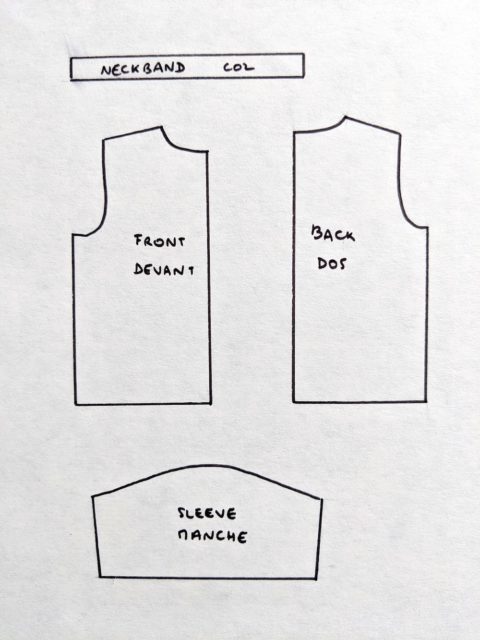
Image Source: camimade.com
Gathering Your Supplies
Before you begin, get your tools ready. Having the right items makes pattern making easier. You don’t need fancy things to start.
Basic Materials You Will Need
- Pattern paper types: You have choices here.
- Dot and cross paper: This paper has dots and lines. It helps keep your lines straight and squared. It’s great for drawing patterns.
- Brown kraft paper: Simple, strong paper. It works well for tracing and drawing larger pieces.
- Medical exam paper: This is thin, cheap paper. Good for making quick test patterns or tracing existing ones.
- Tracing paper: Useful for copying parts of patterns or adding details.
- Measuring tape: A flexible tape is key for body measurements.
- Ruler: A straight ruler and a curved ruler (like a French curve or hip curve) help draw smooth lines.
- Pencils: Use pencils that are easy to erase.
- Eraser: For fixing mistakes.
- Paper scissors: Use different scissors for paper than for fabric!
- Push pins or weights: To hold paper still.
- Clear tape: For joining pieces of paper.
- Notebook and pen: To write down measurements and notes.
Getting these items ready sets you up for success.
Taking Accurate Body Shapes
Pattern making starts with you. You need to know your body’s shape and size. Measure for pattern making is a very important step. Ask a friend to help you for the best results. Wear clothes that are close to your body, like leggings and a tank top. Do not measure over bulky clothes.
Key Measurements to Take
- Bust: Go around the fullest part of your chest. Keep the tape level.
- Waist: Find the narrowest part of your body, usually just above your belly button.
- Hips: Measure around the fullest part of your hips and rear.
- High Bust/Chest: Measure around your chest, just under your armpits and above your bust. This helps figure out cup size needs.
- Shoulder Width: Measure across your upper back, from the tip of one shoulder bone to the other.
- Back Waist Length: From the bone at the base of your neck down to your natural waistline.
- Front Waist Length: From the top of your shoulder (near your neck) over your bust to your natural waistline.
- Sleeve Length: From the tip of your shoulder down to where you want the sleeve to end. Bend your arm slightly.
- Arm Circumference: Around the fullest part of your upper arm.
- Wrist Circumference: Around your wrist bone.
- Thigh Circumference: Around the fullest part of one thigh.
- Knee Circumference: Around your knee.
- Ankle Circumference: Around your ankle bone.
- Inseam: From your crotch down to the floor (or where you want pants to end). Stand straight with legs slightly apart.
- Outseam/Side Length: From your natural waistline down to the floor (or where you want the garment to end).
Write all these numbers down carefully in your notebook. Double-check them if you can. Small mistakes in measuring can lead to big fit problems later.
Making Your Sloper Pattern
A sloper pattern is a basic, close-fitting pattern. It has no style details, like gathers or flares. It is like a second skin made of paper. Think of it as a base map of your body. You will create a garment block (sloper) for different body parts:
* Bodice front
* Bodice back
* Skirt front
* Skirt back
* Sleeve
Why Use a Sloper?
- It fits your exact measurements.
- It is a starting point for any design.
- You change the sloper to make new styles.
- It saves time because the fit is already mostly right.
To draft a sewing pattern from scratch, many people start by making a sloper. There are systems for this. You use your body measurements and simple math to draw lines and curves on your pattern paper. This process is sometimes called flat pattern making.
Simple Steps to Draw a Bodice Sloper (Basic Idea)
Drawing a full sloper takes time and specific guides. Here is a simplified idea of how it works to give you a picture:
- Draw a base rectangle: Use your bust and waist measurements to figure out the width. Use your back waist length for the height.
- Mark key points: Measure down from the shoulder line to mark the bust line, waist line, and hip line.
- Add ease: Clothes need a little extra room to move. This is called ease. Add a small amount to your measurements when drawing.
- Draw neck and arm curves: Use curved rulers to shape the neckline and armholes based on standard guides and your high bust measurement.
- Place darts: Darts are folds sewn into fabric. They shape the flat fabric to fit body curves (like the bust or waist). You calculate where to put these darts based on your measurements and body shape.
- Draw shoulder seams: Connect the neck to the armhole at the shoulder width measurement.
This is a very basic look. Full guides for drafting slopers give exact formulas and steps for different sizes and body shapes. You can find books or online courses that teach this. The goal is to create a garment block that fits you well and can be used again and again.
Drafting Your First Simple Pattern
Once you have a sloper, or if you want to start with a very simple shape like a basic skirt or a simple top with no darts, you can draft a sewing pattern. This means drawing the actual pattern pieces you will cut from fabric.
Let’s think about making a simple A-line skirt pattern without needing a full sloper first.
Drafting a Simple A-Line Skirt
You will need your waist and hip measurements, and the length you want the skirt.
- Draw a line for the waist: This line’s length is half of your waist measurement plus ease.
- Draw a line for the hip: Measure down from the waist line (about 7-9 inches for most adults) and draw a line. Its length is half of your hip measurement plus ease.
- Draw the side seam: Connect the end of the waist line to the end of the hip line with a slightly curved line.
- Draw the hem line: Measure down from the waist line to the length you want the skirt. Draw a line parallel to the waist line. This line will be wider than the hip line for the A-line shape.
- Connect the hip to the hem: Draw a line from the end of the hip line down to the end of the hem line. This line angles out to create the A-shape.
- Add seam allowances: This is extra fabric around the edge of the pattern piece. You need this to sew the seams. A common amount is 5/8 inch or 1.5 cm. Draw a line 5/8 inch outside your main pattern shape.
- Add a waist band: Draw a rectangle piece for the waist band. Its length is your full waist measurement plus overlap for a closure. Its width is double the finished width you want, plus seam allowances.
- Add markings: Mark the grain line (a straight line showing how to place the pattern on the fabric along the fabric’s lengthwise threads). Mark the fold line if a piece is cut on the fabric fold. Mark where the zipper or opening goes.
This is the core process to draft a sewing pattern. You take measurements, draw shapes, add ease, add seam allowances, and add needed markings. This is part of sewing pattern design. You are creating the blueprint for your garment.
Trying Your Pattern: Making a Muslin
Making a test garment is a crucial step. This test garment is often called a muslin (even if you use cheap fabric other than muslin). It helps you see how your pattern fits before you cut into your good fabric.
Steps for a Muslin Test
- Cut out your pattern pieces: Use your paper pattern to cut the test fabric. Don’t forget to transfer markings.
- Sew the muslin: Sew the pieces together using long stitches (basting stitches). Use the seam allowances you added. Don’t worry about finishing edges or adding zippers perfectly. The goal is just to see the shape and fit.
- Try it on: Carefully put the muslin on. Look in a mirror.
- Check the fit:
- Is it too tight or too loose?
- Are there wrinkles or pulls?
- Does it hang straight?
- Is the neckline right?
- Are the armholes comfortable?
- Is the length correct?
Adjusting Your Sewing Patterns
Based on your muslin test, you will likely need to adjusting sewing patterns. This is a normal part of the process. You make changes directly on the muslin while you are wearing it, or mark the changes on it and then transfer those changes back to your paper pattern.
How to Make Common Adjustments
- If it’s too tight: Let out the seams slightly (reduce the seam allowance). If that’s not enough, you might need to add width to the pattern pieces.
- If it’s too loose: Pin the fabric to make it fit better. Mark the new seam line. You will take in the seams on your next version, or make the pattern pieces narrower.
- Removing wrinkles: Wrinkles often point to areas where the fabric is being pulled or is too loose in one spot. Pin out the wrinkle and see how it affects the fit. This might mean reshaping a seam or adding/changing a dart.
- Adjusting length: Simply mark the new desired length on the muslin.
- Changing neck or armholes: Pin or draw the new line you want.
After marking changes on the muslin, take it off carefully. Lay it flat and transfer the changes to your paper pattern. Smooth out the lines. Cut a new muslin if the changes were big, or if you want to be extra sure before cutting your final fabric. This process of adjusting sewing patterns makes sure your finished garment fits you well.
Exploring Other Pattern Making Ways
Flat pattern making, starting from measurements or a sloper, is very common. But there is another major method: draping for pattern making.
What is Draping?
Draping involves working with fabric directly on a dress form (a padded body shape).
- You pin fabric onto the dress form.
- You shape the fabric by pinning, tucking, and cutting right on the form.
- You mark key lines (like waist, seams, darts) on the fabric.
- You take the fabric off the form.
- You lay the shaped fabric flat on paper and trace it to create the pattern pieces.
When to Use Draping
- Complex designs: Draping is great for flowing styles, gathers, cowl necks, and other designs that are hard to picture flat.
- Getting a feel for the fabric: You can see how a specific type of fabric behaves on the body shape.
- Creative design: Some designers find draping more artistic and free than flat pattern making.
While flat pattern making is often taught first for basics like slopers and simple garments, draping for pattern making is a powerful tool for more complex or fluid designs. Many patterns are created using a mix of both methods.
Making Patterns in Different Sizes
Once you have a pattern that fits one size, you might want to make it available in other sizes. This is called pattern grading.
What is Pattern Grading?
Pattern grading is the process of making a pattern larger or smaller than the original size. You do not just shrink or enlarge the pattern evenly. Instead, you increase or decrease the pattern measurements in specific ways at key points (like the bust, waist, hips, shoulders).
How Grading Works (Simple Idea)
Grading uses a set of rules or a system. For example, between one size and the next, you might add a certain amount to the side seams at the bust, a different amount at the waist, and another amount at the hip.
- Grade rules: These are the standard amounts added or subtracted between sizes. These amounts vary based on the part of the body and the size range (smaller jumps between smaller sizes, sometimes larger jumps between larger sizes).
- Grade points: These are specific spots on the pattern where the grading changes happen (e.g., corners, dart points, notches).
Pattern grading can be done by hand using rulers and curves, or using special computer software. It is a technical skill. If you plan to sell your patterns or make clothes for many people, learning pattern grading is essential.
Resources for Learning Pattern Making
Starting out might seem like a lot. But there are many places to get help and learn. You don’t have to figure it all out alone.
Free Pattern Making Resources
- Online Blogs and Websites: Many sewing bloggers and websites offer free tutorials on basic pattern making, drafting simple garments, and adjusting sewing patterns. Look for step-by-step guides.
- YouTube Channels: Video tutorials can be very helpful. You can watch someone draw lines and curves, measure, and fit muslins. Search for terms like “how to draft a skirt pattern” or “DIY sewing pattern.”
- Libraries: Your local library likely has books on sewing and pattern making. These can be great resources for learning classic techniques like drafting slopers.
- Free Mini-Courses: Some pattern designers or sewing schools offer short free online courses that cover the basics of pattern making or pattern fitting.
- Fabric Stores: Sometimes local fabric stores have classes or can point you to resources in your area.
Using free pattern making resources is a great way to start learning without spending a lot of money. As you get more serious, you might consider buying books, taking paid classes, or joining online pattern making communities.
Summary of the Pattern Making Journey
Making a sewing pattern from scratch is a journey with several steps:
- Preparation: Gather your tools and choose your pattern paper types.
- Measurement: Carefully measure for pattern making, getting accurate body numbers.
- Foundation: Create a garment block (sloper) based on your measurements. This is a key step in draft sewing pattern.
- Design: Draft a sewing pattern for your chosen style, adding ease, seam allowances, and markings. This is the core of sewing pattern design.
- Testing: Make a test garment (muslin) to check the fit.
- Refinement: Adjusting sewing patterns based on the muslin test. Repeat testing if needed.
- Explore: Learn about other methods like draping for pattern making.
- Expand: If needed, learn pattern grading to make your pattern in different sizes.
- Learn: Use free pattern making resources and other helps to build your skills.
It takes practice. Your first pattern might not be perfect. That is okay! Each pattern you make and adjust teaches you more about fit, shape, and how fabric works. Keep trying, keep learning, and enjoy the process of creating clothes that fit you perfectly.
Frequently Asked Questions About Pattern Making
h5 What is a sloper pattern?
A sloper pattern is a basic, plain pattern piece (like a bodice front or back) that fits your body very closely. It has no design details. It acts as a starting point. You change the sloper to create patterns for different clothing styles.
h5 Do I need a sloper to make any pattern?
No, you do not always need a sloper. For very simple shapes like a basic elastic-waist skirt or a square-shaped top, you can often draft a sewing pattern directly from measurements and simple shapes. However, for more fitted garments like dresses, blouses, or pants, a sloper helps ensure a good fit before you add style details.
h5 How much fabric ease should I add?
Ease depends on the garment style. A close-fitting dress needs less ease than a loose jacket. There are standard amounts of ease used for different garment types, but you can adjust this based on how you like your clothes to fit. Start with standard ease guidelines found in pattern making books, and adjust based on your muslin test.
h5 How do I add seam allowance?
Seam allowance is added outside the main outline of your pattern piece. A common amount is 5/8 inch (1.5 cm). You draw or measure this distance around the edge of your pattern shape. This extra fabric is where you will sew the seams together.
h5 Can I use old clothes to make patterns?
Yes, this is called reverse engineering or taking apart a garment. You can carefully take apart a garment that fits you well. Then, you can lay the pieces flat on pattern paper and trace around them to create garment blocks or patterns. You might need to add seam allowances back if the original seams were sewn right at the edge. This is a good way to start learning how garments are put together.