
What is a sewing project? It’s simply making something new with fabric, a needle, and thread. This can be anything from a simple pillow to a complex piece of clothing. Can I learn to sew quickly? Yes! With a few basic steps and some practice, you can start creating wonderful things in no time. Who can learn to sew? Anyone can! All you need is a little patience and a desire to make things with your hands. This guide will help you learn to sew for beginners, covering everything from gathering your tools to finishing your very first beginner sewing projects. Get ready to turn plain fabric into something amazing!
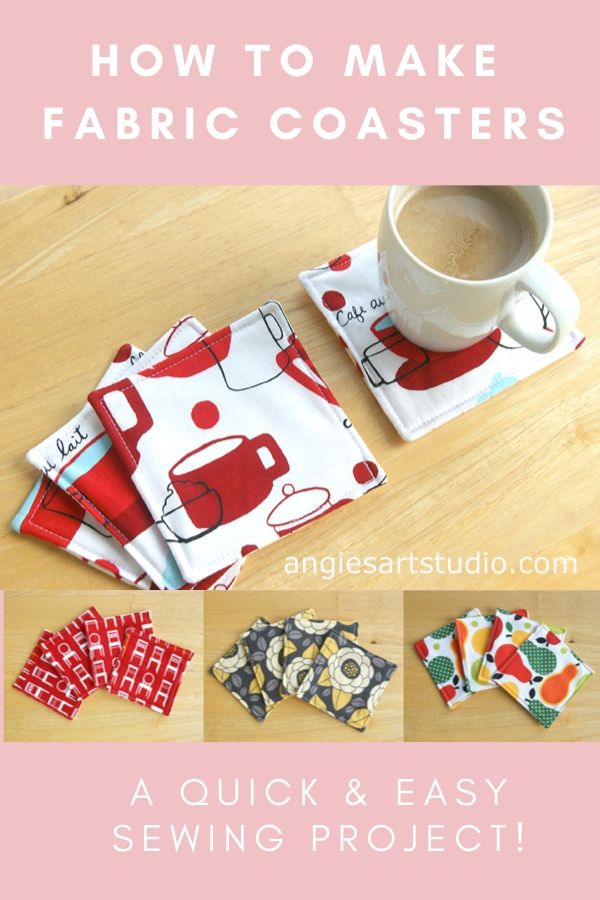
Image Source: angiesartstudio.com
Essential Tools for Your First Stitch
Before you even think about fabric, you need the right tools. Think of it like cooking; you need your pots, pans, and ingredients ready. Having the right sewing supplies list makes your journey much smoother and more fun.
The Sewing Machine: Your New Best Friend
A sewing machine helps you sew much faster and more evenly than by hand. For beginners, a basic mechanical machine is perfect. It does not need many fancy settings. It will stitch forward and backward. Many even have basic zigzag stitches. You can find good machines at different prices. You do not need to spend a lot to get started.
Needles and Pins: Small but Mighty
- Sewing Machine Needles: These are tiny, but very important. They come in different sizes and types. A universal needle (size 80/12 or 90/14) works for most fabrics like cotton.
- Hand Sewing Needles: These are for when you stitch by hand. A pack with different sizes is good.
- Pins: Pins hold your fabric pieces together before you sew them. Look for sharp, rust-proof pins with flat heads or colorful ball heads.
- Pin Cushion: This keeps your pins safe and in one spot. A magnetic pin holder also works well.
Scissors: Cut with Care
You need very sharp scissors for fabric. It’s best to have a pair of fabric scissors that you only use for fabric. Cutting paper or other materials with them will make them dull quickly.
- Fabric Shears: These are your main cutting tool. Get a pair that feels good in your hand.
- Small Snips or Thread Clippers: These are tiny scissors to cut threads close to your fabric.
- Paper Scissors: Keep a separate pair for cutting paper patterns.
Measuring Tools: Precision is Key
Good measuring helps your projects fit and look right.
- Tape Measure: A flexible tape measure is great for body measurements or curved lines.
- Ruler: A clear acrylic ruler (6×24 inches is common) is perfect for cutting straight lines. Look for one with clear markings.
- Seam Gauge: This small metal ruler helps you measure small distances, like hems and seam allowances. It has a sliding marker that stays in place.
Marking Tools: Draw Your Path
You will need to mark lines on your fabric.
- Fabric Chalk or Pen: These let you draw lines on fabric. They usually wash away or disappear after a short time. Always test on a scrap first.
Thread: The Invisible Connector
Thread comes in many colors and types. For most beginner projects, all-purpose polyester thread is best. It is strong and works well with many fabrics. Choose a color that matches your fabric, or one that blends in well.
Iron and Ironing Board: Press for Success
Pressing your seams flat as you sew makes a huge difference. It helps your project look neat and professional. An iron and ironing board are must-have tools.
Basic Sewing Supplies Checklist
To make it easy, here is a simple list of things you will need:
| Item Type | Specific Items to Get | Why You Need It |
|---|---|---|
| Machine & Parts | Basic sewing machine, extra bobbins, universal needles | Main tool for stitching, holds bottom thread, for fabric |
| Cutting Tools | Fabric shears, small snips/clippers, paper scissors | For precise fabric cuts, for thread, for paper patterns |
| Measuring Tools | Tape measure, clear ruler, seam gauge | For body and curved lines, for straight lines, for hems |
| Marking Tools | Fabric chalk or pen | To draw lines on fabric |
| Holding Tools | Pins, pin cushion (or magnetic holder) | To hold fabric pieces together |
| Connecting Tools | All-purpose polyester thread | To sew fabric together |
| Finishing Tools | Iron, ironing board | To press seams flat for a neat finish |
| Optional Extras | Seam ripper, thimble | To unpick stitches, to protect finger during hand sewing |
Choosing the Right Material
Picking the right fabric is important. Some fabrics are much easier to work with than others, especially when you are just starting out. This section will guide you through fabric types for sewing.
Easy Fabrics for Beginners
When you learn to sew for beginners, starting with stable fabrics is a smart move. These fabrics do not stretch or slip much, making them easier to cut and sew straight lines.
- Cotton (Quilting Cotton, Broadcloth): This is the best fabric for new sewers.
- It is strong and holds its shape well.
- It does not slip when you sew it.
- It comes in many colors and patterns.
- It is often cheap to buy.
- Good for things like pillowcases, simple bags, and practice projects.
- Fleece: This soft, fuzzy fabric is also great for beginners.
- It does not fray ( unravel ) much at the edges.
- It is warm and comfy.
- Good for blankets, scarves, and simple hats. Just be aware it can shed a lot of lint when cut.
- Linen Blends: A mix of linen and cotton is often easier than pure linen.
- It has a nice drape.
- It creases easily but also presses well.
- Good for simple clothes or home items.
Fabrics to Avoid (at first)
Some fabrics are very tricky. Save these for later when you have more skill.
- Silks and Satins: These are very slippery and hard to cut evenly. They also snag easily.
- Very Stretchy Knits (like spandex or thin jersey): These can stretch out of shape when you sew them. They need special needles and machine settings.
- Heavy Denim or Canvas: These are very thick. Your machine might struggle to sew through many layers. They can also break needles.
- Very Thin or Sheer Fabrics (like chiffon or organza): These are hard to handle and see through. They often need special finishing.
- Velvet or Fur: These have a “nap” (a raised surface) that can be tricky to sew smoothly.
Fabric Grain and Selvage: Navigating the Weave
Fabric is made by weaving threads together. These threads create a “grain.” Knowing about grain helps your project hang right and not get twisted.
- Selvage: Look at the edge of your fabric. You will see a finished edge that does not fray. This is the selvage. It runs parallel to the length of the fabric.
- Grainline:
- Lengthwise Grain (Warp): This runs parallel to the selvage. It is the strongest and least stretchy direction. Most pattern pieces are cut on this grain.
- Crosswise Grain (Weft): This runs from selvage to selvage. It has a little more stretch than the lengthwise grain.
- Bias: This is the diagonal direction across the fabric (45 degrees to the selvage). It has the most stretch and drape. This is useful for some parts of clothing but usually not for beginners.
When you cut your fabric, make sure your pattern pieces are lined up correctly with the grainline arrows on your pattern. This keeps your finished item from twisting or sagging.
Pre-Washing Your Fabric: A Crucial Step
Always wash and dry your fabric before you cut and sew it. Why?
- Shrinkage: Most fabrics shrink a little when washed for the first time. If you sew your project and then wash it, it might shrink and not fit or look right.
- Color Fastness: Washing removes extra dye. This stops the colors from bleeding onto other fabrics.
- Softness and Ease of Use: Some fabrics feel better after a wash.
Wash your fabric the same way you plan to wash the finished item. Then dry it. After drying, press it flat with an iron. Now it is ready to cut!
Machine Basics for New Sewers
Now that you have your tools and fabric ready, it is time to get friendly with your sewing machine. This step covers sewing machine threading and other core functions.
Getting Acquainted with Your Sewing Machine
Take some time to look at your machine. Find these key parts:
- Power Switch: Turns the machine on and off.
- Foot Pedal: Controls the speed of sewing. Press it gently to start slow.
- Needle Up/Down Button: Some machines have this to move the needle up or down.
- Stitch Selector Dial: Lets you choose different stitches (straight stitch, zigzag).
- Stitch Length Dial: Changes how long each stitch is. For most sewing, a length of 2.5 is good.
- Stitch Width Dial: Changes how wide a zigzag stitch is. For straight stitch, this does nothing.
- Presser Foot Lifter: A lever (usually at the back) that lifts and lowers the presser foot. The presser foot holds the fabric down.
- Reverse Lever or Button: This lets you sew backward to lock stitches.
Read your machine’s manual. It has clear pictures and steps for your specific model. Keep it handy!
Sewing Machine Threading: A Step-by-Step Walkthrough
Sewing machine threading is one of the most important things to learn. It might seem tricky at first, but it gets easier with practice. Follow these general steps:
- Winding the Bobbin: The bobbin holds the bottom thread.
- Place a spool of thread on the spool pin.
- Guide the thread through the winding guides (check your manual for the exact path).
- Place an empty bobbin onto the bobbin winder spindle.
- Wrap the thread a few times around the bobbin center.
- Push the spindle over (if your machine has this).
- Press the foot pedal. The bobbin will spin and fill with thread.
- Stop when it is full, cut the thread, and remove the bobbin.
- Inserting the Bobbin:
- Your machine will have either a top-loading (drop-in) bobbin or a front-loading bobbin.
- For top-loading: Lift the cover plate. Drop the bobbin in so the thread unrolls in the correct direction (check for a small arrow). Guide the thread through the tension slot.
- For front-loading: Open the bobbin case door. Insert the bobbin into the metal bobbin case. Pull the thread through the slot on the case. Insert the case into the machine.
- Threading the Top Thread:
- Raise the presser foot. This opens the tension discs.
- Place your spool of thread on the top spool pin.
- Follow the numbered or diagrammed path on your machine. This usually involves:
- Guiding the thread through the first guide.
- Bringing it down through the tension discs.
- Going up and around the take-up lever (this lever moves up and down as you sew).
- Going down to the needle area.
- Threading the needle from front to back (most common). Some machines have a needle threader.
- Bringing Up the Bobbin Thread:
- Hold the end of your top thread lightly.
- Turn the handwheel (the large wheel on the side) towards you. The needle will go down into the bobbin area and then come back up, catching the bobbin thread.
- Pull the top thread gently. The bobbin thread will form a loop. Pull this loop until the bobbin thread comes all the way up.
- Pull both the top and bobbin threads to the back of the machine, under the presser foot, about 4-6 inches long.
You are now threaded and ready to sew!
Needle Types: Matching Needle to Fabric
Using the right needle prevents skipped stitches and broken threads.
- Universal Needle: Good for many woven fabrics like cotton, linen, and blends. This is what you will use most often as a beginner. Sizes 80/12 or 90/14 are common.
- Ballpoint or Stretch Needle: Has a rounded tip that pushes fabric fibers aside instead of piercing them. Use this for knit fabrics (like t-shirt material) to prevent holes.
- Denim Needle: Stronger needle for very thick fabrics like denim or canvas.
Change your needle often, especially after a few projects or if you hear strange noises. A dull needle can damage your fabric.
Tension Settings: Keeping Stitches Neat
Tension controls how tight your top and bottom threads pull together. If the tension is wrong, your stitches will look messy.
- Default Setting: For most machines and general sewing, the tension dial is set to a middle number (often 3, 4, or 5). Start here.
- Checking Tension: Sew a few test stitches on a scrap of your fabric.
- If the top thread pulls through to the bottom, your top tension is too tight. Lower the number.
- If the bobbin thread pulls through to the top, your top tension is too loose. Raise the number.
- Simple Rule: For beginners, if your stitches look okay, do not change the tension. If they look bad, try re-threading both the top and bobbin first. Most tension problems come from bad threading.
Your First Stitches: Foundations of Sewing
Now for the fun part: sewing! These basic sewing techniques will build your skills.
Practice Makes Perfect: Straight Lines and Curves
Before you sew on your project, practice on scraps.
- Sewing on Paper: This is a great way to learn without using up fabric. Take a piece of paper and draw straight lines, wavy lines, and corners. Do not thread your machine. Just practice steering the paper under the needle, using the foot pedal for speed. Focus on keeping your lines straight and even.
- Sewing on Fabric Scraps: Once you feel good with paper, use a fabric scrap. Set your machine to a straight stitch, length 2.5. Practice sewing straight lines. Use the edge of your presser foot or the seam allowance guides on your machine’s needle plate to keep your line even. Practice stopping and starting smoothly.
Stitch Length and Width: Playing with Dimensions
- Stitch Length: This controls how long each individual stitch is.
- Normal sewing: Set to 2.5-3.0. This is good for most seams.
- Basting (temporary) stitches: Longer (4.0-5.0). These are easy to remove.
- Topstitching (decorative): A bit longer (3.0-3.5) for a bolder look.
- Gathering: Longest stitch length for creating gathers.
- Stitch Width: This only matters for zigzag stitches or other decorative stitches. It controls how wide the stitch goes from side to side. For straight stitches, it has no effect.
Seam Allowance: Your Guiding Line
Most easy sewing patterns will tell you the seam allowance. This is the distance from the cut edge of your fabric to your line of stitching.
- Common Seam Allowances: 5/8 inch (1.5 cm) or 1/2 inch (1.2 cm) are standard for clothing. For crafts, 1/4 inch (6mm) is common (like for quilting).
- Using Guides: Your sewing machine’s needle plate often has etched lines to help you keep your seam allowance even. Line the edge of your fabric up with the correct mark. This is key for neat seams.
Backstitching: Securing Your Work
Backstitching locks your stitches in place so they do not come undone.
- How to Do It: At the very start of a seam, sew forward 2-3 stitches. Then, press your reverse lever/button and sew backward over those same 2-3 stitches. Release the reverse, and then sew forward to complete your seam. Do the same at the end of the seam: sew to the end, go backward 2-3 stitches, then forward 2-3 stitches.
- Why It Matters: This creates a strong knot of stitches that will not unravel.
Stitching by Hand: When Machines Aren’t Enough
Sometimes, you need to sew by hand. This could be for finishing touches, small repairs, or when a machine just cannot reach. Learning a few hand sewing stitches is a valuable skill.
Threading a Needle by Hand
- Cut about 18-24 inches of thread. Too long, and it will tangle.
- Moisten the end of the thread (or use a needle threader).
- Push the thread through the eye of the needle.
- Tie a knot at the very end of the thread. You can wrap the thread around your index finger, roll it off with your thumb, and pull it tight. Do this twice for a stronger knot.
The Running Stitch: Simple and Versatile
This is a basic, quick stitch. It is not very strong but good for gathering fabric or temporary seams.
- How to do it: Push the needle in and out of the fabric in an up-and-down motion, making small, even stitches. Think of it like a dashed line.
The Backstitch: Strong and Reliable
This hand stitch looks like a machine stitch and is very strong. It is great for seams that need to hold up.
- How to do it:
- Bring the needle up through the fabric.
- Make a stitch backward from where the thread came up.
- Bring the needle up again, a stitch length ahead of where the first stitch ended.
- Then, bring the needle down into the end of the previous stitch. This creates a continuous line.
The Slip Stitch (or Ladder Stitch): Nearly Invisible
This stitch is perfect for closing openings where you do not want the stitches to show, like turning a pillow right side out and closing the gap.
- How to do it:
- Fold under the raw edges of the fabric you want to join.
- Anchor your knot inside one fold.
- Bring the needle out of that fold.
- Take a tiny stitch (just a few threads) in the opposite folded edge.
- Go straight across and take another tiny stitch inside the first folded edge.
- Continue this back and forth, making very small stitches that run parallel inside the folds. When you pull the thread tight, the stitches disappear.
The Whipstitch: Quick Edge Finishing
This stitch quickly finishes raw edges or joins two folded edges.
- How to do it:
- Bring the needle up from the back of the fabric, through the edge.
- Wrap the thread over the edge of the fabric.
- Bring the needle down through the fabric on the front side, coming out near the starting point.
- Repeat, making diagonal stitches over the edge.
Tying Off Your Hand Stitches
To secure your hand stitching, make a small knot.
- How to do it: Make a tiny stitch through just one layer of fabric. Before pulling the needle all the way through, loop the thread around the needle 2-3 times. Pull the needle through the loops tightly, creating a knot. Repeat this knot once more for extra security. Then, trim your thread close to the knot.
Your First Simple Creations
It is time to make something real! Beginner sewing projects are designed to be simple and build your confidence. You will often use easy sewing patterns for these.
Choosing Your First Project: Keep It Simple
Start with items that use straight seams and simple shapes. Avoid projects with zippers, buttonholes, or complex curves at first.
- Pillowcases: A classic beginner project. Mostly straight lines.
- Simple Tote Bags: Great for learning how to sew straps and box corners.
- Scarves: Just a few straight seams.
- Scrunchies: Small and quick, good for practicing gathering.
- Coasters or Pot Holders: Small squares, good for practicing even seams and turning corners.
- Rectangular Pencil Case: A bit more challenging but still very doable.
How to Read Easy Sewing Patterns: Your Map to Success
A pattern is like a map for your project. Do not be scared by them! For beginners, look for patterns labeled “Easy” or “Beginner.”
- Pattern Pieces: These are the paper shapes you will cut your fabric from. They have names (e.g., “Front,” “Back,” “Pocket”) and often include grainline arrows and notches.
- Cutting Layout: This diagram shows you how to place your pattern pieces on your fabric to save fabric.
- Seam Allowance Notes: The pattern will tell you what seam allowance to use (e.g., “all seams 1/2 inch”).
- Instructions: These are written steps, often with pictures, telling you how to put your project together. Read them all the way through before you start!
Cutting Your Fabric: Precision First
Accuracy in cutting makes sewing much easier.
- Lay Fabric Flat: Lay your pre-washed and pressed fabric flat on a large surface. Make sure it is smooth.
- Pin Pattern Pieces: Pin your paper pattern pieces onto the fabric. Place pins every few inches, keeping the paper flat.
- Cut Carefully: Use your fabric shears to cut around the pattern pieces. Take long, smooth cuts. Cut any notches (small triangles or lines on the pattern edge) outward or inward. These help you match pieces later.
Pinning and Pressing: Essential Steps
These two steps are often overlooked by beginners but are truly vital for neat results.
- Pinning:
- Right Sides Together (RST): Most sewing involves placing fabric pieces “right sides together.” This means the side of the fabric that will show on the finished item is facing inward.
- Match Edges and Notches: Line up the edges of the fabric. Use the notches on your pattern pieces to match sections perfectly.
- Insert Pins: Place pins perpendicular to the raw edge (at right angles). This makes them easy to remove as you sew. Put pins about an inch from the edge, every few inches along the seam.
- Pressing:
- Press as You Go: Do not wait until the end. After every seam, take your project to the ironing board and press the seam flat.
- Press Seams Open: For most seams, you press the seam allowance open. This means the fabric is pressed flat so the seam allowance lies flat, with half going one way and half the other.
- Press Seams to One Side: Sometimes you will press both seam allowances to one side. The pattern will tell you if this is needed.
- Finger Pressing: For very small seams, you can press them flat with your fingers before using the iron.
Stitching Your Pieces Together
- Set Up Machine: Make sure your machine is threaded, the correct needle is in, and stitch length is set to 2.5.
- Place Fabric: Place the pinned fabric under the presser foot. Line up the edge of your fabric with your chosen seam allowance guide (e.g., 5/8 inch line).
- Lower Presser Foot: Lower the presser foot using the lever.
- Start Sewing: Gently press the foot pedal.
- Backstitch: Sew 2-3 stitches, then backstitch 2-3 stitches to lock the seam.
- Keep Straight: Keep your eyes on the seam allowance guide, not the needle. Guide the fabric gently. Do not push or pull the fabric.
- Remove Pins: Remove pins before your needle gets to them. Sewing over a pin can break your needle or damage your machine.
- Backstitch at End: When you reach the end of your seam, backstitch 2-3 stitches again.
- Lift Presser Foot: Raise the presser foot.
- Cut Threads: Pull your project out from the machine, pulling the fabric away from you. Use your snips to cut the threads, leaving a few inches of tail.
Expanding Your Crafting Horizons
Once you have mastered a few beginner sewing projects, you might want to try DIY sewing crafts. These projects let you be creative and make useful or pretty items for your home or as gifts.
Simple Gifts and Home Decor
- Fabric Baskets: These can hold craft supplies, toys, or even serve as gift bags. They often involve sewing squares or rectangles and creating a structured bottom.
- Placemats: Easy to make by sewing two rectangles of fabric together, turning, and topstitching.
- Aprons: A simple apron can be made from just a few pattern pieces. Great for kitchen use or as a creative gift.
- Pet Beds: A simple rectangle or square sewn together and stuffed. Your furry friend will love it!
Upcycling Old Clothes: New Life for Old Items
DIY sewing crafts can also involve giving old items a new life. This is great for the environment and your wallet!
- T-shirt Bags: Turn an old t-shirt into a simple reusable shopping bag. No sewing needed for some methods, but a basic sewing machine can make it stronger.
- Jean Patches/Repair: Use fabric scraps or other old clothes to patch holes in jeans. This is a step towards learning mending clothes tutorial skills.
- Sweater Mittens: Turn old wool sweaters into warm mittens.
- Scrap Fabric Coasters: Use small fabric pieces from other projects to make new coasters.
Kids’ Projects: Sewing for Little Hands (with supervision)
Sewing can be a wonderful activity to share with children (with adult help, especially around the machine).
- Felt Toys: Felt does not fray, making it very forgiving for hand sewing. Kids can stitch simple shapes together to make stuffed animals or food items.
- Simple Stuffed Animals: Use simple patterns for a basic stuffed animal. They can sew two pieces together, turn them right side out, stuff them, and hand sew the opening closed.
- Doll Clothes: Simple shapes for doll clothes are great for using up fabric scraps.
Maintaining Your Craft
Taking care of your machine and your finished projects will make them last longer.
Cleaning Your Machine: A Happy Machine Sews Better
Lint and thread bits can build up inside your machine. This can cause problems like skipped stitches or noisy operation.
- Regular Cleaning: After a few projects, open the bobbin area. Use a small brush (often comes with the machine) to clean out any lint. Do not use canned air, as it can push lint deeper inside.
- Oiling: Some older machines need oiling. Check your manual. Newer machines often do not need oiling by the user.
Storing Fabric and Notions: Keep It Organized
A tidy sewing space makes sewing more enjoyable.
- Fabric: Fold fabric neatly or roll it onto cardboard tubes to prevent creases. Store it in a closet or on shelves, away from direct sunlight.
- Thread: Keep thread spools neat in clear containers or on a thread rack. This stops tangles.
- Notions: Use small bins or clear drawers for pins, needles, buttons, and other small items.
Washing and Caring for Your Finished Projects
Always follow the care instructions for the fabric you used.
- Pre-Shrinkage: Remember that pre-washing your fabric helps here.
- Delicate Items: For handmade garments, a gentle wash cycle or hand washing might be best.
- Ironing: Many items look better with a final press after washing.
Navigating Common Hurdles
It is normal to run into problems when you are learning. Do not get frustrated! Most sewing machine problems have simple fixes.
Tangled Thread (Bird’s Nest)
- Problem: A big mess of tangled thread, usually on the underside of your fabric.
- Fix: This is almost always a tension problem, and often means your top thread is not threaded correctly, or your presser foot was up when you started sewing.
- Lift the presser foot.
- Completely remove all thread (top and bobbin).
- Re-thread your entire machine carefully, following every step in your manual. Make sure the presser foot is down when you begin sewing.
- Check that the bobbin is wound correctly and inserted properly.
Broken Needles
- Problem: Your needle breaks during sewing.
- Fix:
- You might be using the wrong needle for your fabric (e.g., too thin for heavy denim). Change to a stronger needle.
- You might be pulling or pushing the fabric through the machine. Let the feed dogs (the tiny teeth under the presser foot) do the work.
- The needle might be old or dull. Replace it.
- You might have sewn over a pin. Remember to remove pins before you sew over them.
Skipped Stitches
- Problem: Your machine is sewing, but there are gaps in the stitch line.
- Fix:
- Your needle might be dull or bent. Replace it.
- You might be using the wrong needle type for your fabric (e.g., using a universal needle on a knit fabric). Switch to a ballpoint or stretch needle.
- Sometimes, re-threading the machine completely can fix this.
Fabric Won’t Feed
- Problem: The fabric is not moving forward under the needle.
- Fix:
- Make sure the presser foot is lowered. This is the most common reason.
- Check that the feed dogs are not lowered. There is often a switch or lever to drop the feed dogs for free-motion sewing; make sure they are up.
- The stitch length might be set to zero. Change it to 2.5 or higher.
Uneven Stitches
- Problem: Some stitches are long, some are short, or they are not straight.
- Fix:
- Do not push or pull your fabric. Let the machine feed it at its own pace. Gently guide it.
- Ensure your seam allowance is consistent. Watch your seam allowance guide on the needle plate.
- Practice! Even stitches come with experience.
Moving Forward in Your Sewing Journey
Learning to sew is a journey. Each project teaches you something new.
Practice Regularly
The more you sew, the better you will become. Even just 15-30 minutes a few times a week can make a big difference. Try new beginner sewing projects often.
Join a Sewing Community
Find other sewers! Online groups, local sewing classes, or even just a friend who sews can offer support, tips, and inspiration. Sharing your DIY sewing crafts is fun.
Explore More Complex Patterns
Once you are comfortable with straight lines, try patterns with gentle curves, simple gathers, or basic closures like elastic. Slowly introduce new basic sewing techniques as you feel ready.
Take a Class or Watch Tutorials
If you get stuck or want to learn something specific, online video tutorials are a treasure trove of information. Local sewing shops often offer classes for beginners and beyond.
Giving Garments a Second Chance
One of the most practical skills you can learn as a sewer is how to mend clothes. This saves you money and helps the environment. Here is a simple mending clothes tutorial for common fixes.
Basic Hem Repair
- Problem: The hem of pants or a skirt has come undone.
- How to fix:
- Turn the garment inside out.
- Fold the hem up to its original length.
- Pin it in place.
- You can use your sewing machine with a straight stitch to sew the hem back down. Sew close to the folded edge, on the inside.
- For a nearly invisible look, use a hand sewing needle and a slip stitch (ladder stitch) to attach the hem to the garment. Take tiny stitches on both the folded edge and the main fabric.
Patching a Tear
- Problem: A hole or tear in fabric, often on knees of jeans.
- How to fix:
- Find a scrap of fabric that matches or contrasts nicely. Cut it slightly larger than the hole.
- Trim any frayed edges around the hole.
- Place the patch on the inside of the garment, centered over the hole. Pin it in place.
- On your sewing machine, use a zigzag stitch (or a straight stitch if the fabric is strong enough). Stitch around the edge of the patch. For added strength, you can sew several lines back and forth across the hole itself from the outside of the garment.
- For a neat finish, turn under the edges of your patch before stitching. This is especially good for decorative patches on the outside.
Reattaching a Button
- Problem: A button has fallen off or is loose.
- How to fix (by hand):
- Thread a hand sewing needle with a double strand of thread. Tie a knot at the end.
- Mark where the button should go.
- From the back of the fabric, bring the needle up through the fabric and into one hole of the button.
- Go down through another buttonhole and back through the fabric.
- Repeat 4-6 times for each pair of holes. For buttons with four holes, sew through one pair, then the other.
- For a shank (space under the button), place a toothpick or pin under the button as you sew. When done, pull out the pin. Wrap the thread around the stitches under the button several times to create a strong shank.
- Finish with a secure knot on the back of the fabric.
Repairing a Seam
- Problem: A seam has split open.
- How to fix:
- Turn the garment inside out.
- Line up the raw edges of the fabric where the seam split.
- Pin the edges together, making sure the seam allowance is even with the rest of the seam.
- On your sewing machine, start sewing a few stitches before the split begins, sew over the split, and continue a few stitches past where it ends. Use a straight stitch and backstitch at both ends to secure the repair.
- Press the seam flat.
Frequently Asked Questions (FAQ)
Q: Do I need a fancy sewing machine to start?
A: No, absolutely not. A basic mechanical sewing machine is perfect for beginners. It should have a straight stitch, zigzag stitch, and a reverse function. You do not need many fancy settings to make great projects.
Q: How much fabric should I buy for a project?
A: Your pattern will tell you exactly how much fabric you need. It usually lists fabric amounts based on fabric width (e.g., 45-inch wide or 60-inch wide). Always check the pattern’s fabric requirements. It is always better to have a little extra than not enough.
Q: What is a “right side” and “wrong side” of fabric?
A: The “right side” is the pretty side, the one that will show on the finished project. The “wrong side” is the less pretty side, or the back, that will be hidden inside. Most patterns instruct you to sew “right sides together.”
Q: My thread keeps breaking. What am I doing wrong?
A: Thread breakage is common! First, check your sewing machine threading. Make sure it is threaded correctly, both top and bobbin. Ensure the presser foot is down when you start. Also, check your needle: is it dull, bent, or the wrong type for your fabric? Replace it if needed. Old, weak thread can also break.
Q: Can I sew without a sewing machine?
A: Yes, you can! Many DIY sewing crafts and small repairs can be done entirely by hand. Hand sewing is slower but offers great control and is perfect for delicate work or small projects like mending a button. Learning hand sewing stitches is a valuable skill for any sewer.
Learning to sew is a creative and rewarding journey. With these basic steps and a willingness to practice, you will be making beautiful and useful items in no time. Enjoy your first stitches!