
Image Source: i.ytimg.com
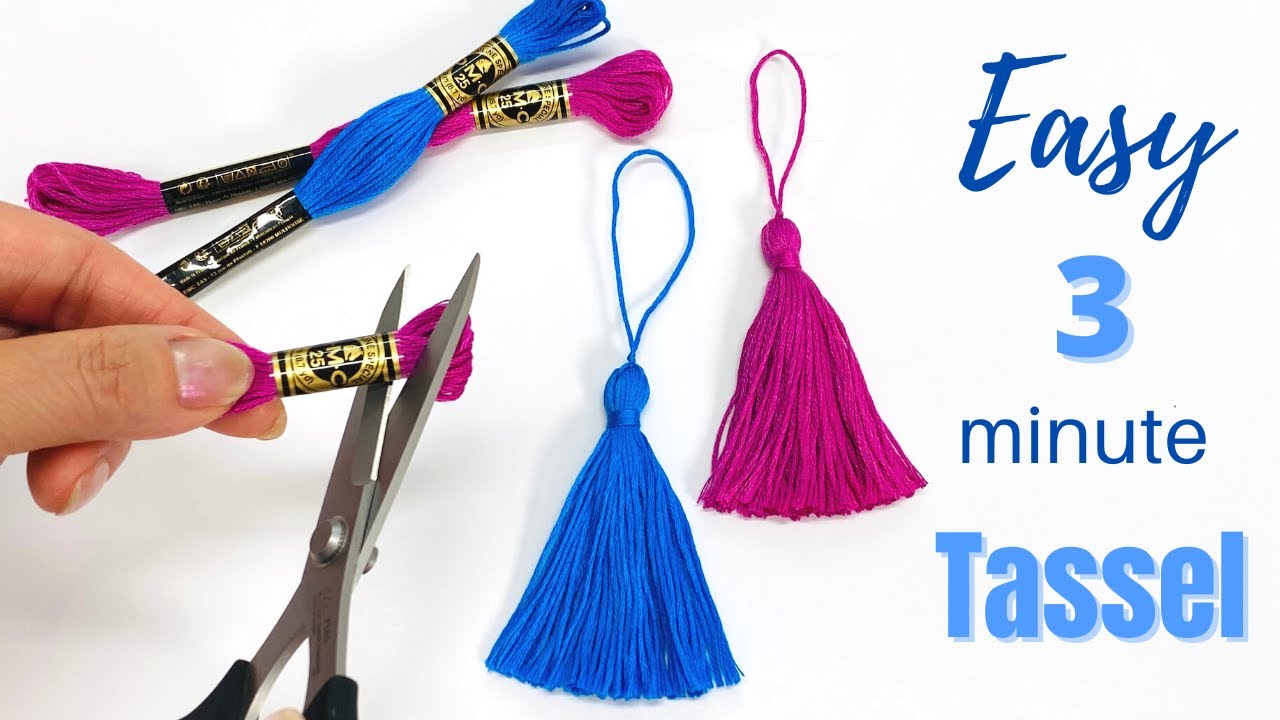
Quick DIY: How To Make A Tassel With Embroidery Floss
Making a tassel with embroidery floss is a fun and simple craft project. It’s perfect for adding a handmade touch to clothes, bags, jewelry, or home decor. Yes, you can easily make your own beautiful tassels right at home with just a few simple items! This is a great way to use up leftover thread. Get ready to learn an easy tassel making method.
Why Craft with Embroidery Floss?
Embroidery floss is a wonderful material for making tassels. It comes in so many colors! You can find every shade you can imagine. It’s also very affordable. One small bundle of floss, called a skein, can make one or more tassels. This makes crafting embroidery floss tassels a very budget-friendly hobby.
The threads are soft and flexible. They hang nicely in a tassel shape. Plus, embroidery floss is easy to find. Most craft stores or even many big stores sell it. It’s a perfect choice for a DIY floss tassel project.
Supplies Needed for Making Tassels
Gathering your tools is the first step. You don’t need many things to make beautiful handmade floss tassels.
Here is a simple list of supplies for making tassels:
- Embroidery Floss: Pick the color you like! One skein works well for one tassel.
- Scissors: Sharp scissors are best for a clean cut.
- Something to Wrap Around: This sets the length of your tassel. A piece of cardboard, a small book, or even your fingers work.
- Needle (Optional): A needle with a large eye can help pull thread through.
That’s it! You likely have most of these items at home already.
Getting Ready to Make Your Tassel
Before you start wrapping, decide how long you want your tassel to be.
- The length of the object you wrap the floss around will be roughly half the finished length of your tassel. Why half? Because you will fold the wrapped thread in half.
- So, if you wrap around something 3 inches long, your tassel will be about 6 inches long (before trimming).
- For how to make a small tassel, wrap around something shorter, like a credit card or even just two fingers.
Cut a piece of floss about 8-10 inches long. Set this piece aside. You will use it to tie the top of the tassel.
Cut another piece of floss, maybe 12-15 inches long. Set this aside too. This piece will make the loop at the top of your tassel.
Now, take the main skein of floss. Do not cut the end yet! You will wrap directly from the skein.
Method 1: Crafting a Tassel with Cardboard
This is a very popular and easy tassel making method. Using cardboard helps keep the tassel size the same each time.
Let’s walk through the tassel with cardboard method step-by-step.
Step 1: Prepare Your Cardboard
- Find a piece of stiff cardboard. An old cereal box or a piece of card stock works great.
- Cut the cardboard to the height you want your finished tassel minus the loop. If you want a 4-inch long tassel (not counting the hanging loop), cut the cardboard about 2 inches tall. Remember, the wrapped length is half the final length.
- The width doesn’t matter as much, just make it easy to hold. About 2-3 inches wide is fine.
Step 2: Start Wrapping the Floss
- Hold one end of the embroidery floss skein against the cardboard.
- Begin wrapping the floss around the cardboard. Go around and around smoothly.
- Keep the tension even. Don’t pull too tight, but don’t let it get loose either.
- How many times should you wrap? This depends on how thick you want your tassel.
- For a thin tassel, wrap 30-40 times.
- For a medium tassel, wrap 50-60 times.
- For a thick tassel, wrap 70-80 times or more.
- The more you wrap, the fuller the tassel will be. This is how to make a small tassel look plump.
- When you have wrapped enough times, cut the floss from the skein.
Step 3: Slide Off and Tie the Top
- Carefully slide the wrapped floss loops off the cardboard. Try to keep the loops together.
- Lay the bundle of loops flat on a table.
- Take the 8-10 inch piece of floss you set aside earlier. This is for tying the head.
- Slide this piece of floss under the bundle of loops, right at the top edge.
- Bring the ends of this piece together above the loops.
- Tie a tight knot right around the top loops. A double knot is good to make it secure. This creates the ‘neck’ of the tassel.
- Do not trim these two ends yet.
Step 4: Create the Hanging Loop
- Take the 12-15 inch piece of floss you set aside for the loop.
- Slide this piece of floss under the knot you just made.
- Bring the ends up and tie a tight knot or two very close to the knot you just made. This forms the loop for hanging.
- You can make the loop as big or small as you like before tying the knot.
- Now you have a loop at the top and the bundle of loops hanging down.
Step 5: Define the Tassel Head
- The top part of the tassel is called the head. You want it to look neat.
- Take the two ends hanging down from the knot that made the hanging loop.
- Wrap these two ends tightly around the top section of the bundle, just below the first knot. Wrap downwards maybe half an inch or so.
- When you have wrapped enough to make a nice head shape, thread the ends onto a needle (optional).
- Carefully pass the needle with the ends down through the center of the wrapped bundle. Pull the ends all the way through to the bottom of the tassel.
- If you don’t have a needle, you can try to push the ends through with your fingers or another tool, but a needle makes it much easier.
- This hides the ends and makes a clean head.
Step 6: Cut the Loops
- Now look at the bottom of your bundle. You will see all the loops you made on the cardboard.
- Take your sharp scissors.
- Slide the scissors into the center of the bottom loops.
- Cut all the way across the bottom. Make sure you cut every loop.
- This releases the individual strands of the tassel.
Step 7: Finishing a Floss Tassel
- Your tassel is almost done! Now it likely looks a little uneven at the bottom.
- Hold the tassel by its hanging loop.
- Gently smooth the strands down with your fingers.
- Gather the ends at the bottom.
- Trim the ends straight and even using your sharp scissors. You can trim them straight across or make a slight curve.
- Trim until all the strands are the same length and the bottom looks neat.
- Fluff the tassel gently.
You have now completed one part of this embroidery thread tassel tutorial using the cardboard method!
Method 2: Trying the Finger Wrap Tassel Instructions
This method is quick and easy, especially for how to make a small tassel. It’s great when you don’t have cardboard nearby.
Let’s follow the finger wrap tassel instructions.
Step 1: Prepare Your Fingers
- Decide how long you want your tassel to be. For a small tassel, wrap around two fingers (your pointer and middle finger). For a slightly longer one, use three or four fingers.
- Remember, the length wrapped is half the final length. Wrapping around two fingers gives you a very small tassel.
Step 2: Start Wrapping the Floss
- Hold the end of the embroidery floss skein against your palm or one of your fingers.
- Begin wrapping the floss around your fingers. Go around and around, keeping the tension even.
- Wrap the same number of times as you would for the cardboard method (30-80+ times) to get the thickness you want.
- Be careful not to wrap too tightly. You need to be able to slide the loops off easily.
- Wrap the number of times you want, then cut the floss from the skein.
Step 3: Tie the Top
- Carefully slide the wrapped loops off your fingers. Try to keep them neat.
- Take the 8-10 inch piece of floss you set aside for tying the head.
- Slide this piece under the top edge of the loops.
- Bring the ends up and tie a tight double knot right around the top loops. This makes the neck of the tassel.
Step 4: Make the Hanging Loop
- Take the 12-15 inch piece of floss for the hanging loop.
- Slide this piece under the knot you just made.
- Tie a strong knot or two close to the first knot to form the loop. Make the loop the size you want.
Step 5: Shape the Head
- Use the ends from the hanging loop knot.
- Wrap them tightly around the top bundle, just below the knots, to make a nice head shape.
- Wrap downwards a little bit.
- Thread the ends onto a needle (optional) and pull them down through the center of the tassel.
Step 6: Cut the Loops
- Hold the tassel by the hanging loop.
- Find the bottom loops.
- Slide your scissors into the center of the loops.
- Cut straight across to release all the strands. Make sure you cut every single loop.
Step 7: Finishing a Floss Tassel
- Hold the tassel by the loop.
- Smooth the strands down.
- Gather the bottom ends neatly.
- Trim the bottom straight and even with sharp scissors. Keep trimming until it looks good and all strands are the same length.
- Fluff the tassel.
You have now learned another simple way to make a tassel! This embroidery thread tassel tutorial has shown you two easy methods.
Quick Comparison of Methods
| Feature | Cardboard Method | Finger Wrap Method |
|---|---|---|
| Wrapping Base | Stiff cardboard piece | Your fingers (2, 3, or 4) |
| Tassel Size | Easy to make consistent sizes, good for any size | Best for how to make a small tassel; size varies by finger number |
| Ease of Use | Very easy, good for beginners | Very easy, requires careful sliding off |
| Consistency | High consistency in length | Can vary slightly depending on wrap |
| Supplies | Requires a piece of cardboard | No extra supplies needed besides floss & scissors |
Both methods are easy tassel making methods. The best one for you depends on what you have and what size tassel you want.
More Tips for Crafting Embroidery Floss Tassels
Here are a few extra tips to help you make perfect handmade floss tassels every time.
- Choose Your Colors: Embroidery floss comes in solid colors, sparkly colors, and even colors that change (variegated). Mix colors by wrapping different strands together! Wrap half pink and half blue for a fun look.
- Controlling Thickness: Remember, the number of wraps sets the thickness. Don’t be afraid to try different counts to see what you like best.
- Making Multiple Tassels the Same: If you are making many tassels for a project (like a garland), use the cardboard method. Cut a piece of cardboard to the exact size you need. This makes sure all your tassels are the same length.
- Keeping the Strands Straight: When you slide the loops off the cardboard or your fingers, try to keep them flat and orderly. This makes tying and cutting easier.
- Trimming is Key: The final trim is very important for finishing a floss tassel nicely. Take your time and use sharp scissors for a clean edge. You can always trim more, but you can’t add length back!
- Using Different Thread: While this embroidery thread tassel tutorial focuses on floss, you can use other threads or yarns too! The methods are similar. Thicker yarn will make a bulkier tassel with fewer wraps.
Exploring Ways to Use Handmade Floss Tassels
Once you start making these, you’ll find so many uses! Your handmade floss tassels can add a lovely touch to many items.
Here are some ideas for using your DIY floss tassel creations:
- Jewelry: Add small tassels to earrings, necklaces, or bracelets. Learn how to make a small tassel for this.
- Keychains: Attach a tassel to your keys or a bag charm.
- Bookmarks: Tie a tassel to the end of a ribbon bookmark.
- Gift Wrapping: Use tassels instead of bows on gifts.
- Home Decor: Add tassels to pillows, curtains, lampshades, or blankets. Make a garland by tying many tassels onto a string.
- Apparel: Sew tassels onto the hems of clothes, corners of scarves, or on zipper pulls.
- Craft Projects: Use them in scrapbooking, card making, or other crafting.
The possibilities are endless! Making handmade floss tassels is a simple way to add color and texture to almost anything.
Reconsidering the Process: An Embroidery Thread Tassel Tutorial Overview
Let’s quickly look back at the steps we learned in this embroidery thread tassel tutorial. Whether you used the tassel with cardboard method or the finger wrap tassel instructions, the main steps were the same:
- Gather Supplies: Get your floss, scissors, and something to wrap around.
- Prepare Threads: Cut two pieces of floss aside for tying and looping.
- Wrap: Wrap the main floss bundle around your chosen base (cardboard or fingers). Wrap many times for thickness.
- Tie the Head: Slide the loops off and tie a piece of floss tightly around the top to create the neck.
- Add the Loop: Tie the second piece of floss to the top knot to make a hanging loop.
- Shape the Head: Wrap the ends from the loop knot around the top section and hide them by pulling them down through the center.
- Cut the Bottom: Cut all the loops at the bottom to release the strands.
- Trim and Finish: Smooth the strands and trim the bottom evenly for a neat look. This is key to finishing a floss tassel well.
These steps cover the easy tassel making method and result in beautiful handmade floss tassels ready for use.
Troubleshooting Common Tassel Issues
Sometimes things don’t go exactly as planned. Here are a few common problems you might face when crafting embroidery floss tassels and how to fix them.
- My Tassel Looks Uneven: This usually happens during the final trimming step. Don’t be afraid to trim more! Hold the tassel by the loop, let the strands hang free, and take small snips across the bottom until it looks straight and even. You can also gently comb the strands with a fine-tooth comb (like a doll comb) before trimming to help them lie straight.
- The Head is Messy: This might mean the first knot isn’t tight enough or you didn’t wrap the head section neatly. You can try adding another piece of floss to wrap the head again right over the first attempt. Make sure to wrap tightly and hide the ends well inside the tassel.
- The Strands Aren’t Smooth: Embroidery floss can sometimes get a little tangled or wavy. You can try gently steaming the tassel (hold it near a steaming kettle, but don’t let it get wet!) to help the strands relax and hang straight. Another trick is to run a flat iron designed for hair over the strands on a very low setting and only if the floss is 100% cotton. Test this on a scrap piece first!
- It’s Hard to Pull the Ends Through the Head: If you wrapped the head very tightly or used a lot of wraps for the main bundle, pulling the ends through can be tough. Using a needle with a large eye is the best way. If you don’t have one, a bent paperclip might work, or try wiggling a skewer or toothpick into the center channel first to make space.
- The Tassel is Too Thin: You didn’t wrap enough times! Next time, wrap more. If the tassel is already made, you can’t add more strands easily. Just remember for your next DIY floss tassel.
- The Tassel is Too Thick: You wrapped too many times. For your next one, wrap fewer times. For the current tassel, you could try to carefully remove some strands from the center, but this is tricky and can make the tassel look messy. It’s often better to just use it as is or start a new one.
Learning how to make a tassel with embroidery floss is a simple skill. Practice makes perfect! Don’t worry if your first few aren’t perfect.
Frequently Asked Questions About Making Floss Tassels
Let’s answer some common questions about this craft.
Q: Can I use other types of thread or yarn?
A: Yes, you can! The methods (cardboard wrap, finger wrap) work for most types of thread or yarn. The thickness and look of the tassel will change depending on the material. Thicker yarn needs fewer wraps than thin embroidery floss.
Q: How much floss do I need for one tassel?
A: One standard skein of embroidery floss is usually enough to make one medium-sized tassel. For very thick tassels or multiple small ones, you might need more.
Q: What’s the best way to make tassels of different sizes?
A: Use the cardboard method and cut cardboard pieces to different lengths. A short piece makes how to make a small tassel. A long piece makes a large one. For the finger method, use fewer fingers for smaller tassels and more fingers for slightly larger ones.
Q: How do I attach the tassel to something?
A: You use the hanging loop! You can tie it directly onto a zipper pull, a key ring, or a gift tag. For jewelry, you might add a jump ring to the loop and then connect the jump ring to your earring hook or necklace chain. You can also thread a needle onto the loop and sew it onto fabric.
Q: How can I make the tassel hang straight?
A: Make sure you cut all the loops at the bottom cleanly and trim evenly. Giving the tassel a gentle shake and smoothing the strands helps. As mentioned in troubleshooting, gentle steaming or low-heat ironing might help stubborn strands.
Q: Can kids make these tassels?
A: Yes! This is a great craft for kids, with adult help for the cutting steps, especially using sharp scissors. The wrapping part is easy and fun for little hands. The finger wrap method is very kid-friendly.
Q: What is the main difference between the cardboard method and the finger wrap method?
A: The main difference is the base you wrap around. Cardboard gives you more control over the exact size and is better for making many tassels the same. The finger wrap method is super fast and doesn’t need any extra tools, making it great for a quick DIY floss tassel anywhere.
Q: My tassel head looks loose. How can I fix it?
A: Make sure the knot you tie first is very tight. Also, when you wrap the head section with the extra ends, wrap tightly and close together. If it’s still loose, you can add another piece of floss and wrap it tightly around the head area, then hide the ends.
This comprehensive embroidery thread tassel tutorial has covered everything you need to know to start crafting beautiful handmade floss tassels.
Final Thoughts
Making tassels with embroidery floss is a simple pleasure. It’s a fast project that gives you a lovely finished item you can use in many ways. Whether you choose the tassel with cardboard method or the finger wrap tassel instructions, you’ll find it’s an easy tassel making method. Enjoy crafting embroidery floss tassels and adding pops of color and texture to your life! Get out your supplies for making tassels and start your DIY floss tassel journey today. Mastering finishing a floss tassel will make all your creations look professional and neat. Happy crafting!