
Yes, you can make a thong without sewing! It is totally possible to create your own underwear using simple methods like cutting and fabric glue instead of a needle and thread or a sewing machine. This means you can turn old clothes into new items easily. It’s a fun way to make your own clothes without needing any sewing skills.
Making things yourself is great. It lets you use old items in new ways. This helps the planet. It also saves you money. Learning to make a thong without sewing is a good example. It shows you can create useful things easily at home. You don’t need special tools. You just need some basic stuff and a little bit of time.
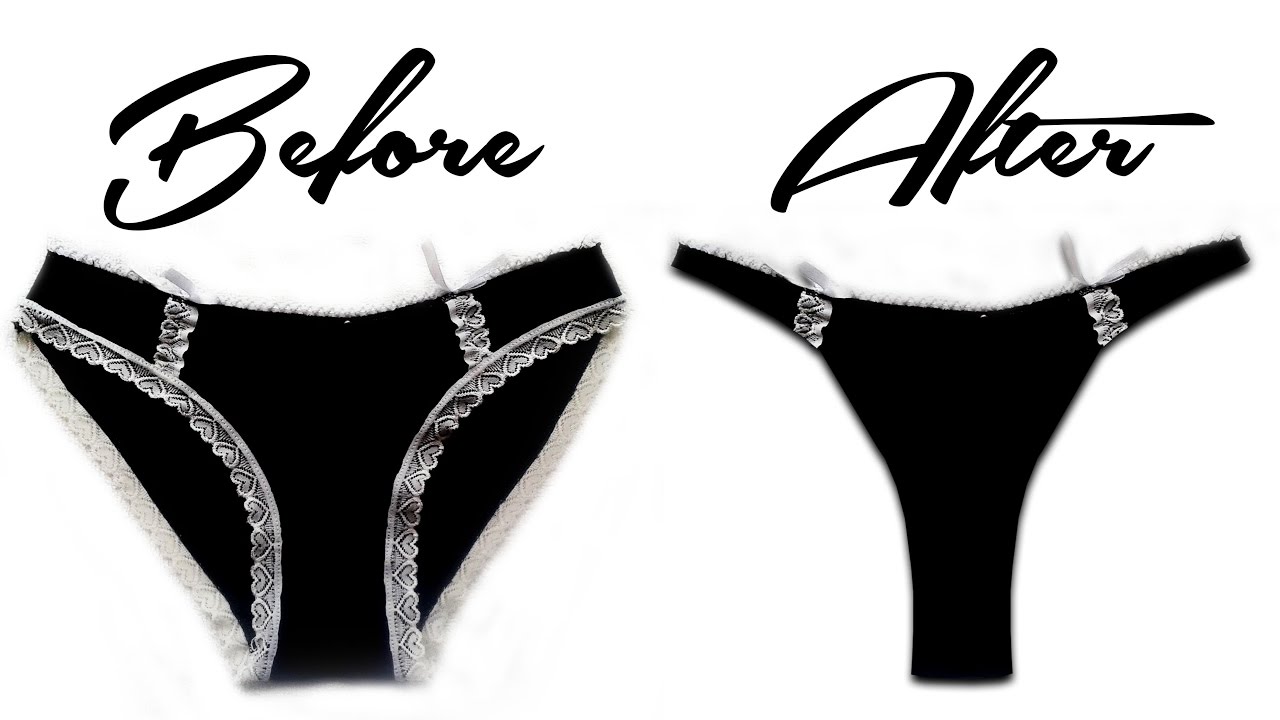
Image Source: i.ytimg.com
Why Make Your Own No Sew Thong?
Making your own thong without sewing is a smart choice for several reasons.
- Use Old Clothes: You can use old t-shirts or other stretchy clothes that you don’t wear anymore. This is a great way to
upcycle clothes into thong. You give new life to fabric that might otherwise be thrown away. - Save Money: Buying new underwear costs money. Making it yourself, especially from old clothes, costs almost nothing.
- It’s Fast: Once you know the steps, making a no sew thong is very quick. It takes much less time than sewing one.
- It’s Easy: You don’t need to know how to sew. You just need to cut and glue. This
DIY no sew thongproject is perfect for beginners. - No Machine Needed: You do not need a sewing machine. This means you can
make a thong without needle and threadand there isno sewing machine needed thong. All the work is done by hand with scissors and glue.
It’s a simple and green way to add to your clothes. Let’s look at what you need to get started.
Gathering Your Simple Supplies
You don’t need a lot of things to make a thong without sewing. The things you need are easy to find. Most you might have at home already.
Here is a list of the basic things you will need:
- An old t-shirt or piece of stretchy fabric
- Sharp scissors
- Fabric glue that works on stretchy fabric
- A pattern or a pair of underwear to copy
- Pins or small clips
- A marker or tailor’s chalk
Let’s look at these supplies a little more.
The Fabric
The best fabric for a no sew thong is stretchy fabric. Old t-shirts are perfect. They are usually made of jersey knit fabric. This kind of fabric stretches well. It is also soft. It is comfortable to wear close to your body.
You can use other stretchy fabrics too. Look for fabrics like spandex blends, lycra, or knit fabrics. Make sure the fabric is clean before you use it. An old t-shirt is easy because it’s already soft from washing.
Using an old t-shirt means you are doing how to make a thong from old t-shirt. This is good for the planet. It gives the shirt a new life.
Sharp Scissors
You need sharp scissors. Sharp scissors cut fabric cleanly. This is important when you are cutting fabric for no sew thong. Clean cuts make the edges look better. They also help the glue stick better. If your scissors are not sharp, the fabric edges can be rough or uneven. This can make the finished thong not look nice. It might also make the glue not hold as well.
Use scissors made for cutting fabric if you have them. Paper scissors can make fabric edges rough.
Fabric Glue
You need fabric glue. Not all glue works on fabric. You need one that is made for fabric. It should also be flexible. This is very important. Underwear stretches and moves with your body. The glue must stretch too. If the glue is not flexible, it will crack or break when you move.
Look for fabric glue for underwear. The label should say it is flexible or suitable for stretchy fabrics. Some glues are washable. This is good because you will need to wash your thong. Read the glue bottle label carefully. It will tell you if it is good for your project.
Some popular fabric glues work well for this. Make sure it is for soft, stretchy items.
A Pattern
You need a pattern to get the shape right. The easiest pattern is a pair of underwear you already have. You can use a thong that fits you well. You will lay this thong on the fabric and trace around it.
If you don’t have a thong to copy, you can find simple no sew underwear pattern shapes online. Or you can draw a simple shape yourself. We will talk more about making or finding a pattern later. The pattern helps you cut the right shapes. This makes the thong fit correctly.
Pins or Clips
Pins or small clips are helpful. You can use them to hold the pattern in place on the fabric. You can also use clips to hold the glued edges together while the glue dries. Clothes pins or binder clips can work if you don’t have sewing clips.
A Marker
You need something to draw the pattern onto the fabric. A marker works, but make sure it doesn’t bleed too much. Tailor’s chalk is better if you have it. It makes a clear line but brushes away later. A pencil can work on some fabrics, but it can be hard to see. Choose something that lets you see your cutting line clearly.
Now that you know what you need, let’s talk about picking the best fabric.
Picking The Right Fabric For Comfort and Stretch
Choosing the right fabric is key for a comfortable no sew thong. As mentioned, stretchy fabric is best. Let’s look at why and what kind.
Why Stretch Matters
Think about underwear. It moves with your body. It needs to stretch when you sit, walk, or bend. Woven fabrics like cotton shirts do not stretch much. If you make a thong from woven fabric, it will feel stiff. It might not fit well. It could be uncomfortable.
Knit fabrics stretch. Jersey knit, like in most t-shirts, stretches in all directions. This stretch makes it perfect for underwear. It hugs your body without feeling tight. It lets you move freely.
The fabric glue needs this stretch too. It needs to flex when the fabric stretches.
Good Fabrics To Use
- Old T-shirts: These are easy to find and use. The fabric is already soft. It has the right amount of stretch. Using an old t-shirt is how many people start learning
how to make a thong from old t-shirt. - Knit Scraps: Do you have leftover pieces from sewing projects? If they are knit fabric, they might work.
- Old Leggings or Yoga Pants: These are also made of stretchy fabric. They can be used to make thongs. The fabric might be thicker than a t-shirt, but it will still work.
- New Knit Fabric: You can buy new knit fabric. Look for jersey knit, modal, bamboo knit, or cotton/spandex blends. Feel the fabric. Make sure it feels soft and stretchy.
How To Check Fabric Stretch
Not sure if your fabric is stretchy enough? Do a simple test.
- Take a small piece of the fabric.
- Hold one edge in each hand.
- Gently pull the fabric.
- See how much it stretches.
- Let go. Does it spring back into shape?
Good fabric for underwear will stretch a good amount. It will also go back close to its original size. If it stretches but stays stretched out, it’s not ideal.
Using the right fabric makes a big difference in how your finished simple no sew fabric thong feels and fits.
Getting Your Pattern Ready
You need a pattern to cut the fabric correctly. This makes sure your thong has the right shape and size.
Using Existing Underwear
The easiest way to get a no sew underwear pattern is to use a pair you already own.
- Find a thong that fits you well and is comfortable.
- Lay it flat on a piece of paper.
- Smooth it out so there are no wrinkles.
- Carefully trace around the edges of the thong.
- You will trace the front part, the back string part, and maybe a small piece for the crotch (called a gusset).
- Some thongs are made of just one or two main pieces. Trace these pieces.
- Draw clear lines. This is your pattern.
- Cut out the paper shapes.
Remember, this is a no sew project. You are gluing the edges together. So, you do not need to add extra fabric around the edges for seams like you do when sewing. Cut right along the lines of your traced underwear. This makes the process of cutting fabric for no sew thong simple.
Making a Simple Pattern
If you don’t have a thong to copy, you can try to draw a basic pattern. This takes a little more guesswork.
You will need three main shapes:
1. Front Piece: This is roughly a triangle shape for the front.
2. Back String/Band: A long, thin piece that goes from the back of the crotch up to the waistband.
3. Waistband: A band that goes around the waist. Sometimes this is part of the front and back pieces.
Look at pictures of thongs online to get an idea of the shapes. Draw these shapes on paper. Start simple. You might need to try cutting these shapes from scrap fabric first to see how they fit together.
Using an existing pair is much easier for beginners doing an easy no sew underwear tutorial.
Preparing Your Pattern Pieces
Once you have your paper pattern pieces (whether traced or drawn), make sure they are clearly marked. You might write “front,” “back string,” etc., on them. This helps you know which piece is which when you are ready to cut the fabric.
This pattern step is important. It sets up the make a thong without needle and thread process for success. Taking a few minutes here helps avoid mistakes later when you cut your fabric.
Getting Ready To Cut Your Fabric
Before you cut, you need to set up your fabric. This makes sure you get accurate pieces.
Laying Out The Fabric
- Find a flat surface. A table or the floor works well.
- Take your chosen fabric, like an old t-shirt.
- Lay it out flat.
- Smooth out any wrinkles. Make sure the fabric is not twisted.
If you are using an old t-shirt, you can cut along the side seams to open it up into a flat piece. Or you can just use the front or back panel of the shirt. Make sure you have a large enough area of smooth fabric for your pattern pieces.
Placing The Pattern
- Place your paper pattern pieces on the fabric.
- Think about the stretch of the fabric. For most thongs, the main stretch should go around your body (horizontally). Place your pattern pieces so that the part that goes around your waist/hips will stretch that way.
- Pin the pattern pieces down onto the fabric. Use enough pins to keep the paper from moving while you trace and cut.
This step ensures your cutting fabric for no sew thong is done correctly regarding the fabric’s stretch. Getting the stretch direction right is important for the fit and comfort of your simple no sew fabric thong.
Tracing The Pattern
Now, use your marker or tailor’s chalk to trace around the paper pattern pieces onto the fabric. Draw clear lines right next to the edge of the paper.
Double-check that you have traced all the pieces you need. A basic thong often has a front piece, a back piece (which is usually just a string or thin strip), and sometimes a small piece for the crotch lining (gusset). Your copied pattern should show these parts.
Make sure your tracing lines are easy to see but not too thick. Thick lines can make your cutting less accurate.
Cutting The Fabric Pieces
Cutting is a main part of making a DIY no sew thong. Take your time to cut carefully.
Using Sharp Scissors
Use your sharp fabric scissors. This makes cutting much easier and gives you clean edges.
Cutting Exactly On The Line
Cut carefully along the lines you traced. Do not cut inside or outside the line. Cut right on top of the line. This is important because you are not adding seam allowance. The edge you cut will be the edge of your thong.
Cut out all the pieces you traced. You should have:
- The front piece
- The back piece (the string or narrow strip)
- Maybe a gusset piece (a small oval or rectangle for the crotch)
Some patterns might have the front and back piece connected, with just the string part to cut out. Follow the pattern you traced.
Be extra careful when cutting fabric for no sew thong that is thin or slippery. Hold the fabric steady. Cut smoothly. Don’t rush this step.
Dealing With Edges
Since you are not sewing, you might worry about the fabric edges fraying. Knit fabrics like t-shirt material usually do not fray much. The edges might curl a little, but they won’t fall apart like woven fabrics. This is another reason knit fabric is great for no sew underwear pattern projects.
If your fabric does seem to fray a little, don’t worry too much. The fabric glue will help to hold the edges together once you start gluing.
Now you have your fabric pieces cut out. You are ready for the next step, which is gluing them together. This is where you truly make a thong without needle and thread.
Using Fabric Glue To Join Pieces
This is the magic step! Instead of sewing, you will use special fabric glue to join the edges of your fabric pieces.
Picking The Right Glue
Make sure you are using a fabric glue that is flexible and hopefully washable. Look for glues that are made for clothing or stretchy materials. Products like fabric fusion or similar flexible fabric adhesives are good choices. This is key for your fabric glue for underwear.
Always read the instructions on the glue bottle. It will tell you how to use it and how long it takes to dry.
How To Apply The Glue
You don’t need a lot of glue. Using too much glue will make the fabric stiff. It can also squeeze out the sides and make a mess.
Apply a thin line of glue along the very edge of one piece of fabric where you want to join it to another piece. A thin line is enough.
Some glues come with a fine tip, which is helpful for this. If your glue bottle has a wide opening, you can use a toothpick or cotton swab to apply a thin line.
Joining The Pieces
Once you apply the glue to the edge of one piece, place the edge of the other piece on top of it. Line up the edges carefully.
Press the two fabric edges together gently. You can use your fingers. Or you can use pins or clips to hold the edges together while the glue starts to set. Clips are often better than pins because pins can make holes. Small binder clips or clothes pins work well.
You are creating a seam with glue instead of stitches. You are making your DIY no sew thong come together.
Letting The Glue Dry
This is a very important step. The glue needs time to dry completely. This is called curing. The drying time can be different for different glues. It might take a few hours. It might take 24 hours. Read the glue bottle to know how long to wait.
Do not rush this step! If you use the thong before the glue is fully dry, the seams might come apart. Lay the glued pieces flat and let them dry without touching them.
Once the glue is dry, it should be flexible. You should be able to gently stretch the fabric without the glue cracking. If it cracks, the glue is not right for stretchy fabric, or it didn’t dry long enough.
Using fabric glue for underwear correctly makes sure your thong is strong and lasts longer. It lets you really make a thong without needle and thread.
Assembling Your Thong: A Step-by-Step Guide
Now let’s put it all together! This is your easy no sew underwear tutorial. Follow these steps to join your cut fabric pieces using glue.
This guide assumes you have a pattern with at least a front piece and a back string/band piece. If your pattern includes a gusset (crotch lining), we’ll include that step too.
Step 1: Get Your Pieces Ready
Lay out all your cut fabric pieces on a flat surface. Make sure you have the front piece, the back string, and the gusset if your pattern included one. Have your fabric glue and clips nearby.
Step 2: Join The Front To The Back String
Most thongs have the narrow back string attached to the bottom point of the front piece.
- Take the front piece and the back string piece.
- Find the bottom point of the front piece (where it goes between your legs).
- Find one end of the back string.
- Put a thin line of fabric glue along the very edge of the bottom point of the front piece, about 1-2 cm (less than an inch) long.
- Overlap the end of the back string onto this glued edge. The back string should be centered on the front piece’s point.
- Press the two pieces together gently.
- Use a clip to hold them in place while the glue sets a little.
This joins the main two parts of your simple no sew fabric thong.
Step 3: Attach The Waistband (If Separate)
If your pattern had a separate waistband piece, you would attach the top of the front piece and the free end of the back string to it. However, many simple no sew thongs don’t use a separate waistband. The top of the front piece forms the front of the waistband, and the back string goes up to meet it at the back or sides.
Let’s assume your pattern does NOT have a separate waistband, which is simpler for make a thong without needle and thread. The sides of the front piece will connect to the back string somewhere around the hip.
Step 4: Join The Sides
This step makes the loops for your legs and the waistband.
- Hold the piece you have now (front and back string joined). The front piece should be facing up. The back string goes down from the point.
- Take one side edge of the front piece.
- Bring the back string up and towards the side edge of the front piece.
- Decide where you want the back string to connect to the front piece to form the side. This point is usually around the hip area. Look at your original underwear pattern for guidance on where this connection happens.
- Put a thin line of glue on the side edge of the front piece where you want to make the connection.
- Overlap the back string onto this glued spot. You will likely overlap the back string onto the back side of the front fabric piece.
- Press together and use a clip to hold it.
- Repeat on the other side. Make sure both sides are joined at the same point on the back string so the thong is even.
Now you should have loops for the legs and the waistband area is formed. This is starting to look like a no sewing machine needed thong.
Step 5: Add The Gusset (Crotch Lining)
A gusset is a small extra piece of fabric in the crotch area. It makes the thong more comfortable and clean. It’s usually placed on top of the main fabric in that area.
- Take your gusset piece.
- Lay the thong flat with the inside facing up.
- Place the gusset piece over the crotch area where the front piece joins the back string.
- Apply thin lines of glue around the edges of the gusset piece.
- Press the gusset piece down onto the thong fabric. Smooth it carefully.
- You can use pins sparingly or just press firmly with your fingers. Be careful not to glue it to your work surface!
Adding the gusset finishes the main assembly for your DIY no sew thong.
Step 6: Let It Dry Completely
This is the most important step for durability. You must let the glue dry completely without touching or moving the thong. Lay it flat on a surface protected by wax paper or something similar, just in case any glue squeezed out.
Check the glue bottle for the full drying time. It could be 12 hours or even 24 hours. Do not try it on until it is completely dry.
Once dry, gently test the seams. They should hold together and be flexible. You have successfully made a make a thong without needle and thread!
Tips For Success With Your No Sew Project
Making a no sew thong is easy, but a few tips can help make sure it turns out great.
- Test Your Glue: Before putting glue on your thong pieces, test the glue on a small scrap piece of the same fabric. Apply a thin line, let it dry fully, and then stretch it. Does it stay flexible? Does it hold the fabric pieces together well? This check ensures you are using the right
fabric glue for underwear. - Less Glue is More: Don’t use too much glue. A thin, even line is all you need. Too much glue makes the seams hard and uncomfortable. It also takes longer to dry and can make a mess.
- Use Clips: Clips are very helpful for holding the glued edges together while they dry. They keep the fabric edges aligned and ensure good contact for the glue to bond. If you don’t have fabric clips, small binder clips or even clothespins can work.
- Align Edges Carefully: Take your time when placing the fabric edges together after applying glue. Line them up as neatly as possible. This makes the finished thong look better.
- Let It Dry FULLY: We said it before, but it’s worth saying again. Patience is key! Waiting for the glue to dry completely is vital for strong seams that will last. This is critical for your
no sewing machine needed thongto hold up. - Consider the Fabric Stretch: Always remember which way your fabric stretches most. Place your pattern pieces so the main stretch goes around the body. This is crucial for the fit and comfort of any
no sew underwear pattern. - Practice Cutting: If you are new to
cutting fabric for no sew thong, practice cutting curves and straight lines on scrap fabric first. This helps you get a feel for the scissors and the fabric. - Start Simple: Your first
DIY no sew thongshould use a very simple pattern, like tracing an existing thong. Don’t try complex styles for your firsteasy no sew underwear tutorial. - Upcycle Creatively: Look at old t-shirts, tank tops, or even swimsuits for fabric.
Upcycle clothes into thongis a great way to use items you no longer wear.
Following these tips will help you make a comfortable and lasting simple no sew fabric thong without any sewing.
Caring For Your No Sew Thong
You made your thong without sewing, using glue. How do you wash it?
Most flexible fabric glues are washable once they are fully cured (dried).
- Check Glue Instructions: First, look at the bottle of the
fabric glue for underwearyou used. It will say if it is washable and maybe give washing instructions. - Gentle Washing: It is best to wash your no sew thong gently. Hand washing is the kindest way. Use cool or warm water and a mild soap. Gently squeeze out water, don’t wring or twist it hard.
- Machine Washing: If the glue says it is machine washable, put the thong in a small mesh laundry bag. This protects it during the wash cycle. Use a gentle cycle and cool water.
- Drying: Do not put your no sew thong in a hot dryer. The heat can sometimes weaken the glue bond. It is best to lay it flat or hang it to air dry. It will dry quickly because it is small and made of lightweight fabric.
Taking good care of your make a thong without needle and thread creation will help it last longer. The glue seams are strong when dry, but gentle care is always best for handmade items.
Beyond Thongs: More No Sew Ideas
Making a no sew thong is just one fun project you can do without sewing. The skills you learned – choosing fabric, cutting carefully, and using fabric glue – can be used for other things too.
- No Sew Headbands: Cut strips of stretchy fabric and glue the ends together to make headbands.
- No Sew Scarves: Cut a piece of knit fabric the size you want for a scarf. Since knit doesn’t fray, you don’t need to hem it!
- No Sew Tops/Skirts: For very simple designs, you can use clever cutting and tying or minimal gluing to make basic tops or skirts from t-shirts or large pieces of fabric.
- No Sew Accessories: Fabric glue is great for attaching patches, adding fabric trims, or fixing small tears on clothes without sewing.
Learning to make a thong without needle and thread opens up ideas for other simple clothing projects where no sewing machine needed thong techniques can be used. It’s all about being creative with cutting and gluing.
Frequently Asked Questions About No Sew Thongs
Here are some common questions people ask about making underwear without sewing.
H4: What kind of fabric glue is best?
Look for a fabric glue that says it is flexible when dry. It should also be washable. Glues made for stretchy fabrics or general fabric crafts often work well. Always read the product label to be sure it is right for fabric glue for underwear.
H4: Will the glued seams be uncomfortable or scratchy?
If you use a thin line of flexible glue and let it dry completely, the seams should be quite flat and flexible. Using too much glue can make them stiff. Using the right kind of soft, stretchy fabric like t-shirt material also helps ensure comfort in your simple no sew fabric thong.
H4: How long does a no sew thong last?
This depends on the glue you use, how well you make it, and how you care for it. A well-made no sew thong using good glue and proper drying can last through many washes, but maybe not as long as a sewn one. It’s a fun, easy project, and you can always make more! Upcycle clothes into thong means you have lots of free fabric to use.
H4: Can I use any old t-shirt?
Most cotton or cotton blend t-shirts work well because they are knit and have good stretch. Avoid shirts that are not stretchy at all. Make sure the shirt is clean before you start your how to make a thong from old t-shirt project.
H4: Do I need a pattern?
Using a pattern, or tracing existing underwear, is highly recommended for a good fit. It gives you the correct shapes for your no sew underwear pattern. Trying to cut freehand without a pattern can be difficult and the thong might not fit right.
H4: Is this method truly no sewing?
Yes! This method uses cutting fabric for no sew thong and fabric glue. You do not use a needle, thread, or sewing machine at any point. It is a true make a thong without needle and thread project.
H4: Can men’s t-shirts be used?
Absolutely! Any stretchy knit fabric from a clean t-shirt will work, whether it was originally a men’s or women’s shirt. The key is the fabric type, not the shirt’s original purpose. This is part of the fun of upcycle clothes into thong.
H4: What if my fabric edges fray?
Knit fabrics like t-shirt material don’t usually fray much. If you use a fabric that does, a little fraying on the cut edge is okay because the glue will hold the edges together. For fabrics that fray a lot, a no sew method might not be the best choice for something that gets stretched and washed often.
Getting The Steps Right
Making a thong without sewing is a fun and simple craft. It is a great way to upcycle clothes into thong. You don’t need special skills or a machine. You just need some basic items and a little patience while the glue dries.
- Pick a stretchy fabric.
- Get a pattern (trace old underwear!).
- Cut carefully with sharp scissors.
- Use a good, flexible
fabric glue for underwear. - Glue the pieces together step-by-step.
- Let the glue dry completely.
This easy no sew underwear tutorial shows that you can make useful and wearable items without any sewing at all. Whether you call it a DIY no sew thong, a simple no sew fabric thong, or just a no sewing machine needed thong you made yourself, it’s a rewarding project. Give it a try and see how easy it is!